You can create a blank source course or a new source course from an existing course in the Source Courses tab in the Courses tool.

|
Important: A source course must always have a course template attached as its direct parent. If a source course is not a child of a course template, then the Re-offer source course function does not work.
|
Create a source course
Watch this video to learn how to create a source course. Review the written steps below.
You can create a blank source course or start from an existing course.
To create a source course:
- From the Admin Tools menu, click Courses.
- Select the Source Courses tab and click Create Source Course.
- Select whether you want to start with a blank course or select an existing course to copy the course settings to the source course.
To create a blank source course:
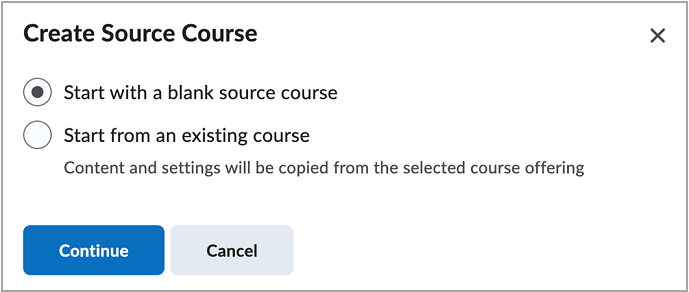
- From the Create Source Course dialog, select Start with a blank source course.
- Click Continue.
- Enter a Name and Code for your source course.
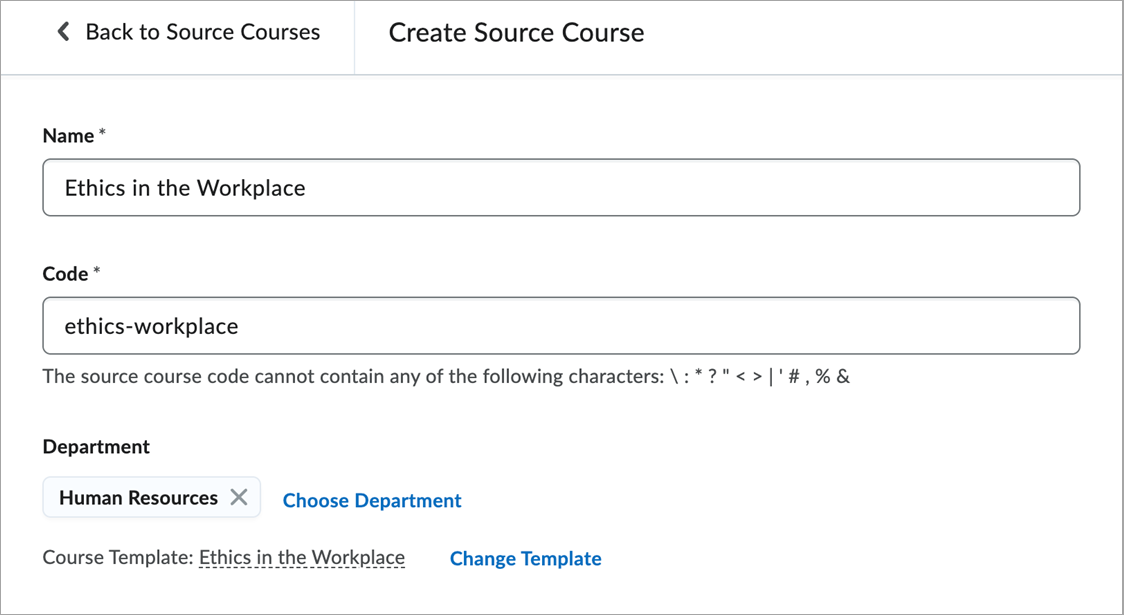
- Do one of the following:
- Click Change Template to select an existing template for your source course.
- Click Create Course Template, then enter a Name and Code. Click Save.
- Optionally, select a Department.
- Click Save or Save and Manage.
To create a source course from an existing course:
- From the Create Source Course dialog, select Start from an existing course.
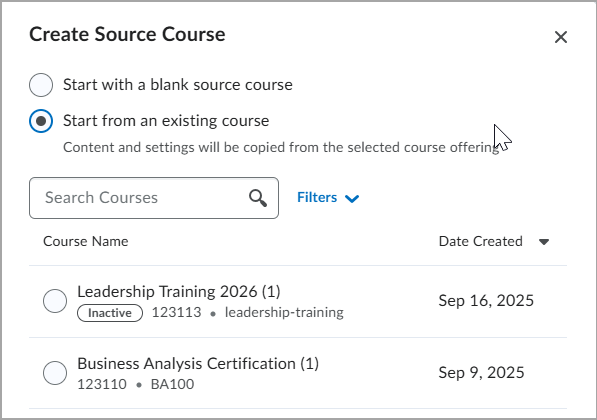
- Search Courses or select an existing course that you want to copy.
- Click Create Source Course. A Source Course Creation in Progress dialog appears.
- Click Close.
Once the content and settings from the existing course are copied, a notification reading Source Course [course name] creation complete appears in Update Alerts on the navbar.

|
Notes:
- Administrators must enroll learners directly into the desired re-offered course.
- Administrator roles can be directly enrolled into a Source Course org unit using regular enrollment methods. The enrolled Administrator role is copied from the source course to the re-offered courses.
|
Adding content and dates to a source course
You can create content in a source course using the same workflows as a course offering.
When creating content like assignments, quizzes, and discussions with Due Dates, Start Dates, and End Dates, ensure that these dates are updated to the latest dates before re-offering your course. Any dates you add to your source course content will be the same dates that are used when you re-offer that source course. Date settings do not update automatically when re-offering a source course and must be done in either the source course before re-offering, or in the re-offered course itself.
|
Note: D2L recommends enabling Completion Tracking in your source course so you can track completion for all course re-offerings. |
Tool limitations in source courses
A source course serves as a content model for course offerings only. While all tools can be enabled in a source course and are inherited by re-offered courses, some tools require learner enrollments to function properly. These tools must be configured directly in the re-offered course.
The following tools are not recommended for use in a source course:
- Accommodations
- Attendance
- Brightspace Parent & Guardian
- Class Progress
- Classlist
- ePortfolio
- Locations
- Seating Chart
- SIS Course Merge
- User Collection
|
Warning: D2L strongly recommends against using SIS Course Merge with a source course org unit. If SIS Course Merge is used with a source course, a parent course offering is created which results in functionality errors in the merged course. Consequently, the SIS Course Merge permissions are not available at the Source Course level when editing permissions in the Roles and Permissions tool.
|
Archive a source course
Watch this video to learn how to archive a source course. Review the written steps below.
You can archive a source course that has no associated course offerings. In cases where you want to archive a source course with associated courses, you must first archive those course offerings. Archiving a re-offered course offering does not affect its source course.
To archive a source course:
- From the Admin Tools menu, click Courses.
- Select the Source Courses tab and click Archive from the context menu of the source course you want to archive.
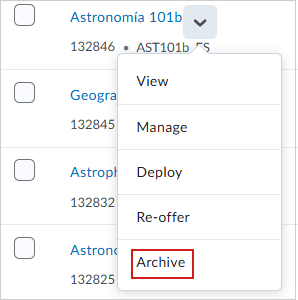
- Click Archive.
Archived source courses are listed in the Org Unit Editor > View Archive. You can Restore source course org units any time, or delete them permanently from the Archived Org Units page.
Manage source courses from Source Course Information
Watch this video to learn how to manage source courses. Review the written steps below.
The Source Course Information page is available on the Course Administration page in source courses and course offerings that were re-offered from source courses.
To manage source courses:
- From the Admin Tools menu, click Courses.
- In the Source Courses tab, click the name of the source course you want to manage.
- On the Course Administration page in the source course, click Source Course Information.
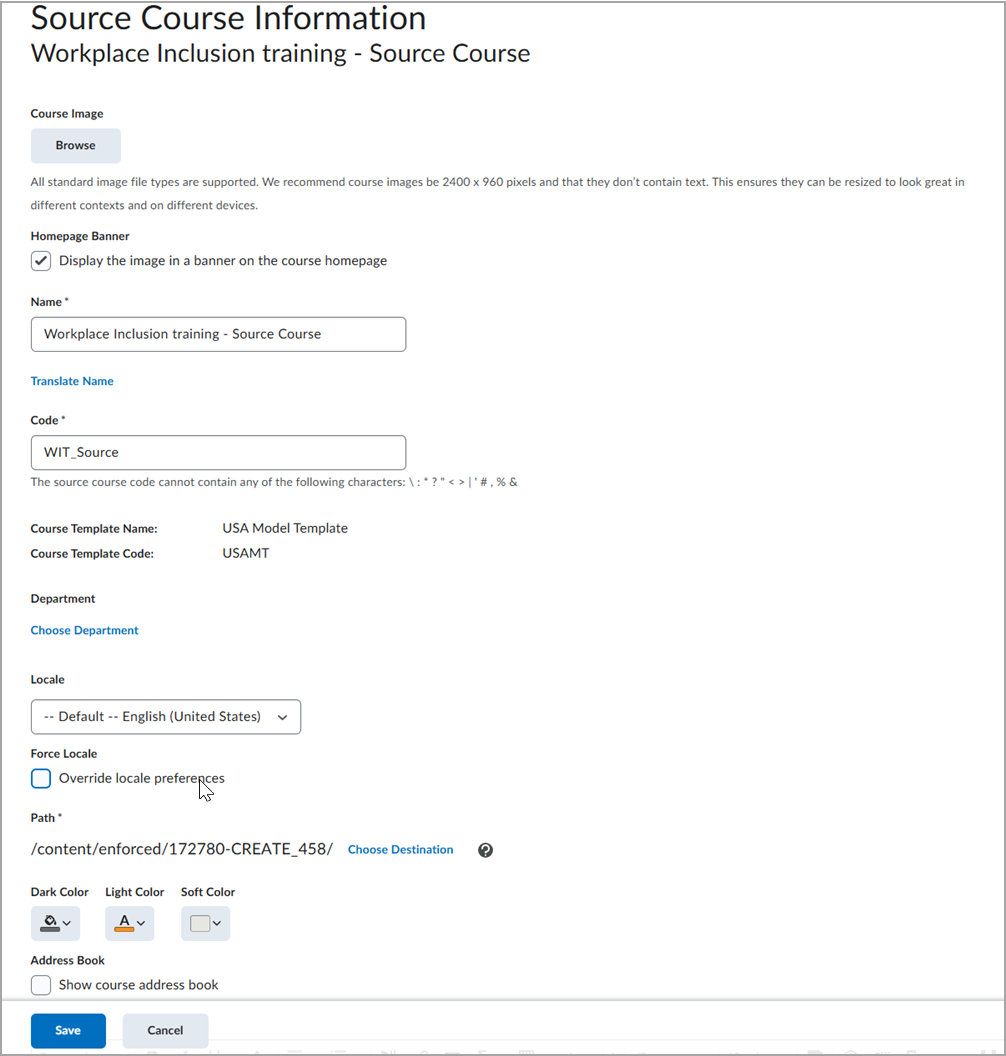
- On the Source Course Information page, perform any of the following actions:
- Under Course Image, click Browse to select an image for the course. After uploading your file, click Add.
- For your Homepage Banner, select the Display the image in a banner on the course homepage check box to ensure your image appears on the course homepage.
- Enter a Name for your source course. You can also select Translate Name, which opens the Translate Name dialog where you can add the source course name in other supported languages.
- Enter a Code for your source course.
- Under Locale, select a locale for your source course. You can Force Locale for all users of the source course by selecting the Override locale preferences check box.
- Under Path, click Choose Destination to select the root folder where your course's content-related files are stored in Brightspace. Click Select a Path after you select the destination file path.
- For Address Book, select the Show course address book check box if you want the address book to appear for your source course.
- In the Description field, enter a description for your source course.
- In Associated Course Offerings, view the re-offered courses for this source course. Click the name of a course offering in the list to navigate to the re-offered course's homepage.
- Click Save.