This is where Site, Catalog, Checkout/Cart, Email, Payment Gateway, LMS and Password settings are managed.
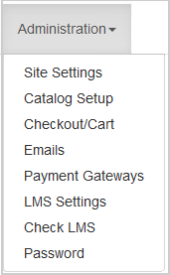
Figure: Click the Administration dropdown menu and select an option.
Site Settings
During the build phase your site will have been set up to your specifications. If you have any issues with your store, contact Course Merchant Support.
Store Name and Email Settings
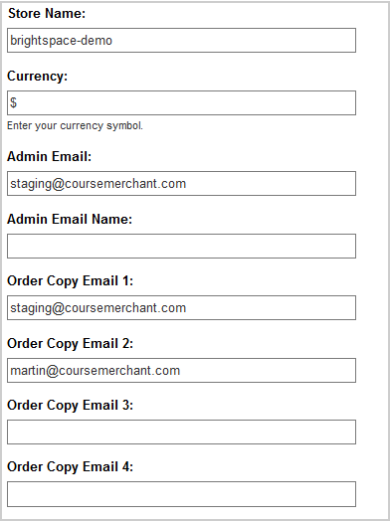
Figure: Complete the fields for store name and email settings in Site Settings.
Input Fields:
- Store Name - The name of your store.
- Currency - Your currency symbol.
- Admin Email - The email address administrative and order emails will be sent from.
- Admin Email Name - The name to associate with the admin email, e.g. admin.
- Order Copy Email 1 - 4 - Order emails can be sent to multiple addresses so that multiple people can be kept up to date with the store. This helps when orders need to be processed, for example invoice sales or goods that need to be shipped.
Maintenance Mode
If you need to make changes to your products and categories and don't want customers to be able to view the work in progress or make purchases during this time, you can set your store into maintenance mode.
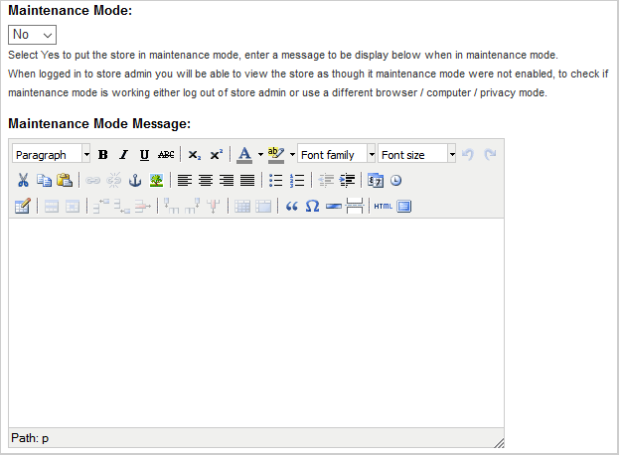
Figure: Enter a message in the Maintenance Mode Message field.
Input Fields:
- Maintenance Mode - Select Yes to put the store in maintenance mode. When logged in to store admin you will be able to view the store as though maintenance mode were not enabled. To check if maintenance mode is working either log out of store admin or use a different browser / computer / privacy mode.
- Maintenance Mode Message - Enter a message that visitors to your site will see when it is under maintenance. You can edit the formatting and insert media using the WYSIWYG HTML editor.
Contact and Emails
You can have contact and enquiries links set up in your store.
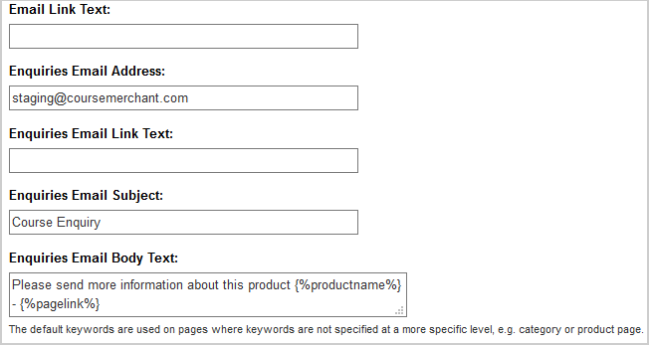
Figure: Create contact and enquiry links for your store.
Input Fields:
- Email Link Text - The text you enter here will show up on your product page. When a customer clicks it their default email client will open with an email already populated with text linking to the product.
Hi, I was looking at STORENAME and thought you might be interested in this page https://YourStore.com/product?catalog=Product_Name
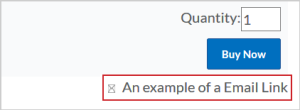
Figure: An example of email link text in a store.
- Enquiries Email Address - What email enquiries should be sent to.
- Enquiries Email Link Text - The text for the Enquiries link. This is an alternative to waiting lists which isn't generally used.
- Enquiries Email Subject - What subject the enquiries emails should have.
- Enquiries Email Body Text - You can customize the enquiries email that will be sent to the store administration email.
Metadata
You can enter default metadata for the store.

Figure: Enter metadata in the Meta Description and Meta Keywords fields.
Input Fields:
- Meta Description - The Meta Description is used for basic SEO. The default description is used on pages where the description is not specified at a more specific level, e.g. category or product page.
- Meta Keywords - Meta Keywords are used for the store search and basic SEO. The default keywords are used on pages where keywords are not specified at a more specific level, e.g. category or product page.
To save any changes click Update Variables at the bottom of the page.
This is where you can set the default options for your storefront.
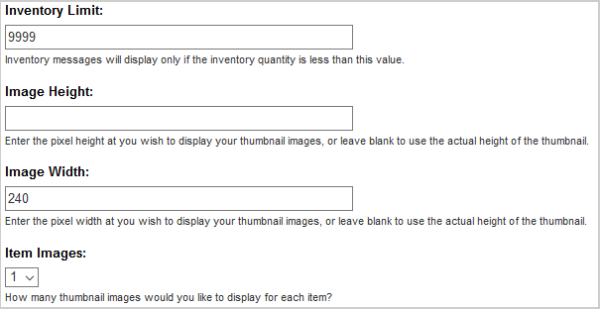
Figure: Set default inventory and image limits for your catalog.
Input Fields:
- Inventory Limit - Only applies to products with an Inventory number entered under Products Metadata and Quantities in the Product Editor. Once the product inventory quantity falls below this number, the number of seats left available will show on the product page.
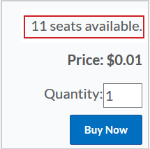
Figure: An example of an inventory limit for a product.
- Image Height - Enter the pixel height at which you wish to display your thumbnail images, or leave blank to use the actual height of the thumbnail.
- Image Width - Enter the pixel width at which you wish to display your thumbnail images, or leave blank to use the actual width of the thumbnail.
- Item Images - The number of thumbnails to display for each item.
Layout and Ordering
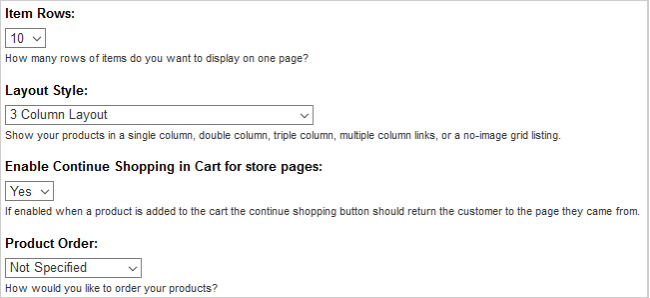
Figure: Change how items are laid out and ordered in the catalog.
Input Fields:
- Item Rows - The number of rows of items to display on one page. This can be overridden on a per category basis.
- Layout Style - Show your products in a single column, double column, triple column, multiple column links, or a no-image grid listing. This can be overridden on a per category basis.
- Enable Continue Shopping in Cart for store pages - If set to Yes, when a product is added to the cart the customer can click Continue Shopping to return to the page they came from.
- Product Order - The default ordering for products in categories. This can be overridden in a category's Products Display Options by enabling the Use explicit product category sort order option.
Other Settings
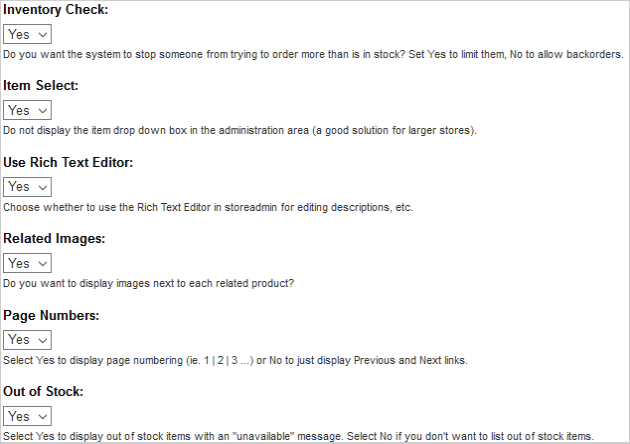
Figure: Configure other settings for items in a catalog.
Input Fields:
- Inventory Check - Controls what happens when a customer tries to buy more of a product than you have in stock. If set to Yes it limits them, No allows backorders.
- Use Rich Text Editor - Choose whether to use the Rich Text Editor (WYSIWYG HTML editor) in the admin UI for editing descriptions, etc.
- Related Images - Sets whether images are displayed next to related products.
- Page Number - Select Yes to display page numbering or No to just display Previous and Next links.
- Out of Stock - Select Yes to display out of stock items with an "unavailable" message and the option to sign up for a waiting list. Select No if you don't want to list out-of-stock items.
To save any changes click Update Variables at the bottom of the page.
Checkout/Cart
This menu contains checkout and cart settings.
URLs
At checkout you can link to your terms and conditions, terms of use, and privacy policy and have the customer confirm they agree to them.
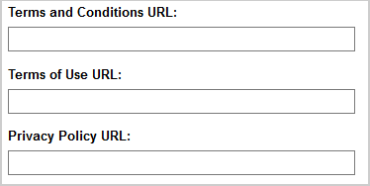
Figure: Create terms and conditions or privacy policy URL links for checkout.
Input Fields:
- Terms and Conditions URL - A link where the customer can find your Terms and Conditions.
- Terms of Use URL - A link where the customer can find your Terms of Use.
- Privacy Policy URL - A link where the customer can find your Privacy Policy.
Note: The wording at the checkout and which of these fields display depends on your template.
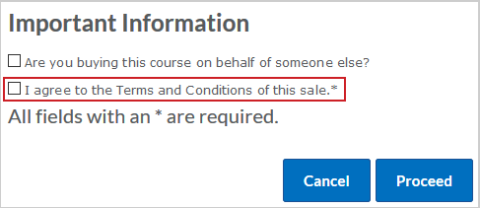
Figure: An example of a terms and conditions agreement at checkout.
Cart Options
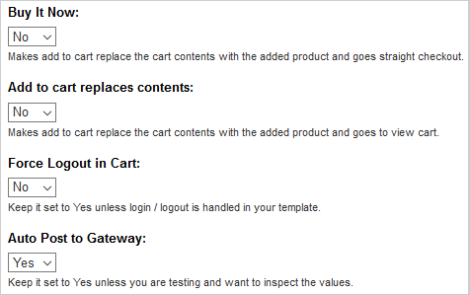
Figure: Configure cart options for users.
Input Fields:
- Buy It Now - Makes it so that when a customer adds an item to the cart it replaces the contents with the added product and goes straight to checkout.
- Add to cart replaces contents - Makes it so that when a customer adds an item to the cart it replaces the contents with the added product and goes to View Cart.
- Force Logout in Cart - Keep it set to Yes unless login and logout is handled in your template.
- Auto Post to Gateway - Keep it set to Yes unless you are testing and want to inspect the values.
To save any changes click Update Variables at the bottom of the page.
Emails
Course Merchant will send out a variety of different emails for different order types at different stages of the order. The Emails menu allows you to preview the email templates and pages your customers will see and send test emails.
These email templates cannot be customized within the store admin, if you would like changes made, contact Course Merchant Support.
Email and Page Previews

Figure: An example of an order acknowledgment for enrollments.

Figure: An example of an order acknowledgment for enrollments by a free product.

Figure: An example of an order acknowledgment for licenses.

Figure: An example of an order acknowledgment for no courses.

Figure: An example of an order acknowledgment for no courses by a free product.

Figure: An example of an order acknowledgment for an invoice.

Figure: An example of an order acknowledgment for verification.

Figure: An example of a Manage Licenses enrollment notification from an order's licenses.
Test Emails
You can send all the email previews to an email address of your choice.
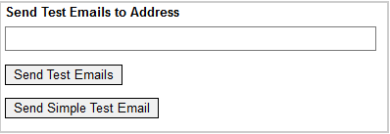
Figure: Enter an email in the Send Test Email to Address to test email previews.
Enter an email address in Send Test Emails to Address then click Send Test Emails to send tests of all the email templates to that address.
This menu lists all the payment methods and payment gateways enabled on your store and their settings. During the build phase we will have discussed with you which gateways you need enabled and set them up for you.
Inactive Gateways
Inactive Gateways will be shown collapsed. Click (collapse / expand) to expand them.

Figure: Inactive Gateways can be expanded by clicking expand.
Free
This is a testing payment method which allows you to easily perform test orders. It will be turned off in live stores.

Figure: Perform test orders with gateways.
Input Fields:
- Gateway - The name of the gateway.
- Display name - The name that will be shown at checkout.
- Display order - The order in which payment methods will be shown at checkout, the lower the number the higher on the page.
- Force Active (for testing) - Forces the Gateway to be active. This is the only way to enable the "Free" payment method.
Invoice
Invoicing is a delayed payment method that is optionally enabled on the store.

Figure: Optionally enable invoicing for delayed payments.
Input Fields:
- Active - If selected the payment method will be shown at checkout.
- Display Name - Name for the payment method to show at checkout.
- Display order - The higher the number the lower the payment method will show in the list.
- Force Active (for testing) - This is only used for the "Free" payment gateway as others are controlled by the Active checkbox.
- Use Products Invoice setting - Normally if it is active the invoice payment method is enabled for all products in the store, when this is enabled only products with Allow Invoice enabled in the Product Editor will have the pay by invoice option.
To save any changes click Update Variables at the bottom of the page.
LMS Settings
Course Merchant can connect to many LMS, and the options you will see here will depend on your LMS.
Moodle
An example of Moodle LMS settings.
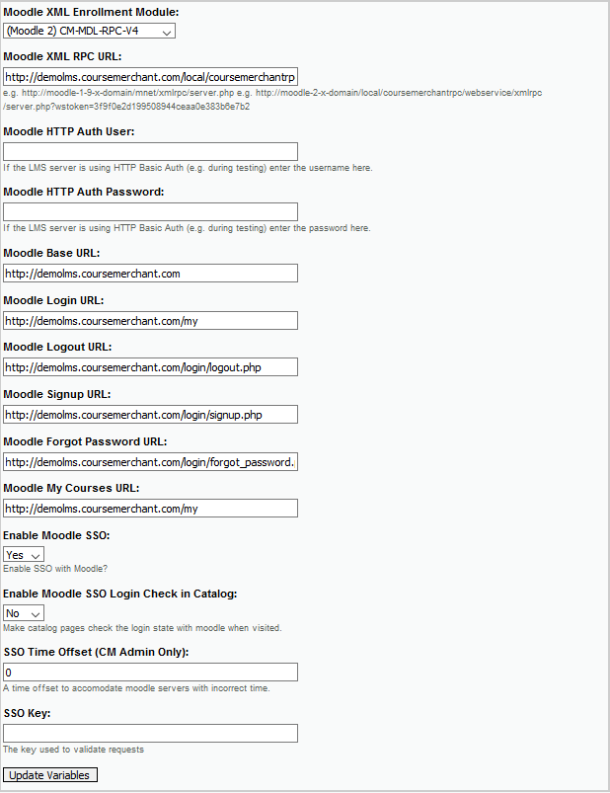
Figure: Configure Moodle using the LMS settings.
Brightspace
An example of Brightspace LMS settings.
DO NOT CLICK Authenticate desire2learn admin account for connection or you will break your LMS connection.
Once your LMS connection has been restored you will need to go into a product and click Refresh the list of courses from your LMS to restore the course connections.
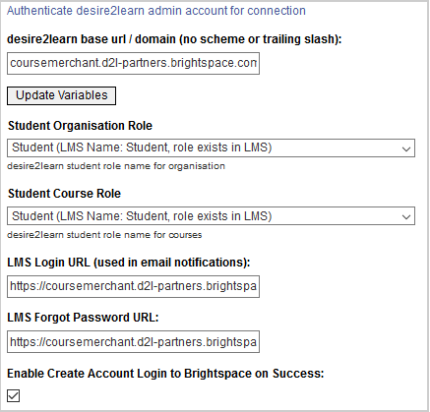
Figure: Configure Brightspace using the LMS settings.
Check LMS
From this page you can check your LMS connection is working correctly.
The example below shows a Brightspace LMS connection.
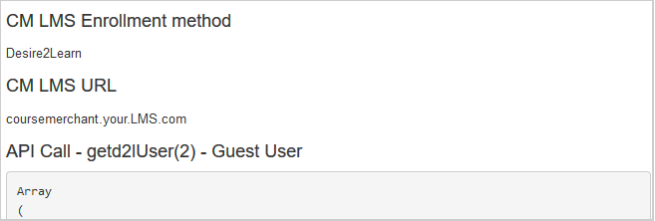
Figure: Verify LMS settings by checking the connection.
- CM LMS Enrollment method - What kind of LMS you are connected to, and in some cases, which version of the connection plugin.
- CM LMS URL - The URL of the LMS Course Merchant is connected to.
- API Call - A test API call which will show if there is an issue with the LMS connection.
Password
This menu allows you to change the password for the currently logged in admin user.
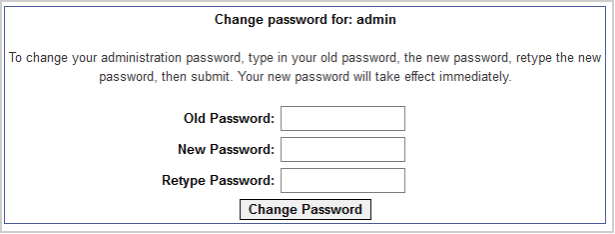
Figure: Use the Change password window to reset passwords for admin users.
Enter your Old Password and the New Password and Retype Password then click Change Password.
The password will change immediately.