To ensure that only relevant courses are available to users who meet specific criteria, users with the correct permissions can manage enrollment rules using the following methods:
-
Use the Enrollment Rules page to edit, delete, or create a new enrollment rule and apply it to multiple courses. This workflow allows a user to create an enrollment rule first and apply that rule to as many courses as required.
-
Review, add, or remove enrollment rules applied to a course from the Course Offering Information page of a course.
Before you create and add Enrollment Rules
To ensure that you can create and add enrollment rules in Discover, it is important to note the following:
- By default, all courses configured to display in Discover are available to any role within your organization.
- The Manage Discover permission is required to:
- Access the Enrollment Rules page from the Discover page.
- Access the Create Enrollment Rule button from the Enrollment Rules page.
- Edit or delete rules from the Enrollment Rules page.
- Access the Manage Enrollment Rules link on the Course Offering Information page, which opens the Enrollment Rules page.
- To access the Add Enrollment Rule button on the Course Offering Information page, you must either have the Configure Availability in Discover permission, or the Manage Discover permission applied to your role. Either of these permissions will grant access to the Add Enrollment Rule button.
- The User Information Privacy > See First Names and See Last Names permissions are required to:
- View user initials in enrollment rule cards. If these permissions are not granted, users see user profile images instead of initials.
- The User Information Privacy > See Usernames permission is required to view a list of attributes when creating an enrollment rule based on a custom user attribute. If this permission is not granted, users do not see any attributes for a custom user attribute. For example, with the permission, users see all users that are managers for the Manager custom user attribute.
-
When creating an enrollment rule, it is important to understand that there are two different types of Conditions that can be applied to an enrollment rule based upon a user's purchased version of Brightspace.
-
Brightspace Core customers can use the Create Enrollment Rule page to specify role values for the Role in Organization condition. Users can apply enrollment rules to a course and select from up to 10 role values to apply to the Role in Organization condition. For example, Learner or Instructor.
-
Customers of Manager Dashboard and Learning Groups can add more than one condition to an enrollment rule each with custom User Attributes. Users can apply enrollment rules to a course, with each enrollment rule containing a maximum of 10 conditions and 10 custom user attributes per condition.

|
Note: If you are creating enrollment rules based on User Attributes configured through Manager Dashboard and Learning Groups, you must continue to use the User Attributes tool to upload and update attributes into your Brightspace instance. This is to ensure that newly-created users continue to satisfy the requirements of an enrollment rule based on user attributes. If you do not continue to upload user attributes, newly-created users may not have the required user attributes assigned to their role, and therefore, enrollment rules based on those attributes will not be correctly applied to that user. This can result in courses showing as available to users, even though they do not satisfy the enrollment rule requirements. For more information refer to Importing Attributes. |
-
Multiple enrollment rules are treated as "or" statements and custom user attributes are treated as "or" statements in conditions. Adding another condition treats each condition as an "and" statement.
-
If you make a course unavailable in Discover, any enrollment rules are permanently removed from the course.

|
Important: If you are using API Valence to configure enrollment rules for a course, you must perform a GET to obtain the correct CanSelfRegister value. This value must be FALSE when enrollment rules are set in a course.
|
Create an enrollment rule and associate it with courses
You can use the Enrollment Rules page to create an enrollment rule, add conditions to that rule, and associate that rule with multiple courses. This enables you to apply an enrollment rule to multiple courses easily.

|
Important: You can create an enrollment rule that your own role does not fulfill. For example, an enrollment rule could limit the visibility of a course to those who have an Org Role Membership of Student. In this case, if your Org Role Membership is not set to Student, you will not see that course in Discover once you save that rule.
|
To create an enrollment rule and add it to courses
-
From your organizational homepage, navigate to Discover.
-
Select More Actions > Enrollment Rules.
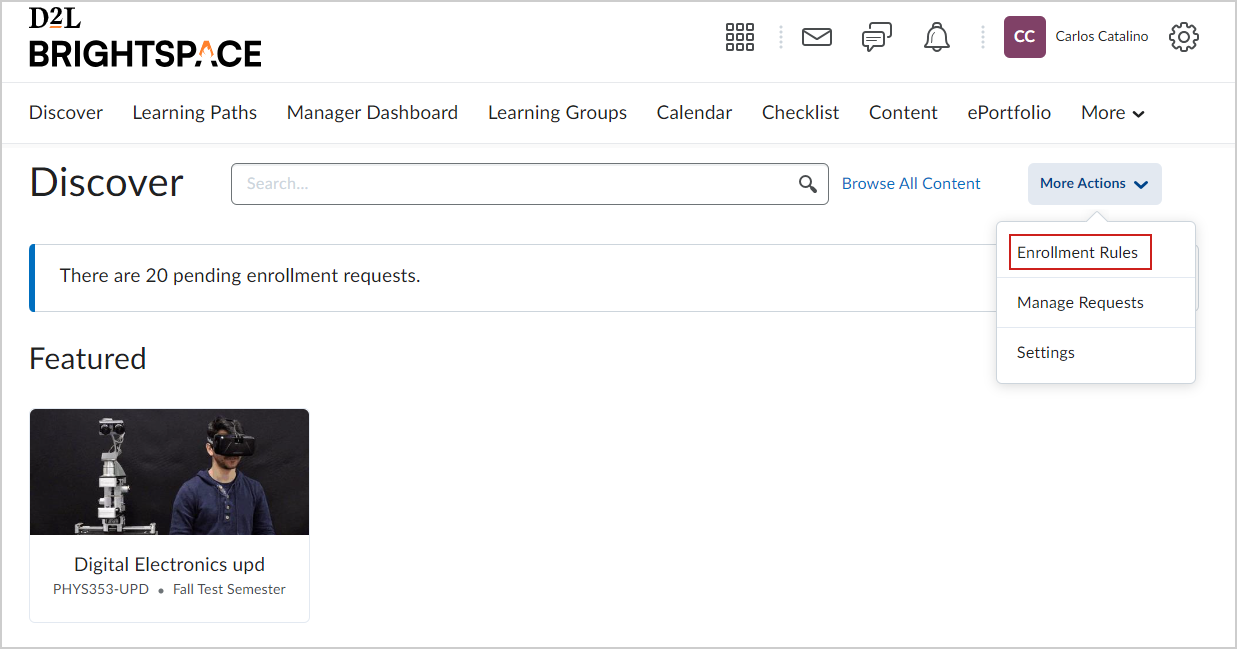
Figure: Select Enrollment Rules to open a list of all enrollment rules created in Discover.
-
From the Enrollment Rules page, select Create Enrollment Rule.

Figure: Select Create Enrollment Rule to create a rule, add conditions to the rule, and associate it with multiple courses.
-
From the Create Enrollment Rule page, do the following:
-
Enter a Rule Name.
-
Under Conditions, next to Role in Organization, select the desired role or roles.
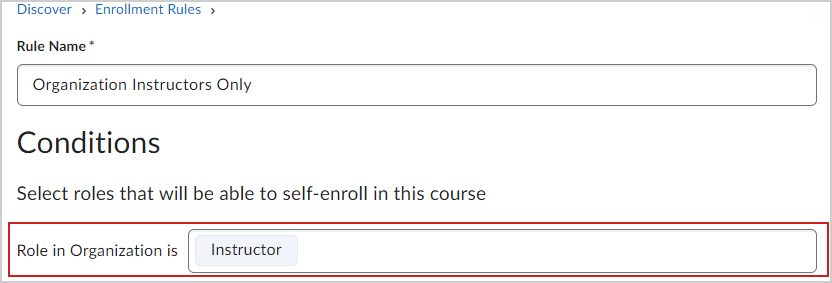
Figure: Specify an org unit (role) as a condition of your enrollment rule.

|
Note: Manager Dashboard and Learning Groups users can add multiple custom User Attributes to a condition and select + Add Another Condition to apply multiple conditions. |
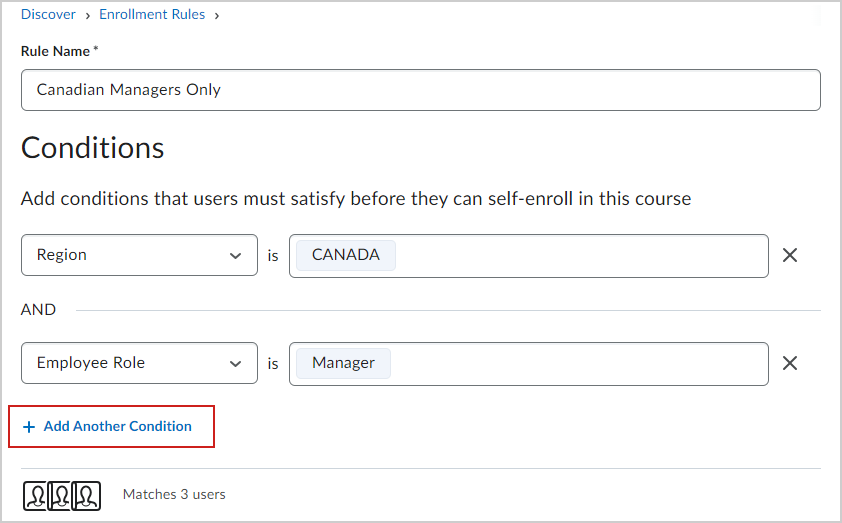
Figure: As a Manager Dashboard and Learning Groups user, select +Add Another Condition to apply more than one condition to your rule.
-
Under Courses, select Add Courses and do the following:
-
From the Add Courses dialog, search for and select the courses that you would like to add.

|
Note: You can also select the check box at the top of the list to select all courses visible in the list. |
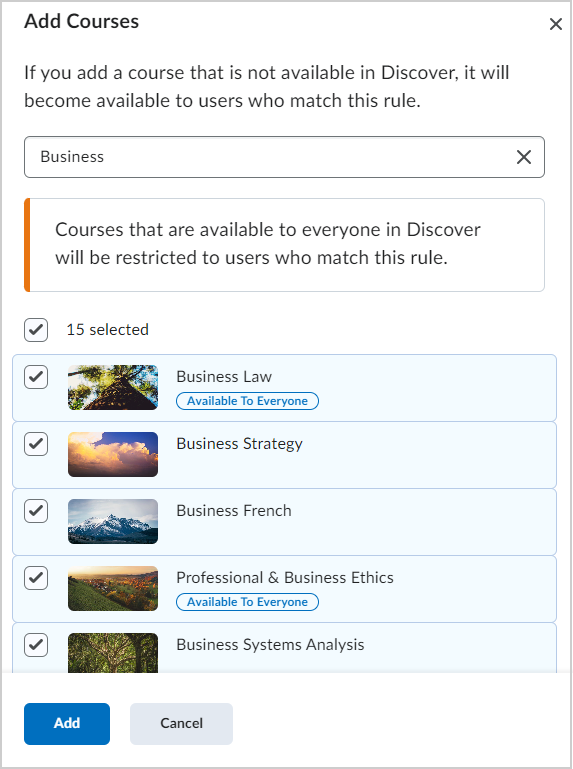
Figure: Use the Add Courses dialog to search for courses, select courses, and add courses to your enrollment rule.
-
Select Add to associate the courses with your enrollment rule.

|
Note: If you add a course to your rule that is not yet available in Discover, it is made available in Discover to users that satisfy the conditions you have added to your rule. To remove a course from your enrollment rule, navigate to the Courses section of the Create Enrollment Rules page and click the X next to the course you want to remove. |
-
To create your new enrollment rule, select Save & Close.
Your enrollment rule is added to the Enrollment Rules page.
Edit or delete an existing enrollment rule
Once you have created an enrollment rule, you can edit that rule to change conditions, add courses to the rule, remove courses from the rule, or delete the rule.

|
Note: Any existing enrollment rules created before the August 20.23.8 release display with an auto-generated name that takes the attribute values from the first condition within a rule. For example, if an existing rule has Role in Organization values of Learner and Manager, the rule's auto-generated name displays as "Learner, Manager". All existing rule names are editable and can be deleted. |
To edit or delete an existing enrollment rule
-
From your organizational homepage, navigate to Discover.
-
Select More Actions > Enrollment Rules and do one of the following:
- To edit an enrollment rule, use search for the rule and click to open the rule in the Create Enrollment Rules page.

Figure: Search for and select a rule to open and edit it.
- To delete an enrollment rule, select the Delete Enrollment Rule icon next to the rule and select Delete Rule.

Figure: Search for the rule you want to delete and select the Delete Enrollment Rule icon to delete it.

|
Note: Deleting an enrollment rule can result in the removal of the last rule applied to a course. If a course no longer has any enrollment rules assigned, then it will no longer be visible to users in Discover. This is also the case if you remove a course from an enrollment rule, resulting in that course to have no other applied rules. |
You have successfully edited or deleted an enrollment rule.
Video: Apply Enrollment Rules to Multiple Courses within Discover
Review, add, or remove enrollment rules from the Course Offering Information page
You can also view all enrollment rules that are associated with a course from the Course Offering Information page.
To review, add, or remove enrollment rules applied to a single course
-
Navigate to a course and select Course Admin.
-
Select Course Offering Information.
-
Under the Discover section, expand the Enrollment Rules section to review rules applied to the course and do one of the following:
-
To add existing enrollment rules to the course, select Add Enrollment Rules.
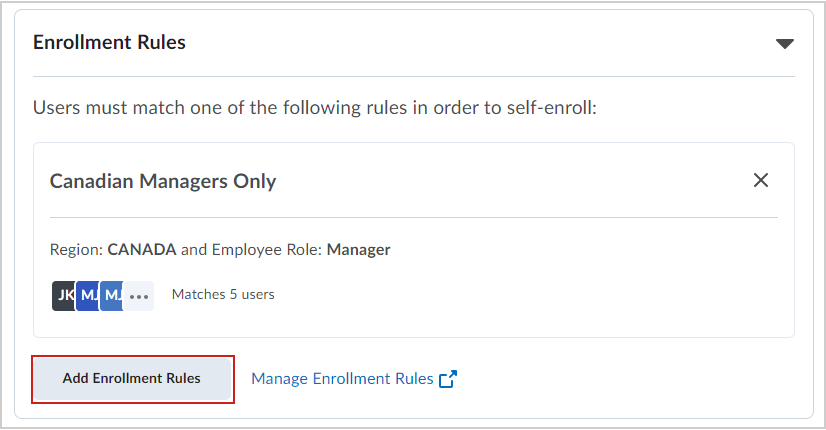
Figure: Select Add Enrollment Rules to open the Add Enrollment Rules dialog, search for existing enrollment rules, and add them to your course.
-
To remove an enrollment rule from the course, select the X next to a rule to remove it.
-
To navigate to the Enrollment Rules page to create, edit, or delete enrollment rules, select Manage Enrollment Rules.
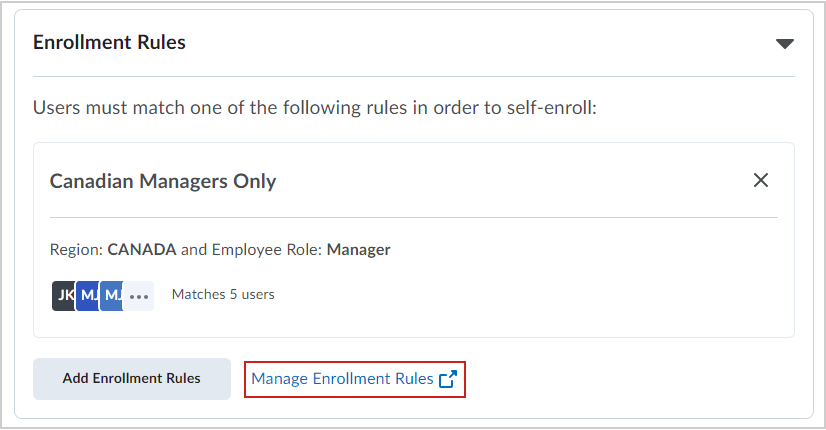
Figure: Select the Manage Enrollment Rules link to navigate to the Enrollment Rules page.

|
Note: You must have the Manage Discover permission applied to your role to access the Manage Enrollment Rules link and the Enrollment Rules page. |