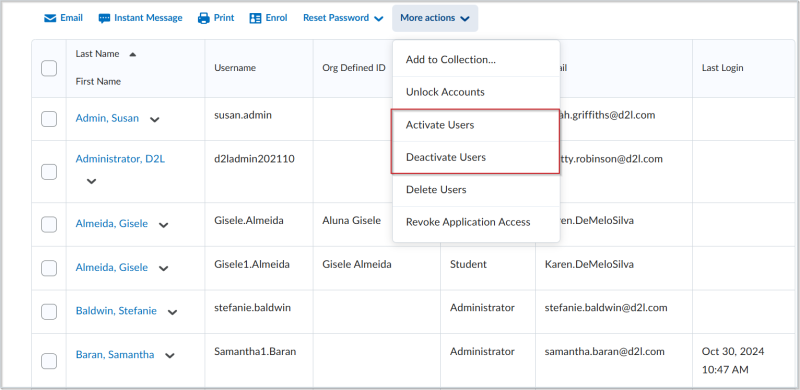
You can make users inactive when you want to block their access to Brightspace, but want to retain their data and associated information for administrative purposes. Deactivating users hides all their data but doesn’t delete or remove their enrollments. When you reactivate users, the system restores all their data in any course offerings/org units they were previously enrolled.
- From the Admin Tools menu, click Users.
- Enter the desired user into the Search For... field. You can filter the search result by selecting Show Search Options and checking or unchecking the desired options.
- Click the magnifying glass icon to perform the search.
- On the Users page, select the users you want to change.
- Do either of the following:
- From the More actions link, select Deactivate Users.
- From the More actions link, select Activate Users.

Figure: Click More actions and select either Activate Users or Deactivate Users.