This is where Course Merchant's built in reporting functions are accessed.
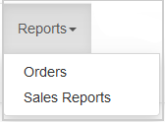
Figure: Click the Reports drop-down menu to access Orders and Sales Reports.
Course Merchant has three built in orders reports which you can view on the Orders page. You will be presented with the Order List and can select one of the alternative reports from the View Orders box at the bottom of the page.
The reports are a summarized listing of order data collected from each sale. Only a small subset of the available data fields is displayed in the Store Admin. All data fields (with exception of credit card numbers, which are never stored in Course Merchant) are available if you download the sales data as a CSV file.
This is also where you can view and approve invoice orders and cancel orders.
Default Report
This is the report you will see when you enter the Orders page which is a paginated table of all the orders in your store.
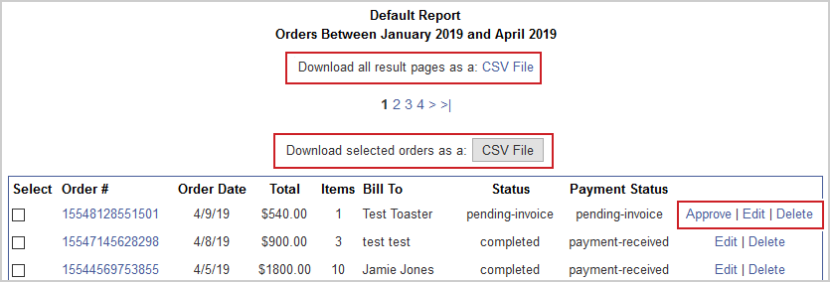
Figure: Download the Default Report order list as a CSV file.
Column Headings:
- Select - Allows you to select multiple orders to download in a CSV file.
- Order # - Course Merchant's unique order number.
- Order Date - The date the order was placed.
- Total - The total sale value.
- Items - The number of products purchased in the order.
- Bill To - The invoice name.
- Status - The order status can be set either within Course Merchant via the Order Edit screen, by clicking one of the action links or automatically by the payment gateway. Here is a list of possible order statues, not all stores and gateways will use all of them.
- pre-checkout - These are orders where products have been added to the cart and checkout started but not completed. Refer to Pre-Checkout Orders for more details.
- initiated-payment - May be set automatically by some payment gateways. The payment has started but was not completed. This expands on pre-checkout.
- checked - The order has been checked. This status is normally set via one of the Pre-Checkout Order actions.
- pending-verification - A product in the order needs verification.
- pending-invoice - Set automatically on an invoice order. The order will be delayed until approved.
- pending-invoice-immediate-processing - Set automatically as part of an alternative invoice workflow where rather than having to wait for approval the order continues normally.
- completed - The order has been paid for and the customer has been enrolled on courses if applicable.
- canceled - Set automatically when an order is canceled, either manually in Course Merchant or automatically by the payment gateway when there is a payment error.
- transferred - Only used on highly customized store setups.
- Payment Status - The payment status can be set either within Course Merchant via the Order Edit screen, by clicking one of the action links or automatically by the payment gateway. Here is a list of possible payment statues, not all stores and gateways will use all of them.
- pre-checkout - These are orders where products have been added to the cart and checkout started but not completed. Refer to Pre-Checkout Orders for more details.
- payment authorized - Set automatically in some payment gateway and store configurations.
- payment-received - Set automatically when a payment has been received. The order will proceed normally.
- pending-invoice - Set automatically on an invoice order. The order will be delayed until approved.
- pending-invoice-immediate-processing - Set automatically as part of an alternative invoice workflow where rather than having to wait for approval the order continues normally.
- canceled - The payment has been canceled. This is set by some payment gateways when the payment fails. It may also be set manually, or as part of an order edit screen option.
- declined - Set automatically by some payment gateways when a payment is declined.
- failed - Set automatically by some payment gateways when a payment fails.
- refunded - The payment has been refunded. This may be set manually, or as part of an order edit screen option. This is not set by the payment gateway.
Available Actions:
- Approve - This option will only appear on pending invoices, pre-checkout and pending-verification orders. Approves the order and enrolls a customer on their courses if appropriate.
- Edit - Enters the order editing screen where you can change order and payment status and approve invoices. This is not enabled in all stores.
- Delete - Permanently removes an order from the store.
Financial Report
The second orders report is a financial report. You can download this report as a CSV file to view all the data.

Figure: Download a Financial Report for orders as a CSV file.
The column headings are the same as in the default Order List Report.
The final orders report available is the customer summary. This report allows you to see how many orders specific customers are sending you. You can download the data as a CSV file.
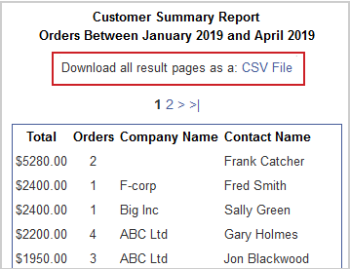
Figure: Download a Customer Summary Report for orders as a CSV file.
Column Headings:
- Total - The sum of all the orders from this customer.
- Orders - Number of orders this customer has made.
- Company Name - The company this customer works for if applicable.
- Contact Name - Name of the customer.
At the bottom of each Order Report is the search and filter box.
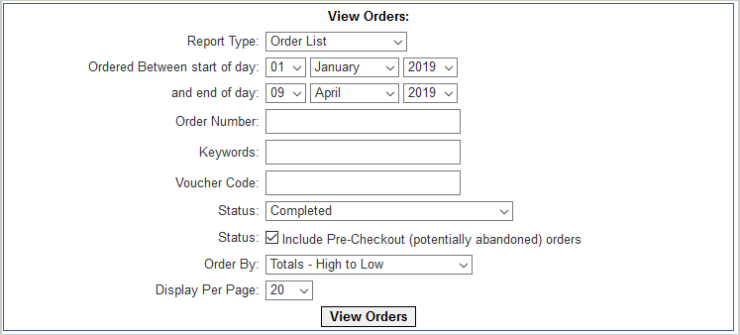
Figure: Enter order details in the search filter fields and then click View Orders.
Search Fields:
- Report Type - This is where you select from one of the three report types.
- Ordered Between start of day, and end of day - Filter orders between two dates.
- Order Number - Search by Course Merchant order number.
- Keywords - Searches the Contact Name or Bill To column for a keyword, generally a customer name.
- Voucher Code - Search for orders that used a specific voucher code.
- Status - Filters the orders by Status.
- Include Pre-Checkout (potentially abandoned) orders - If this is ticked the report will include orders that are pre-checkout.
- Order By - Allows you to sort the report by Date, Totals, Quantity sold, Item or Customer A-Z and Z-A and Number of orders (Only applies to Customer Summary report).
- Display Per Page - How many orders to display per page.
Click Edit next to an order in the Orders List to go to the Order Edit screen. From this screen you can perform some common order actions.
The available actions depend what type of order you are editing.
Pending Invoice Orders
A pending invoice order lets you perform a pair of actions.
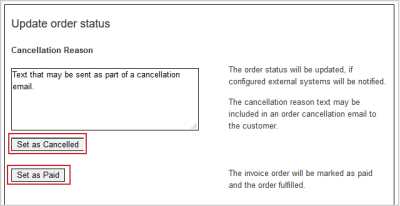
Figure: Pay or cancel a pending invoice order.
- Set as Canceled - Sets the order status to canceled and depending on the store configuration may send an email to the customer containing the text entered in the text box.
- Set as Paid - This will Approve the invoice and let the order proceed normally.
Completed Order
A completed order has one action.
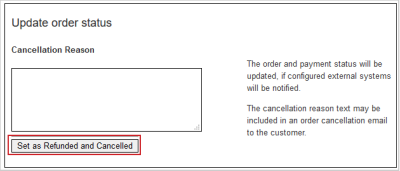
Figure: Click Set as Refunded and Canceled for a completed order.
- Set as Refunded and Canceled - Set the Order status to canceled and the payment status to refunded. Used as part of a refund workflow. Course Merchant does not issue refund payments so that will need to be done via your payment gateway.
Pre-Checkout Orders
A pre-checkout order has one action.
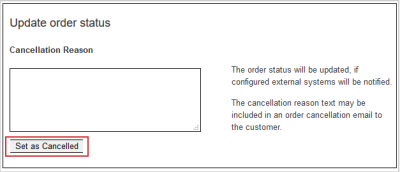
Figure: Click Set as Canceled for pre-checkout orders.
- Set as Canceled - This sets the order status to Canceled.
You cannot set pre-checkout orders as Checked Status from this page by default.
Free Form Status Editing
Some stores don't have order editing buttons enabled, instead they have free form edit boxes. You can select an Order Status and a Payment Status then click Update to make the changes.

Figure: Change order status and payment status with the drop-down options.
The Order Status and Payment Status options are the same as those listed in the Orders List.
Order Information
A summary of the ID numbers associated with an order, its payment type, and status.

Figure: An example of a summary containing order ID numbers, payment type, and status.
Invoice Information
The invoice information contains the data the customer entered at checkout.

Figure: An example of an invoice from a customer checkout.
You can approve Invoice Orders from this screen as well.

Figure: Click Approve (Mark Paid) to approve an invoice order.
Products and Order Amounts
At the bottom of the page is the products in the order and a breakdown of the payment. You can click Back to Orders to return to the Orders List.
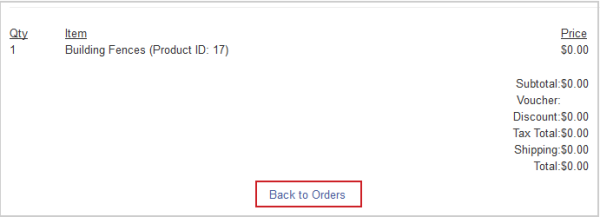
Figure: Click Back to Orders to return to the Orders List.
As well as the instant Credit Card payment method, Course Merchant also supports a "delayed" payment method. This is generally described as "Pay by Invoice" or similar. A delayed payment simply means that funds will not be received instantly for the order. Funds will follow later after some form of processing by your finance team.
Because funds will not be received instantly, Course Merchant deliberately delays the enrollment into the LMS. To force the enrollment to occur (once payment is received), the store administrator will click Approve in the Orders Report.

Figure: Check the Status and Payment Status of an order and click Approve.
Overview of delayed payments
- Every part of the checkout process remains the same up until the customer selects Pay by Invoice.
- Upon selecting Pay by Invoice, the customer receives a message on screen (confirmed by email) with information on how to pay (you may provide checking info, wire transfer info, etc.).
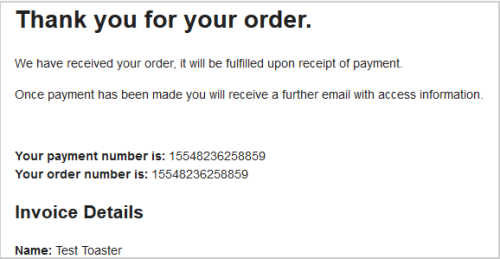
Figure: An example of a confirmation message for a Pay by Invoice order.
- The store owner receives an email alerting them that a delayed payment order is in. They should arrange for payment to be confirmed using existing internal systems.
- Once the payment is confirmed, or you have decided to proceed anyway (maybe the customer has an existing account) you must access the Store Admin and approve the order. Log in to the Store Admin, click Reports, and then in Orders locate the orders that are awaiting approval.
- If all is well, click Approve. The payment status will change.

Figure: The order Status changes to completed after clicking Approve.
Once approved, the user will receive an email confirming either:
- Their login details (if this was a single seat order).
- Their Manage Licenses details (if this was a multi-seat order).
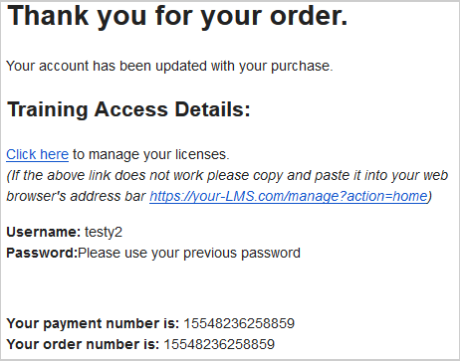
Figure: An example of the email a multi-seat order customer receives once their invoice is approved.
From now on, this order will behave just like any other order.
Overview with interstitial page
An optional interstitial can be enabled that allows you to capture more information about an invoice order when it is approved.
The invoice approval workflow follows the same process. To access the orders list, log in to Store Admin, then go to Reports and then Orders. Locate the invoice order you wish to approve and click Approve.

Figure: Click Approve to confirm an invoice order.
When you click the link the invoice interstitial page will open.
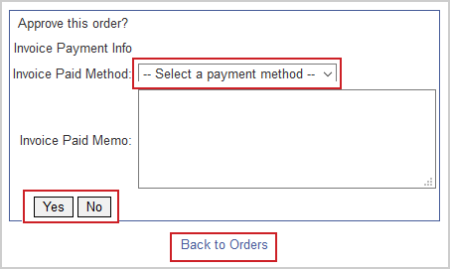
Figure: Select an invoice payment method and click Yes.
Input Fields:
- Invoice Paid Method - You can select how the invoice was paid.
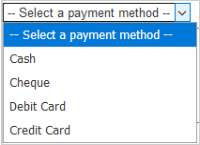
Figure: Click the Select a payment method drop-down menu and choose a payment method.
- Invoice Paid Memo - You can enter a free form note about the memo payment.
Once you have approved the invoice it will proceed as usual.
If you Edit an approved invoice order you will see the following extra information that you entered within the interstitial page.
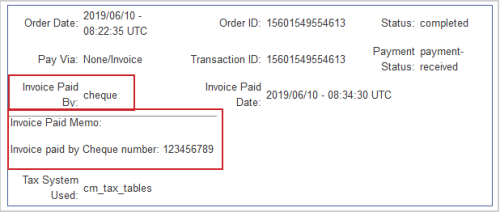
Figure: View the payment method in the invoice memo.
Invoice Paid By and Invoice Paid Memo will be viewable on the order edit page. This data will also be sent to the Reporting Layer if applicable.
Store products can be set to Require Verification before they can be accessed, for example if there are course prerequisites.
The customer will add the product to their cart as normal and pay. They will be presented with a different email saying that their order requires verification. An admin must approve the order before they gain access to the courses or licenses. If a user is not approved, they will need to be manually refunded via the payment gateway and the user must be informed. An order cannot be denied via the system.
Note - If an order has both "Require Verification" and normal items in it, the whole order will be held until approved.

Figure: Orders pending verification have the pending-verification status.
An order that requires verification will show up in the Orders Report with the status pending-verification.
The customer will receive an email explaining that their order needs to be verified.
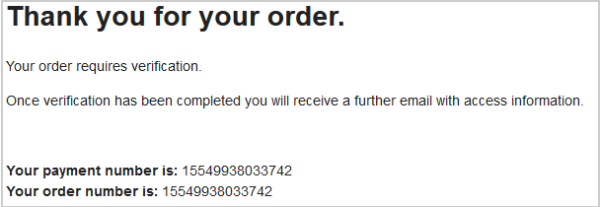
Figure: An example of a customer email stating their order needs verifying.
Verifying an order
Once you have verified the prerequisites you can go into the Orders Report and search for the order.

Figure: Click Approve in Orders Report after verifying an order.
Click Approve. This will change the order's status to completed and the order will proceed normally.

Figure: The order Status changes to completed after approval.
The customer will receive another email with a link to sign into their course or manage their licenses in the case of a multi-seat order.
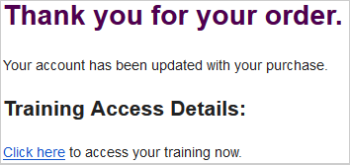
Figure: An example of a customer email containing a login link.
An order is considered Pre-Checkout when a customer has selected to pay by card and clicked Proceed at checkout and been passed along to the payment gateway, but hasn't been returned to the store or they have but the gateway's response isn't understood by Course Merchant.
This may be due to cart abandonment or a gateway issue.
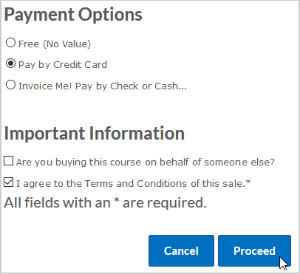
Figure: A customer's order is considered pre-checkout when they click Proceed and the payment is not fulfilled.
When this happens the Order Status and Payment Status will be pre-checkout.

Figure: If a pre-checkout order occurs, the Order Status and Payment Status both change to pre-checkout.
Available Actions:
- Approve - This sets the Order Status to completed and the Payment Status to payment-received and lets it continue as usual, issuing course seat licenses or getting physical goods shipped. This is useful if you have confirmed in the payment gateway that the order went though successfully and you have received the funds.

Figure: Click Approve to set the order Status and Payment Status to completed and payment-received, respectively.
- Checked Status - This sets the Order Status to checked but leaves the Payment Status as pre-checkout so the order doesn't precede normally. This is useful if you have checked the order in the payment gateway and the payment didn't go though.

Figure: An order Status is set to checked for a pre-checkout order.
The Sales Reports is a group of three reports that provide you with an overview of what products have been sold. You can generate a report from the search and filtering box at the bottom of the page.
This is the report you will see when you first enter the Sales Reports menu. This shows all the sales in your store.

Figure: View a sales report for a period of time in the Sales Report menu.
Column Headings:
- Qty - The quantity of the product sold in the order.
- Item - The name of the product.
- Price - The total amount of product sold in the order.
- Date - The date of the order.
- Action - A link to the Order Page for this sale.
This report shows you the total value of sales for a product.

Figure: View a sales report of the total value of sales.
Column Headings:
- Total - Total amount of a product sold within the selected date range.
- Item - The name of the product.
- Avg Net Price Per Order Line - Average line item value taking into account discounts (Average amount spent on this product per order).
- Sum Gross Price - This is the total amount of product sold after tax and discounts in the selected period.
- Max Date - The date the product was last purchased.
This report is accessed via the box at the bottom of the Sales Reports page.

Figure: Click Show List to see order bestsellers.
This report shows you the 50 bestselling products in your store.

Figure: Click Back to Sales to navigate away from the Bestseller List.
Column Headings:
- Total Sold - The lifetime total sales for the product.
- Item Name - The name of the product.
- Highest Price - The most product sold in one order.
- Last Date Sold - The date the product was last sold.
The Back to Sales link will take you back to the Sales Reports.
Searching and Filtering Sales Reports
After the Sales Report paginated table there is a search and filtering box. This is also where you will select a report to view.
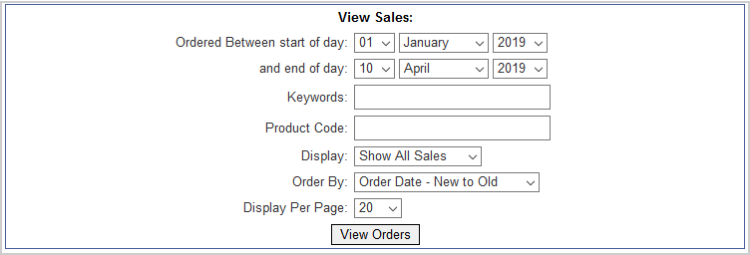
Figure: Use View Orders to search and filter sales.
Search Fields:
- Ordered Between start of day, and end of day - Filters the report to show orders and sales between a selected date range.
- Keywords - Searches the product name.
- Product Code - Searches for a product code.
- Display - Select between the All Sales and Totals Only reports.
- Order By - Order by Order Date, Totals (this is either the Price in the All Sales Report or Sum Gross Price in Totals Only), Quantity Sold, Product Name A-Z, or Product Name Z-A.
- Display Per Page - How many products to display per page.