Displaying the course code in the My Courses widget
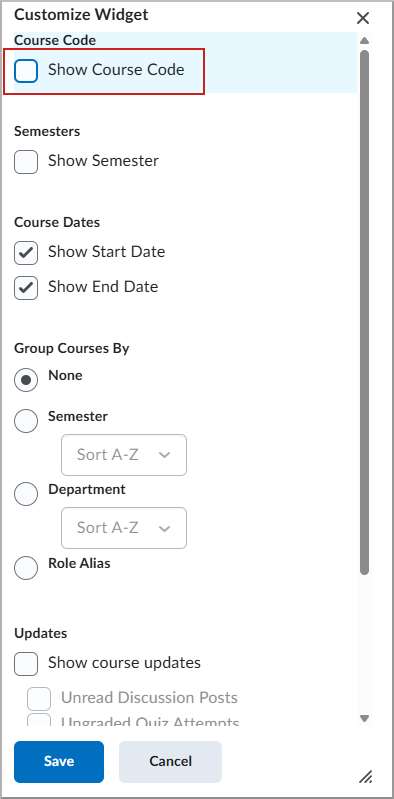
The My Courses widget can display the course code below the course name if you select the Show Course Code option in the widget settings.
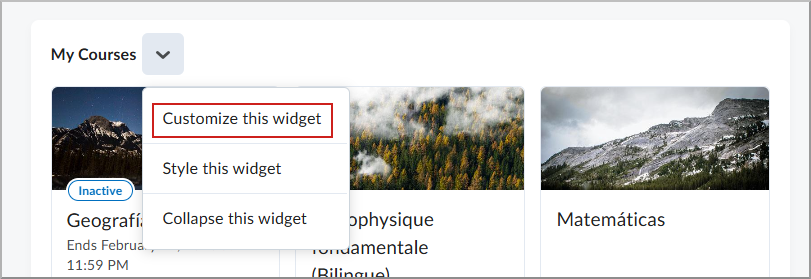
- On the My Home or Course Home page, navigate to the My Courses widget.
- From the Actions menu, select Customize this widget.

- Select Show Course Code.

- Click Save.
Hiding or showing course dates in the My Courses Widget
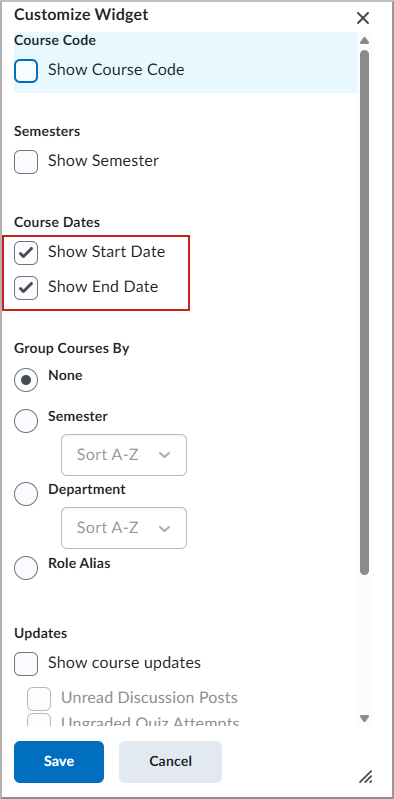
In the My Courses Widget, homepage administrators can configure whether start or end dates appear on the My Courses widget course cards. This functionality can be of benefit if learners have access to courses before the official course start date. Alternatively, if courses remain available in Brightspace after the last day of the course, that learners can review final grades or access their completed course materials.
- On the My Home or Course Home page, navigate to the My Courses widget.
- From the Actions menu, select Customize this widget.

- Set the Show Start Date and Show End Date check boxes to reflect the access you want to provide.

When the Show End Date option is turned off, the Closed icon does not appear for courses past their end date. Note that any changes you make to the widget configuration settings impact all users.
Using images on the My Courses widget
In the My Courses widget on your homepage, the courses display a default image assigned from the curated image library. You can select an image that is more representative of the course from the library provided by D2L to replace the default image; alternatively, you can upload your own image for the course tile.
Any images that you include with the My Courses widget are available to include in the course components that you export, copy, or import.
Before uploading logo or course images, consider the following recommendations:
- For logo images used on navbars, ensure that your image is a maximum size of 260 pixels by 60 pixels, and saved as SVG filetype.
- For course images, it is recommended that images are 2400 pixels by 960 pixels. Keep in mind that the display height and width of these images may vary in different tools and on different screens and devices. Ensure that any images that you are using appear correctly at different sizes and crop points on laptop, tablet, and mobile device screens.
Note: To maintain security, ensure any .jpg images are clear of EXIF (exchangeable image file) data.
To change the default image
- Navigate to your homepage by doing one of the following:
- If your My Courses widget appears on the My Home page, click the My Home button.
- If your My Courses widget appears somewhere else, navigate to the location of the widget.
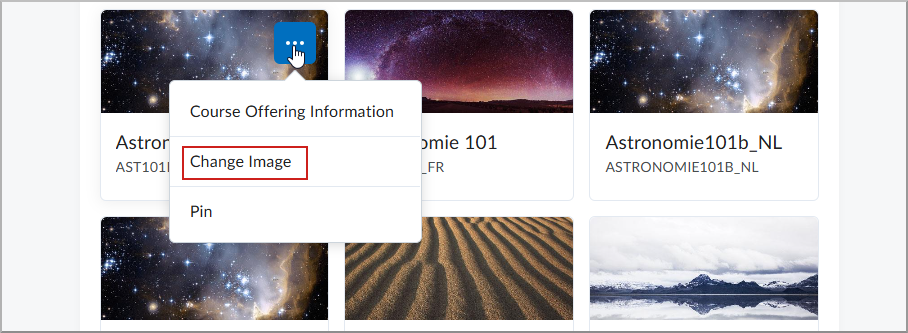
- Hover over the course image and click the More Options menu. If you are using assistive technology or keyboard-only navigation, press Tab to access the More Options button and press Enter to view the menu items.
- Select Change Image or press Enter.

- Search or browse the list of available images.
- Hover over the image you want to use and click Use this image. If you are using assistive technology or keyboard-only navigation, press Enter to select the image.

Your new image displays in the My Course widget.