You can use the Locations tool to define the location name, building, and room dimensions to represent real rooms within your institution.
Use the Seating Chart's drag-and-drop interface to view and track attendance and participation for your course and group events. Seating Chart enables you to assign students to seats representative of your classroom and track student performance on a session-by-session basis.
Note: Seating Chart integrates with both the Locations and Calendar tools. Because seating charts depend on locations, you must first create or activate a location with a layout before creating any seating charts.
To add layouts to locations
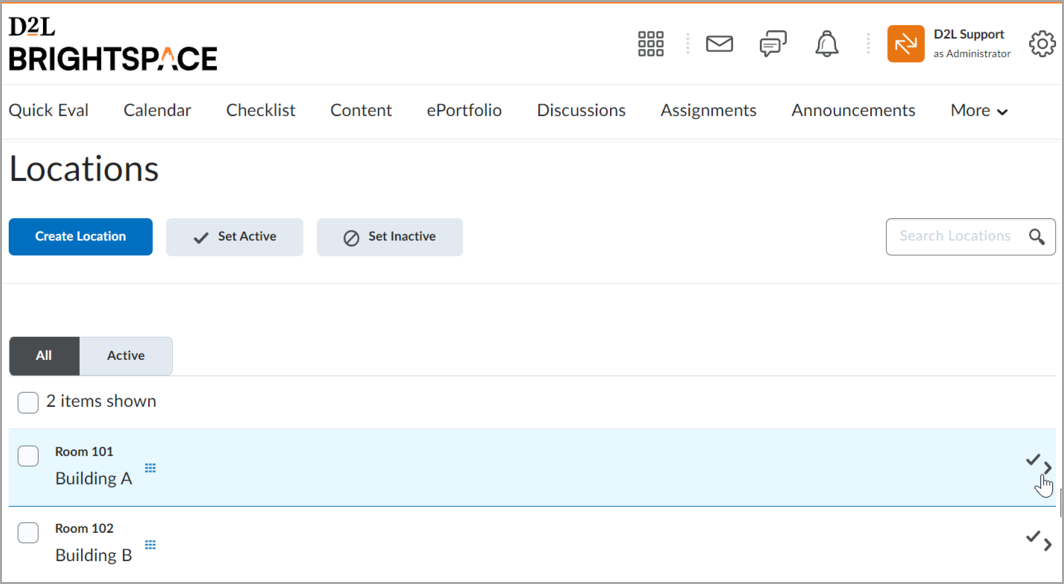
- From the Admin Tools menu, click Locations.
- On the Locations page, click the location that you want to add a layout to.

Figure: Choosing a location for adding a layout.
Locations with existing layouts display a Seating Chart icon beside the location name. You can pause on this icon to view seating capacity details.
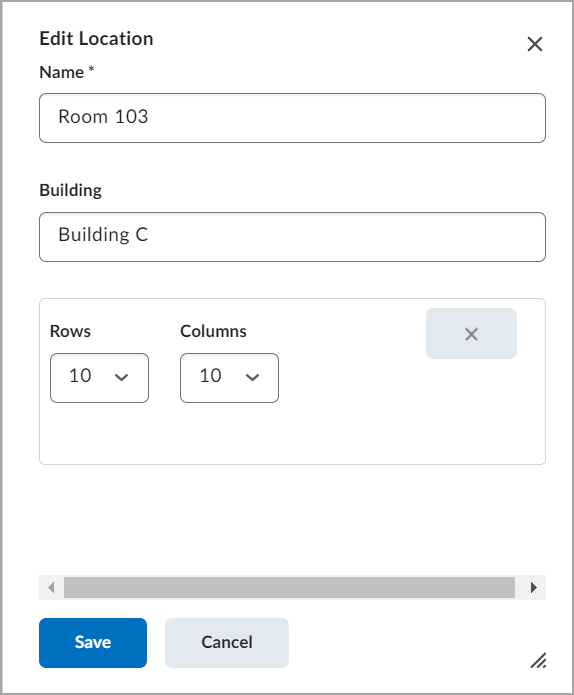
- Click Edit Location.
- Select the number of rows and columns from the drop-down lists.
- Click Save.

The Edit Location window.
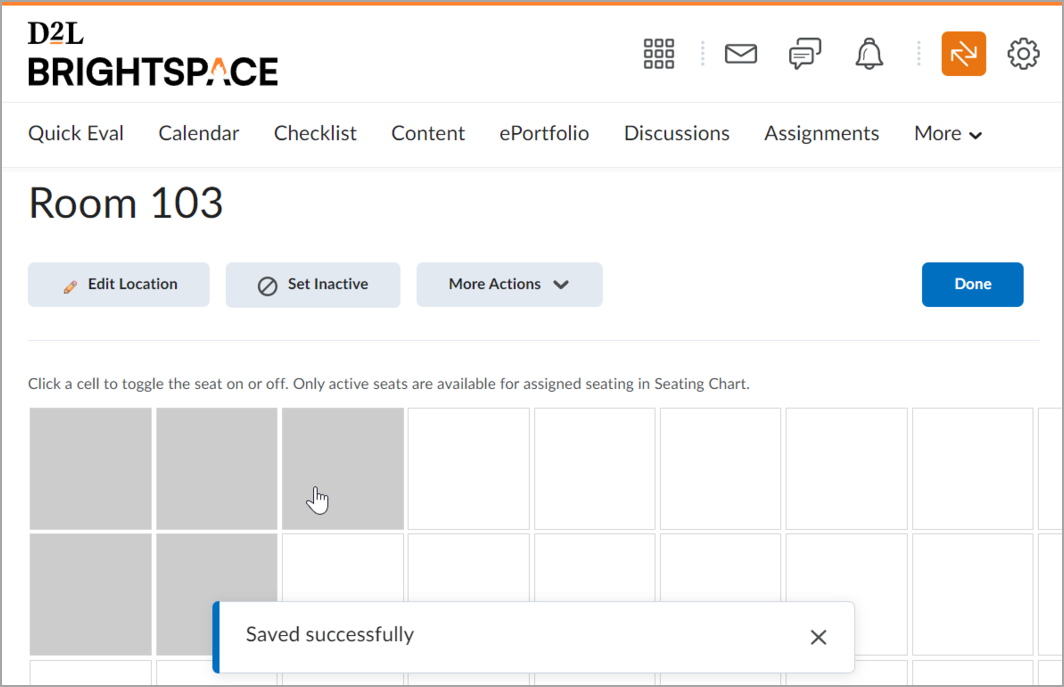
- Click the cells to toggle the seats on and off in the room layout. Gray boxes denote inactive seats and white boxes denote active seats.

Figure: Selecting the cells to toggle the seats on and off in the room layout.
- Click Done.