Create custom locales when you want Brightspace to reflect your organization's cultural preferences. When you create a new locale, it must always inherit its initial settings from a pre-existing locale. Inheriting initial settings from a complete, tested locale allows you to create new locales quickly while ensuring that cultural elements behave correctly.
Every locale is mapped to one language pack from Language Management. Before creating a locale, ensure that the language you want to implement is available and its status is not set to draft.
To create a custom locale
- From the Admin Tools menu, click Locale Management.
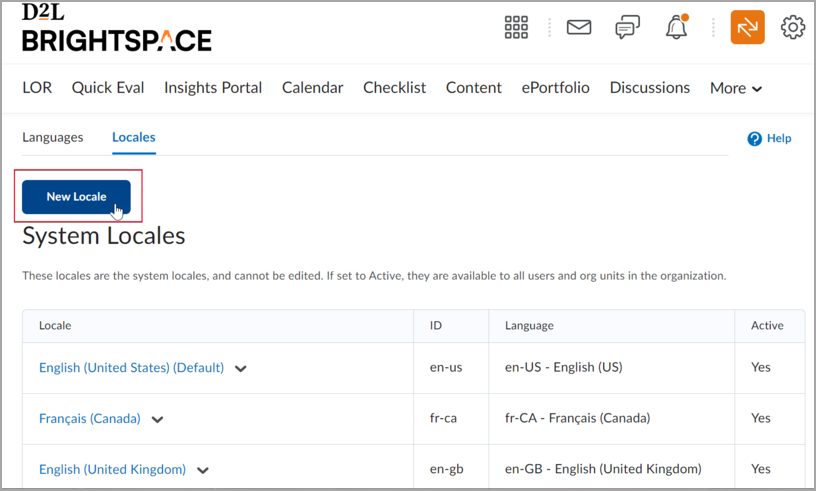
- Click New Locale.

Figure: The New Locale button.
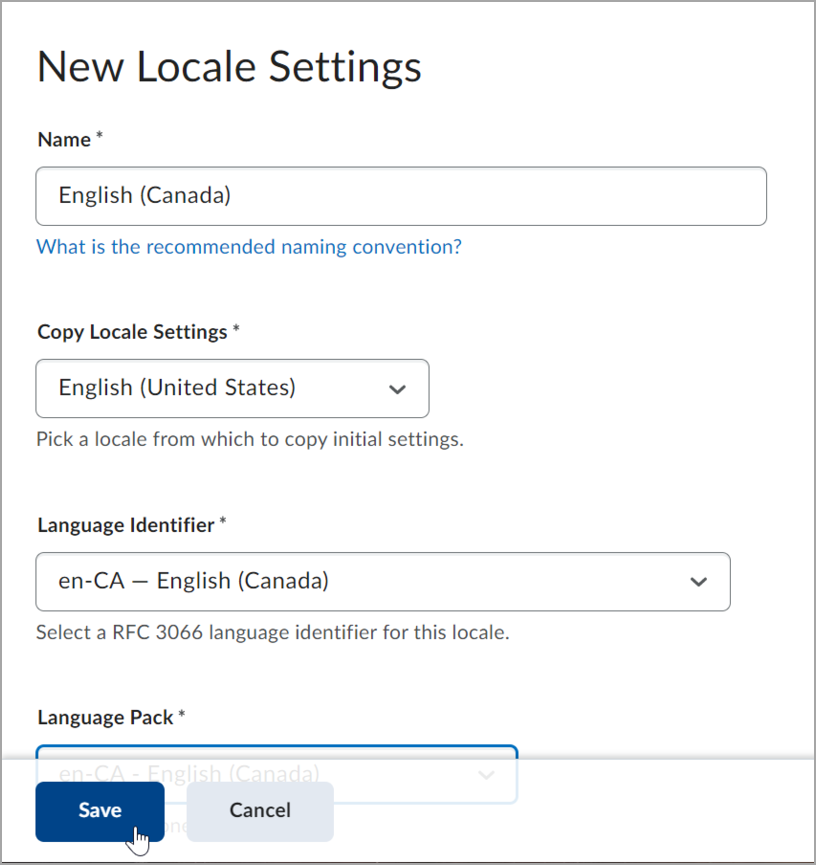
- On the opened page, populate the following fields:
- In the Name field, enter a name for your locale.
- From the Copy Locale Settings drop-down list, select the locale from which you want to copy initial settings. If you want your locale to include right-to-left text and icons, ensure that you select a locale with right-to-left support. You cannot edit the screen direction once the locale is created.
- From the Language Identifier drop-down list, select the language identified you want to use in the custom locale. The language identifier affects how browsers render pages.
- From the Language Pack drop-down list, select the language pack you want to associate with the custom locale.
- Click Save.

Figure: The New Locale Settings page.
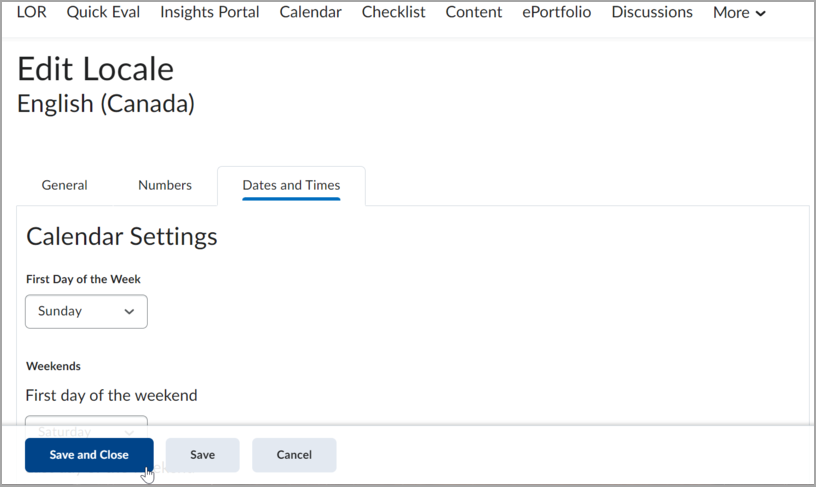
- On the Edit Locale page, in the Numbers tab, customize how you want numbers in the system to appear.
- In the Dates and Times tab, customize how you want dates and times in the system to appear.
- Click Save and Close.

Figure: The Edit Locale page.