Use grade categories to organize grade items and manage restrictions and conditions in your grade book. Grade categories also help you group and characterize learner activities such as assignments and quizzes.
Create a grade category
Grade categories organize and group related grade items into sections in your grade book and appear on the Manage Grades tab.
To create a grade category
- On your course homepage, navigate to Grades.
- In the Grades tool, click Manage Grades.

- Click New > Category.

- In the Properties tab, enter the details for your category.

|
Note: The fields in the Properties tab vary depending on your grade book setup. |
- In the Restrictions tab, do one or more of the following:
- Hide from users: Hide restrictions from learners.
- Has Start Date: Set a start date for the grade category.
- Has End Date: Set an end date for the grade category.
- Display In Calendar: Display start and end dates in the course Calendar.
- Release Conditions: You can Attach Existing conditions or Create and Attach conditions.
- Click Save and Close.
Create a grade item
Grade items can exist independently in the grade book, or you can associate numeric grade items with course objects such as discussions, quizzes, and assignments.
To create a grade item
- On your course homepage, navigate to Grades.
- In the Grades tool, click Manage Grades.
- Click New > Item.
- On the New Item page, choose a Grade Item Type from the following:
- Numeric: Assign users a value out of a specified total number of points.
- Selectbox: Grade users by selecting the grade scheme level that best matches their achievement. Selectbox grade items cannot be created until at least one org unit grade scheme has been created.
|
Note: Numeric and Selectbox are the only grade items that support associations for grading and actively contribute to grade book calculations. |
- Pass/Fail: Grade users using a simple pass or fail grade scheme.
- Formula: Automatically grade users using a custom formula based on their achievement for other grade items.
- Calculated: Calculate users' cumulative achievement across multiple grade items.
- Text: Provide comments in the grade book that are not calculated in the final grade.
- In the Properties tab, enter the details for your grade item.
|
Note: The fields in Properties vary depending on the grade item type you choose. To learn more about a particular field in Properties, click the Get help on (? icon) beside the field. |
- In the Restrictions tab, enter the following information:
- Hide from users: Hide restrictions from learners.
- Has Start Date: Set a start date for the grade category.
- Has End Date: Set an end date for the grade category.
- Display In Calendar: Display start and end dates in the course Calendar.
- Release Conditions: You can Attach Existing conditions or Create and Attach conditions.
- In the Objectives tab, click Associate Learning Objectives to add learning objectives to the grade item.
- Click Save and Close.
Delete a grade item or category
|
Note: To delete a grade item or category, you require the Manage Grades permission. Contact your administrator if this permission is not assigned to your role. |
- From your course navbar, click Grades.
- On the Manage Grades page, click the More Actions button, and select Delete.
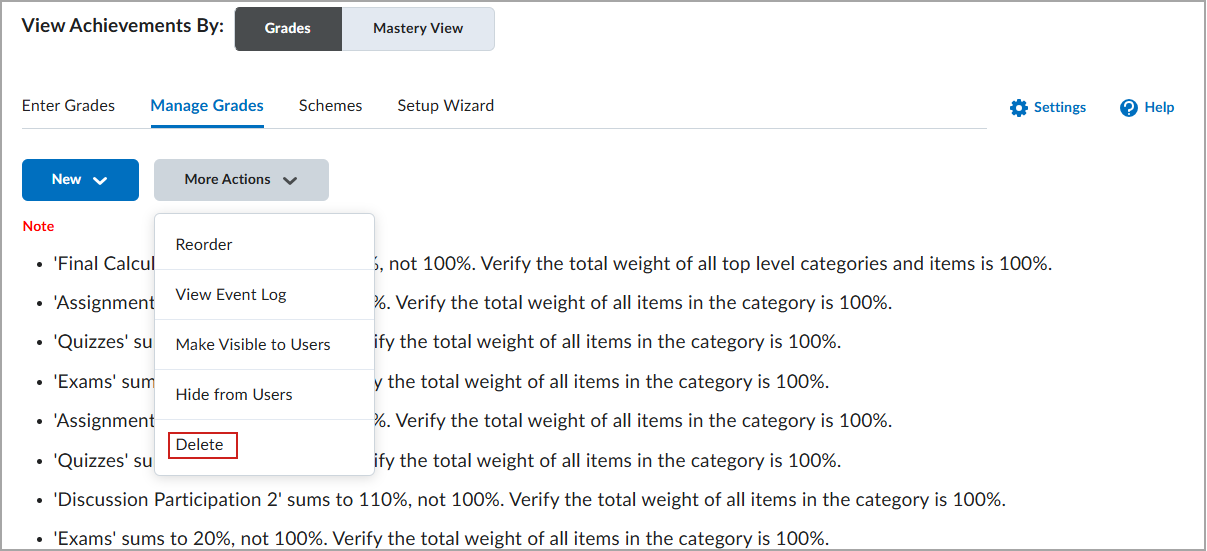
- Select the check box for each grade item or category you want to delete.
- Click Delete.
|
Note: Important rules when deleting:
- Deleting a grade category does not delete its grade items; they become standalone items.
- You cannot delete a grade item if it is associated with a course object such as a quiz, discussion topic, or assignment. To delete the item, you must first remove its association. Click the Information icon beside the grade item to learn where it is used. For more information, refer to the video Delete grade items with associations.
- If you merge your course or delete your grade book, be aware that the grade book cannot be restored.
|
Video: Delete grade items with associations
Learn how to remove grade items with associations in your grade book.
Read the video transcript
Restore a deleted grade item
To restore a grade item, you must have the Manage Grades permission. Contact your administrator if this permission is not assigned to your role.
- Navigate to Grades.
- On the Manage Grades page, click More Actions > View Event Log.
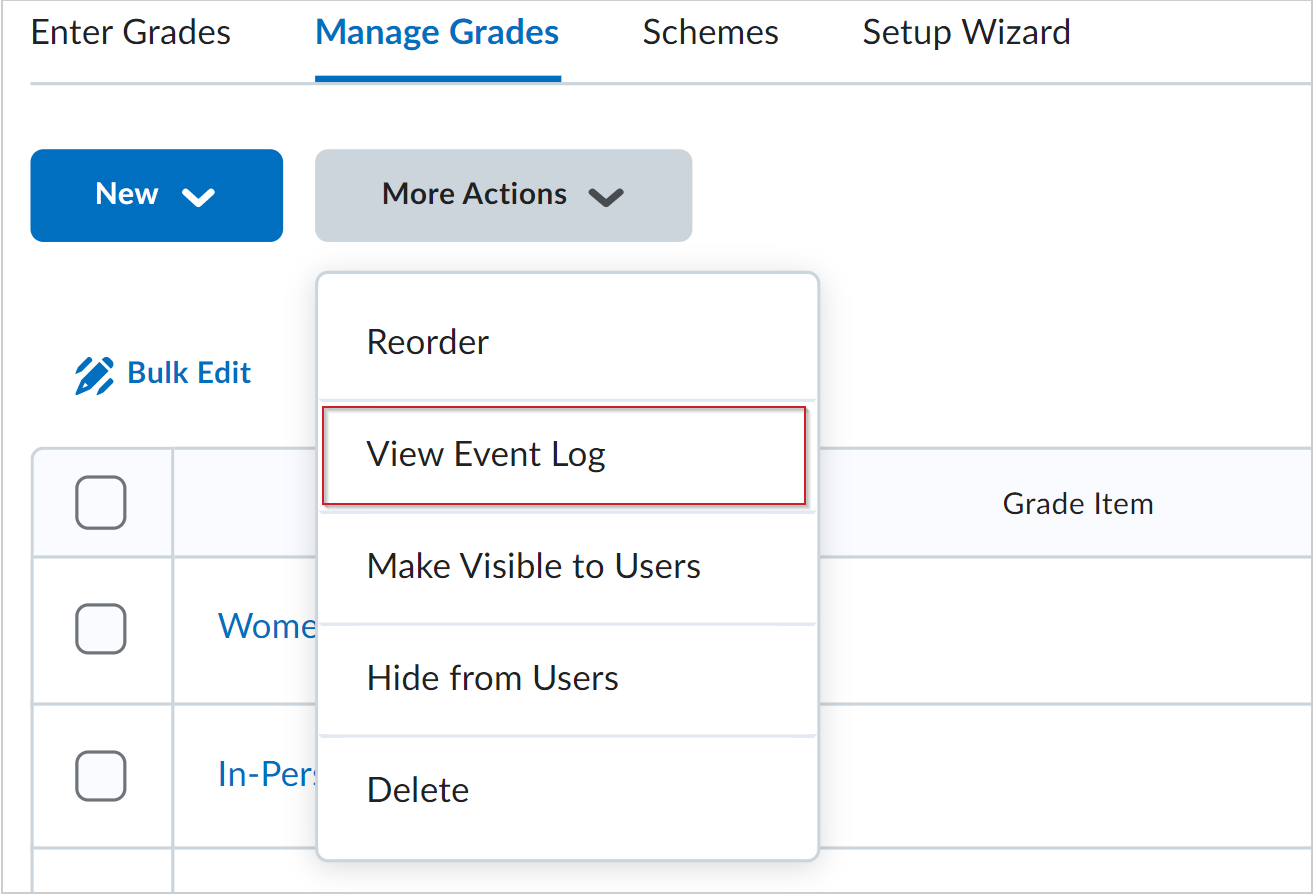
- Beside the appropriate grade item, select Restore.
|
Note:
- Formula and Calculated grade items cannot be restored.
- You need the Manage Grades permission to restore grade items. Contact your administrator if you do not have this permission.
|
Rename a grade category
- From your course navbar, click Grades.
- On the Manage Grades page, find the category you want to rename.
- Click the drop-down arrow next to the category name and select Edit.
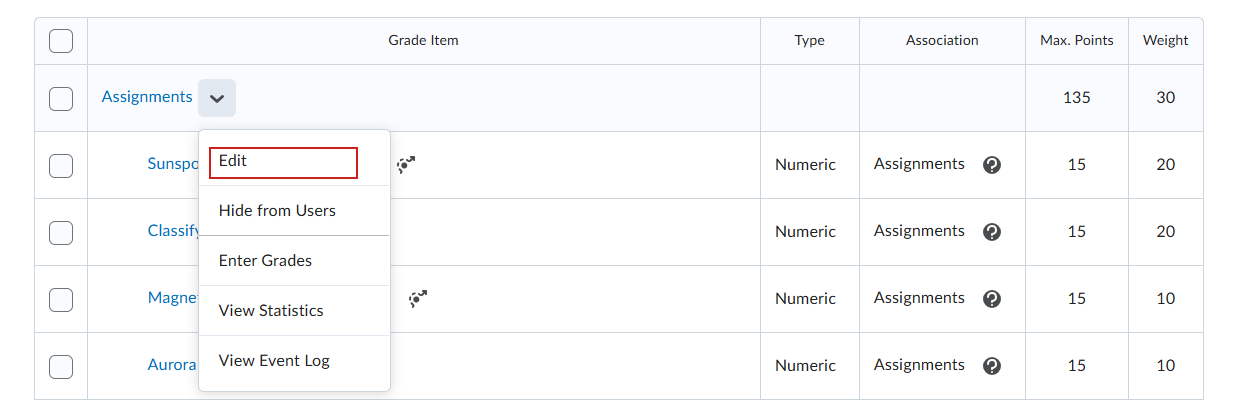
- Enter the new name in the Name field.
- Click Save and Close.