After you create forums and topics, you can control availability, set participation requirements (including a first post due date), moderate posts, manage notifications, and restrict access by groups or sections.
Before you begin
- To see and use the Discussions tool, you must have the required Discussions permissions applied to your role. These permissions can only be accessed by your organization administrator.
- To add the Discussions tool to your course navbar, you must have the required Navbar permissions applied to your role. For more information about how to add a tool or link to your course navbar, refer to the Customize your course navbar topic.
Lock a discussion topic or forum in the Discussions creation experience
Use availability dates and locking to control when learner can access a topic and whether they can post.
This is also a good option when you want to stop any posts and replies so you can grade discussions.
To set availability and locking for a discussion topic
- Navigate to Discussions.
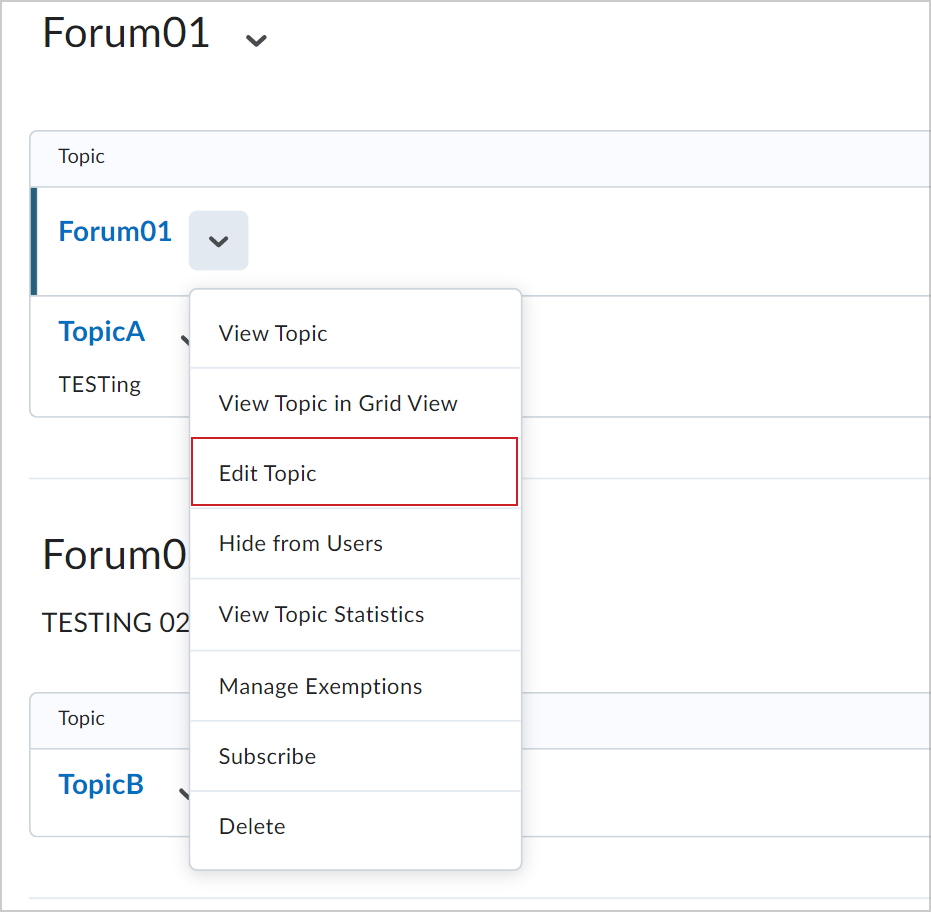
- From the topic’s Actions menu, click Edit Forum or Edit Topic.
- Expand Availability Dates & Conditions.
- (Optional) Set a Start date and End date.
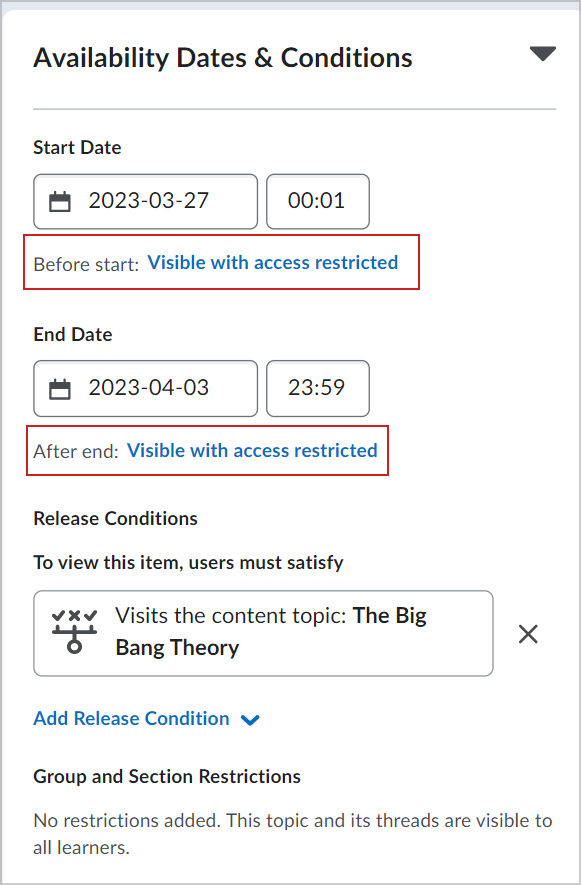
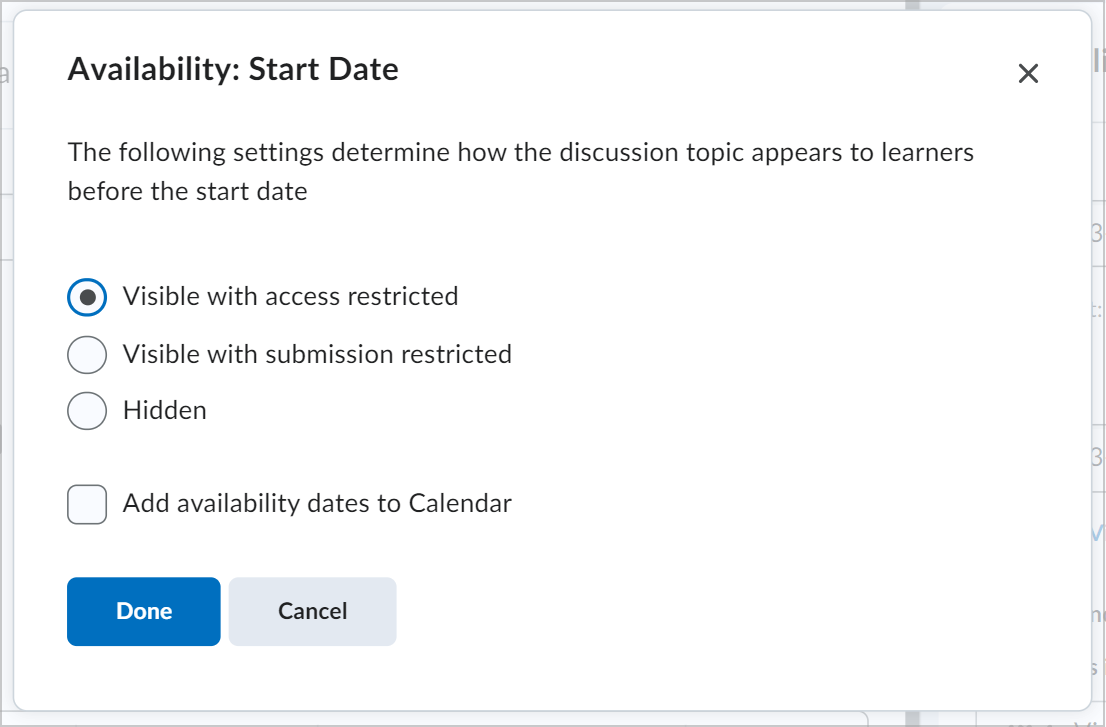
- To set locking options, click the Visible with access restricted link and select one of the following locking options:
- Visible with access restricted: The forum or topic is visible to learners before or after the start or end date, but they cannot access it.
- Visible with submission restricted: The forum or topic is visible to learners before or after the start or end date and they can access it, but they cannot post new threads or replies.
This effectively makes a discussion read-only. - Hidden: The forum or topic is hidden from learners until the start or end date. Calendar events for Availability Start and Availability End are hidden until the start or end date.
Notifications are also not sent until the start or end date. - Add availability dates to Calendar: Add the start date and end date of your discussion to the course Calendar.
- Click Done.
- Click Save and Close.
You have locked a discussion topic or forum.

|
Note: Availability settings affect access and submission windows across Brightspace and influence what the learner sees in related tools. |
Lock a discussion topic or forum in the Classic Discussions experience
You can use the Classic Discussions experience to lock a discussion topic of forum.
To lock a discussion topic or forum
- Navigate to Discussions.
- From the context menu of the forum or topic you want to lock, click Edit.
- On the Restrictions tab, choose your Locking Options.
- Visible with access restricted before start/end: The forum or topic is visible to learners before or after the start or end date, but they cannot access it.
- Visible with submission restricted before start/end: The forum or topic is visible to learners before or after the start or end date and they can access it, but they cannot post new threads or replies. This effectively makes a discussion read-only.
- Hidden before start/end: The forum or topic is hidden from learners until the start or end date. Calendar events for Availability Start and Availability End are hidden until the start or end date. Notifications are also not sent until the start or end date.
- Click Save.
You have locked a discussion topic or forum.
|
Note: Availability settings affect access and submission windows across Brightspace and influence what the learner sees in related tools. |
Set a first post due date
Set a due date for the learner's first post to encourage timely participation and align with course pacing and policies.
To set a first post due date for a discussion topic
- Navigate to Discussions.
- From the Actions menu, select Edit Topic.
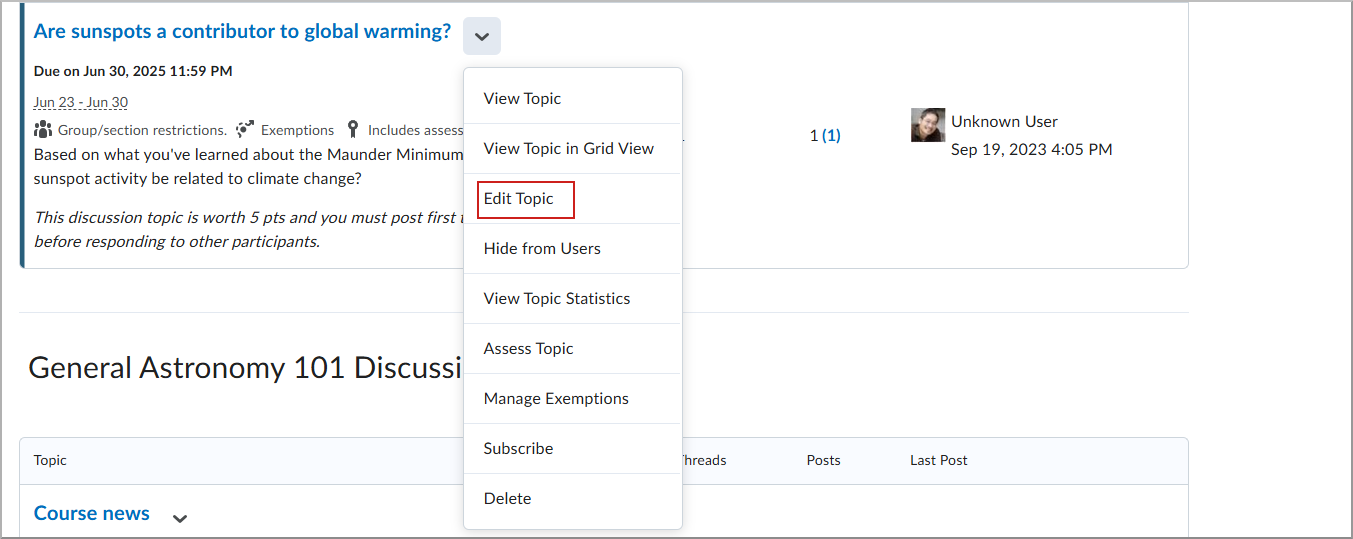
- In Due Date, select the desired due date and time for the first post.
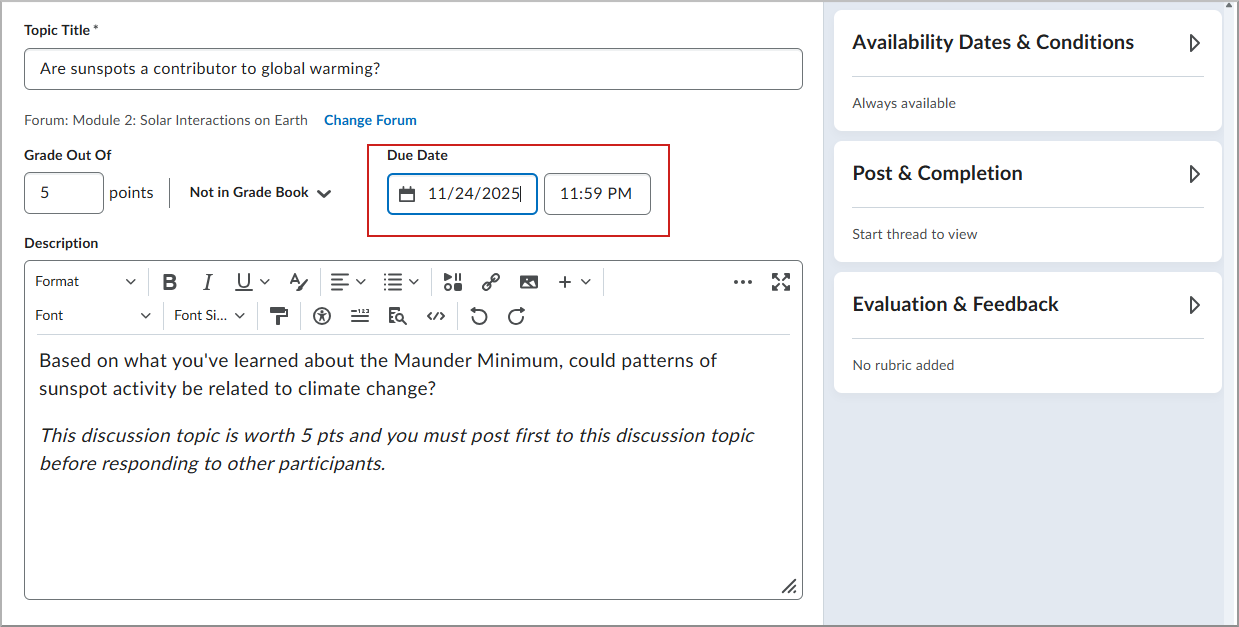
- Select Save and Close.

|
Tip: First post due dates:- Must fall within the topic’s Start date and End date.
- Respect the Availability types of the topic (for example, Hidden, Visible with access restricted, Visible with submission restricted).
- Support automatic-zero grading for discussions.
- Will appear in Work to Do Widget.
- In Quick Eval and Consistent Evaluation, first post due dates appear in evaluation workflows.
- If enabled by your administrator, the due date can trigger Brightspace and Pulse push notifications.
- In the Content Experience, Overdue and Late indicators appear when deadlines are missed. Classic content will continue to show the due date on the content topic.
|
Hide a discussion forum or topic
You can hide a discussion forum or topic so that learners cannot view or access the content.
To hide a discussion forum or topic
|
Note: Users require the Discussions > Manage Discussions permission to hide topics and forums from learners. |
- Navigate to Discussions.
- From the Actions menu of the forum or topic you want to hide, click Hide from Users.
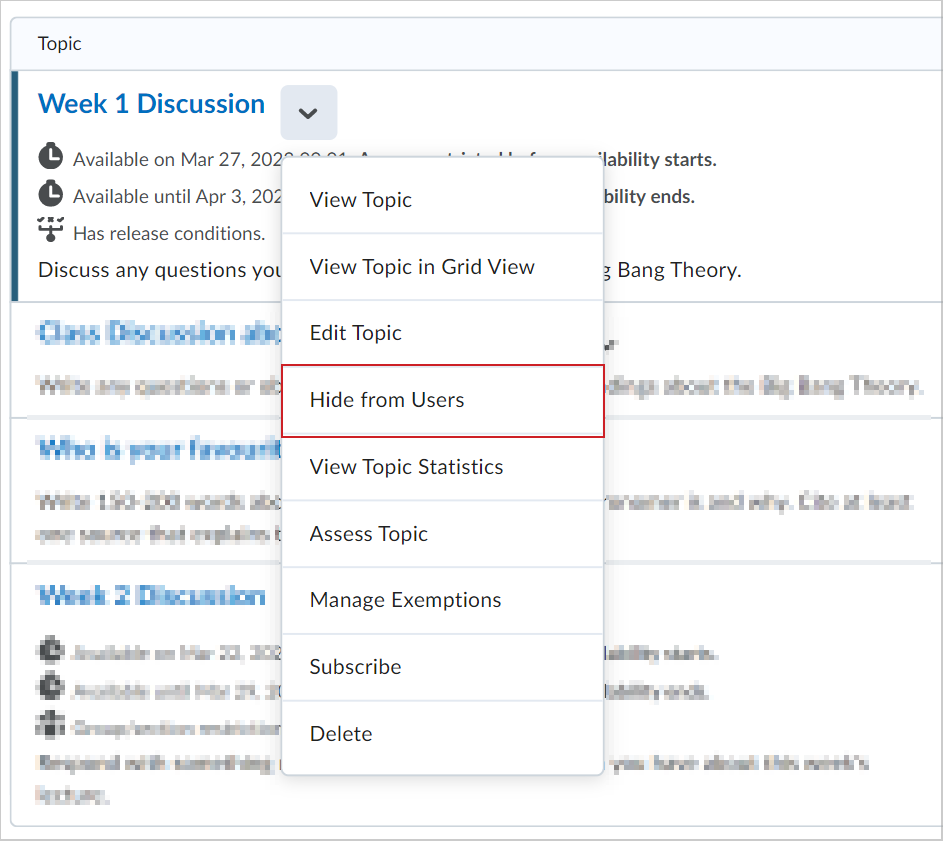
You have hidden your discussion topic or forum.
Moderate discussion topics
If a topic requires post approval or moderation, posts only appear to users with permission to approve them. You must manually approve these posts to make them visible to all users. Users with permission to approve posts in a topic can create approved posts automatically.
You can enable and disable post approval from the Properties tab when creating or editing a forum or topic. Once you enable post approval, a Moderated notification appears beside the forum or topic name.
If a post is not appropriate for the topic and you do not want to approve it, you can do any of the following:
- Leave the post unapproved.
- Edit the post before approving it.
- Delete the post.
Configure the approval of posts
You must manually approve posts and threads in topics that require approval. Once you approve a post or thread, it is visible to all users. To hide the post or thread, you must unapprove it.
To configure the approval of posts
- Navigate to Discussions.
- From the Actions menu of the topic you want to moderate, click Edit Topic.
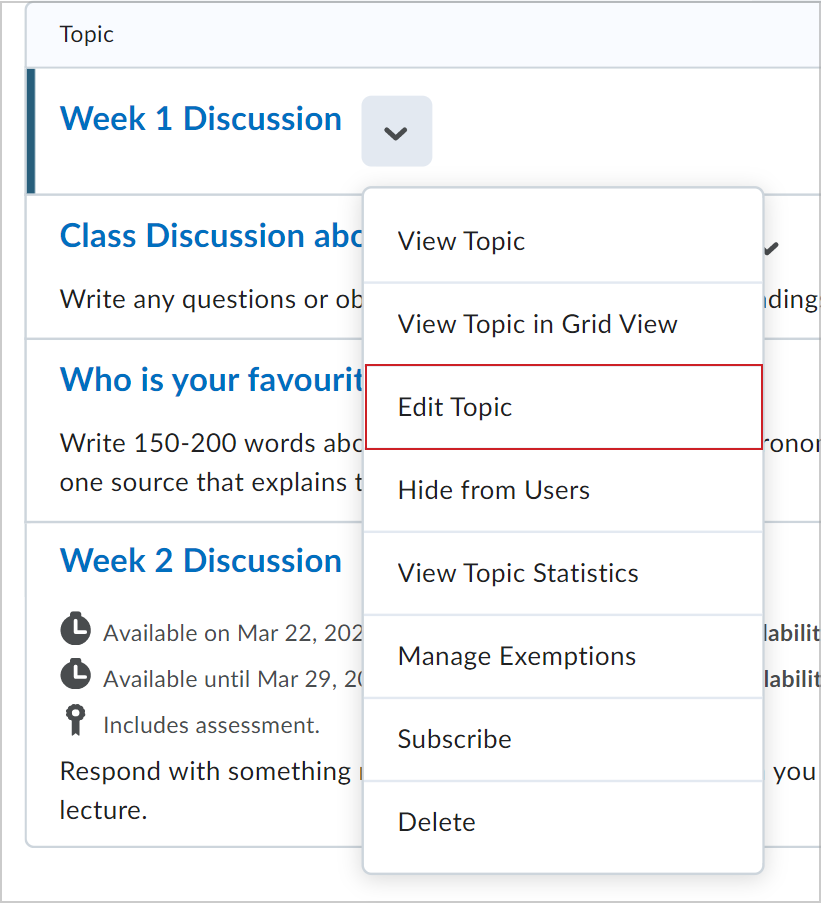
- In the Post & Completion accordion, select Posts must be approved before they display in the topic.
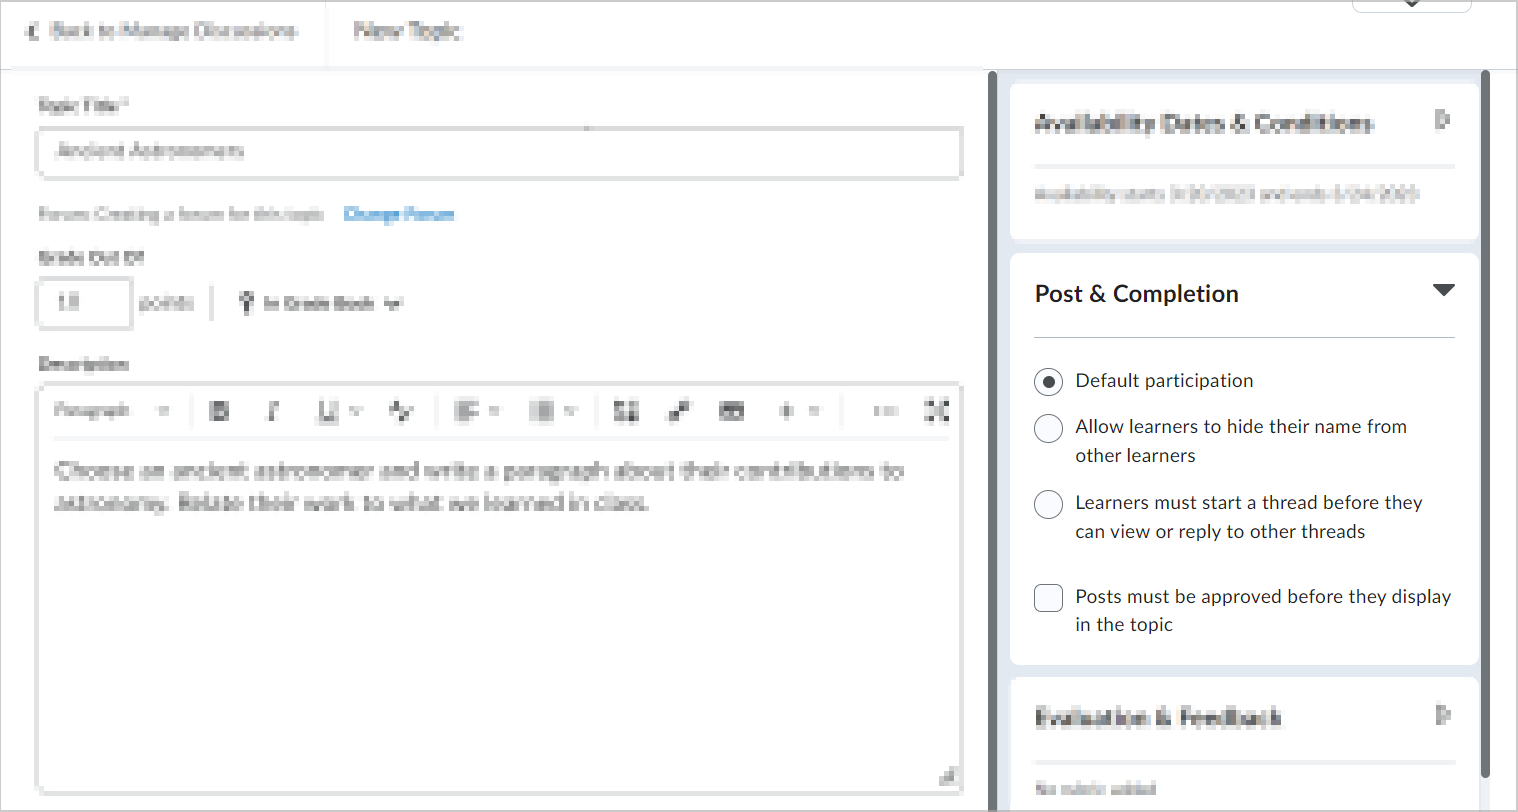
- Click Save and Close.
You have configured the approval of posts.
Approve posts in a topic or forum
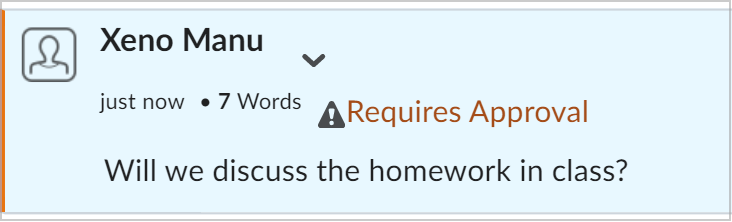
When a learner posts in a moderated topic, a message will appear on the learner's post with the note Requires Approval.
To approve a learner's post
- Navigate to Discussions.
- Click the topic and thread where you want to approve posts.
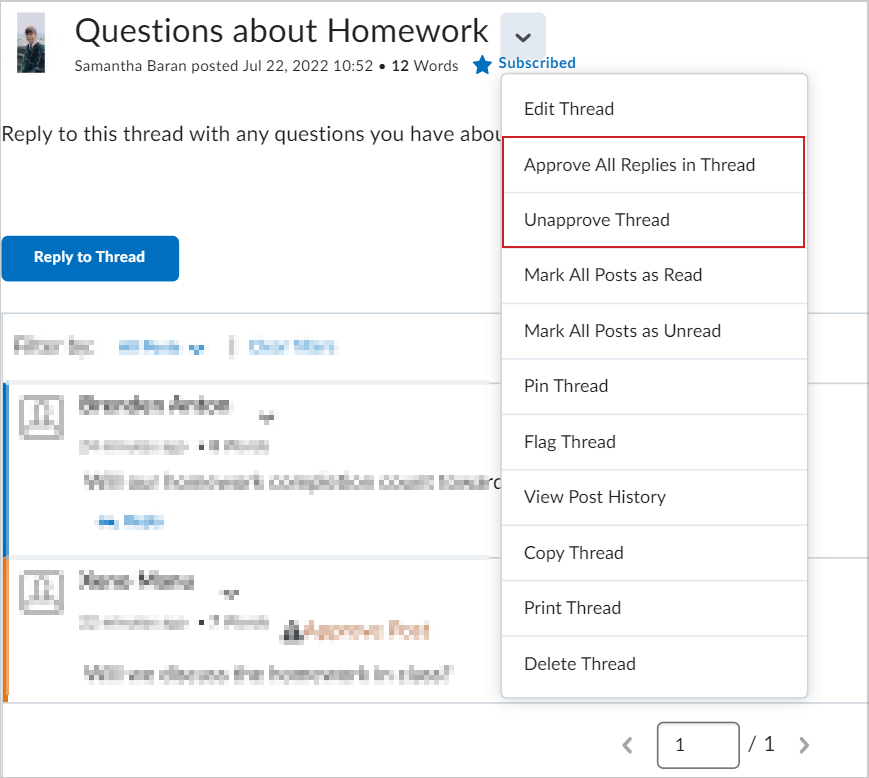
- To approve or unapprove all thread replies, click the Actions menu beside the topic title and select Approve All Replies in Thread or Unapprove Thread.
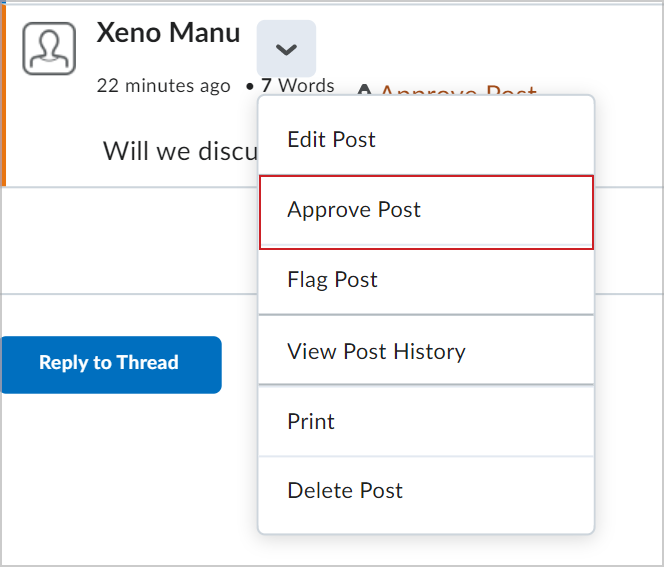
- To approve or unapprove a post, click the Actions menu for a learner's post and select Approve Post or Unapprove Post.
Subscribe to discussions
Use the Subscribe option to be notified of learners' posts. You can adjust how and where you want your notifications to be sent.
To subscribe to discussions
- Navigate to Discussions.
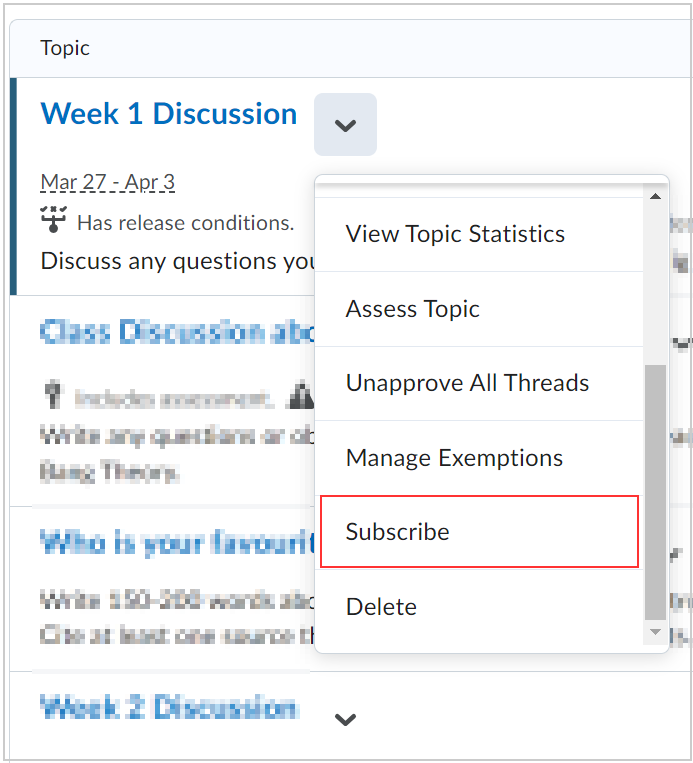
- From the Actions menu of the forum or topic you want to subscribe to, click Subscribe.
- In the Customize Notifications dialog, select one of the following options for receiving notifications:
- Show notifications in navigation area only
- Send me an instant notification
- Include in my summary of activity
| Note: Notifications will be sent to the email listed in the dialog. |
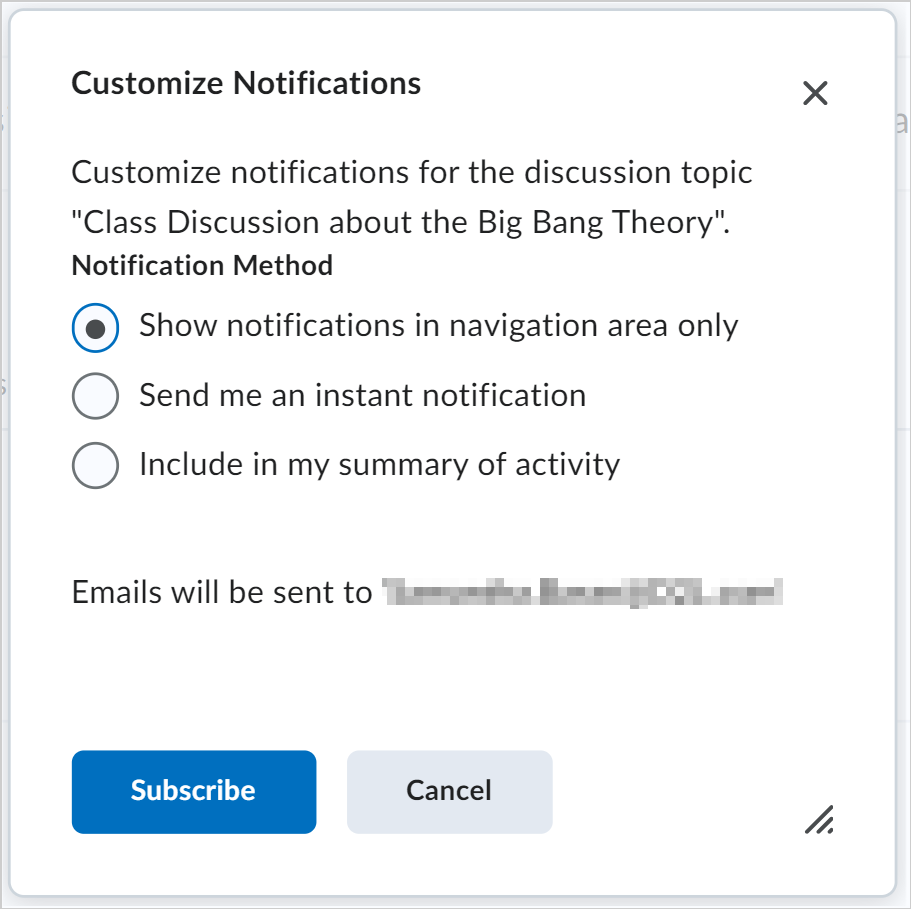
- Click Subscribe.
You have subscribed to a discussion topic or forum.
Unsubscribe from discussions
You can also unsubscribe from discussions.
To unsubscribe
- Navigate to Discussions.
- From the Actions menu of the forum or topic you are subscribed to, click Unsubscribe.
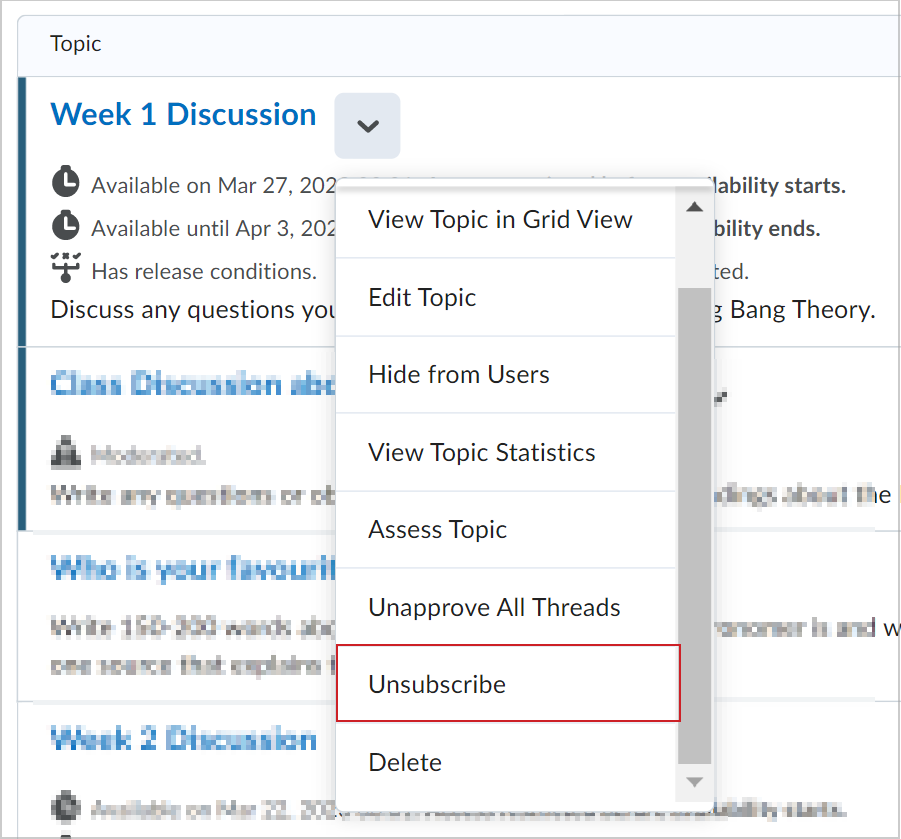
- In the Confirmation dialog, click Yes.
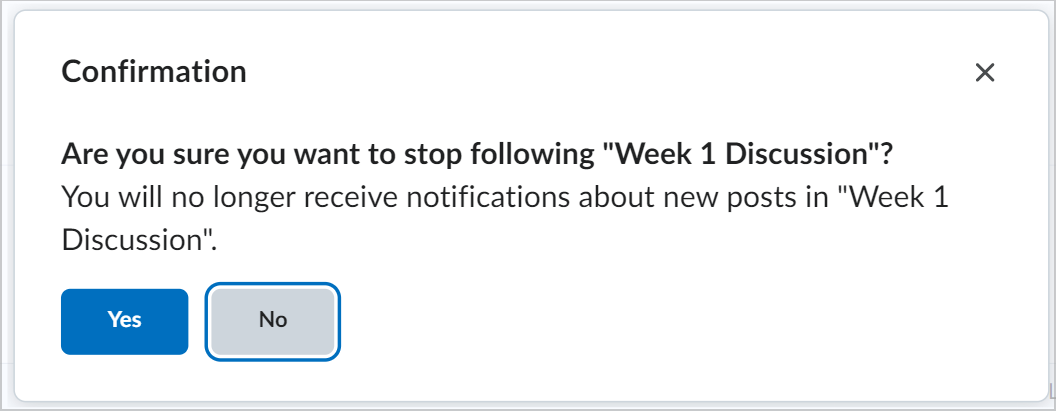
You have unsubscribed from a discussion forum or topic.
Restrict multiple forums or topics to specific groups or sections
After you have created groups or sections, you can restrict access to a forum or topic using your groups or sections. Restricting forums or topics enables you to create discussion areas where members of a group or section can collaborate on assignments or discuss course materials in small groups. You can also create separate forums for specific groups or sections in a course offering.
To restrict access to forums or topics for specific groups
- Navigate to Discussions.
- Click the Group and Section Restrictions tab.
- Under View Options, select the Group or Section Category and the Forum.
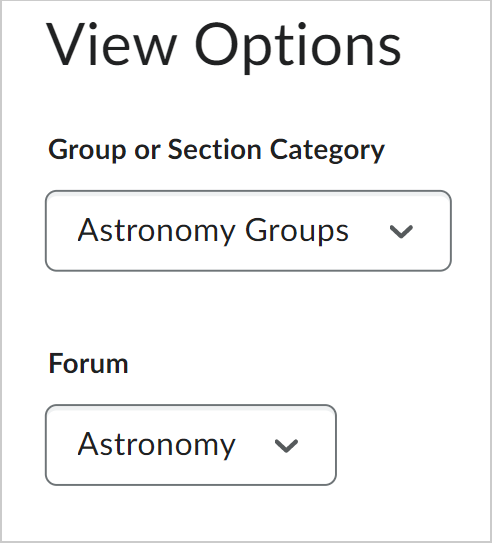
- In the Edit Restrictions area, select the Restricted check box for any forum or topic you want to restrict; then select the check box for any group or section you want to have access to the forum or topic. To open a forum or topic to everyone, clear the Restricted check box.
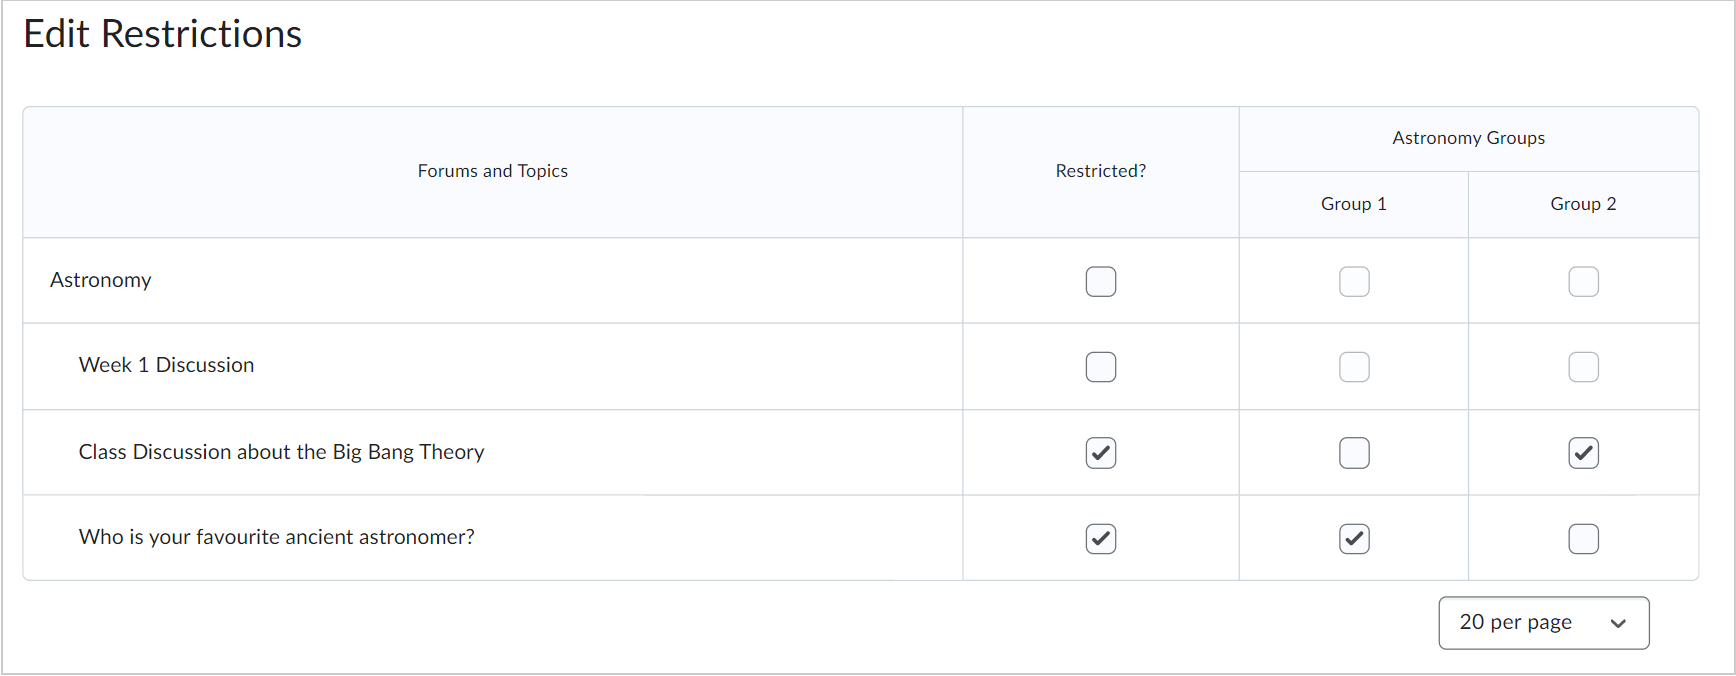
- Click Save.
You have created restrictions for groups.
Video: Create a discussion topic and forum
Automatically create restricted topics for groups or sections
You can automatically create a discussion topic for each group or section in a selected category. Topics get their names from the group or section they associate with.
To automatically create restricted topics for groups or sections
- Navigate to Discussions.
- Click the Group and Section Restrictions tab.
- Click the Automatically create restricted topics link.
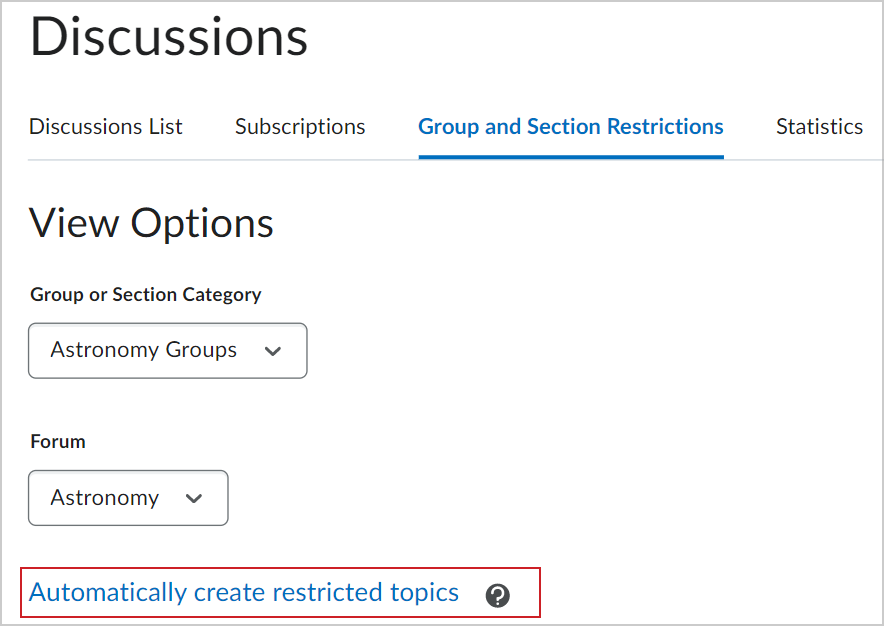
- Select a Group or Section Category and the Forum where you want to create your topics. If you want to create a new forum, click New Forum.
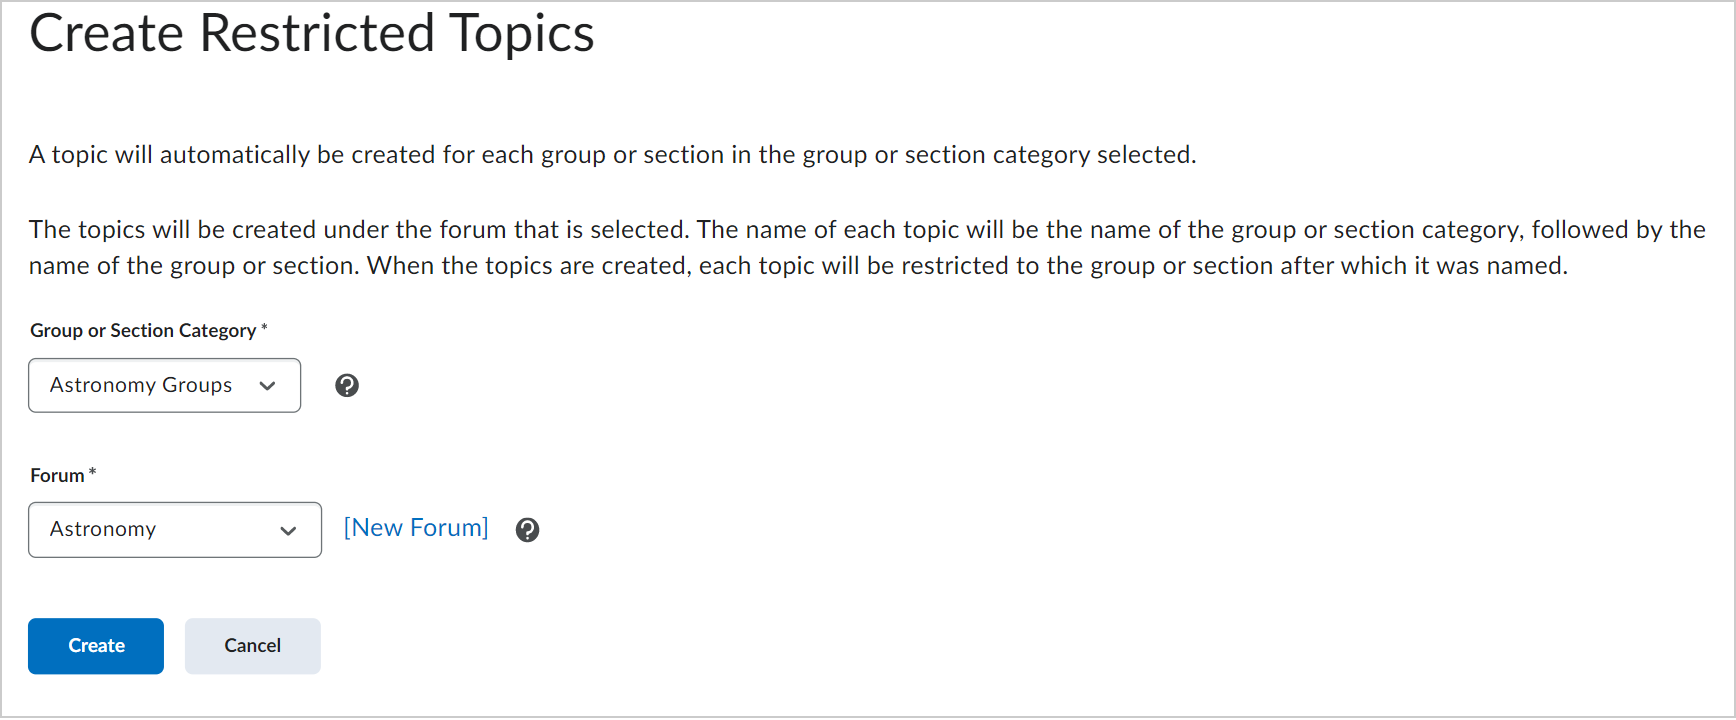
- Click Create.
You have automatically created restricted topics for groups and sections.
Copy a discussion thread with replies
Copy a discussion thread to add it to other discussion forums and topics.
To copy a discussion thread
- Navigate to Discussions.
- Click on a discussion topic.
- From the discussion thread's Actions menu, click Copy Thread.
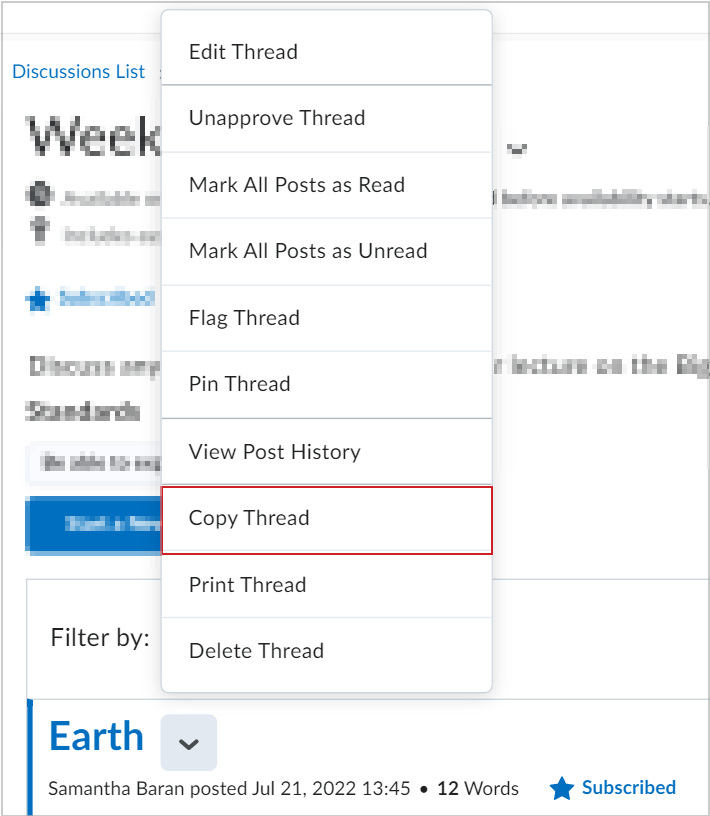
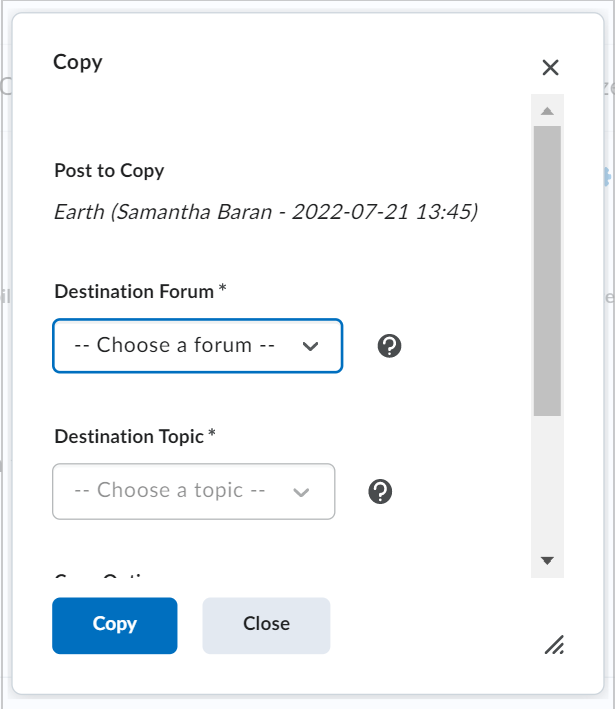
- In the Copy dialog, select the Destination Forum and the Destination Topic from the respective drop-down menus. This is where the discussion thread will be copied to.
- Under Copy Options, select the Copy replies check box.
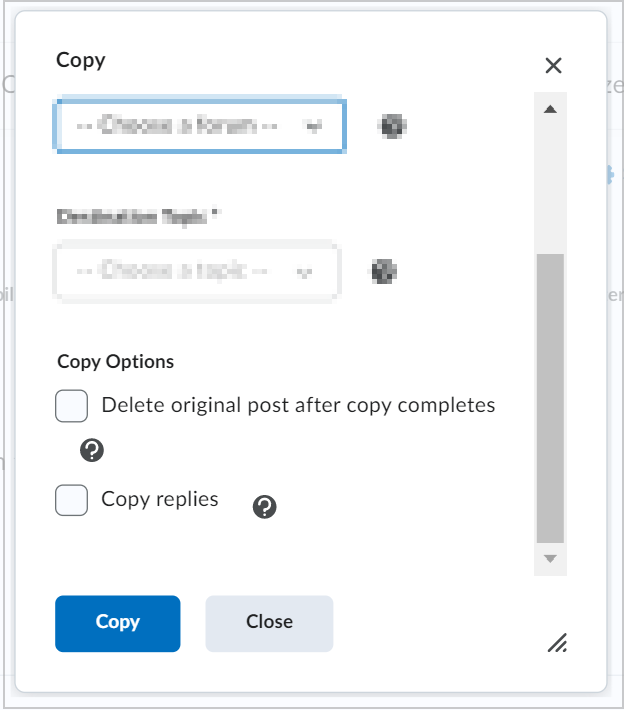
- Click Copy.
You have copied a discussion thread.
Copy discussion forums and topics
You can copy discussion forums and topics from another course offering into your current course using the Import/Export/Copy Components tool.
To copy discussion forums and topics
- Navigate to the course that you want to copy the discussion forum or topic into.
- On the navbar, click Course Admin > Import/Export/Copy Components.
- Select Copy Components from another Org Unit.
- Click Search for offering, locate the course offering that contains the discussion forum or topic you want to copy, and click Add Selected.
- Click Select Components.
- Select Discussions and then Select individual items to copy.
- Click Continue.
- Select the discussion forums and topics that you want to copy. Expand a forum to select individual topics, if required.
- Click Continue.
- Review the components you selected. Optionally, select Offset all dates of copied components and specify how you want to adjust dates.
- Click Finish.
The selected discussion forums and topics are copied into your course.
|
Note: Copying Discussions copies discussion forums and topics, but does not copy user posts. If a discussion is associated with other course components, copy the associated components as well to preserve those relationships. |
Export discussion statistics
Export discussion statistics to track and visualize learners' participation. You can export statistics to a CSV file and then import the data into a spreadsheet application to perform further analysis.
Watch this video for an overview of discussion statistics. Review the written steps below.
To export discussion statistics
- Navigate to Discussions.
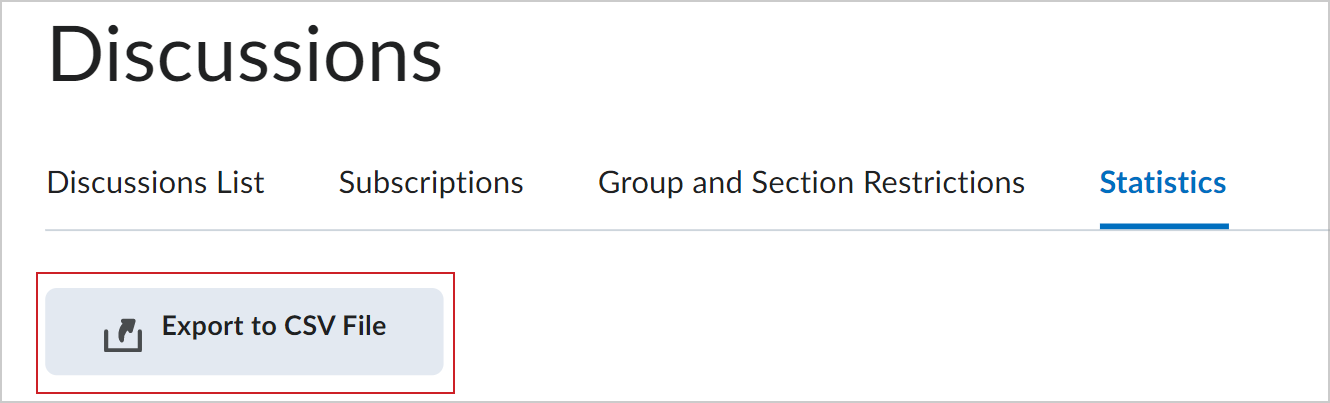
- Click the Statistics tab.
- Click Export to CSV File.
- Once the file has finished processing, click the file name to download the file.
You have exported discussion statistics.