Customize the D2L Lumi Chat assistant to match your branding and help learners get started faster. You can update the welcome message, add shortcut buttons, set a nickname, choose a brand color, and configure the launch button and close icon for use in Brightspace.
Before you begin: Ensure you can access the Lumi Chat admin portal and have edit permissions.

|
Tip: Accessibility tips:
- Use clear, direct language in the Welcome message and Shortcut buttons.
- Choose a brand color that meets Web Content Accessibility Guidelines (WCAG) contrast guidance with text and icons.
- Write button text as actions, for example, Start a practice quiz, and avoid ambiguous labels like Click here.
- Ensure all interactive elements can be reached and activated with a keyboard.
|
Change the welcome message
A welcome message introduces your AI assistant, sets the tone, and helps users such as learners, instructors, or staff find the assistance they need.
To change the welcome message
- Log in to the D2L Lumi Chat, Tutor and Feedback admin portal.
- Select the Assistants tab.
- Find the assistant you want to modify and select Edit.
- In the Welcome Message section, enter your new message.
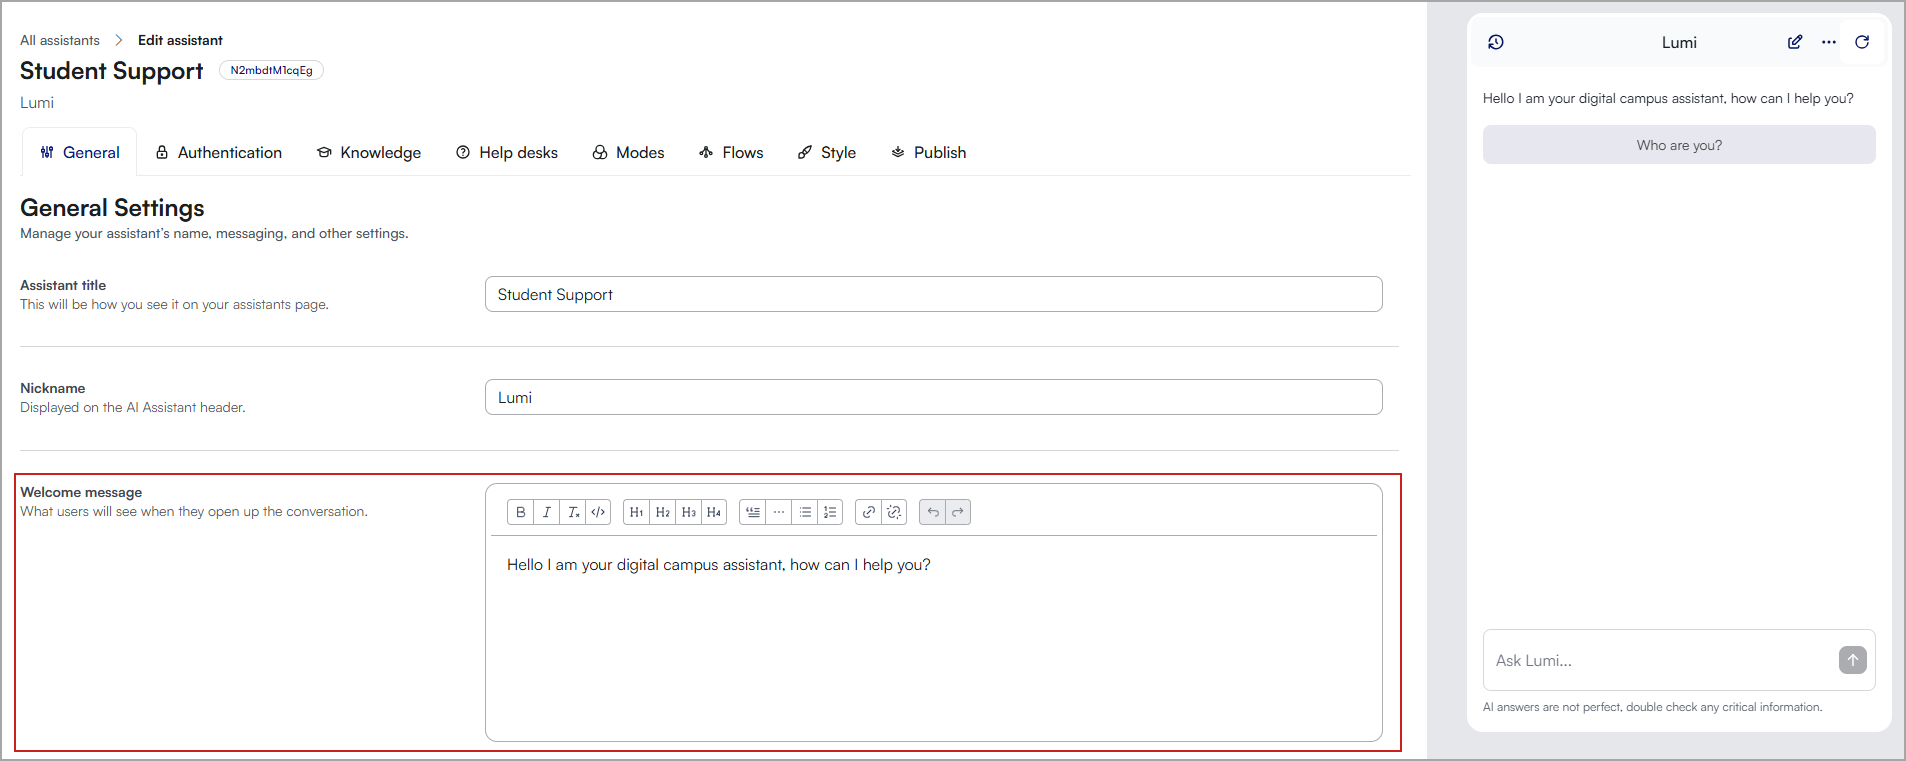
- Test the message by starting a chat with the assistant to ensure it appears as expected.
Tips for creating appropriate welcome messages
- Decide if your AI assistant serves learners, instructors, or both, and understand its range of functions.
- Create a message that best matches your AI assistant's purpose and the channel where it is placed.
- Customize the message to capture the tone and personality of your institution and assistant. The rich content editor allows you to add links and format the welcome message in a way that suits your needs.
Example welcome messages
- For learners: Hello! I'm Aiden, your digital campus guide. You can ask me anything related to life here at the College. How can I assist today?
- For instructors: Greetings, instructors! I'm Aiden, dedicated to supporting your role here at the University. How can I contribute to your success today?
- For student services: Welcome! Aiden here, ready to assist with registration, financial aid, or student activities. What information can I provide for you?
- For IT support: Hi, I'm Aiden, your IT support specialist. Having trouble with logins or software? Let's troubleshoot together. What's the issue?
- For both learners and instructors: Hello and welcome! As Aiden, I'm equipped to assist both learners and instructors across a range of queries. What support do you need today?
Create shortcut buttons
Shortcut buttons allow users to quickly access answers to frequently asked questions, navigate to common tasks, or trigger specific actions without needing to type detailed queries. By integrating these buttons into your AI assistant, you can reduce the time users spend searching for help, enhancing their overall experience.
Button types:
- Send Text Into Chat: Sends predefined text into the chat automatically.
- Open External Link: Redirects users to an external webpage.
- Escalation Buttons: Displays a Contact Support button, offering help desk and escalation options.
- FAQ: Pulls predefined question-and-answer text. Note: These must be set up before they can be used as shortcuts.
To create shortcut buttons:
- Log in to the D2L Lumi Chat, Tutor and Feedback admin portal.
- Select the Assistants tab.
- Find the assistant you want to modify and select Edit.
- In the General settings screen, scroll to Shortcut Buttons.
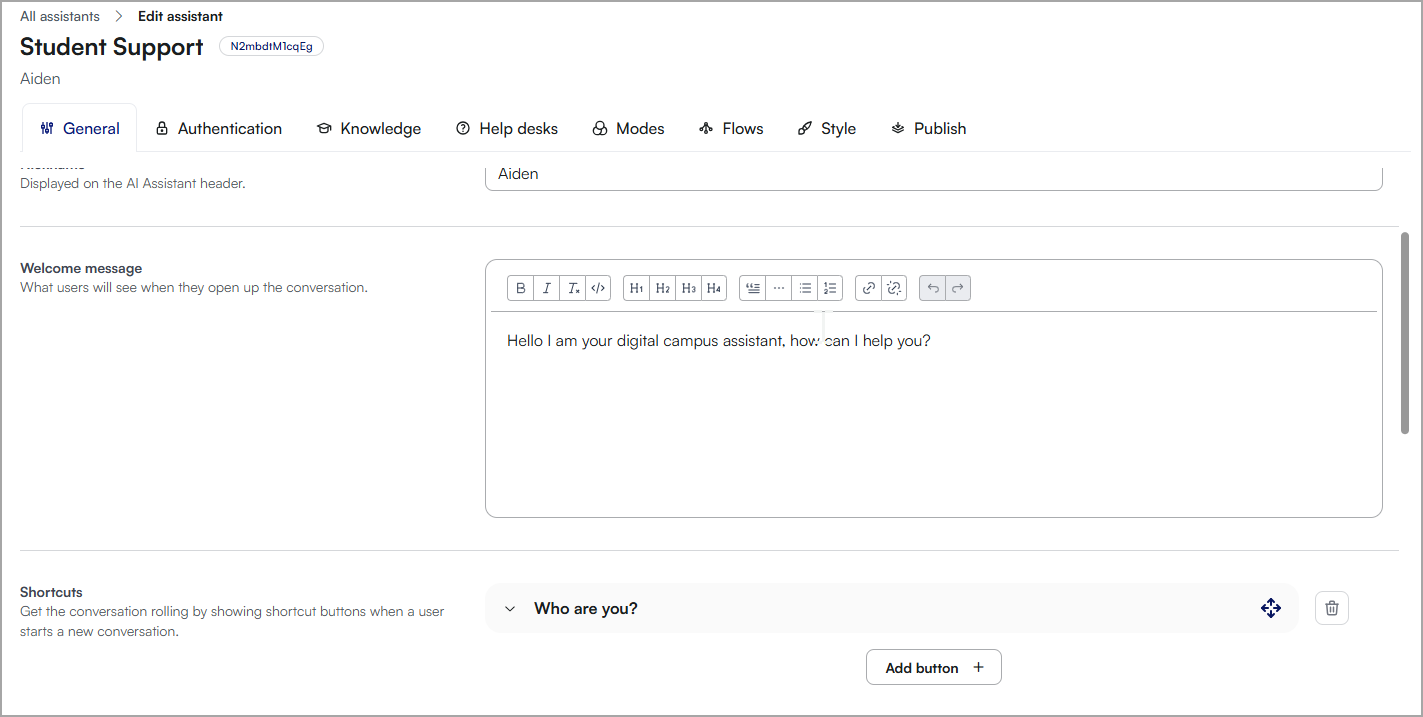
- Select Add button.
- Complete the following:
- Button name: Enter a name for the button that users will view in the chat interface.
- Type: Select the button type and complete the necessary information.
- Send Text Into Chat: Enter the message that appears in the chat.
- Open External Link: Provide the URL where users are directed.
- Escalation Buttons: Choose the action that connects users to additional support options.
- Select Create.
- Preview the AI assistant to ensure each button performs its intended action correctly.

|
Note: You can reorder the shortcut buttons by dragging and dropping; these changes are reflected in the chat interface. |
Example shortcut buttons
Example shortcut buttons
| Button name |
Button type |
Action example |
Description |
|---|
| Course Registration Info |
Send Text Into Chat |
Here's how you can register for courses. |
Directs users to information about registration procedures. |
| IT Helpdesk |
Escalation Buttons |
Directs to IT support contact options. |
Offers options for contacting IT support for technical issues. |
| Library Resources |
Open External Link |
URL to the library's resource page. |
Links to the university library's digital resources. |
| Academic Calendar |
Send Text Into Chat |
Check out the academic calendar here. |
Provides information on important academic dates and deadlines. |
| Financial Aid Assistance |
Open External Link |
URL to financial aid information. |
Guides to detailed information on scholarships, loans, and grants. |
| Campus Events |
Send Text Into Chat |
Here are the upcoming campus events. |
Informs about current and upcoming campus activities. |
| IT system status down |
Q&A |
Where should you troubleshoot IT issues before escalating? |
Directs users to the IT System Status page to identify if there are network or system issues. |
Change nickname
Selecting a nickname for your AI assistant is a great way to infuse school spirit and make the assistant more relatable to users. While the default name is Aiden, customizing it to reflect your institution’s identity can add a unique touch. A memorable and meaningful nickname can boost user engagement and strengthen the sense of community.
To change the nickname of Lumi Chat
- Log in to the D2L Lumi Chat, Tutor and Feedback admin portal.
- Select the Assistants tab.
- Find the assistant you want to modify and select Edit.
- In the General settings screen, scroll to Nickname.
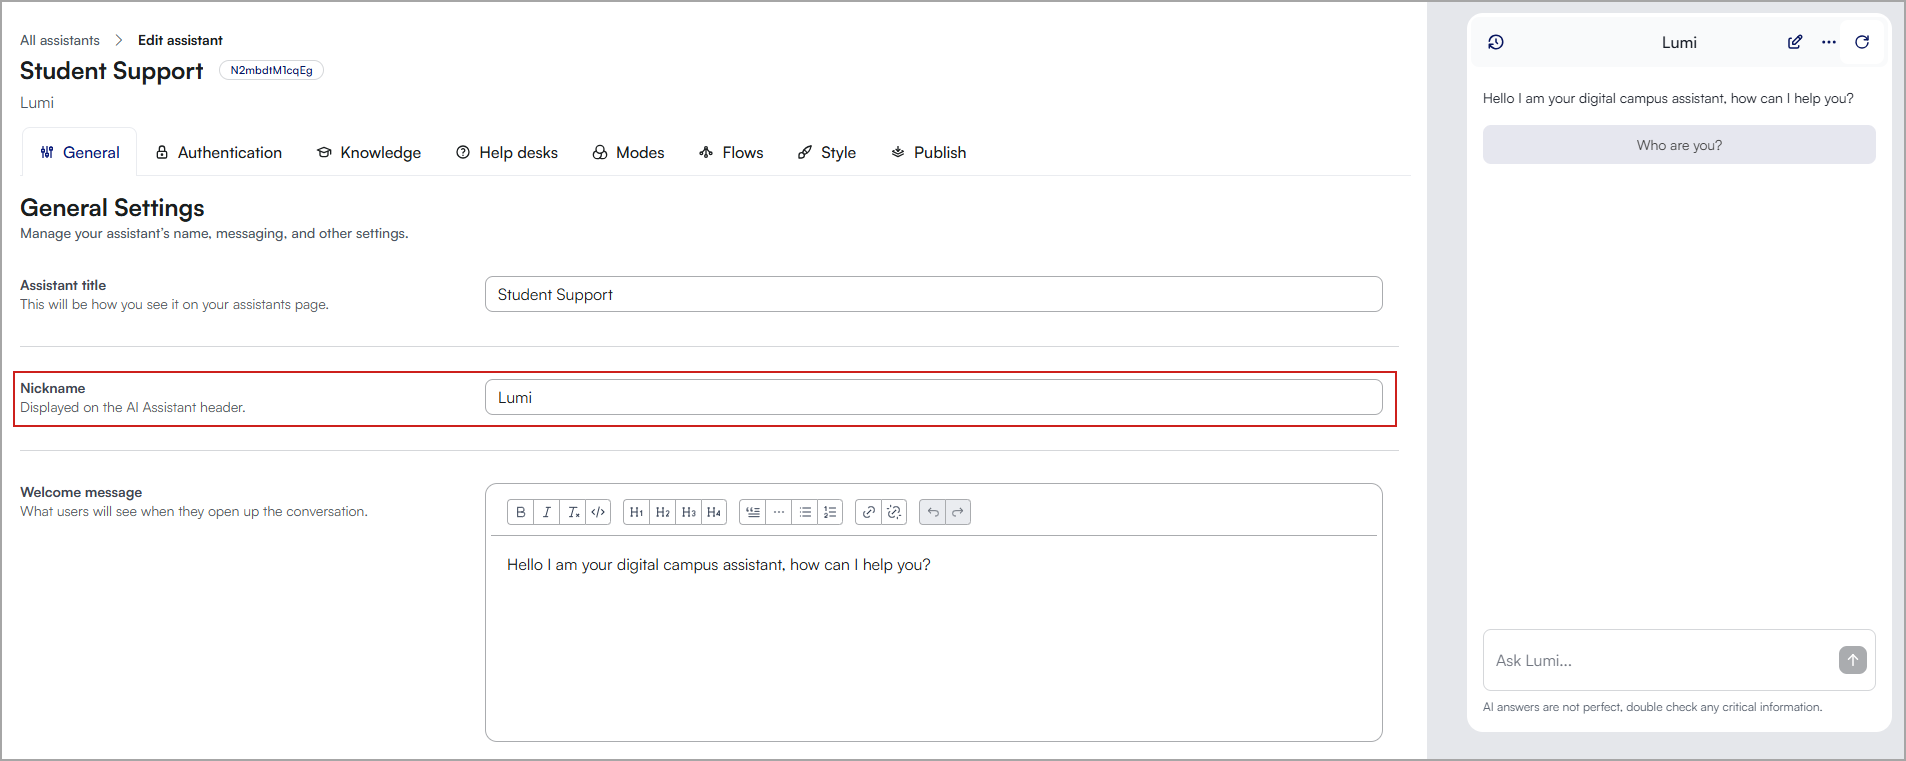
- Enter a new nickname in the Nickname field.
- Preview the AI assistant to ensure the new nickname is used in conversations.
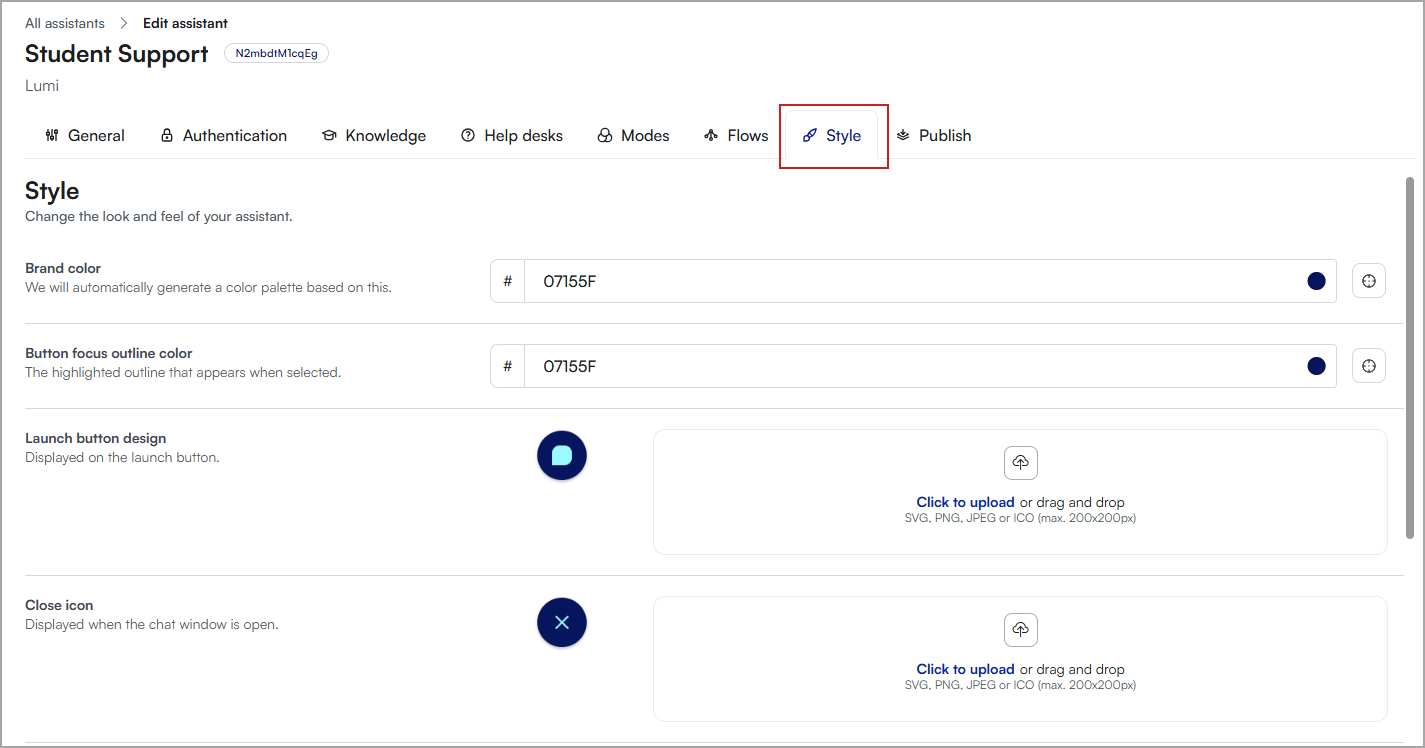
Change the brand color, launch buttons, and close icon
Updating the assistant’s color to match your institution’s visual identity helps reinforce brand recognition. Choose a color that maintains strong contrast and readability to ensure accessibility for all users, including those with visual impairments.
To change the color of Lumi Chat
- Log in to the D2L Lumi Chat, Tutor and Feedback admin portal.
- Select the Assistants tab.
- Find the assistant you want to modify and select Edit.
- Select the Style tab.
- The following can be customized:
- Brand color: The color palette is automatically generated based on this value (hex code).
- Button focus outline color: The highlighted outline that appears when selected.
- Launch button design: Displayed on the launch button.
- Close icon: Displayed when the chat window is open.
- Mobile: Toggle to show the launch button on small screens.
- Button size: Customize button sizes.
- Button position: Customize button position.
- Preview the AI assistant to ensure the changes are used in conversations.
|
Note: The launch button and close icon must meet the following requirements:
- Maximum size: 200 x 200 pixels.
- File format: Supported formats include PNG, JPG, or SVG.
- File size limit: 50 MB.
|
Enable voice mode
Voice mode lets users interact with AI assistants using spoken questions. This hands-free feature improves accessibility and ease of use, especially for users who prefer or require voice input. Follow the steps below to enable and use Voice mode.
|
Note:
- Voice mode in D2L Lumi Chat and Tutor supports multilingual dictation and audio playback. Previously, Voice mode supported only English.
|
To enable Voice mode
- Log in to the D2L Lumi Chat, Tutor and Feedback admin portal.
- Select the Assistants tab.
- Find the assistant you want to modify and select Edit.
- Scroll to the Voice mode section and select Enable voice mode.
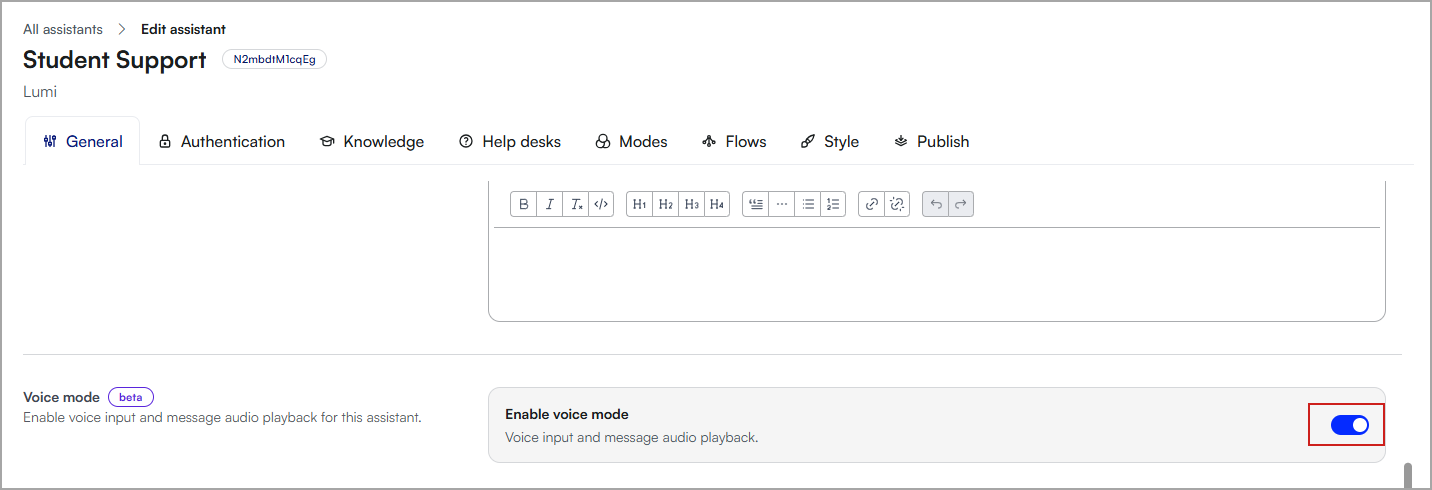
Voice mode is now enabled in Lumi Chat.
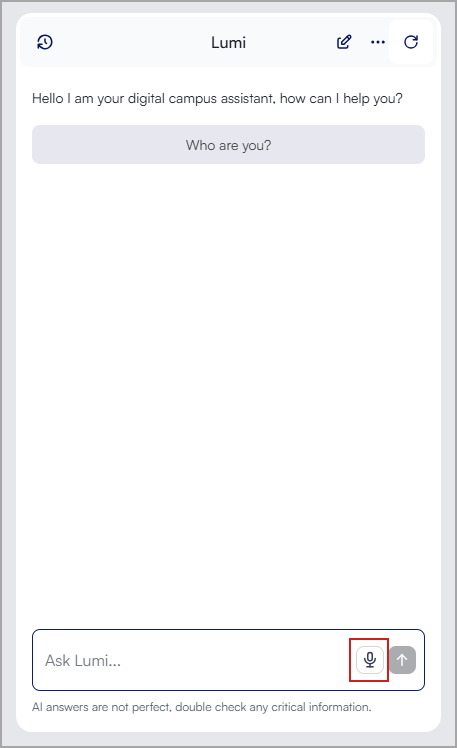
To start a conversation with Voice mode
- Open the Lumi Chat interface. A microphone icon now appears in the input bar where you usually type questions.
- Select the microphone icon to activate Voice mode.
- Clearly state your question aloud. Voice mode captures and processes your spoken input.
- There are two ways to stop recording:
- Manual stop: Select the microphone icon again to end recording.
- Automatic stop: Select the Send button. This automatically ends recording but might continue if not explicitly sent by the user.
- After the assistant processes your question, the response appears as text in the chat interface. To listen to the response, select Play below the text answer and the assistant reads the response aloud.
|
Tip: Voice mode tips:
- Device permissions: Ensure your browser or device has given microphone access to Lumi Chat.
- Environment: For best results, use Voice mode in a quiet environment where the assistant can accurately capture your question.
- Browser issues: If voice input doesn't work, check microphone permissions and try refreshing the page.
- LMS integration: Voice mode may need extra permissions in some environments. Try the floating button version if Learning Tools Interoperability (LTI) doesn't work.
- Screen reader users: Voice controls include proper accessibility labels and keyboard navigation support.
|
Activate AI-suggested questions
AI-suggested questions in Lumi Chat help users engage more effectively by offering contextually relevant prompts during their interaction with AI assistants. Use the following guide to activate and manage this feature.
- Log in to the D2L Lumi Chat, Tutor and Feedback admin portal.
- Select the Assistants tab.
- Find the assistant you want to modify and select Edit.
- Scroll to the AI suggestions section and select the Enable AI suggested questions and Enable AI follow up questions optional toggles.
- Preview the AI assistant to ensure the AI-suggested questions are available in conversations.
How AI-suggested questions work
The assistant suggests questions based on where the user initiates the chat. The assistant displays three suggested questions by default.
These are tailored to the user's context to improve relevance and engagement.
Examples:
- On an assignments page, Lumi Chat might suggest:
- How can I submit my assignments for this course?
- What resources are available to help me better understand the assignment requirements?
- In a financial aid section, Lumi Chat might suggest:
- What scholarships are available this semester?
- How do I apply for student loans?
|
Note: AI-suggested questions are currently in beta. The assistant relies on the content in its knowledge base. If key information is missing, the assistant may not return useful answers. Lumi Chat continues to refine AI models to improve the accuracy and context awareness of suggestions. |
Customize the search behavior and answer formats
Custom instructions let you shape how your Lumi Chat assistant responds to questions, ensuring answers match your institution’s style, terminology, and content priorities. By defining custom rules, you improve clarity, increase relevance, and support more engaging interactions for both learners and instructors.
- Log in to the D2L Lumi Chat, Tutor and Feedback admin portal.
- Select the Assistants tab.
- Find the assistant you want to modify and select Edit.
- Scroll to the Custom instructions section.
- Enter your instructions into Answer guidelines.
| Tip: Example instructions: - Answer length
- Keep responses short and to the point while still being as detailed as possible.
- Provide elaborate, in-depth answers.
- Complexity and clarity
- Use simple and clear language suitable for a bachelor’s degree level.
- Keep answers as simple as possible. Avoid using complicated language.
|
- To adjust search behavior, enter instructions into Search guidelines.
| Tip: Example instructions: Search expansion: - When searching for X, also search for Y to ensure comprehensive results.
- Example: If searching for student ID policies, also check for account management guidelines.
Campus-specific clarifications: - We have three campuses. Always search information across all three campuses.
- Never search information on other campuses if the user has specified where they study.
Query generalization: - Always broaden queries to include related terminology to ensure the full knowledge base is considered.
- Example: A search for Wi-Fi access should also check for network troubleshooting guides.
Role-based filtering: - Exclude content that is not relevant to the user’s role. For example, students should not receive faculty-only policies.
- Note: This does not necessarily prevent the assistant from searching sources that fall outside the user role, but it significantly reduces this occurrence.
|
- Your changes are auto-saved and automatically adjust search behavior and responses based on the new instructions.
- Preview the AI assistant and test Lumi Chat's responses before rolling out the changes to all users.
Recommended testing process
Custom instructions can significantly alter the assistant’s responses, so thorough testing is recommended before rolling out changes to all users.
- Review test scenarios
- Identify common queries from different user roles. For example, students, faculty, and staff.
- Enable custom instructions in a copy of your assistant
- If available, apply changes to a test assistant before updating the live version.
- Run sample queries
- Test a variety of user inputs to confirm expected behavior.
- Look for inconsistencies or unintended changes.
- Refine and apply changes
- Adjust instructions based on testing feedback.
- Once satisfied, deploy the changes to the live assistant.
Add external user data to your Lumi Chat or Lumi Tutor assistant
Use external user data to give your assistant more personalized and relevant responses. External user data allows the assistant to access information about authenticated users, such as their program, faculty, year of study, or advisor, before a conversation begins.
When external user data is configured, the assistant can:
- Use the data in conversations to tailor responses to the user.
- Display the data as metadata in the inbox and conversation exports for reporting and analysis.
What is external user data?
External user data is information about a user that does not come from the conversation itself. For example, you can upload or connect data such as:
- Program or faculty
- Year of study
- Degree level
- International student status
- Academic advisor
Once connected, the assistant can use this information to provide more relevant answers without requiring users to repeat details about themselves.
For example, if a learner asks, “What electives can I take during my master’s degree?”, the assistant can use the learner’s program and faculty information to narrow the response automatically.
Add external user data
Before you begin:
- Ensure that your users authenticate with your assistant.
- Prepare a comma-separated values (CSV) file or integration source that includes a unique user identifier and email address for each user.
To add external user data:
- Log in to the D2L Lumi Chat, Tutor and Feedback admin portal.
- Open the assistant you want to configure.
- Select Knowledge.
- Select the User Data tab.
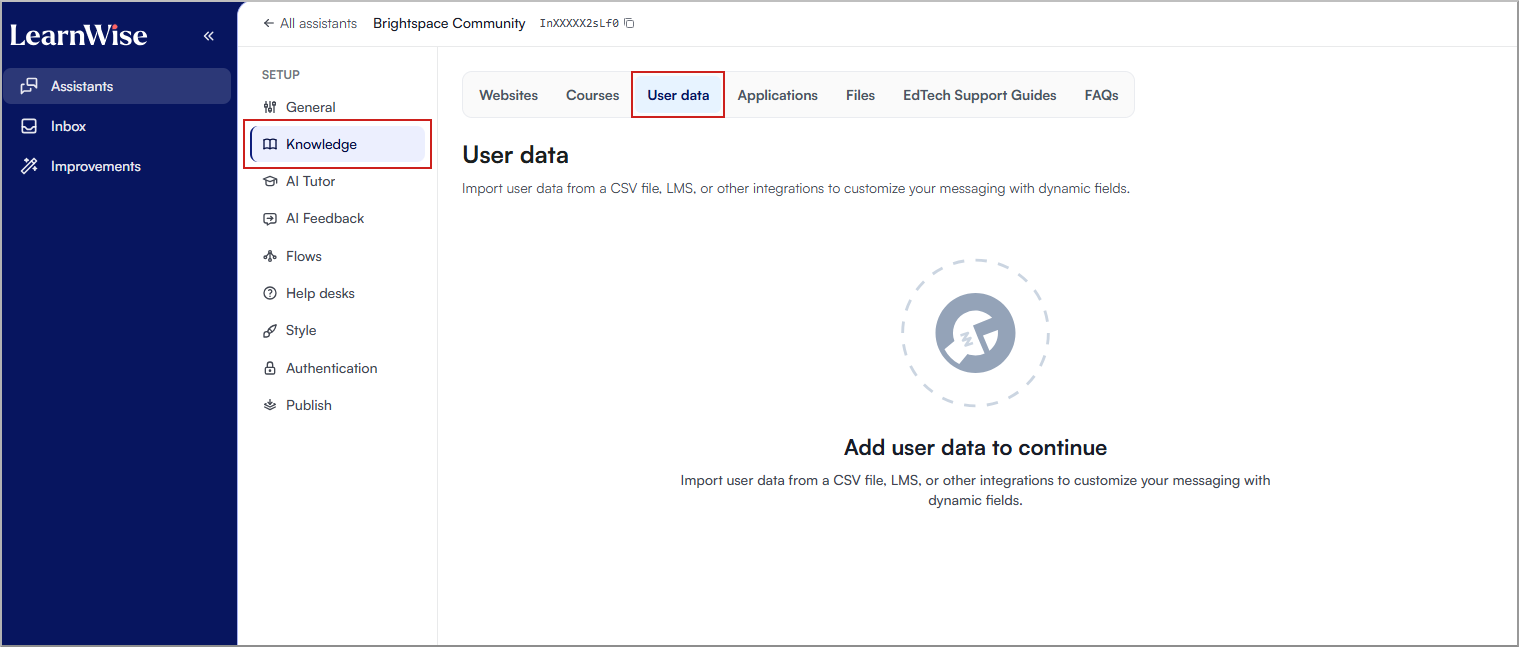
- Select one of the following:
- Upload file: To upload a CSV file of the external data.
- Add from Microsoft Entra: To connect an integration source for external data.
- Add from LMS: To connect user data from the LMS.
- If CSV is selected, map the following identity fields:
- User ID field: The column containing the institutional user identifier, such as student_id.
- Email field: The column containing the user’s email address.

|
Important: These fields connect CSV rows or integration records to authenticated users and must contain accurate values.
|
To finish configuration for CSV:
- Select the columns you want to make available to the assistant.
- For each selected field, add a description explaining what the field represents.
| Note: Clear field descriptions help the assistant interpret the data correctly. For example:- This field contains the learner’s program.
- This field contains the learner’s year of study, where 1 indicates first year.
|
- For each field, decide whether to include it in the conversation context.
| Note: Fields included in the conversation context are available to the assistant during conversations. Fields not included remain available as inbox metadata only. For example: - Program, faculty, and advisor fields are often useful in conversation context.
- Student ID and email fields are typically better suited for metadata only.
|
- Select Save.
The data becomes available the next time users sign in and start a conversation.
How external user data appears
Conversation context
Fields enabled for the conversation context are passed to the assistant automatically during conversations. Users do not directly view these fields, but the assistant can use them to personalize responses.
For example, if a learner asks about available electives, the assistant can use the learner’s program and faculty information to provide more relevant recommendations without additional questions.
Inbox metadata
External user data also appears as metadata alongside conversations in the inbox and in exported conversation data.
This metadata can support reporting and analysis, such as comparing engagement across faculties, programs, or year groups.
Privacy and data recommendations
External user data can influence assistant responses. If a field is included in the conversation context and a user asks about that information directly, the assistant may return the value in its response.
|
Important: Avoid uploading highly sensitive information such as GPA values, risk indicators, learning condition labels, or any information that users should not be able to retrieve through conversation responses.
|
Consider the following best practices when configuring external user data:
- Use general categorizations, such as program, faculty, year of study, degree level, or international student status.
- Use external user data as flow conditions when the information should guide routing decisions but should not appear in responses.
- Use email flow actions to notify staff about sensitive information instead of exposing that information in conversations.
|
Tip: Fields used only for routing or automation do not need to be added to the conversation context. |