You can add subtitles to uploaded videos by uploading an SRT or WebVTT file. You can also attach more than one subtitle file to a video to accommodate more than one language. This can make your video available to a broader audience. Subtitles appear to students as closed captions within the video player and they can decide if they want to view the video with subtitles enabled, as well as which of the available languages they want to use. Subtitles are not automatically generated for videos, and they are not automatically translated into different languages. The closed caption file uploads into a subfolder in the same location as the video file. You can only add subtitles to the videos that you upload. If you want to include subtitles for web videos hosted on another site, such as YouTube, you must follow the practices of that site.
Add subtitles to video topics in the New Content Experience
You can add subtitles to video topics from the New Content Experience (Lessons)
To add subtitles
- Navigate to Content.
- Click on the module where you want to create a new video topic.
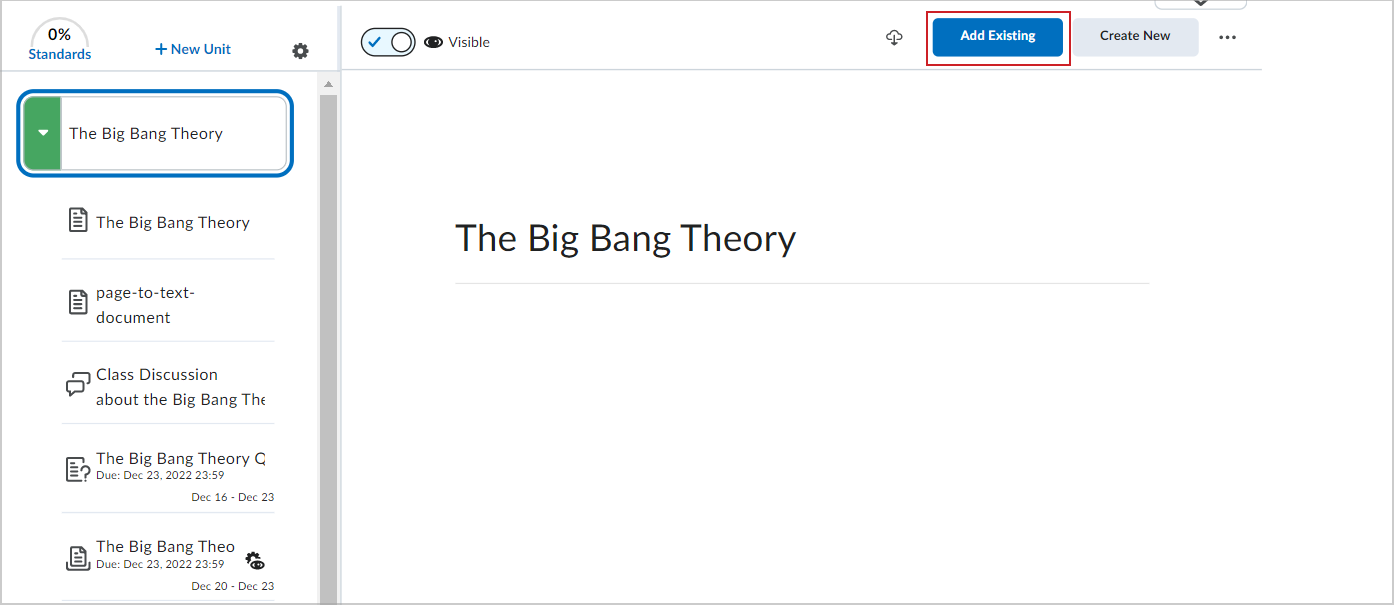
- Click Add Existing.

Figure: The Add Existing option for a module.
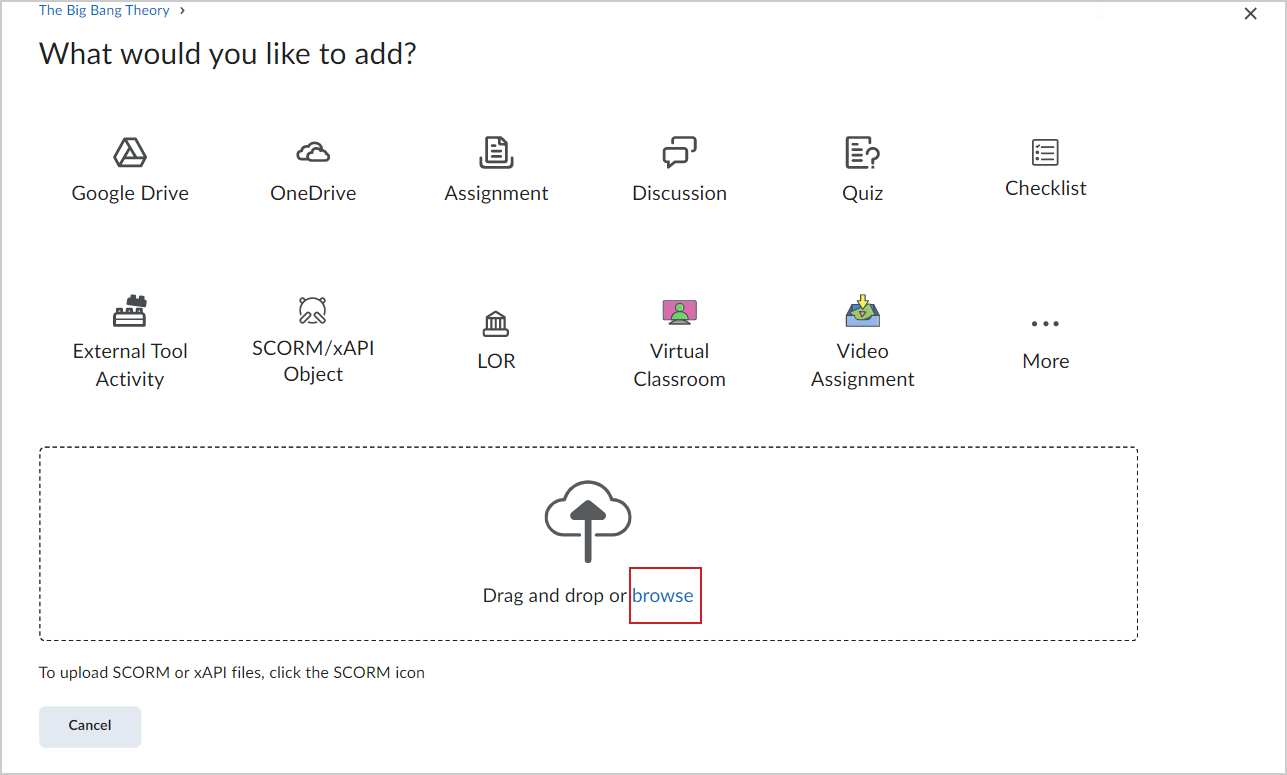
- On the What would you like to add? page, click the browse link.

Figure: The What would you like to add? page with the browse link.
- Select the SRT or WebVTT file you want to upload and click Open.
Add subtitles to video topics in the Classic Content experience
You can add subtitles to video topics in the Classic Content Experience.
To add subtitles
- Navigate Content.
- In the Table of Contents panel, click on the module in where you want to create a new video topic.
- From the Upload/Create button, click Video or Audio.
- In the Upload tab, upload your video.
- Click Add Subtitles.
- From the Subtitle Language drop-down list, select a language.
- To upload the SRT or WebVTT file containing your close captions for the video, click Browse. Locate your file and click Open.
- Click Done > Save.