Start and end dates specify when learners can access a topic or module. If you set a start, end, or due date for a topic or module, it appears on the Upcoming Events page and the Agenda view in the Calendar tool. Setting an end date later than the due date for a topic enables learners to access and complete the topic from the Overdue tab on the Course Schedule page. Topics with a due date and no end date also appear in the Overdue tab on the Course Schedule page.

|
Note: Adding a due date to a content item that is associated to an assignment overrides an existing end date that is further in the future. The due date also overrides the end date in the Calendar tool.
|
To add availability and due dates in the New Content Experience
- Navigate to Content.
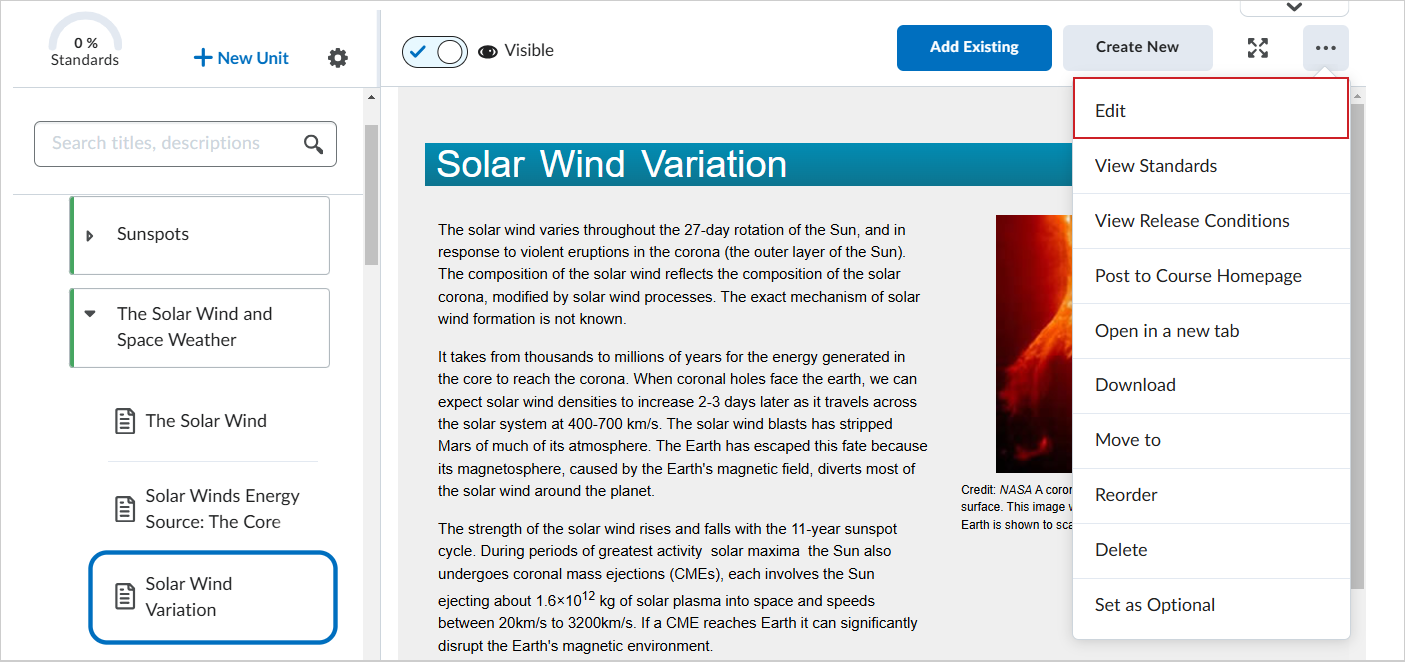
- Navigate to the module where you want to add availability and due dates and click Options (...) > Edit.

Figure: Select Edit from the Options (...) drop-down menu to make changes to the module.
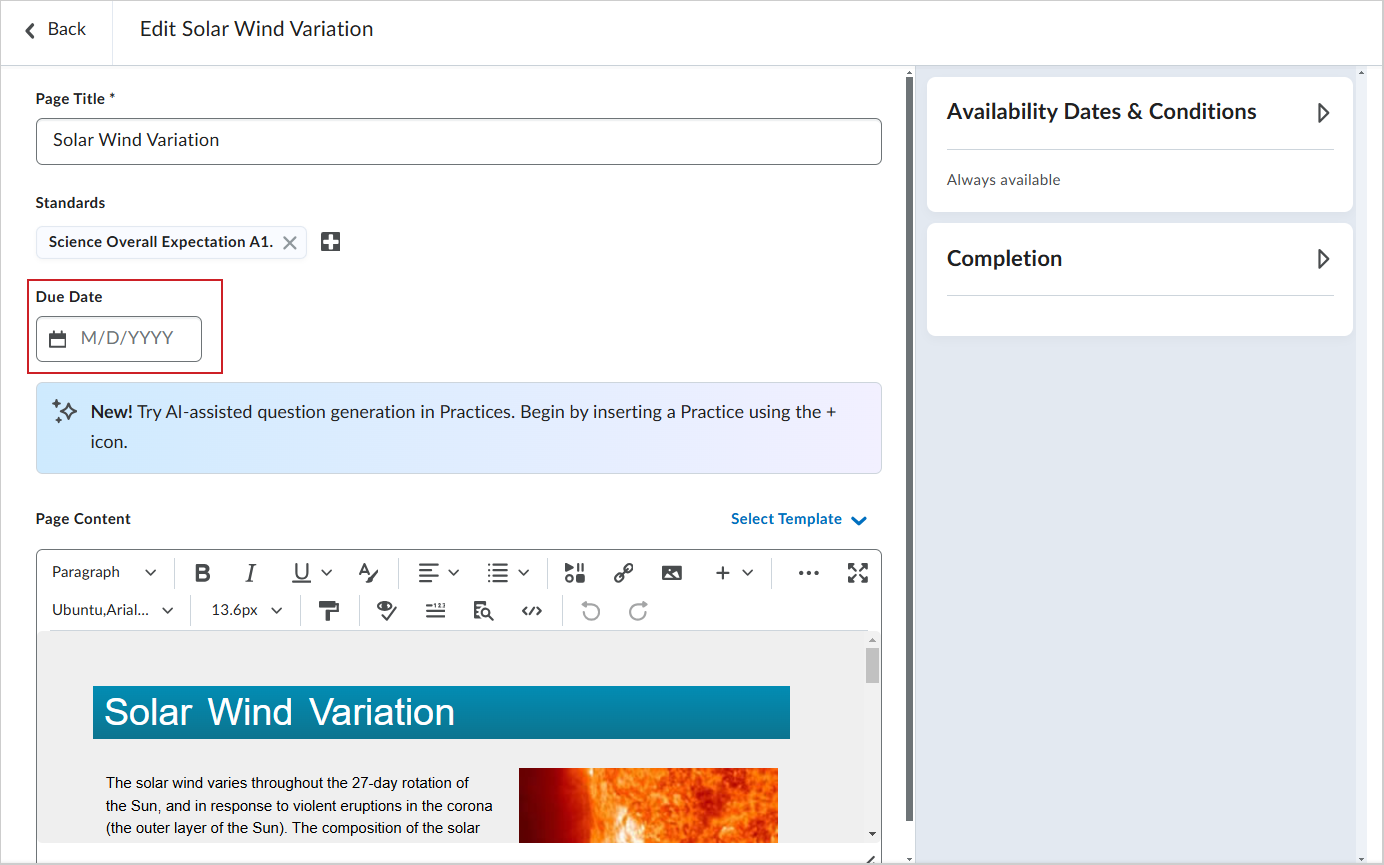
- On the Edit Topic page, add your desired due date in the Due Date field.

Figure: Enter a due date in the Due Date field.
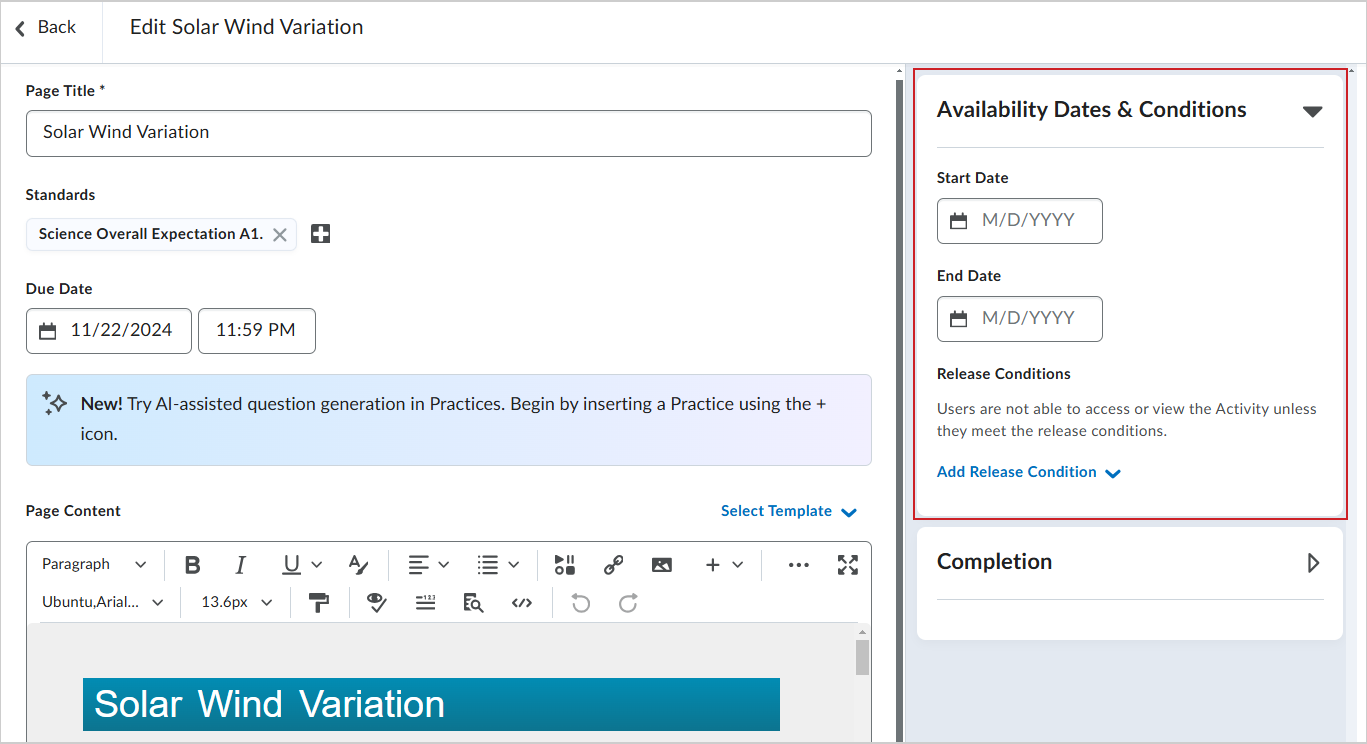
- In the Availability Dates & Conditions accordion, enter a Start Date and End Date. One or both can be blank.

Figure: Enter the Start Date and End Date in the Availability Dates & Conditions accordion.
- Toggle the Visibility ON or OFF.
- Click Save and Close.

Figure: The Visibility toggle and Save and Close and Save options.
To add availability and due dates in the Classic Content experience
- On the navbar, click Content.
- On the Table of Contents page, click Bulk Edit.
- For any topic or module that you want to add availability or due dates to, click Add dates and restrictions.
- Do any of the following:
- To add a start date, click Add start date. Enter your start date details.
- To add a due date, click Add due date. Enter your due date details.
- To add an end date, click Add end date. Enter your end date details.
- Click Update.
- Click Done Editing.