The Insert Image option is available wherever the Brightspace Editor is present, allowing you to add and edit images as desired.

|
Note: Images respect the settings you define in the Attributes page. |
Insert images with Brightspace Editor
- Navigate to anywhere Brightspace Editor is available, like Content or Discussions.
- In Brightspace Editor, click the Insert Image icon.

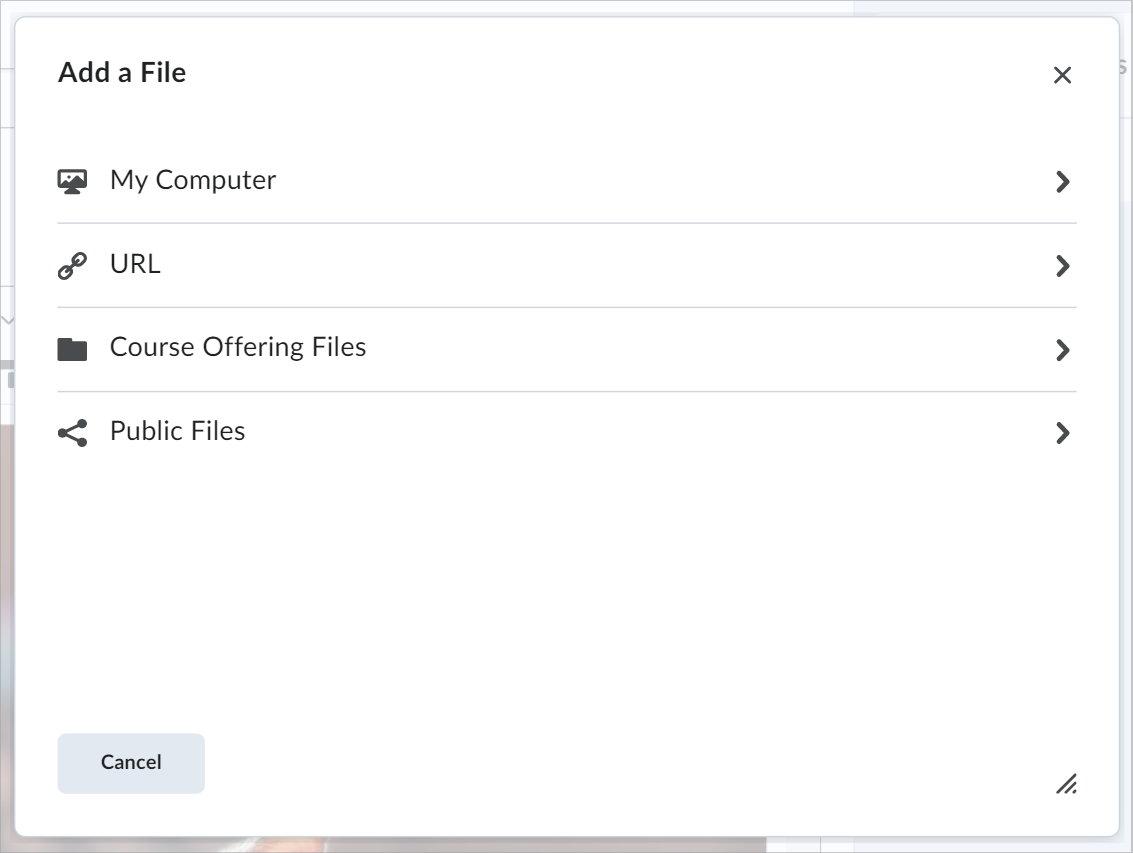
- In the Add a File dialog, click either My Computer or Course Offering Files and select the image you want to insert, or click URL and link out to the image you want to insert.
 | Important: Depending on where you access Brightspace Editor from, the My Computer option may not exist. This could be because there is no place to save the file you plan to upload (for example, because you cannot get to Manage Files due to your role or permission) or the tool does not support that function. |
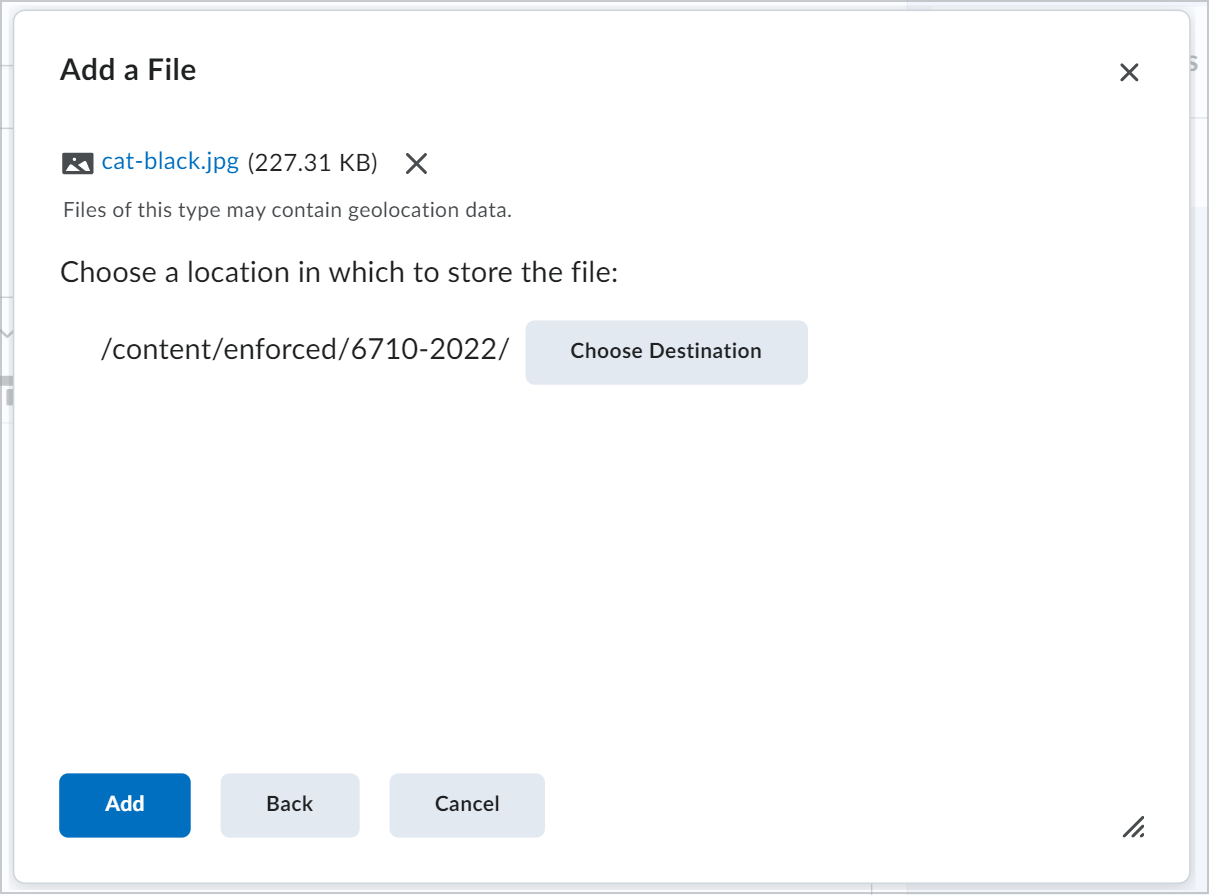
| Note: To save the image file in a specific location, click Choose Destination and select the path or create a new folder in which you want to save the same.
|
- Click Add.
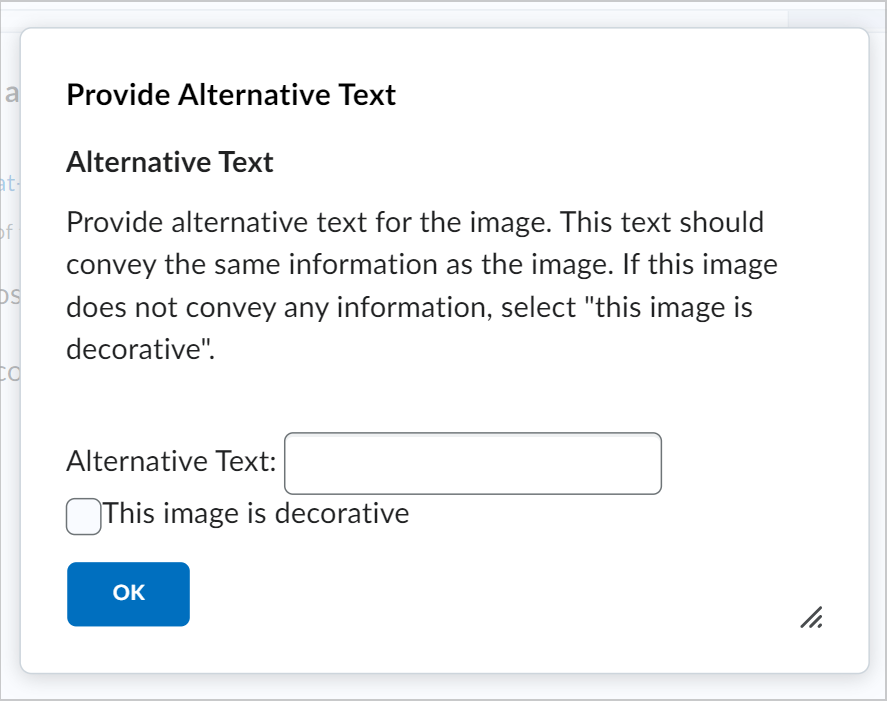
- Enter Alternative Text and click OK.
Remove an image from the Brightspace Editor
- Locate the image you want to remove.
- Do one of the following:
- Select the image. When the resize handles are visible around the image, press Delete or Backspace.
- Move the text cursor after the image, then press Backspace.
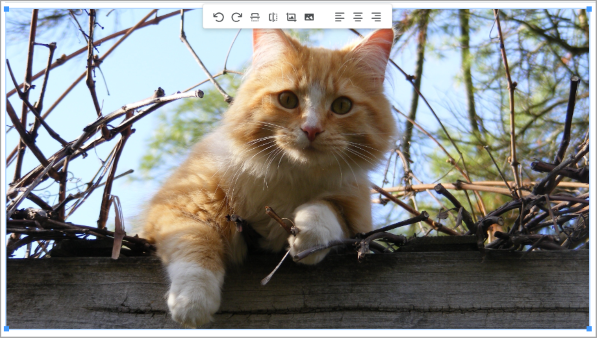
Edit images in Brightspace Editor
- Navigate to anywhere Brightspace Editor is available, like Content or Discussions.
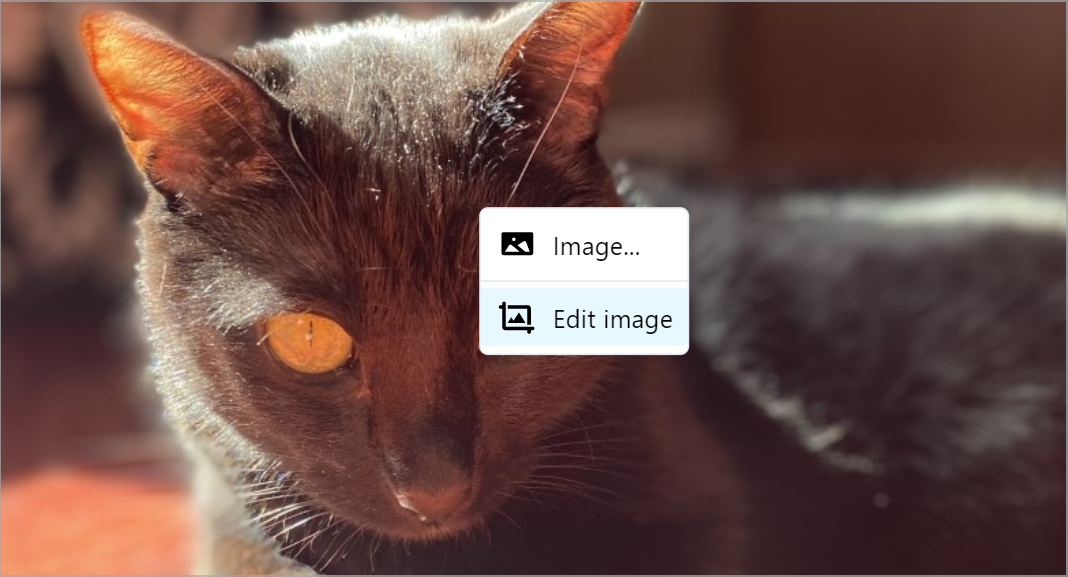
- Right-click on the image you want to update and click Edit image.
- In the Edit Image dialog, you can edit your image using the following options:
- Crop
- Resize
- Orientation
- Brightness
- Sharpen
- Contrast
- Color levels
- Gamma
- Invert
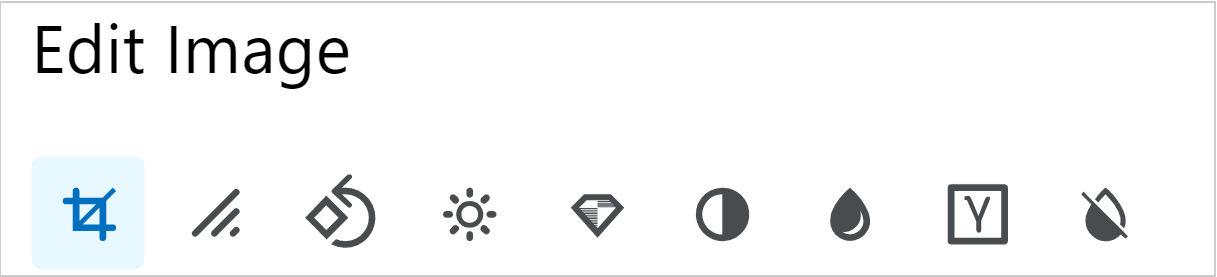
- Click Save.
|
Note: Image changes are saved to Manage Files at the course-level root, or, depending on user permissions, as new file attachments to the item (such as the discussion) every time a change is made. Multiple edits, in turn, create multiple files. If the course is copied, all image edits are copied as well. Edited images are saved with their original names followed by a date-time string, which helps to find changed pictures easily when browsing files in Manage Files. |