Brightspace Media Player is a display window that enables you to watch any videos uploaded to Brightspace. It allows you to play video, adjust playback speed, and download videos.
Note: Embedded videos such as YouTube do not use Brightspace Media Player.
Audio-Video file types supported in Brightspace
The following file types are supported in Brightspace:
| Uploaded Video Files |
.mp4, .avi, .f4v, .flv, .m4v, .mov, .webm, .wmv, and the ability to optimize for streaming (2GB max and up to 720p output) |
| Uploaded Audio Files |
.mp3, .m4a, .ogg, .wav, .wma (1GB max) |
Notes:
- Brightspace supports these file types but prefers .mp4 and .mp3.
- If problems are discovered while playing a video after upload, try using the <Optimize for Streaming> option in the Media Library’s edit suite. This option optimizes the file for Brightspace and resolves most playback issues.
Upload audio-video content
You must upload all audio-video content into Brightspace before you can view it in Media Player. There are various methods available to upload audio-video content.
Uploaded audio and video files are transcoded as follows:
- MP3 and MP4 video files are saved in their original form because they can play in a browser without transcoding.
- WMV and AVI are automatically transcoded on upload as they will not play by default.
Note: When uploading content, the media file is unavailable while processing (transcoding, creating thumbnails, auto-generating captions). However, you can navigate away from the upload page to work on other tasks. If another user attempts to access the media file in the topic before processing is complete, a message prompts them to wait for the media file to become available. When processing is complete (or the uploaded media file is invalid or corrupted), a notification displays from Update alerts in the navbar, with a link to the organization homepage. Depending on the file format of audio and video files, they might not play in a web browser by default. The Optimize for Streaming option in the editing tool enables users who want to manually transcode original versions of the files, for example, to reduce the file size or enable multi-bitrate streaming.
To upload audio-video content in the New Content experience (Lessons)
- Navigate to Content.
- Select a unit and click Add Existing. The What would you like to add? page opens.
- Do one of the following:
- Drag and drop the media file onto the dialog box. Click browse to select a file from your computer. The upload process begins.
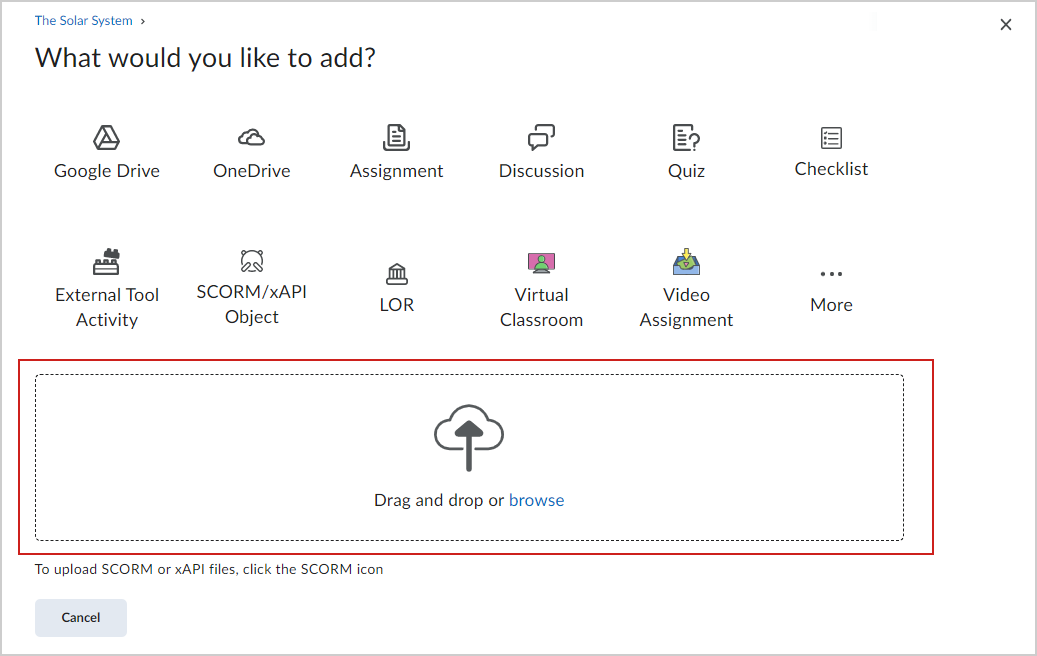
Figure: Drag and drop a file or click browse.
When the upload is complete, a topic is automatically created for the media file.
To upload audio-video content in the Classic Content experience
- Navigate to Content.
- Select a module and click Upload/Create > Video or Audio. The Add Video or Audio dialog opens.
- Do one of the following:
- To embed a web video, click the Web Video or Audio tab and enter a URL or embed code.
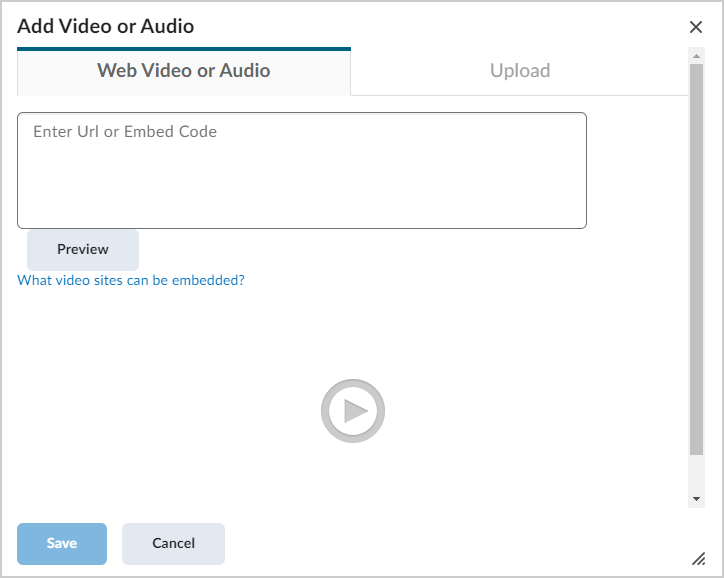
Figure: Enter a URL or embed code in the Web Video or Audio tab. - To upload a video file, click the Upload tab and do one of the following:
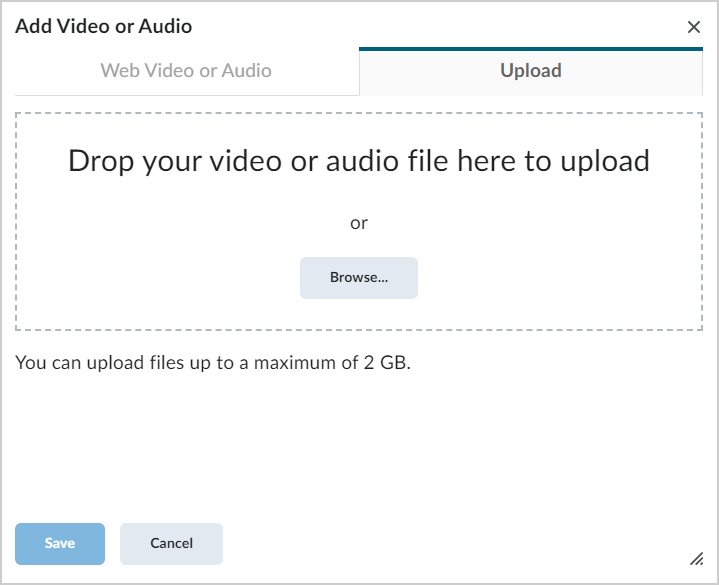
Figure: Drag and drop a file or browse in the Upload tab.- Drag and drop the file.
- Click Browse... to upload.
- When the upload is complete, click Save.
A new audio-video topic is added to your selected module.
Edit video content
You can edit video content to change the title, change to another video file, adjust the default playback speed of the video, and change the source URL or embed code of web video or audio.
Note: This topic explains editing video files uploaded from the Classic Content Experience and New Content Experience (Lessons). D2L recommends using the desktop experience when editing video.
Depending on the file format of audio and video files, they might not play in a web browser by default. All uploaded audio and video files are transcoded only when necessary. All MP3 and MP4 video files are saved in their original form because they can play in a browser without transcoding. Other files, such as WMV and AVI, which would not play by default, continue to be automatically transcoded on upload. The Optimize for Streaming option in the editing tool enables users who want to manually transcode original versions of the files, for example, to enable multi-bitrate streaming.
Important: You can only edit a video if you are the owner of the video file. Contact your administrator for more information about transferring ownership.
To edit video content in the Classic Content experience
- Locate and open a video.
- Under the video, click Edit Video. The Update Video or Audio dialog opens.
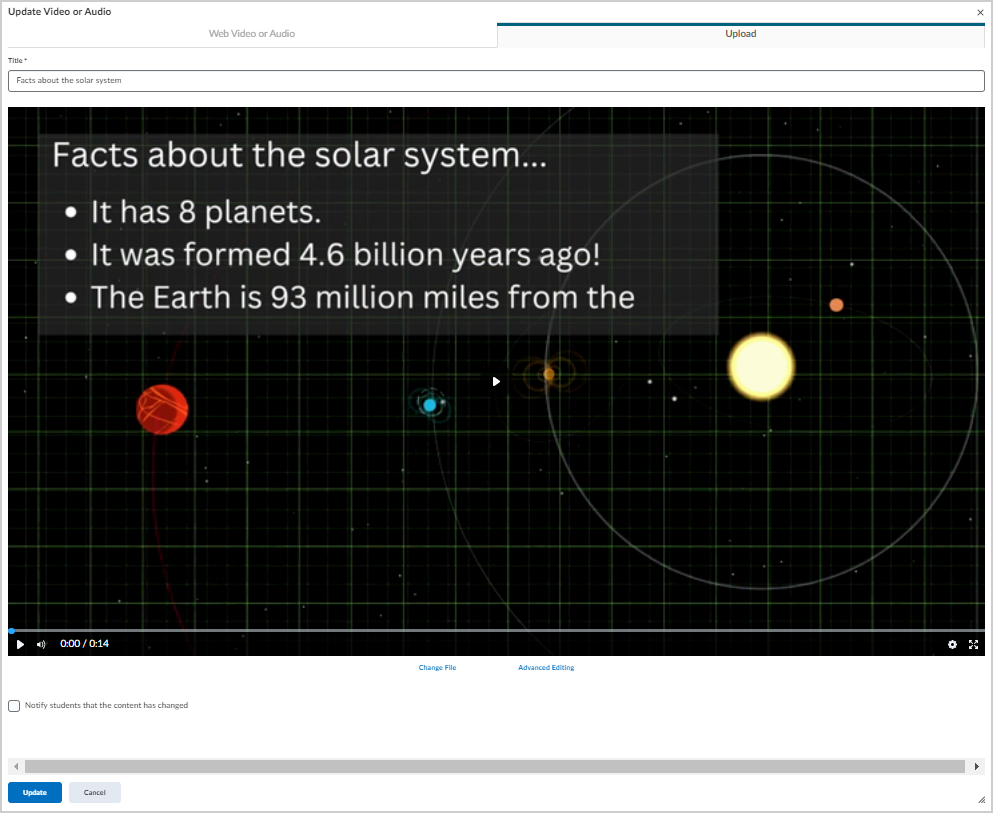
Figure: The Update Video or Audio dialog appears after clicking Edit Video.
- From the Upload tab, do any of the following:
- Edit the Title of your video.
- Click Change File to browse your computer and upload a new video to replace the existing video.
- Select Notify students that the content has changed if desired.
- Click Advanced Editing for more editing options. Refer to the Use Advanced Editing to edit audio-video content heading for more details.
- If you are using a web video, from the Web Video or Audio tab, do any of the following:
- Enter an updated URL or Embed Code. Click Preview to review the updated video.
- Click Update to save changes.
You have edited and saved your video using Media Player in the Classic Content Experience.
To edit video content from the New Content experience (Lessons)
- From Content, navigate to a module containing a video.
- Click the video to open it.
- Click Options (...) > Edit.
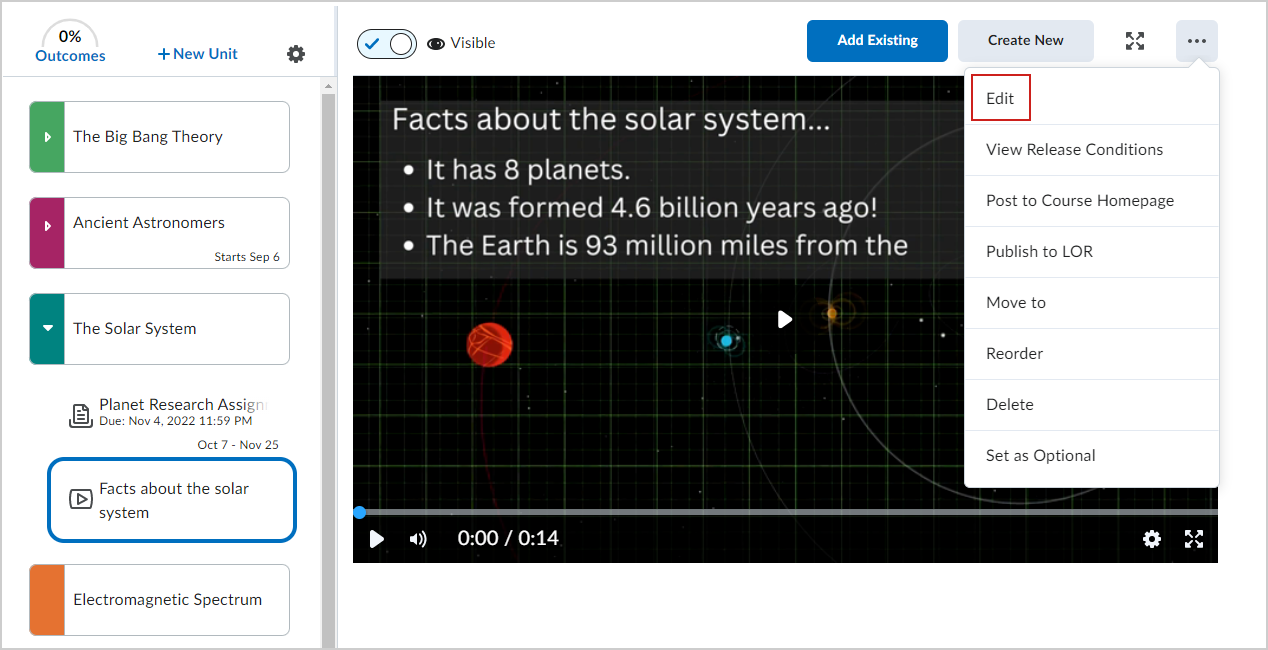
Figure: Click Options and then click Edit
Figure: Update your video on the editing page.
- Customize the following options:
- Edit the Name of the video.
- Set a Due Date for the video.
- Under Availability & Dates, set a Start Date and End Date for the availability of the video.
- Click to toggle the video as Visible or Hidden.
- Click the Settings icon (gear) to set the default playback speed for the video.
- Click Advanced Editing for more editing options. Refer to the Use Advanced Editing to edit video content topic for more details.
- Click Save and Close.
You have edited and saved your video using Media Player in the New Content Experience (Lessons).
Use Advanced Editing to edit audio-video content
You can also access Advanced Editing options when editing your audio-video content. You can access Advanced Editing from either the Classic Content or New Content (Lessons) experience.
To edit your content with Advanced Editing
- From the Update Video or Audio dialog in the Classic Content Experience or Edit page in New Content (Lessons) Experience, click Advanced Editing.
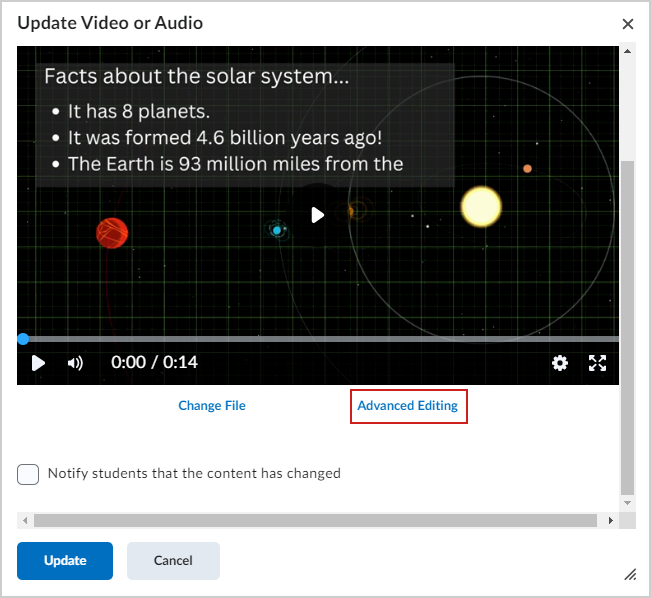
Figure: Click Advanced Editing in Classic Content.
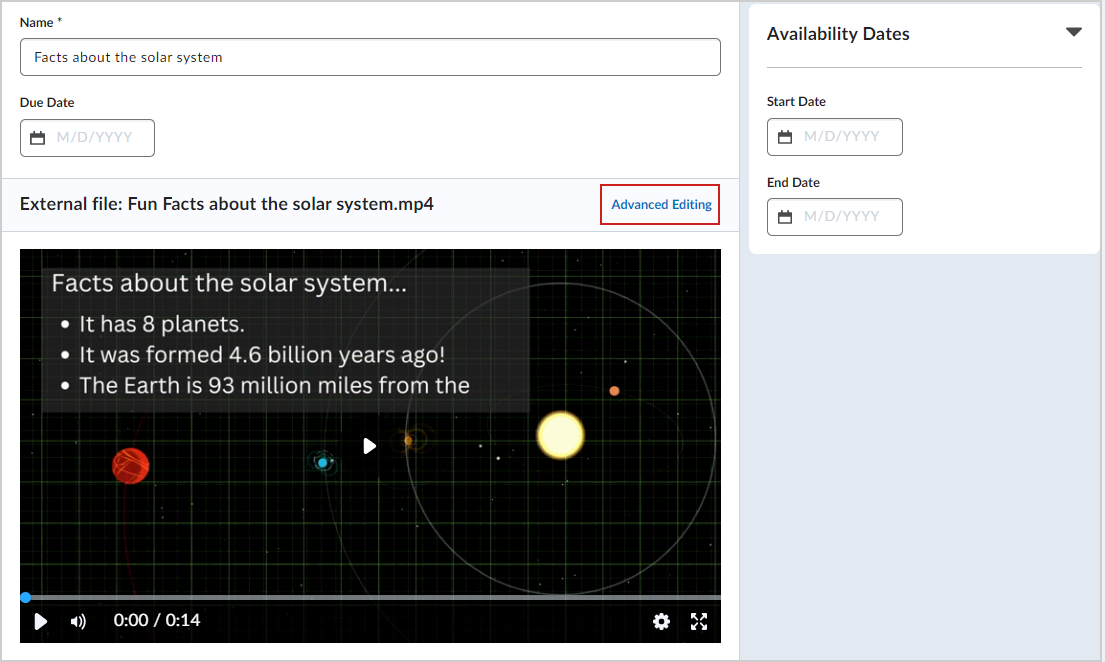
Figure: Click Advanced Editing in the New Content experience (Lessons).
- From the Advanced Editing dialog, customize any of the following:
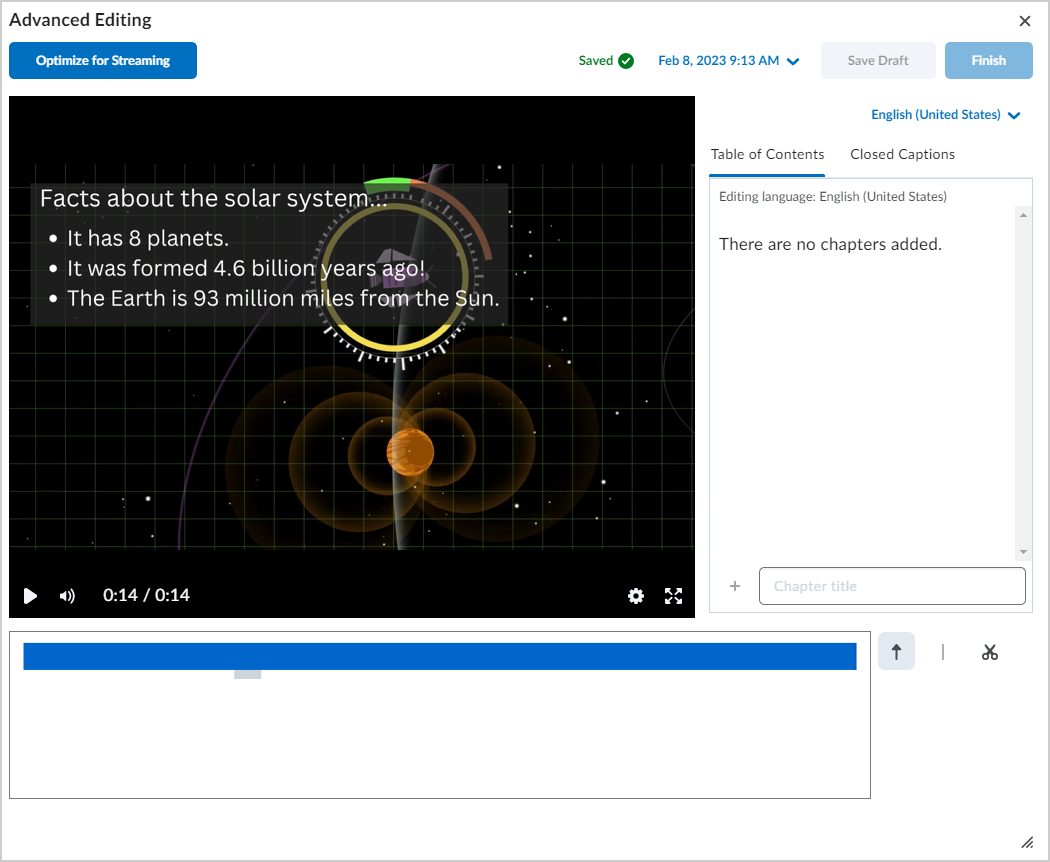
Figure: Customize your video in the Advanced Editing dialog.- To optimize the video quality for streaming, click Optimize for Streaming.
- Under the Table of Contents tab, enter a Chapter title and click + to add it.
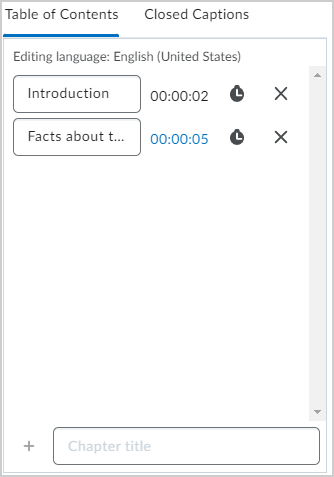
Figure: Add chapter titles to your video in the Table of Contents tab.
Note: Chapters titles appear above the timecode when a user hovers over the timeline.
- To generate or upload Closed Captions, click the Closed Captions tab and do one of the following:
- Click the English (United States) drop-down to select the default language for your video.
- To automatically generate closed captions, click Auto-Generate.
Important: English (United States) is the default language for auto-generated captions. If you select a different language and auto-generate captions, you must explicitly select that language to view that caption. Otherwise, a video will automatically display English (United States) as a default, and state that there are no captions generated for English.
- To upload a closed caption file, click Upload.
- From the Timeline Editor do any of the following:
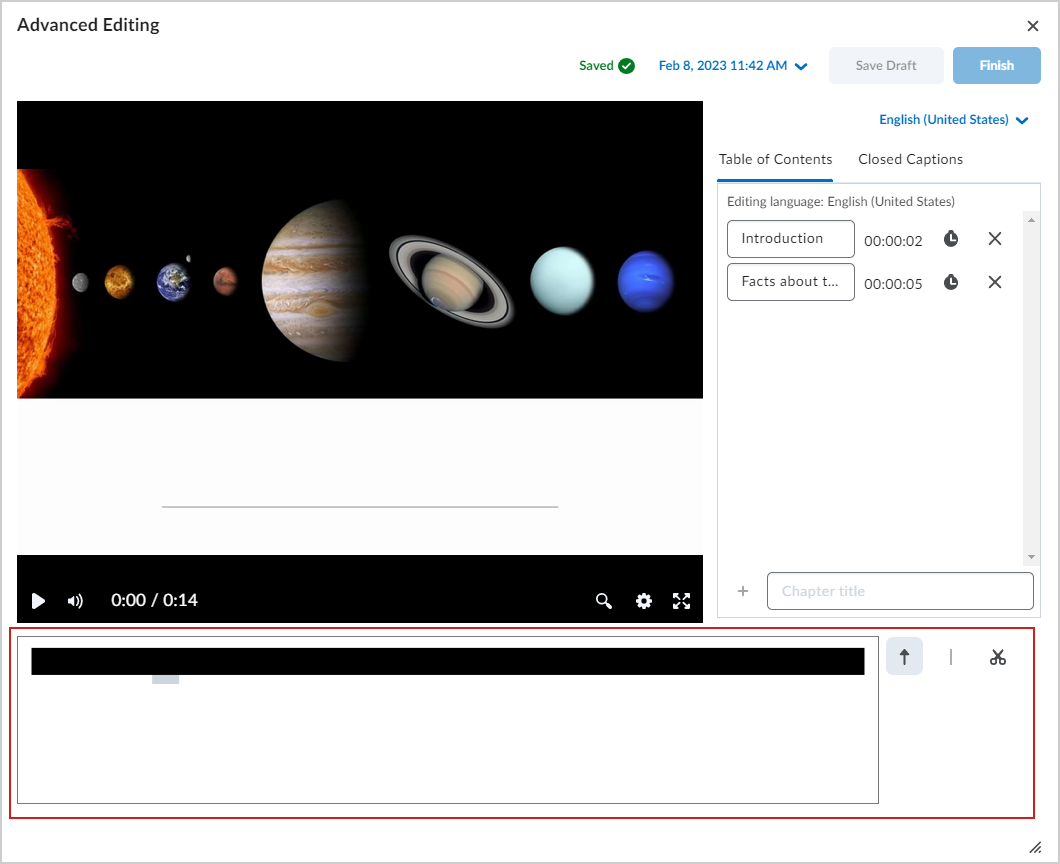
Figure: Edit your video in the Timeline Editor. - Click the arrow icon and then click and drag the timeline to move to a specific point in the video.
- To create a section or block on the timeline, click the line icon ( | ) and do the following:
- Click on the timeline to place a marker at a start or 'in' point.
- Click on the timeline again to place a marker at an end or 'out' point.
- To cut a section of video out, click the scissors icon and click on a section with an in and out point.
- If you want to recover a previous version of your edits, click the date at the top of the dialog to select a previous version.
Note: The latest saved version appears wherever the file is used within Brightspace.
- When you have completed all edits, click Save Draft or click Finish to save over your previous video.
You have edited and saved your video using Advanced Editing.
Locate and view content in Media Player
You can access and edit audio-video content from either the Classic Content experience or New Content experience (Lessons).

|
Note: You can also find all saved videos using Media Library. Refer to Media Library overview for more information. The Download option may not be available depending on your organization's setup. Contact your administrator for more information. |
To view content in Media Player from the New Content experience
- Navigate to Content.
- Click to expand the lesson that contains a video.
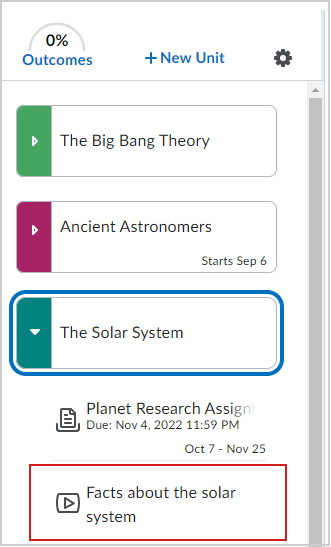
Figure: Click on a video in one of your lessons.
- Click to open the video in Media Player and play your video.
- If desired, click the Settings icon (gear) and do any of the following:
- Adjust the playback speed.
- Click Download to download the video.
You have located and viewed a video using the New Content Experience.
To view content in Media Player from Classic Content
- Navigate to Content.
- Under Table of Contents, click a module that contains a video and click the video to open it.
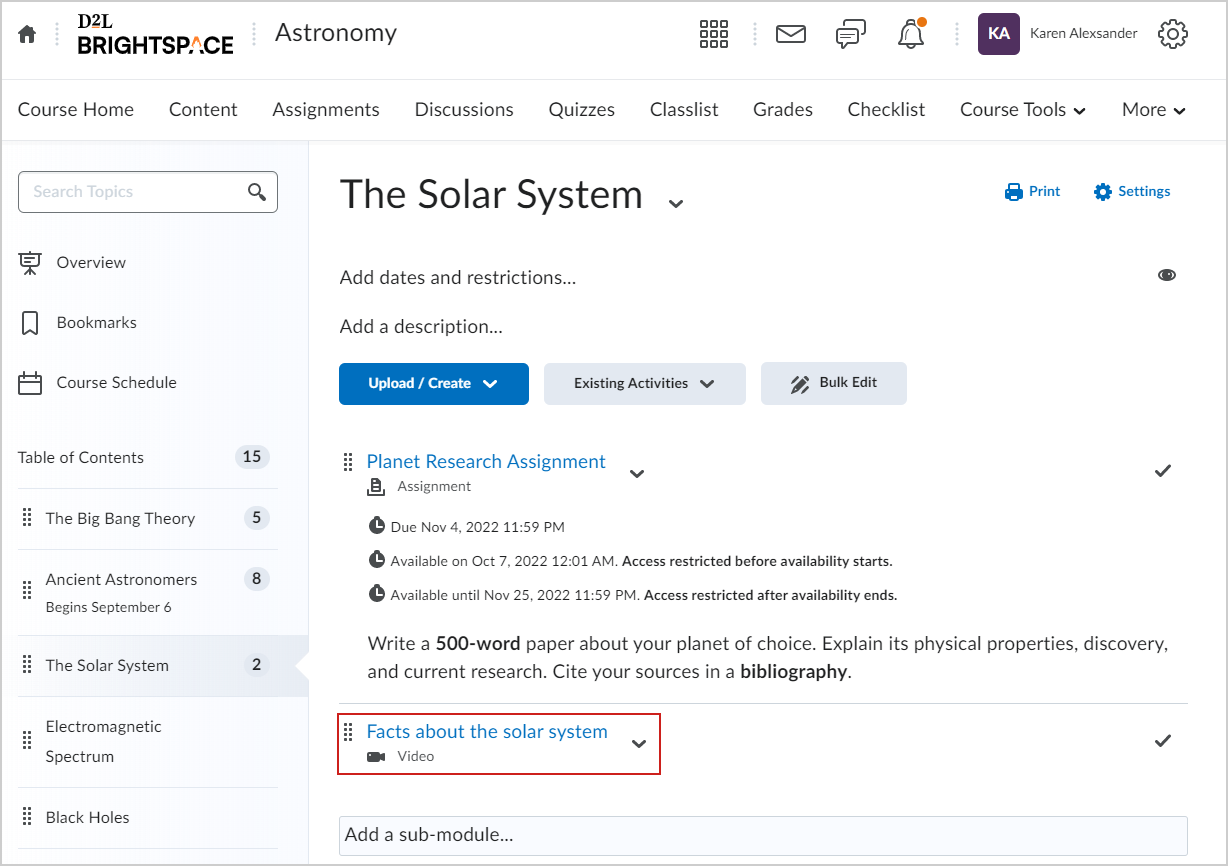
Figure: Click a video in a module in the Classic Content experience to open it.
- If desired, click the Settings icon (gear) and do any of the following:
- Adjust the playback speed.
- Click Download to download the video.
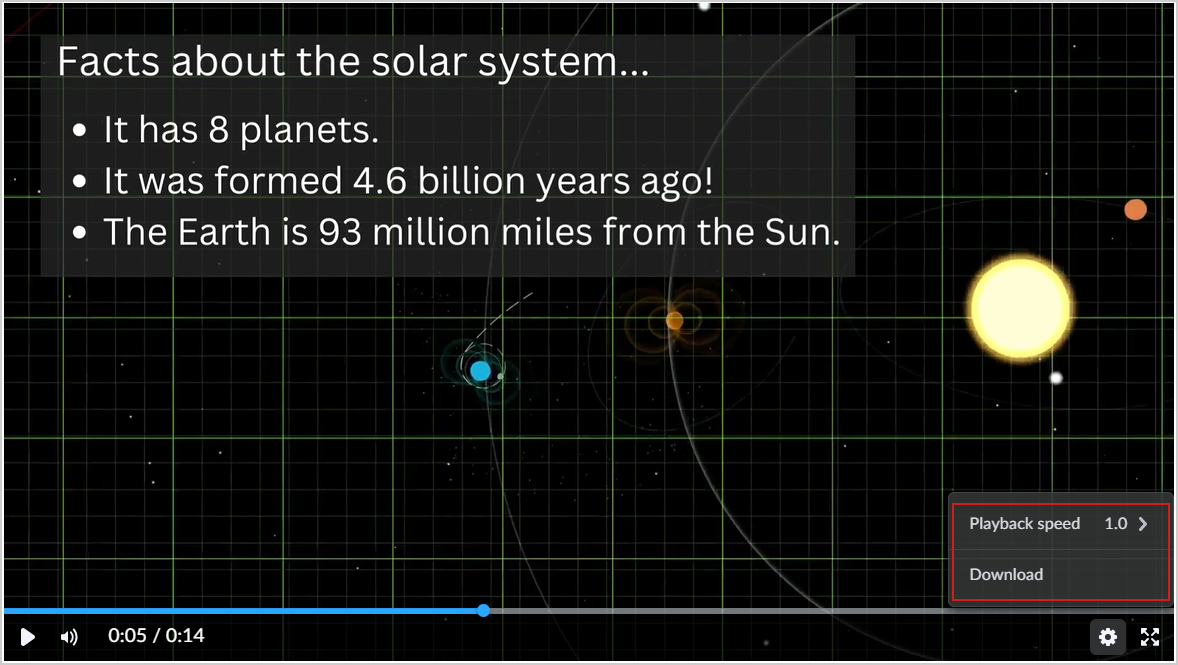
Figure: Click Download in Media Player to download the video.
You have located and viewed a video using the Classic Content Experience.