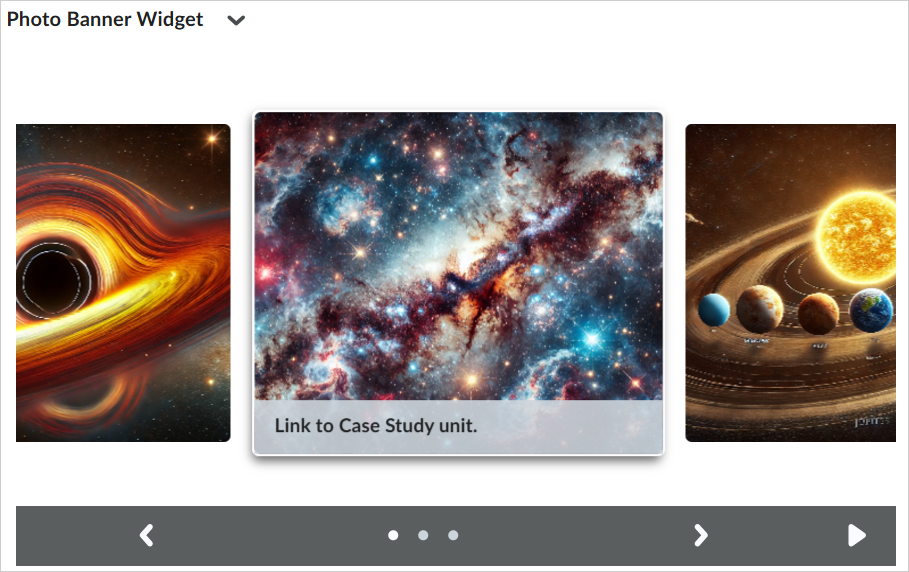
Use the Photo Banner widget to display course related images.

Figure: Use the Photo Banner widget to display course related images and link to specific course content.
Use this widget when:
- You have image heavy content: If your course relies significantly on sharing image-based content, consider updating the photo banner to highlight scheduled content. For example, if this week’s History lesson is focused on the Tudors, you may want to include pictures of each of the monarchs. Or if this month’s content shares tips to feng shui your workspace, you can include images that capture those best practices.
- You ask your learners to collect images: When you have learners capturing images of their work or experiences, consider using the Photo Banner widget to curate the best examples, highlight learner contributions, and inspire peers.
- You have visuals to support learning: When learning materials can be presented visually, post a job aid, diagram, or infographic in the Photo Banner and link it to the relevant content in your course for more information.
- Your in-class activities are photo-worthy: When moments of exploration, collaboration, and discovery are happening in person, consider capturing those learning experiences and sharing the photos.

|
Important: To manage custom language terms for the Photo Banner widget, you must contact your administrator to select the WebComponentsTool Package and homepage-widget-expansion-pack Collection. For more information, refer to Customize language terms.
|
Add images to the Photo Banner Widget
You can upload your own image files to the Photo Banner widget.
To add images to Photo Banner
- In the Photo Banner widget, click the Actions icon (arrow) and select Configure this widget.
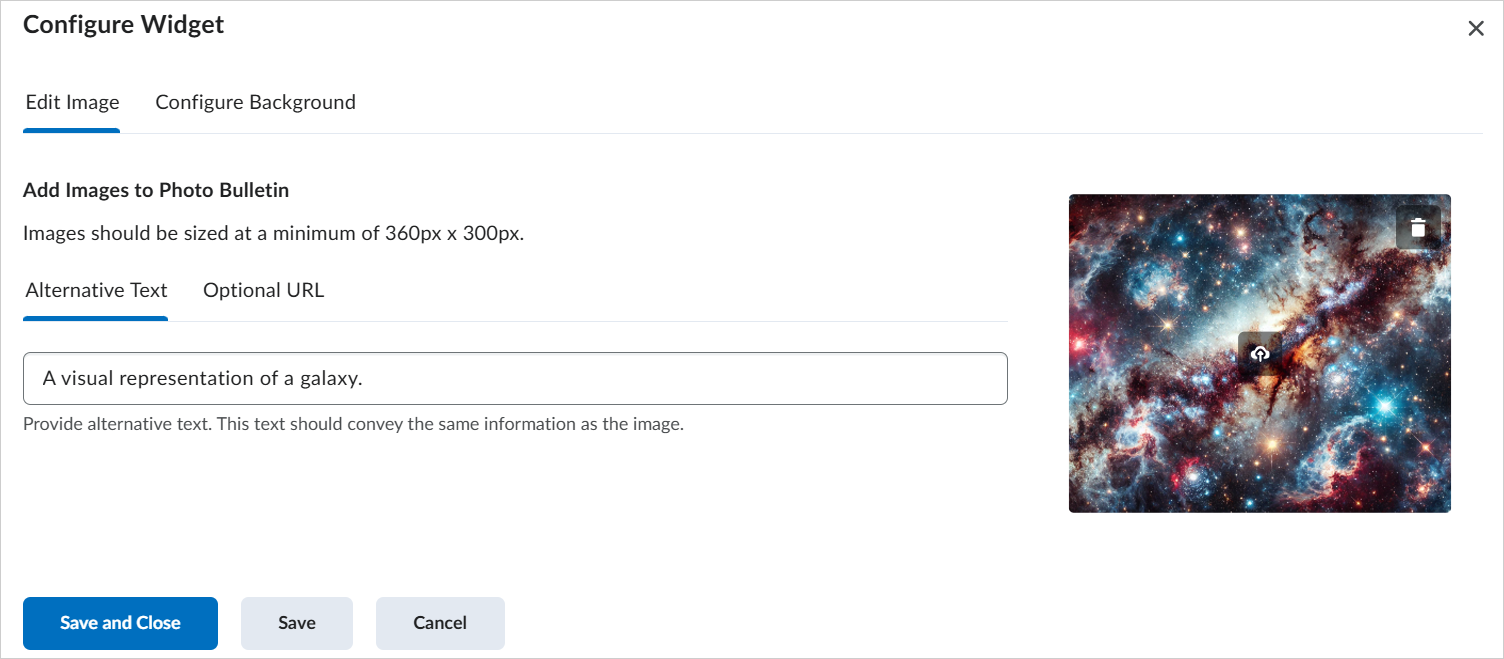
- From the Edit Image tab, click the Upload a New Image (+) icon.
- Click the Upload icon and select an image and click Open.
- Optionally enter the following information:
- Alternative Text: This provides text used for accessibility tools such as screen-readers.
- Optional URL: This adds a link below the uploaded image. The link can be to course content.

Figure: Use the Alternative Text and Optional URL options under Add Images to Photo Bulletin to configure your image before saving.
- Click Save and Close.
You have added images to your Photo Banner widget.
Remove images from the Photo Banner Widget
To update or replace images in the Photo Banner widget, you must first remove the existing ones.
To remove images from Photo Banner
- In the Photo Banner widget, click the Actions icon (arrow) and select Configure this widget.
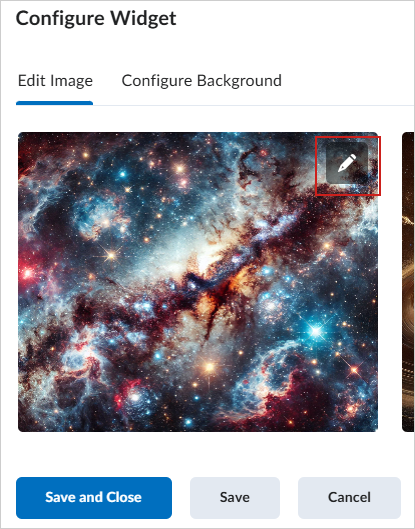
- From the Edit Image tab, locate the image you want to remove.
- Click the Edit Image icon (pencil).

Figure: Click the Edit Image icon (pencil) to open the image settings.
- Click the Delete Image icon and click Yes.
- Click Save and Close.
You have removed images from the Photo Banner widget.
Configure background settings in the Photo Banner Widget
In addition to adding photos, you can customize the appearance of the widget background.
To configure the background of Photo Banner
- In the Photo Banner widget, click the Actions icon (arrow) and select Configure this widget.
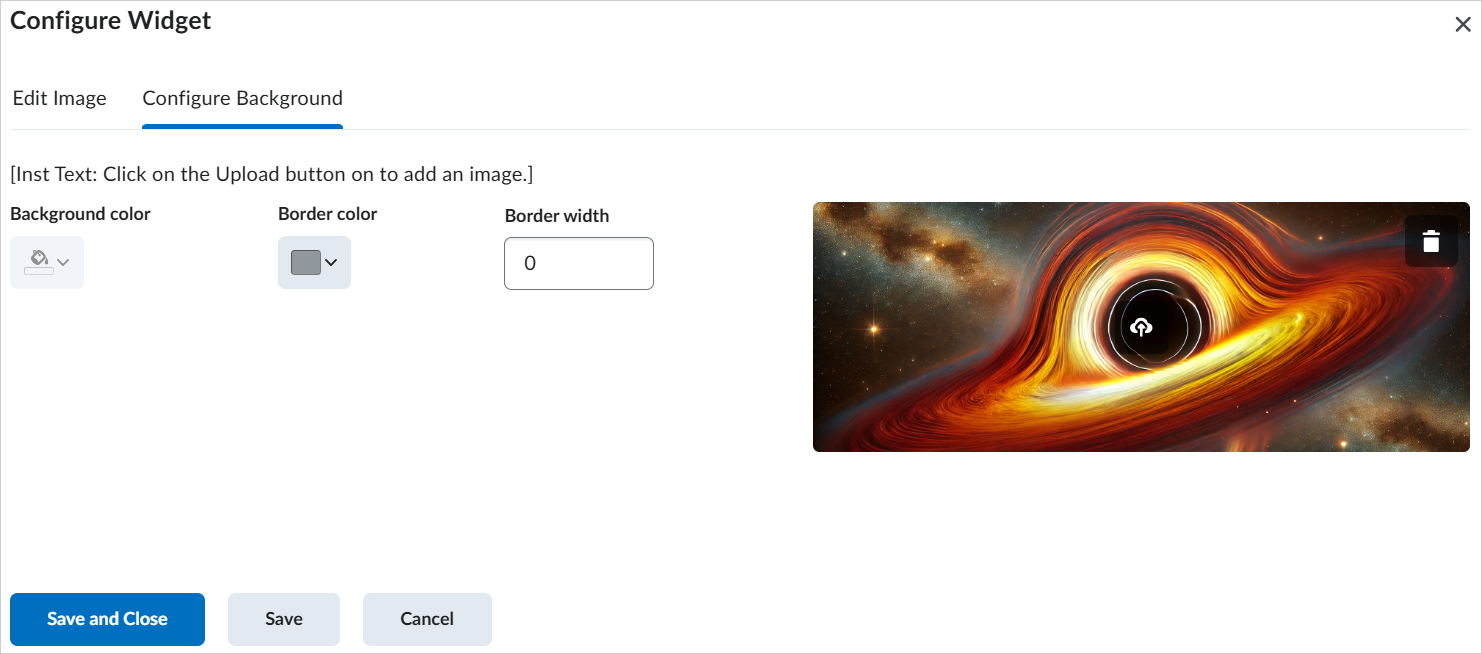
- From the Configure Background tab, do any of the following:
- If you want to use a background image, click the Upload icon. Select the image you want to use and click Open.
- Use the Background color and Border color selectors to change the color styles.
- Set the Border width of up to 10 pixels.

Figure: Use the Configure Background tab to set background settings.
- Click Save and Close.
You have configured the Photo Banner widget background appearance.

|
Note: If a Photo Banner Widget has no available data, you see an illustration and a clear message that no data is available yet. |
Video: Configure the Photo Banner Widget