When you log in to Brightspace, you will notice that your course homepage is broken up into two sections. In the top half, you will see navigation tools, such as your navbar. You can customize your navbar to surface the tools most relevant to you and your learners . Your navbar can be enabled to be text-based or icon-based.
Important: To customize your course navbar, create new navbars, add links to your navbar, or create navbar themes, you must be given Instructor > Navbar permissions. Contact your administrator for more information.

Figure: A text-based navbar.

Figure: An icon-based navbar.
Customize your navbar
- On your course navbar, navigate to the Actions for Navbar (...) drop-down menu.
- Click Edit This Navbar.
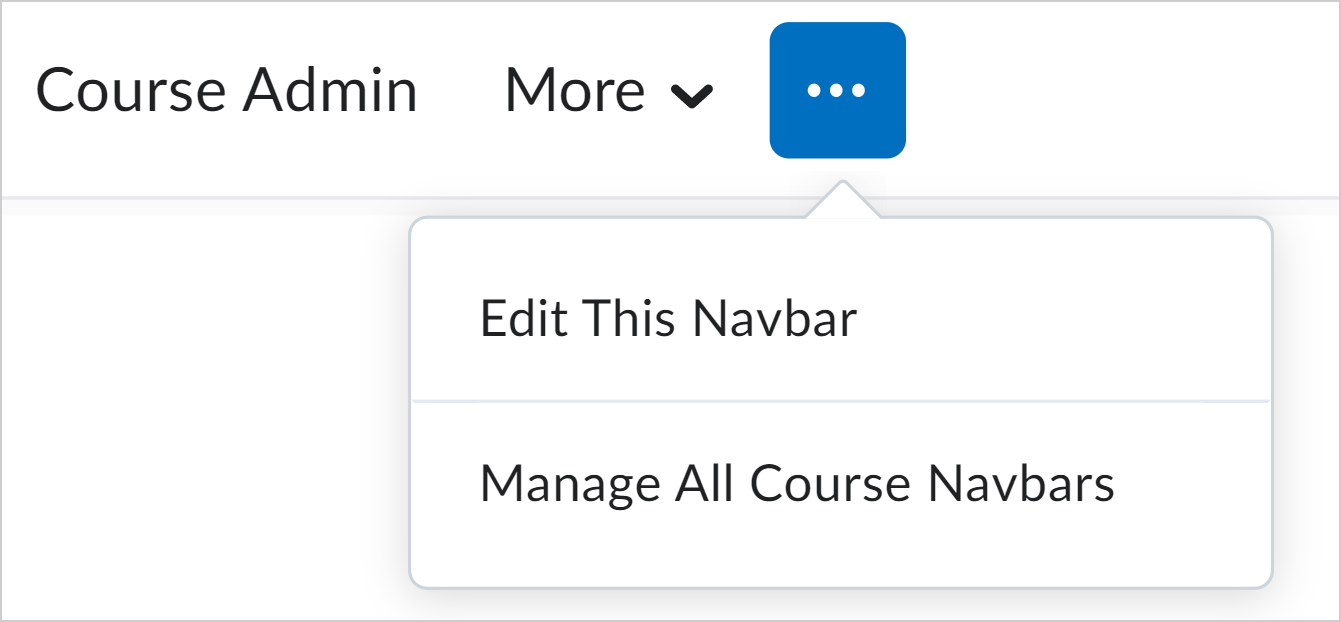
Figure: Click Edit This Navbar in the Actions menu.
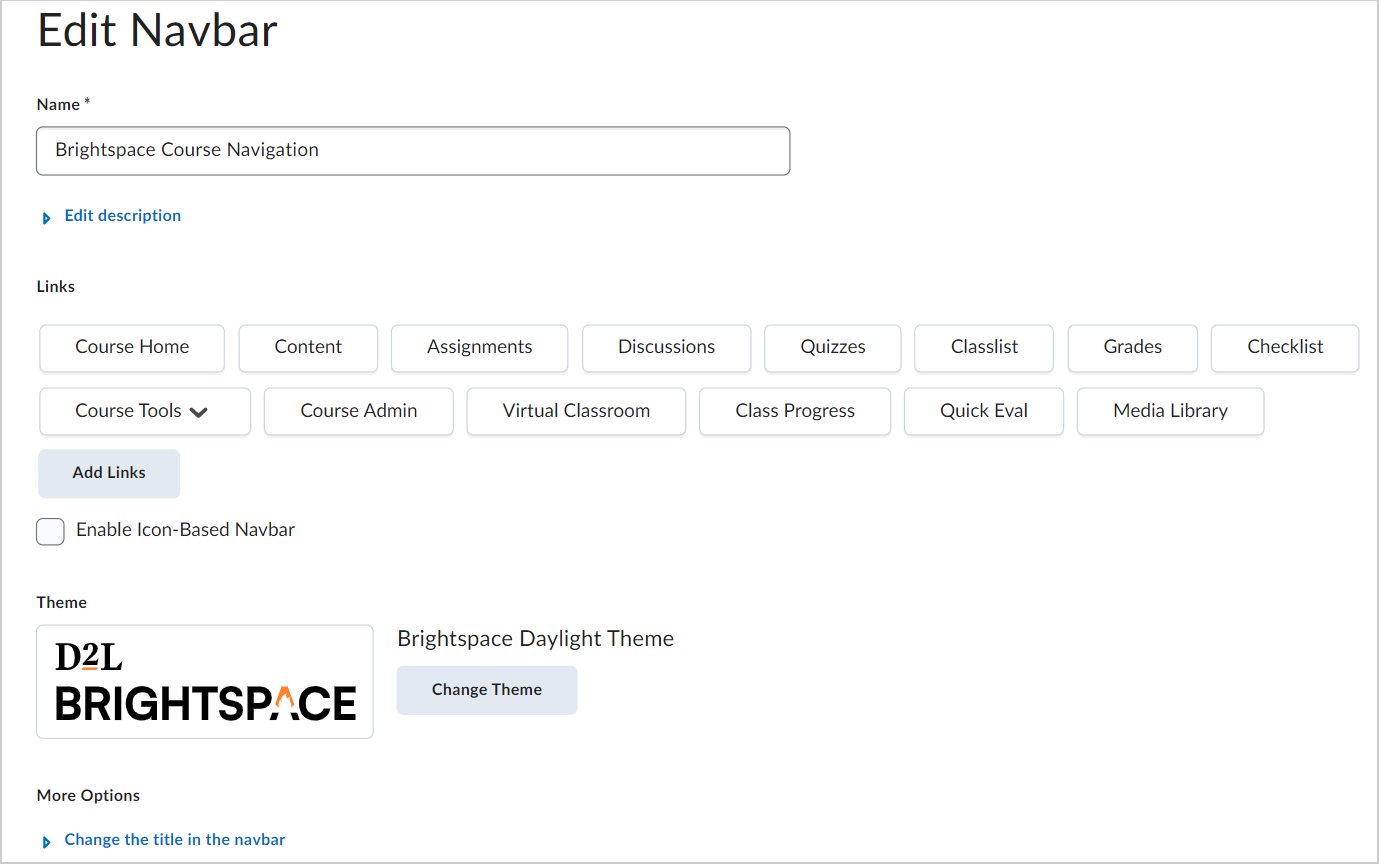
- On the Edit Navbar page, you can do one or more of the following:
- Name: Change the name of your course navigation.
- Add Links: Add different Brightspace tools to your navbar.
- Note: You can remove a tool from your navbar by hovering over the tool and clicking the X.
- Enable Icon-Based Navbar: Click the checkbox to change your navbar to icon-based. Deselect the checkbox to make your navbar text-based.
- Change Theme: Change your navbar's theme. For example, you can change your navbar's color.
- Click Save and Close to save and use your new navbar.
Create a navbar
You can create your own custom navbar that appears on your course homepage.
To create a navbar
- On the navbar, click Course Admin.
- Click Navigation & Themes.
- From the Navbar tab, click Create Navbar.
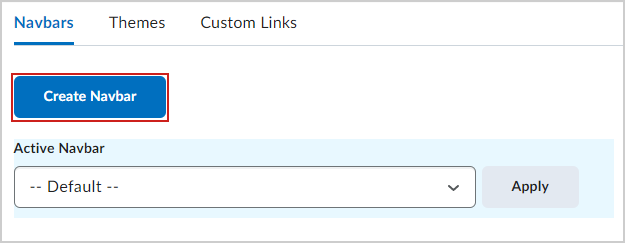
Figure: Click Create Navbar on the Navbars tab.
- From the Create Navbar page, do the following:
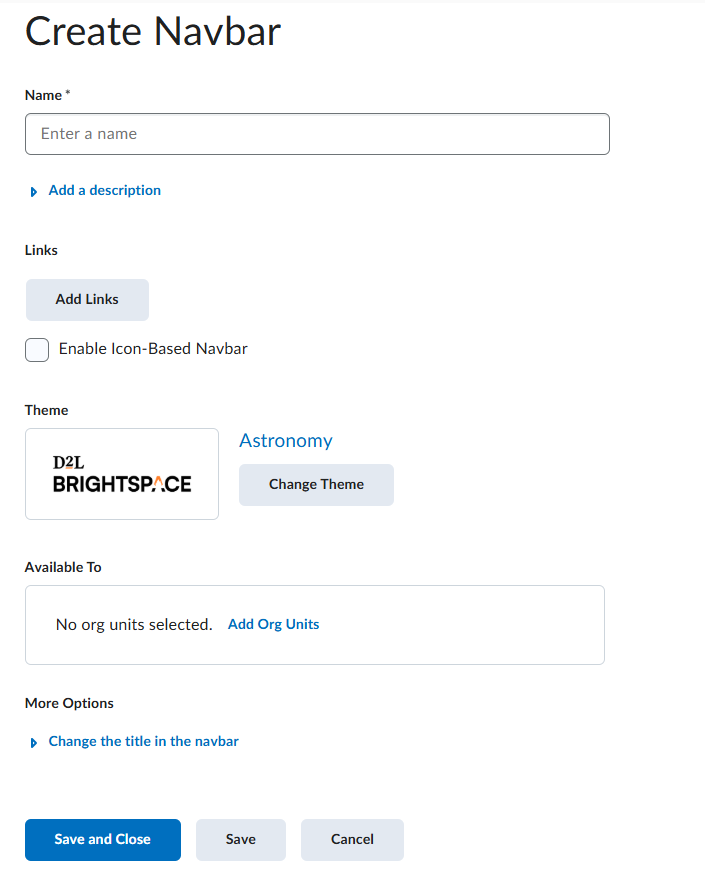
Figure: Edit your navbar on the Create Navbar page.
- Enter a Name for your custom navbar.
- If desired, click Add a Description and enter a description for your custom navbar.
- Under Links , click Add Links.
- Select your links, and click Add. The list of links available depends on the tools your organization uses, the custom links and link groups available, and the tools enabled for your course.
- If applicable, click to select Enable Icon-Based Navbar.
- If you want to change the theme of your navbar, click Change Theme. Select a new theme and click Update.
- To make this navbar available to specific org units, click Add Org Units.
Under More Options, click Change the title in the navbar and select from the following:- None
- Org Unit Name: Use the default Org Unit Name.
- Custom: Enter a replace string. For example:
- {OrgUnitId} - Identifier of the org unit
- {OrgUnitName} - Name of the org unit
- {OrgUnitCode} - Code for the org unit
- {OrgId} - Identifier of the organization
- {OrgName} - Name of the organization
Click Save and Close.
You have created a custom navbar. To preview your new navbar, from the Navbar tab, click the context menu next to your navbar and select Preview. Select Set as the default to apply your new navbar to your course.
Create and add a new custom link to the navbar
You can also add custom links to your course navbar. These include custom URLs and Quicklinks to existing course materials or third-party tools.
To add a new custom link to your navbar
- On the navbar, click Course Admin.
- Click Navigation & Themes.
- Click the Custom Links tab and click Create Link.
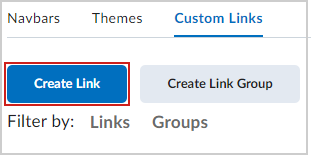
Figure: Click Create Link on the Custom Links tab.
- From the Create Custom Link page, enter the following:
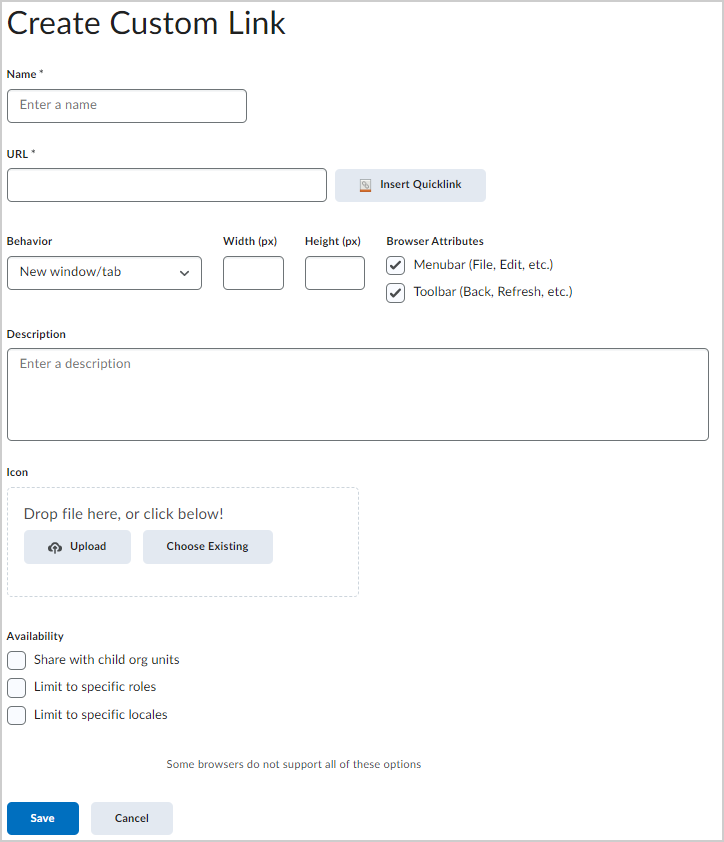
Figure: Make a custom link on the Create Custom Link page.
- Name: The name of the link you want to appear in the navbar.
- URL: Add the URL path the custom link follows or click Insert Quicklink to link to existing course material or third-party tools.
- Behavior: Select how the link opens when the link is clicked:
- Same window
- Same window no navbar
- New window/tab: Specify the Width (px) and Height (px) of the new window/tab.
- Under Browser Attributes, specify if you want the new window to include the Menubar (File, Edit, etc.), or the Toolbar (Back, Refresh, etc.) or neither of these options.
- Description: Provides an optional description of the custom link.
- Icon: An icon to use with the custom link.
- Availability: Determines the visibility of the custom link.
- To share with child organization units, select Share with child org units.
- To limit the visibility of the custom link to specific roles, select Limit to specific roles and then select the roles.
- To limit visibility of the custom links to users with specific locales, select Limit to specific locales and then select the locales
- Click Save.
A new custom link is created and added to your navbar.
Create and add custom link groups to your navbar
Custom link groups are multiple links grouped together. You can create custom link groups and use effective link group names to suggest relationships or common features each group shares. For example, you could create an Assessments link group that contains links to the Quizzes, Assignments, Surveys, and Self Assessments tools.
When you create a custom link group and add it to a navbar link area, the link group appears as a drop-down menu labeled with the custom link group name.
To create custom link groups
- On the navbar, click Course Admin.
- Click Navigation & Themes.
- From the Custom Linkstab, click Create Link Group.
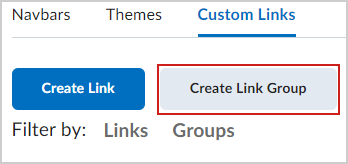
Figure: Click Create Link Group on the Custom Links tab.
- From the Create Custom Link Group page, do the following:
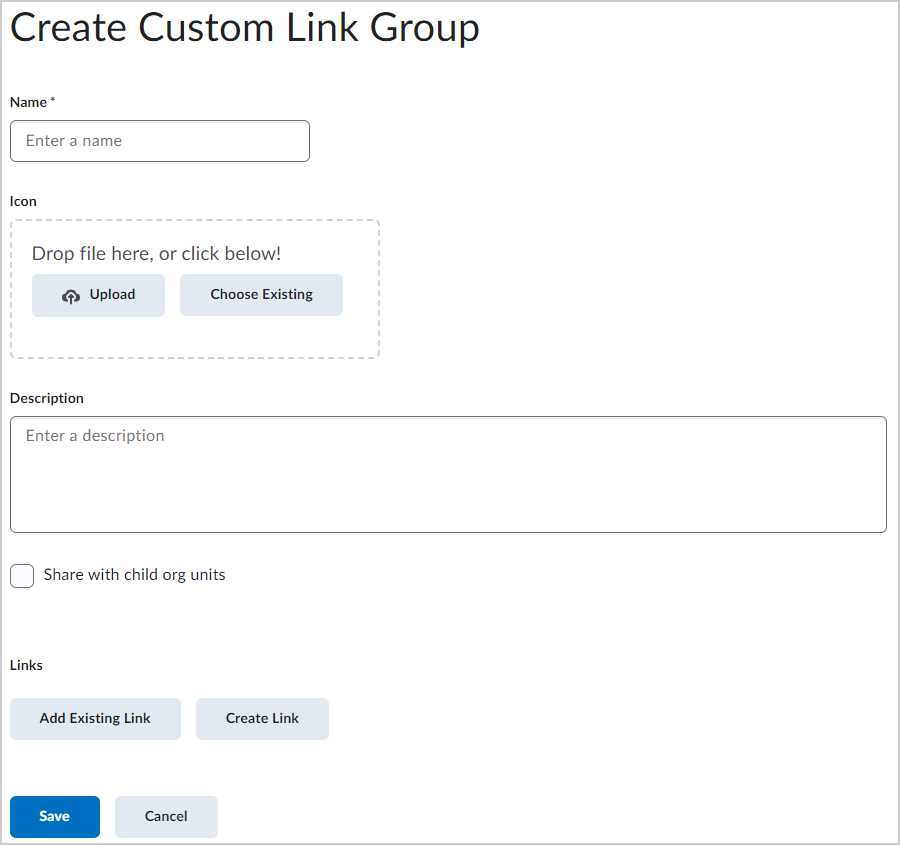
Figure: Make a custom link group on the Create Custom Link Group page.
- Enter a Name for your custom link group.
- To apply an icon to your custom link group, do any of the following:
- Drag and drop an image file.
- Click Upload.
- Click Choose Existing to apply an image that is already uploaded to Brightspace.
- If desired, enter a Description for your link group.
- Select Share with child org units if applicable.
- Under Links, do any of the following:
- To add existing links to the group, click Add Existing Link. Select the links you want to add and click Add.
- Click Create Link to create a new link.
- Click Save.
A new custom link group is created.
To add the custom link group to a navbar
- On your course navbar, navigate to the Actions for Navbar (...) drop-down menu.
- Select Edit this Navbar.
- From the Edit Navbar page, click Add Links.
- From the Add Links dialog, click the Custom Groups tab.
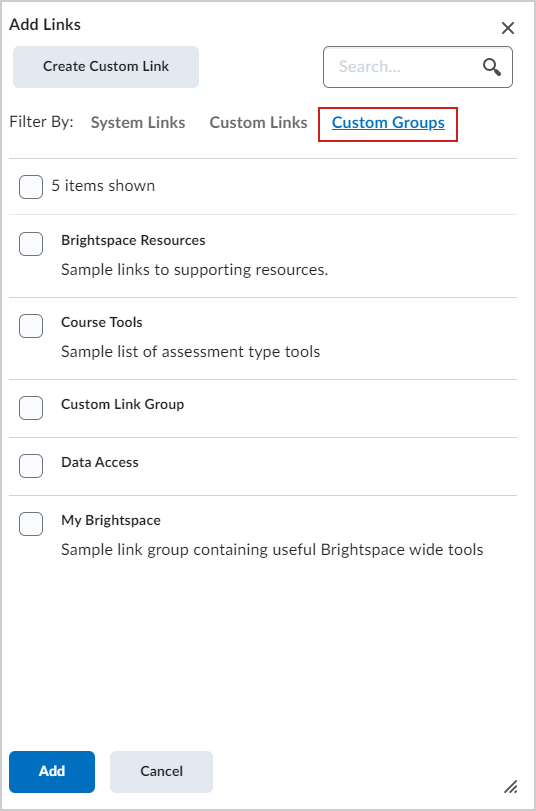
Figure: Create Custom Groups in the Add Links dialog.
- Select any custom link groups you want to add to your navbar.
- Click Add and then click Save and Close.
The custom link group is added to your navbar.
Change your course navbar
You can select and apply a different navbar to your course.
To change your course navbar
- On the navbar, click Course Admin.
- Click Navigation & Themes.
- From drop-down list under the Active Navbar section, select a navbar for your course.
- Click Apply.
Create a theme
Themes enable you to customize and brand the look and feel of navbars and page backgrounds. Themes do not control the type of links navbars can contain. When you create a theme, there are two colors in the theme you can configure to ensure a consistent user experience and adhere to your organization's branding guidelines:
- Primary Color: Modifies the background of the link area in the navbar and units in Lessons (each lesson and folder in a unit displays the same color, only lighter), if enabled.
- Accent Color: Modifies the thin color strip above the navbar.
Notes:
- If the Primary Color is not specified, the default “rainbow” colour scheme is used in Lessons, if enabled.
- At the course offering level, all themes listed on the Themes page contain information about whether a theme is shared from another org unit and the name of the org unit sharing the theme.
- If your permissions do not allow you to create themes, you must select from existing themes or use the default theme. Themes created in an org unit are automatically shared with child org units.
- Themes created at the course level cannot be shared with other courses, but you can create and store them inside a course template to make them available in course offerings that use the course template.
- The Theme Preview area displays changes as you make them.
To create a theme
- On the navbar, click Course Admin.
- Click Navigation & Themes.
- From the Themes tab, click Create Theme.
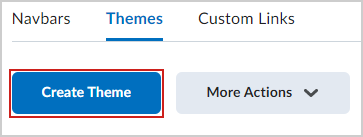
Figure: Click Create Theme in the Themes tab.
- From the Create Theme page, do the following:
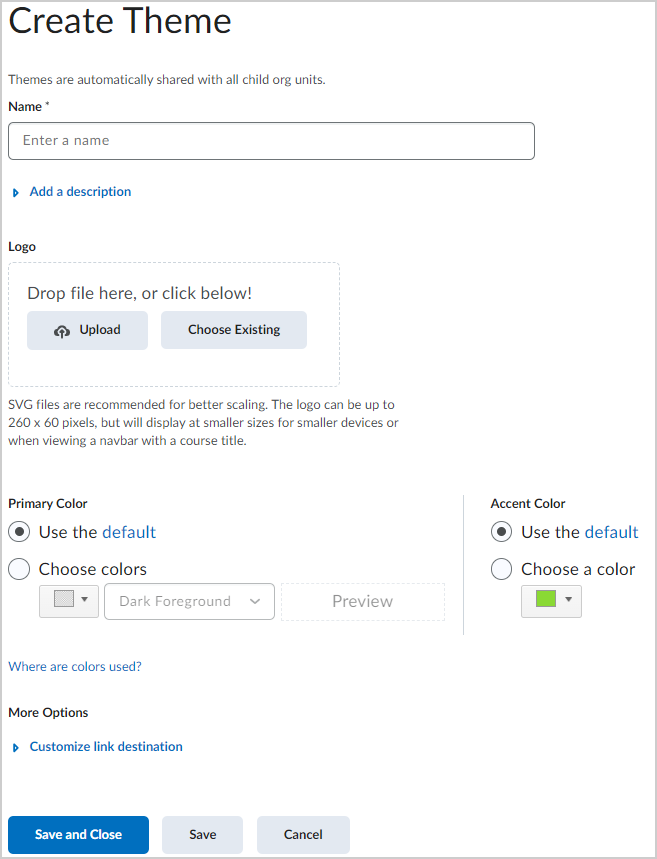
Figure: Make you theme on the Create Theme page.
- Enter a Name and Description for your theme.
- To apply a Logo to your theme, do any of the following:
- Drag and drop an image file.
- Click Upload.
- Click Choose Existing to apply an image that is already uploaded to Brightspace.
Note: SVG files are recommended for better scaling. The logo can be up to 260 x 60 pixels, but displays at smaller sizes for smaller devices or when viewing a navbar with a course title.
- Choose a Primary Color to modify the background of the link area in the navbar and units in Lessons (each lesson and folder in a unit displays the same color, only lighter), if enabled.
- Choose an Accent Color to modify the thin color strip above the navbar.
- If you want to customize the link destination, click the context menu and select the correct destination from the options in the menu.
Click Save and Close.
Your new theme is created. To make your theme the default theme for your course, click the context menu next to your theme and select Make Default.
Video: Create a theme
Delete a theme
You can delete a theme from Brightspace.
Note: You cannot delete a default theme or a theme shared to you from the organization, a parent course, or department. If you want to delete a theme you are prompted to choose a replacement theme for the navbars using the theme you want to delete. If a theme with an identical layout does not exist, you are not allowed to delete the theme until you have created an acceptable replacement.
To delete a theme
- On the navbar, click Course Admin.
- Click Navigation & Themes.
- On the Themes page, from the context menu of the theme you want to delete, click Delete.
- In the Choose a Replacement dialog, from the drop-down list, select a new theme.
- Click Delete.
Changing the color in the navbar
The color of the strip across the top of the screen is set from the Themes tab in the Navigation and Themes tool. You can select the Organization Default Color or set a unique color for the top color strip for each theme. If you do not set a unique color for a theme, the top color strip and link area defaults to the Organization Default Color.
Note: It is good practice to use a color that is WCAG compliant to ensure the best possible color contrast with white text.
To set a unique color for a theme
- Navigate to Course Admin and then click Navigation & Themes.
- On the Themes tab, click Create Theme.
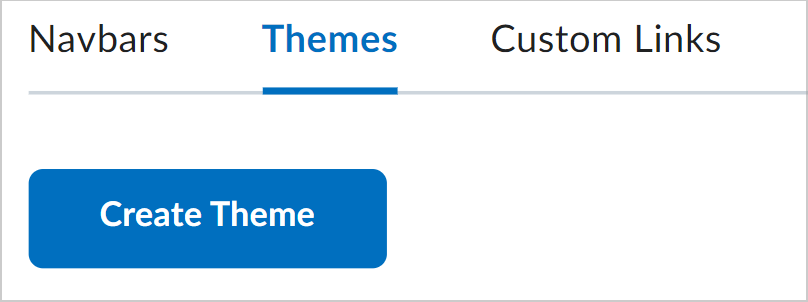
Figure: Click Create Theme in the Themes tab.
- You can choose to do the following:
- Enter a name for the new theme.
- Under Primary Color, you can either use the default primary color or select Choose colors and select a primary navbar color.
- To set the navbar text to be black, select Dark Foreground or to set the navbar text to be white, select Light Foreground.
- Under Accent Color, you can either use the default accent color or select Choose a color and select an accent color.
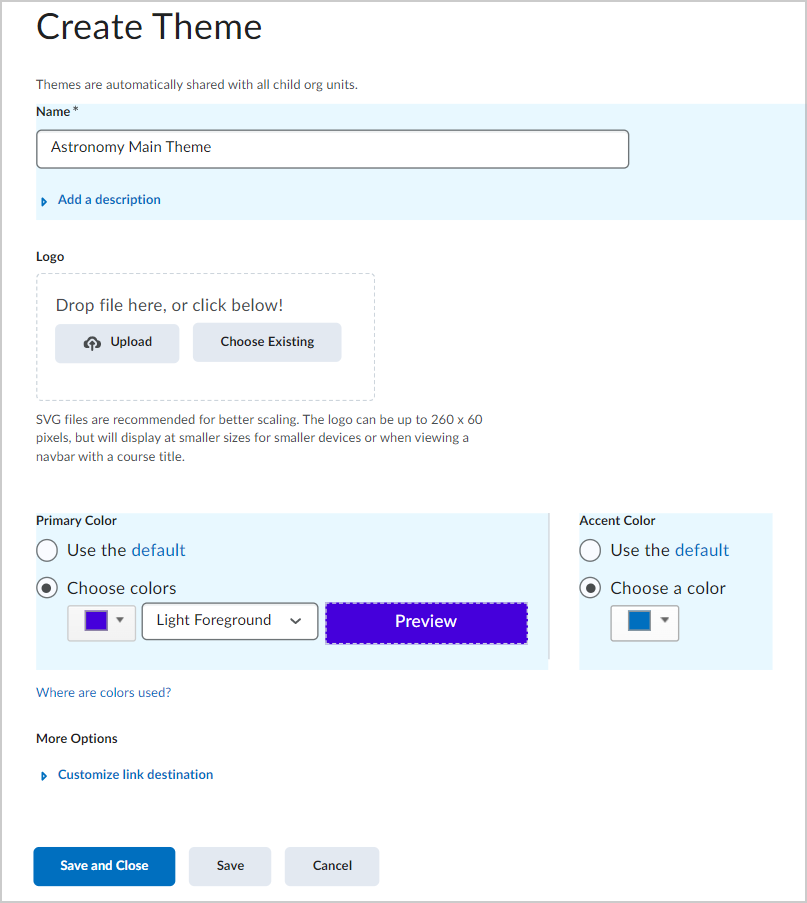
Figure: Customize your theme on the Create Theme page.
- Click Save and Close.
- Add the theme you just created to your navbar.
- On the Navbars tab, to edit your Navbar, click on its name.
Note: You cannot edit the default navbar set by your organization. You must create a new navbar if you want to change the color of the navbar. - Select Change Theme
- Find the theme you created and select it.

Figure: Click Change Theme on the Edit Navbar page.
- Click Save and Close.