The Checklist tool helps you create and manage checklists for learners. A checklist can include required or recommended assignments, readings, videos, and other activities that learners can mark as complete. You can organize items into categories, assign due dates, and link directly to checklists from within content modules or make them available from the navbar. Checklists help learners track their progress and stay organized throughout a course.
Create a checklist
A checklist contains one or more categories. A category is a top-level item on a checklist and can be used as a standalone list item or used to group related second-level checklist items. You can use a category to group related tasks, such as weekly activities or assignment types.

|
Note: You must create at least one category before you can add checklist items. Category and item descriptions have a character limit of 65,536 characters. |
- Navigate to Checklist. If Checklist is not available in your navbar, you can access it from Course Admin > Checklist.
- Click New Checklist.
- Enter a Name for your checklist, and Description (optional) and then click Save.You are returned to the Edit Checklist page.
- On the Edit Checklist page, in the Categories and Items area, click New Category. Enter the category Name and Description (optional), and then click Save.You are returned to the Edit Checklist page.
- To add an item to the checklist, click New Item.
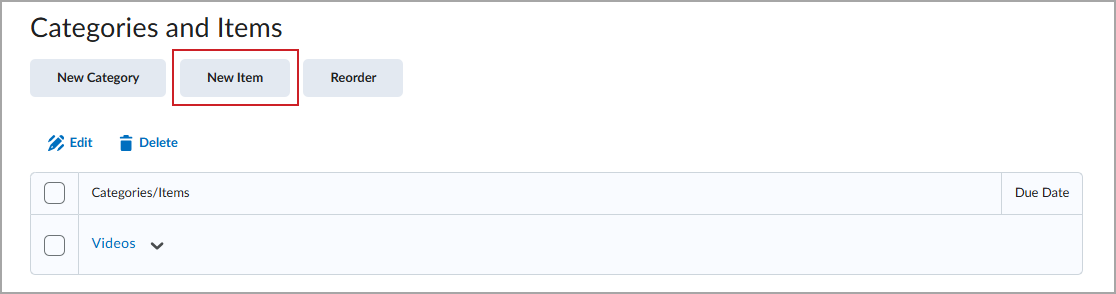
- From the Category drop-down list, select the category for the item. Enter your item Name. Configure any optional fields:
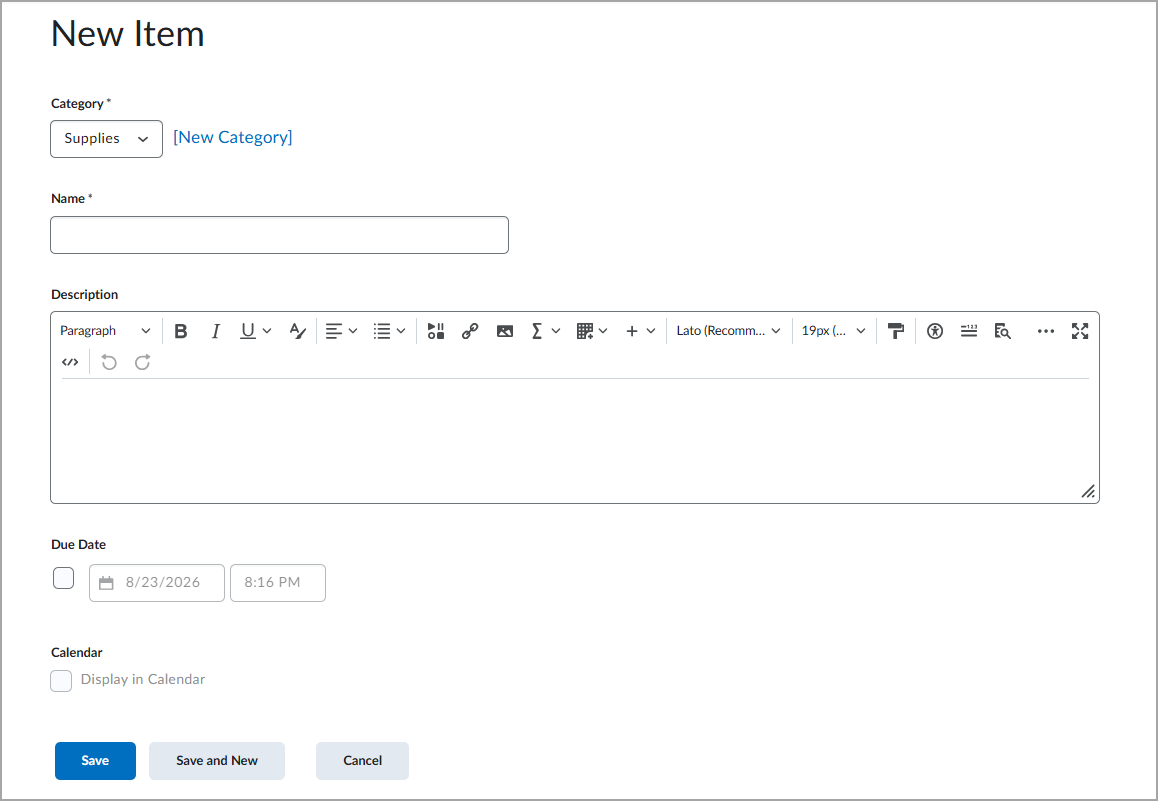
- Enter a Description for your item.
 | Tip: Use Quicklinks in a checklist item's description to provide learners with direct access to related course content. For more information on Insert Quicklinks, refer to About Brightspace Editor. |
- Select Due Date, and specify a due date and time for the item.
| Note: The default due date for a checklist item is one month from the current date. |
- Select Display in Calendar to display the item's due date in the learner's calendar.
-
Repeat steps 4 and 5 to add additional categories and items.
- Click Save and Close.
Make a checklist available to learners
You can make checklists available to learners by linking to a checklist in course content, adding a checklist to a module, or by making the Checklist tool available from the navbar. This topic describes how to add a checklist to course content. For information about adding the Checklist tool to the navbar, refer to Customize your course navbar.
Add a checklist to a module
Checklists are always available from the Checklist tool, but you can include them directly in your course modules.
- Navigate to Content.
- Select the module you want to add the checklist to and click Add Existing.
- Click Checklist.
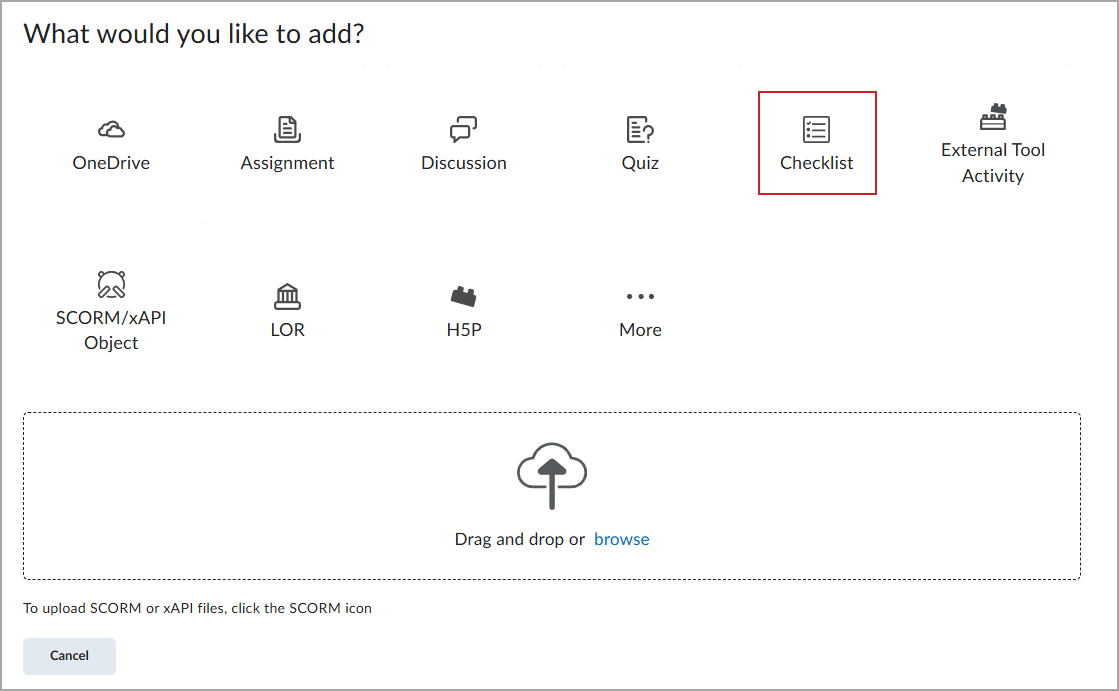
- Select the checklist that you want to add.
The checklist is added to the module.
Link to a checklist using Quicklink
When you insert a checklist as a Quicklink, learners can click the link to open the checklist within the content window.
- Navigate to the content where you want to insert the checklist link and then open it for editing.
- Place the cursor in the Brightspace Editor where you want the link to appear, and then click the Insert Quicklink icon.
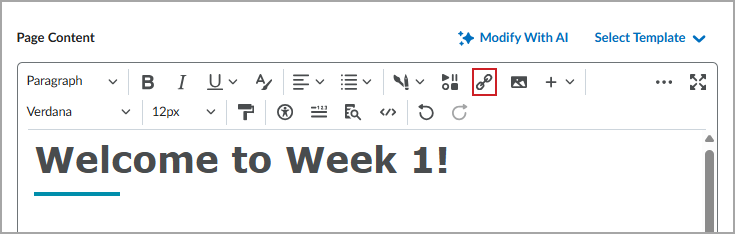
- Select Checklist.
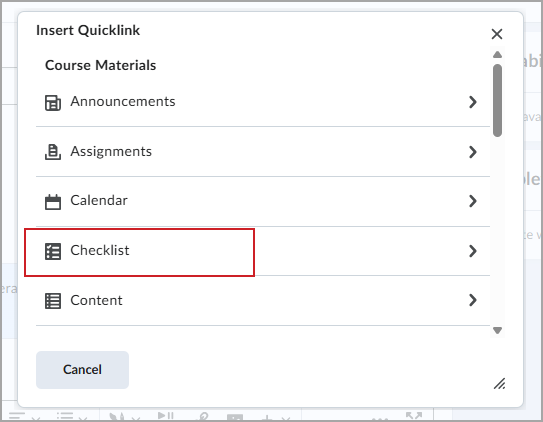
- Select the checklist you want to link. The checklist link appears in the editor.
- Optional: Click the Quicklink and then click the Edit link icon. In the Open in section, select Current Window, and then click Apply.
| Note: The Current Window option allows the learner to open the checklist in the current window so learners can continue working in Content instead of being redirected to the Checklist tool in a new tab. |
- Click Save and Close.
Edit categories and items in a checklist
You can reorder and make changes to categories and items in your checklist.
Edit an item or category
- Navigate to Checklist.
- Click the checklist that you want to modify.
- Select the item or category and make any changes.
- Click Save.
Bulk edit items and categories
- Navigate to Checklist.
- Click the checklist that you want to modify.
- Select two or more items using the check boxes and click Edit.
- On the newly opened Edit Multiple Items page, make changes to the fields as needed.
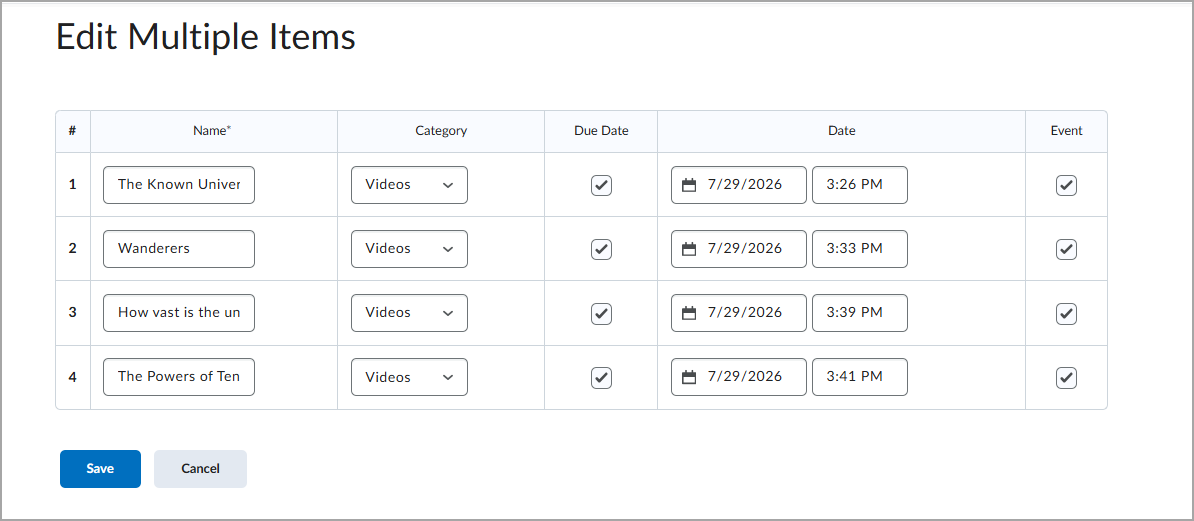
| Note: The Event field corresponds to the Display in Calendar field. |
- Click Save.
Reorder a checklist
You can reorder categories and checklist items to better organize your checklist.
- Navigate to Checklist.
- Click the checklist that you want to modify.
- On the Edit Checklist page, in the Categories and Items area, click Reorder.
- Use the Sort Order drop-down lists to change the position of categories and items.
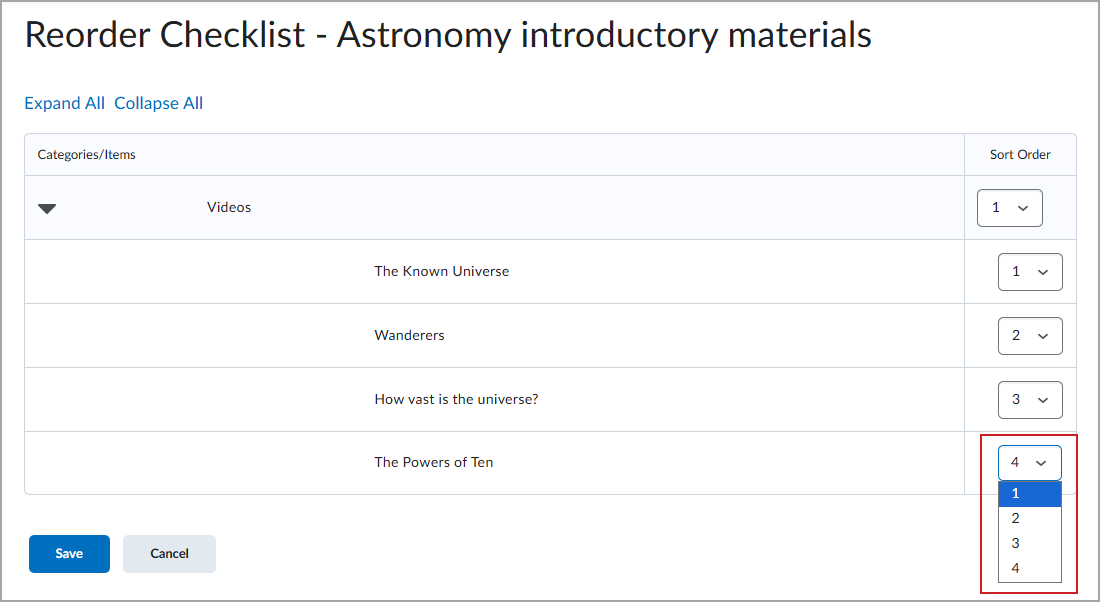
- Click Save.
Copy a checklist
- Navigate to Checklist.
- Open the Actions menu for the checklist you want to copy, and click Copy.
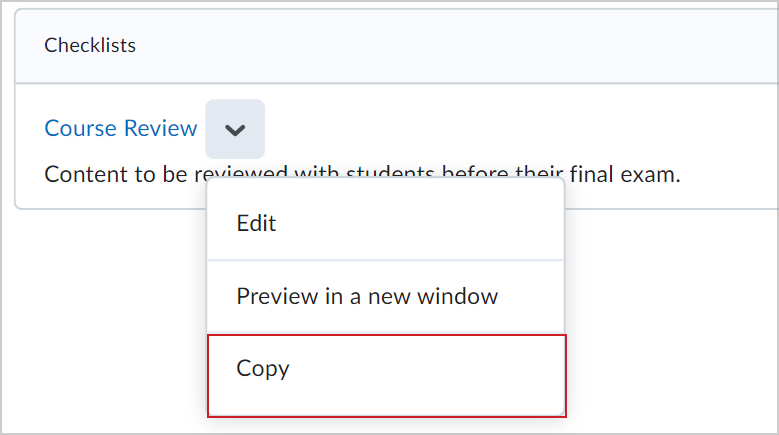
A new checklist is now visible at the bottom of the list of checklists with the title Copy of {original checklist name}.
Set release conditions for a checklist
You can configure release conditions to make a checklist available only after learners complete specific activities, such as viewing content or submitting an assignment.
- Navigate to Checklist.
- From the context menu of the checklist for which you want to set release conditions, click Edit.
- In the Restrictions tab, do any of the following:
- Click Attach Existing, then select the check box for any condition you want to attach. Click Attach.
- Click Create and Attach, then select a Condition Type from the drop-down list. Complete any additional Condition Details that appear and then click Create.
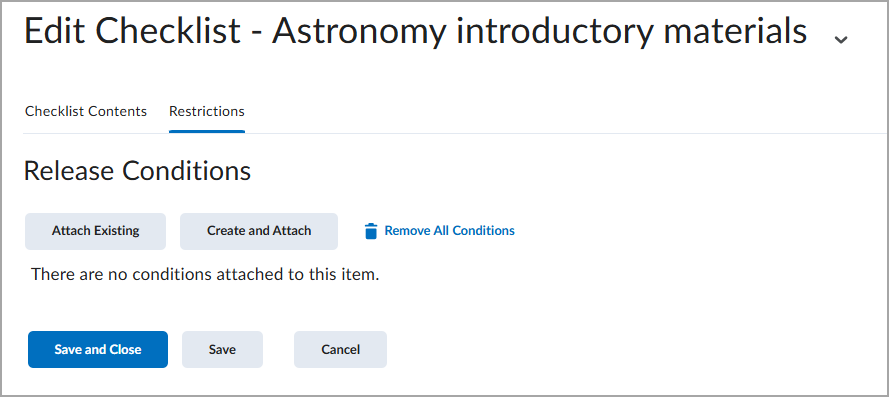
- To set how accessing the checklist is controlled, select All conditions must be met or Any condition must be met from the drop-down list.
- Click Save and Close.
|
Tip: Use the Completed checklist condition type to create a guided learning path by making each checklist available only after learners complete the previous one. |