Use the Content tool to post and organize course content so that users can use information about course expectations, syllabus, lecture notes, and important dates.
Course materials you post in Content can include documents, images, media files, CaptureCast presentations, URL links, and existing course activities. You can add release conditions, grade items, and learning objectives to topics to ensure users navigate through course materials while fulfilling specific course requirements and learning expectations.
You can also monitor class and user progress as learners work through course content by setting automatic (determined by the system) or manual (determined by the learner) completion tracking.
Visual tour of Classic Content

- Overview: When users access a course's Content tool for the first time, the first page they land on is the Overview. Use the Overview page to orient users to the course, content materials, and course expectations. If you decide not to add anything to this page, the Overview link and page is hidden from learners' view.
- Bookmarks: Topics you bookmark appear in a list on the Bookmarks page. The number beside the Bookmarks link indicates how many bookmarks you have.
- Table of Contents: Lists all modules available in your course. The number beside each module name in the Table of Contents panel indicates the number of topics you have set completion tracking for. The number beside the Table of Contents link indicates the total number of topics you have set completion tracking for. Use the number totals to determine the task load being put on learners per module.
- Course content administration options: Located on the Table of Contents page, these options allow instructors to import and copy course content, bulk Course Admin content properties, manage course files, and view reports on course content.
Visual tour of Content
In the Content interface, the table of contents for the course is represented by a familiar tree structure, allowing you to easily organize and navigate course components (lessons, units, folders, and materials).
Arrow icons appear on tiles containing additional course components, indicating that they can be expanded by clicking on them.
Hovering over a component displays a tooltip. This is useful if the complete heading is too long to display in the table of contents.
Each material type displays a unique icon, making it easier to visually distinguish materials.
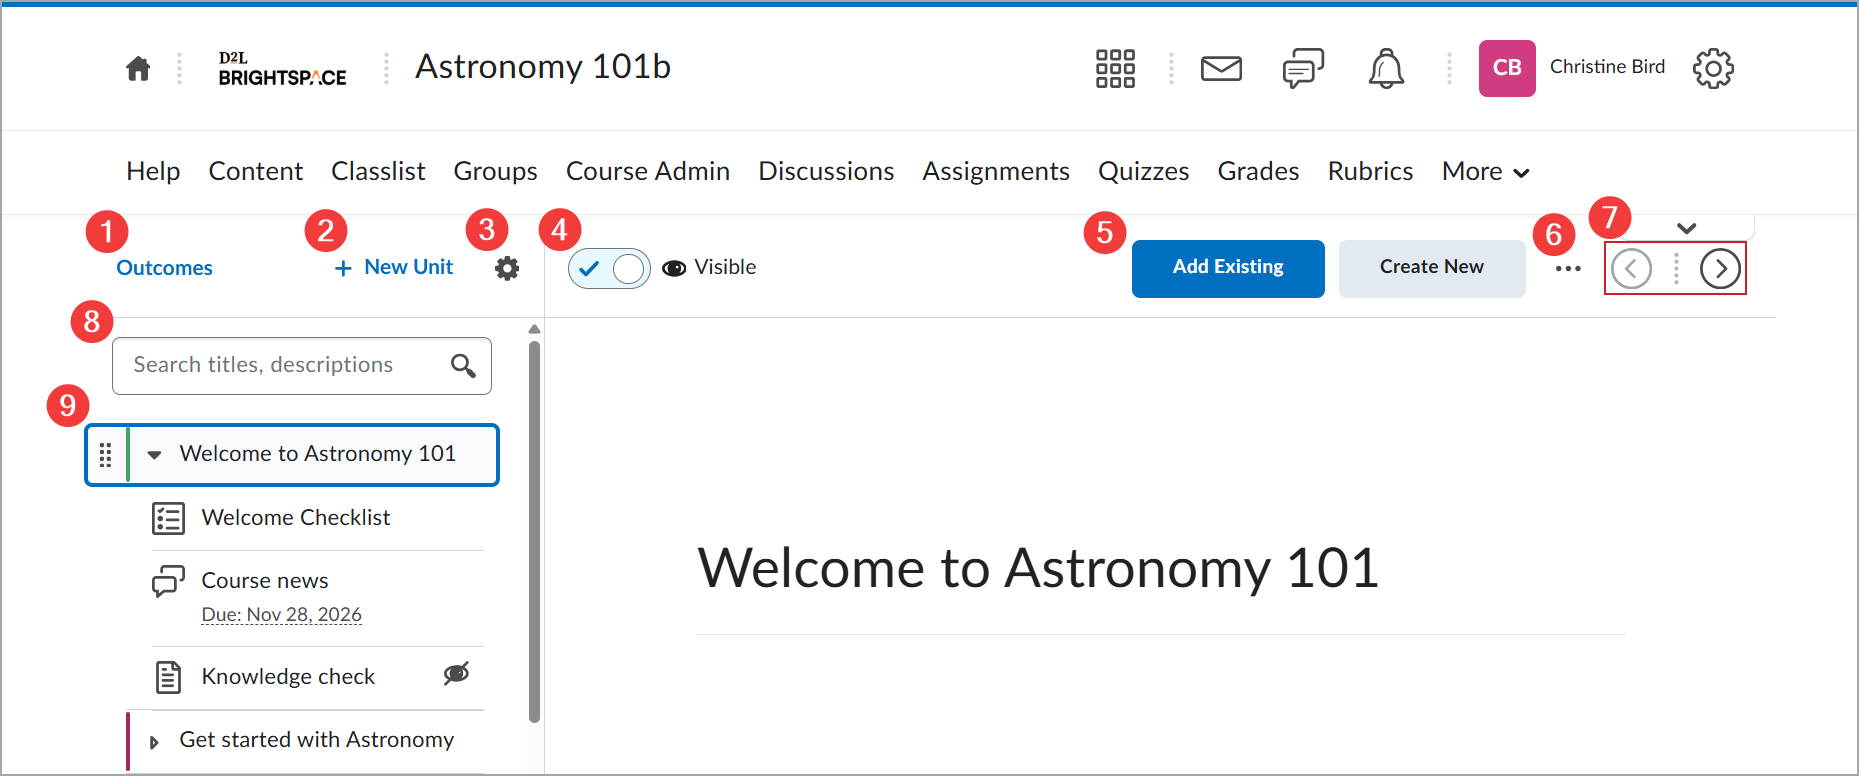
- Outcomes: A shortcut to the Outcomes Coverage tool. The term displayed is controlled by the d2l.Languages.Terminology.LearningOutcomes configuration variable.
- New unit: Click New Unit to add a new unit to the course.
- Course Options
 Menu: Includes the options to Preview as a Student, Manage Dates, and View Reports.
- Visibility toggle: Indicates whether units, lessons, and materials are visible or hidden. Visibility icons also appear next to units in the table of contents. To change the visibility of a unit, lesson, or material, select the item, and then select the visibility toggle: Visible (
 icon) or Hidden (
 icon).
- Add Existing and Create New: display full-screen pages with options for creating new materials, adding a new lesson, or inserting existing materials.
- Options Menu: Click the Options (...) menu and select Edit for a unit, lesson, or folder, you can update its title, availability and due dates, and description. For materials, you can update their titles, properties, and dates.
The Options (...) menu also allows you to view outcomes that align to a unit, lesson, or material; make units, lessons, and materials visible to or hidden from learners; organize materials using move and reorder features; and delete units, lessons, and materials. When you select course material in courses with Activity Feed on their homepage, the option to Post to Course Homepage is also available. Move to lets you move lessons, folders, and materials to a different unit. Reorder lets you organize lessons and materials within a unit. You can also use the drag and drop functionality in the table of contents to perform these actions. The selected tile displays handles indicating you can drag-and-drop the tile to rearrange it in the table of contents.
- Course Navigation: Use the navigation buttons to move between topics in the order they appear in the course content structure.
- Search titles, descriptions: Enter a search term to locate matching course content by title or description.
 | Note: Search results include only items that you can access. Items that otherwise match the search criteria do not appear in the results if they have a future start date or an end date that has passed. |
- View course structure: Click a unit to display its lessons and activities in the TOC.
Video: Content Experience Overview
Visual tour of Content with Immersive View enabled
Immersive view is an optional configuration that extends the Content experience by providing learners with a focused environment for viewing and navigating course content. When Immersive View is enabled, learners can access course content in a streamlined, full-width interface designed to minimize distractions and make it easier to move through learning materials. Immersive View includes enhanced navigation options that help learners understand where they are in the course and move between content without returning to the main Content page.
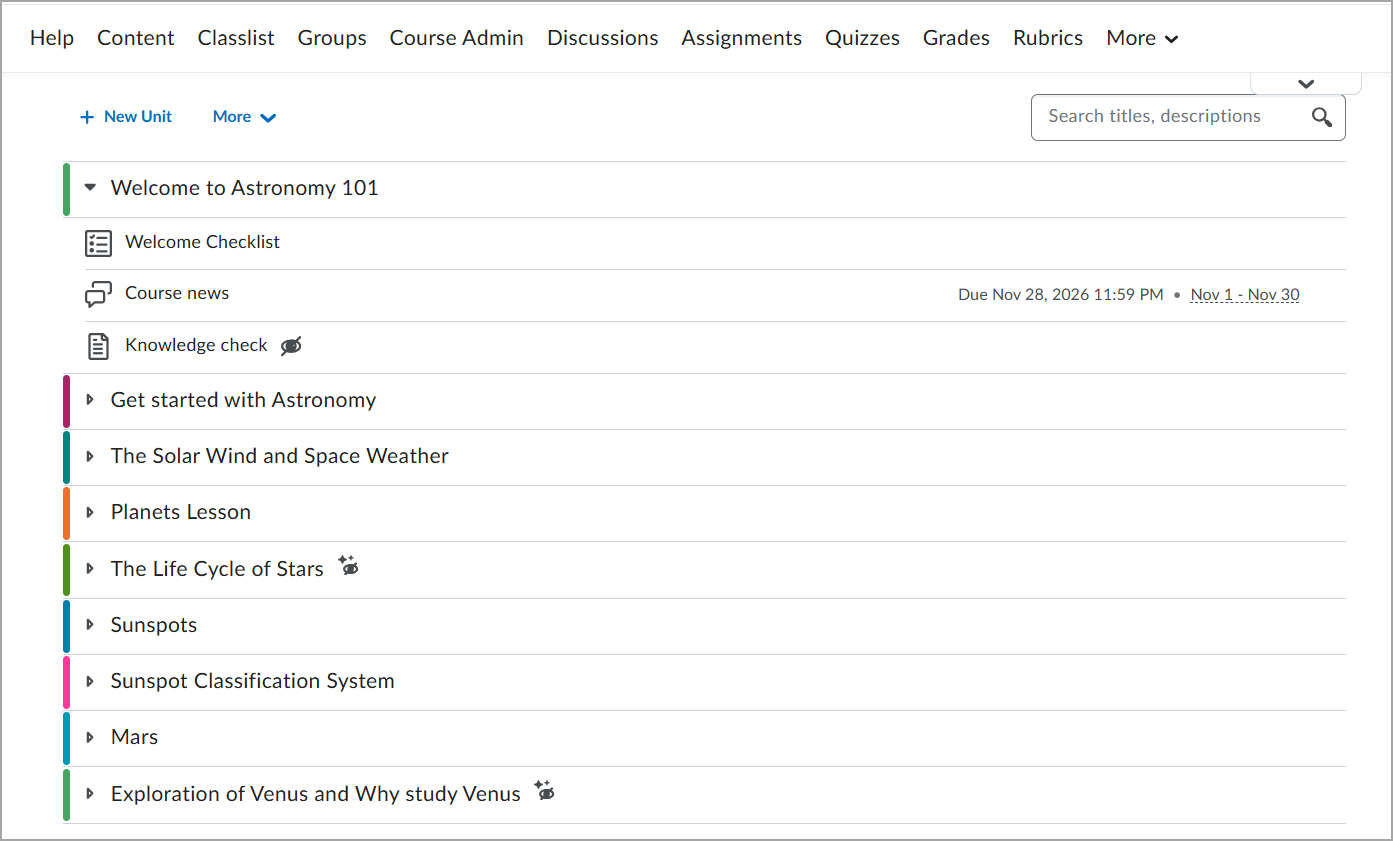
When you navigate to Content, the table of contents (TOC) displays as a full-width course landing page, providing learners with access to the course content structure. Click a unit or topic to launch the full-screen Immersive View experience.
|
Note: If the Content experience is enabled for your course, your administrator can enable Immersive View on a course-by-course basis. Immersive View is controlled by the d2l.Tools.Content.EnableImmersiveView (Org Unit) configuration variable. Contact your administrator for more information. |
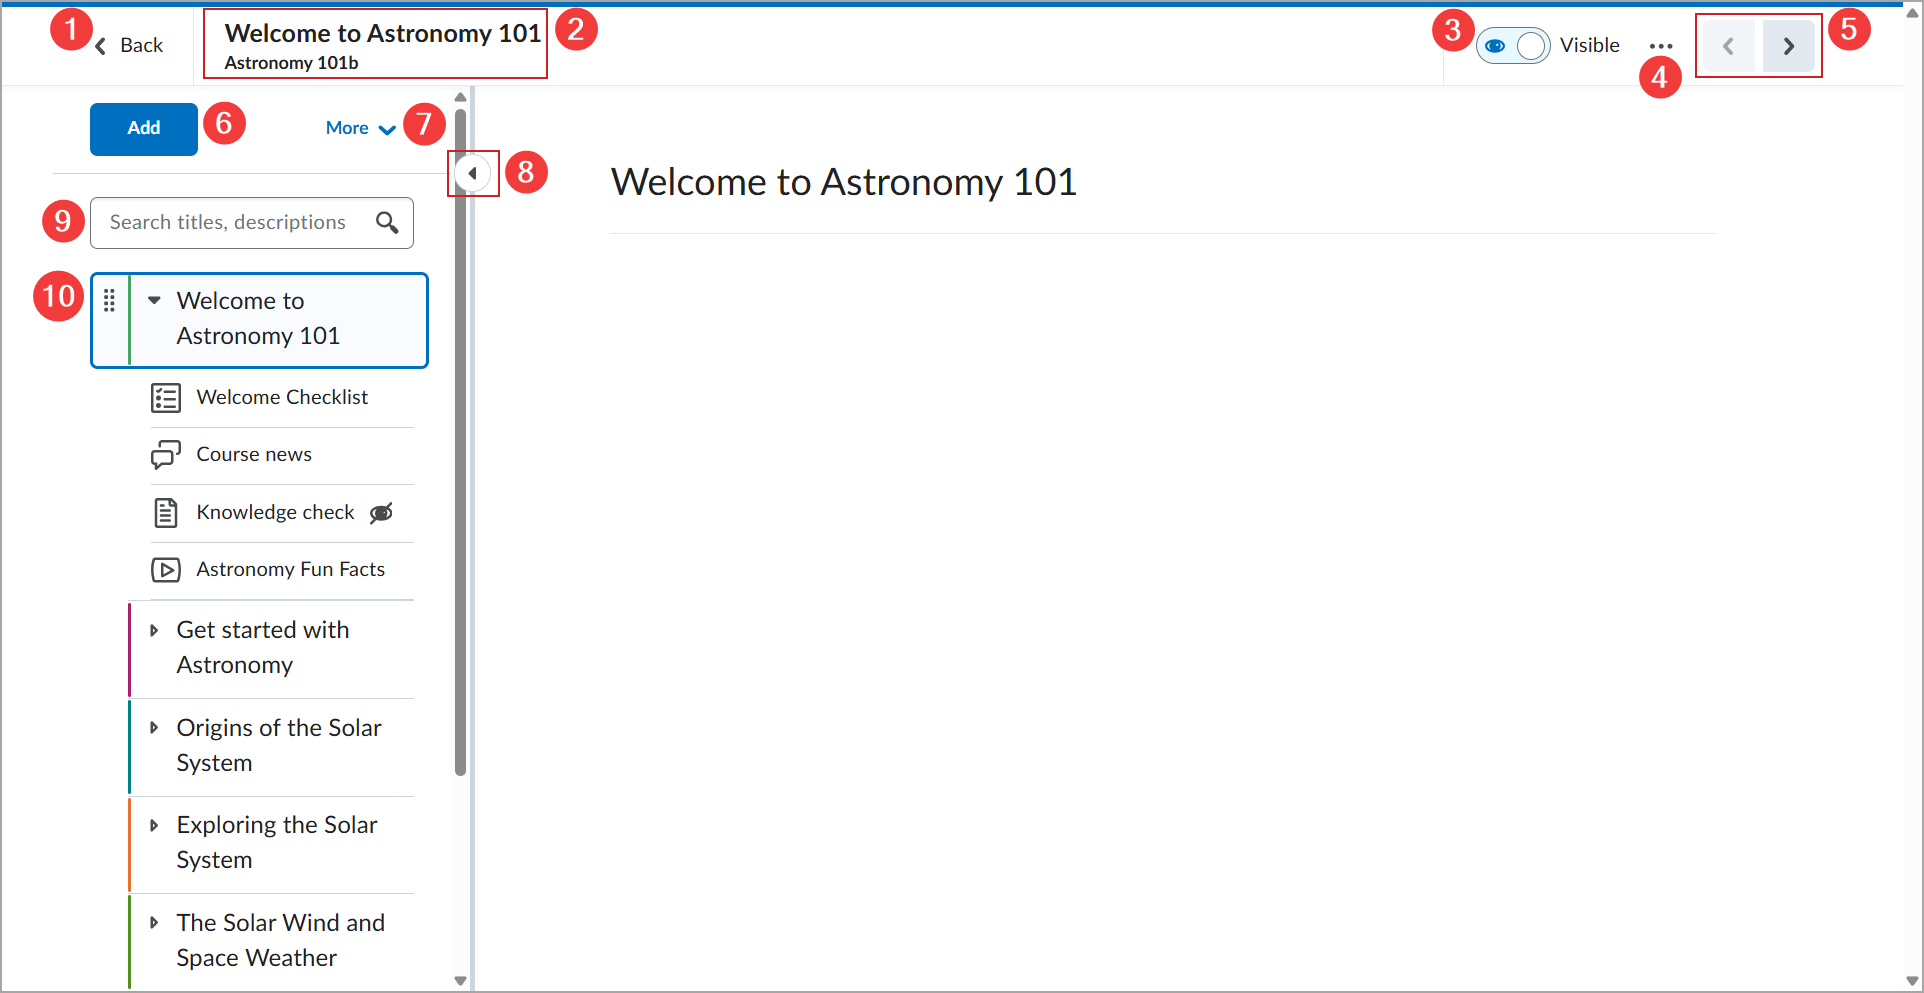
The Immersive View interface includes the following elements:
- Back: Click Back to exit Immersive View and return to the Content TOC page.
- Breadcrumbs: The breadcrumbs display the course name and the title of the current lesson or module.
- Visibility toggle: Indicates whether units, lessons, and materials are visible or hidden. Visibility icons also appear next to units in the table of contents. To change the visibility of a unit, lesson, or material, select the item, and then select the visibility toggle: Visible ( icon) or Hidden ( icon).
- Options Menu: Click Options (...) and select Edit to update a unit, lesson, or folder's title, availability and due dates, and description. For materials, you can update the title, properties, and dates. From Options, you can also configure release conditions, set completion requirements, or delete course content.
- Page Navigation: Use the navigation buttons to move between topics in the order they appear in the course content structure.
- Add: Click Add to add new or existing content to your course.
- More: Click More to edit Outcomes coverage, manage course dates, and view content reports.
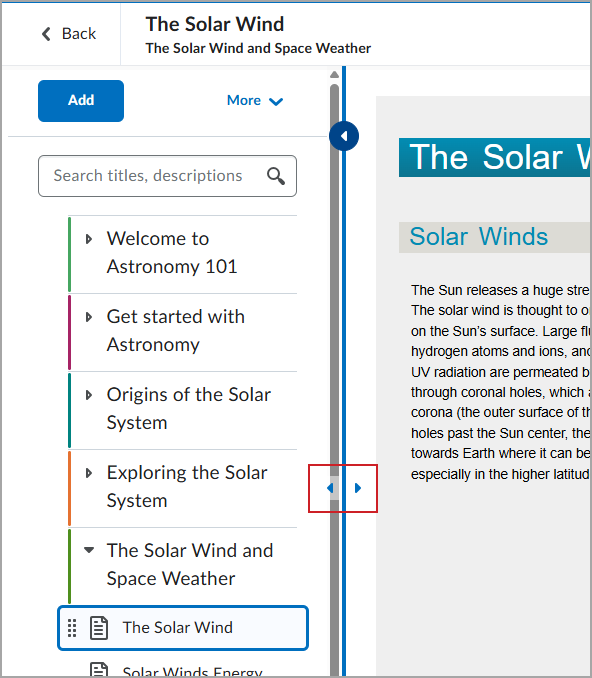
- Panel resize controls: Click the arrow to expand or collapse the navigation panel or drag the edge of the panel to adjust the space available for course content.
- Search titles, descriptions: Enter a search term to locate matching course content by title or description.
| Note: Search results include only items that you can access. Items that otherwise match the search criteria do not appear in the results if they have a future start date or an end date that has passed. |
- View course structure: Click a unit to display its lessons and activities in the TOC. Double-click the drag handle
 of a unit, lesson, or material to open the keyboard controls for reordering.
Turn on the Content experience
You can choose between the Classic Content experience and the Content experience for your specific course.
|
Note: Your administrator can turn the Content experience on or off for all courses at the org level. However, your administrator can also assign your role the ability to switch between content experiences from your course. To complete the workflow below, your role must be assigned the required permissions and your course must have the required configuration variables enabled. Contact your administrator for more information. |
To turn on the Content experience
- From your course navbar, click Content.
- Click the arrow on the top to expand the window.

- Click Turn it on.
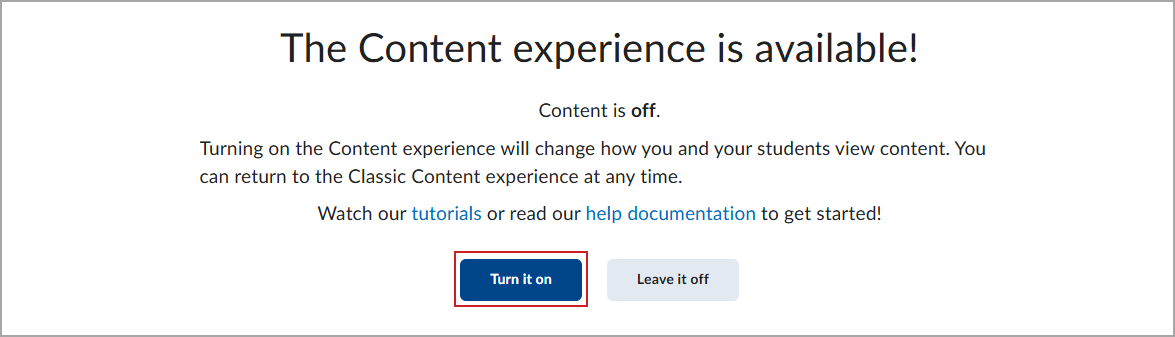
The Content experience is turned ON for your course. If desired, you can repeat this process to turn OFF the Content experience and switch back to Classic Content.
|
Note: The Content experience is also turned ON for all learners. |
Navigate the Table of Contents
The Table of Contents (TOC) provides flexible navigation and course organization in the Content tool. You can:
- Nest units and lessons at any level, helping preserve course structures from Classic Content or imported from another learning management system (LMS).
- Reorganize content at any level using drag-and-drop or using the keyboard when the drag handle is selected.
- Expand and collapse modules from the sidebar without leaving the current page, helping you maintain context as you navigate course content.
- Open topics in a new browser tab or window using the right-click menu.
- Navigate content using your keyboard.
The condensed TOC layout also displays more course content on smaller screens.
When immersive view is enabled, the table of contents displays as a full-width course landing page when you navigate to Content. To adjust the navigation panel in the split-screen Immersive view, click the arrow to expand or collapse the panel, or drag the edge of the panel to adjust its width. You can also use the small left and right arrows for precise adjustments.
Learner progress and Course Overview display
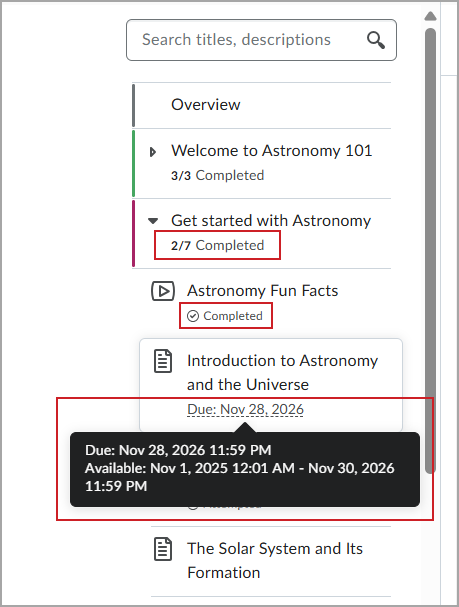
Learners can track progress using completion indicators displayed beside topics and modules. Completed topics display check marks, and modules display a summary of learner progress for nested activities. Completion terminology varies by activity: Assignments display Submitted, Discussions display Posted, and Quizzes display Attempted.
|
Note: If the d2l.Tools.Content.DisplayContentOutsideofAvailabilityDates configuration variable is enabled, topics outside their availability window can still appear in the Table of Contents while remaining inaccessible to learners. |
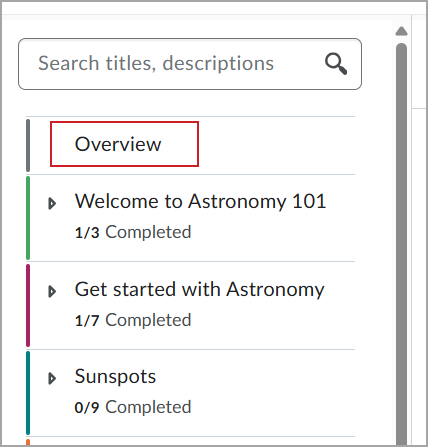
If a course includes a Course Overview page from Classic Content, it appears as the first module in the Content experience as The Overview. For more information about making changes to the Course Overview, refer to Add and organize learning materials in Content.
View assessable activities in Content
Assignments, discussions, and quizzes can be configured to display in the Content tool as assessable activities. Learners can complete these course activities directly in Content without navigating to other tools in Brightspace. You can also view the Completion Summary for the activity in content to quickly see who has completed it.
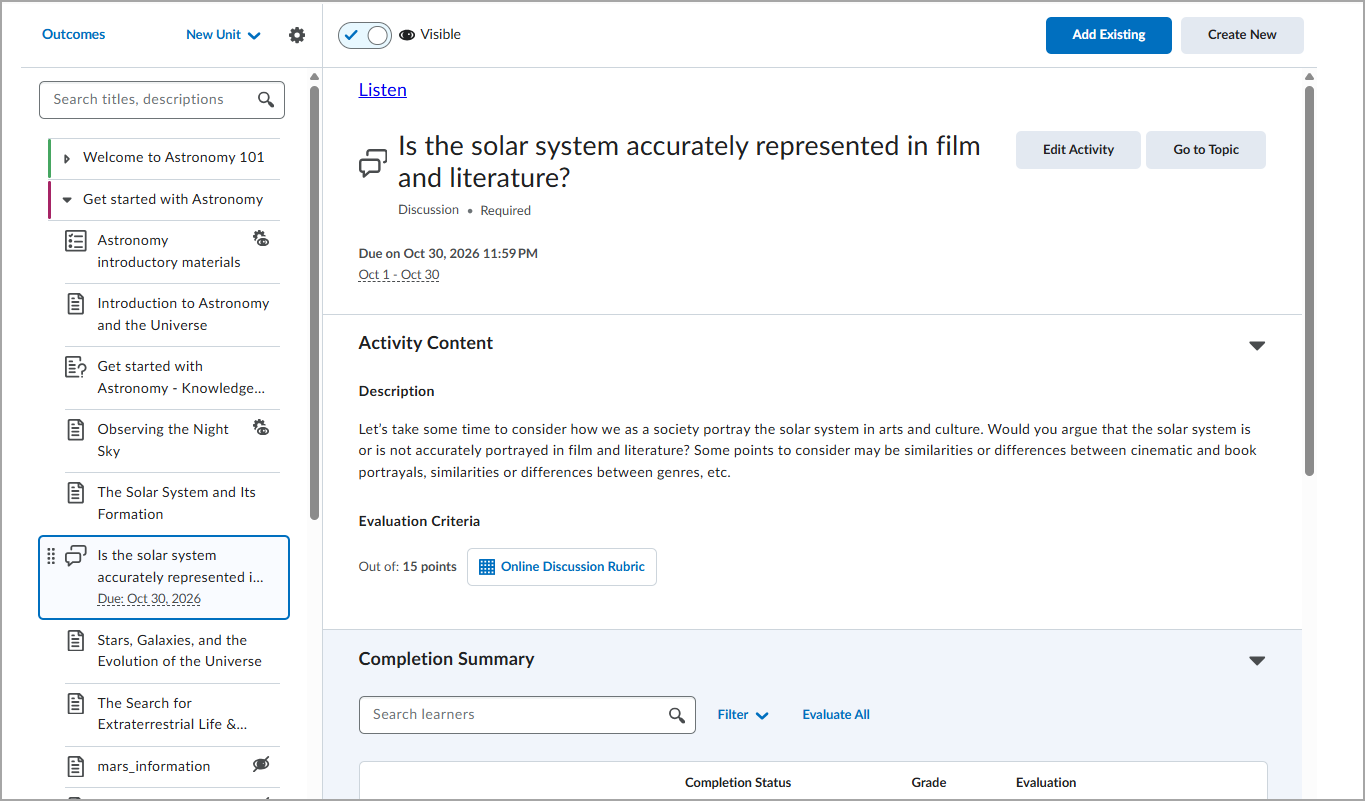
The following permissions must be enabled for each role to view activities correctly:
| Tool |
Learner permissions (My Work) |
Facilitator permissions (Completion Summary – view only) |
Evaluator permissions (Completion Summary – view and evaluate) |
|---|
| Assignments |
Assignments > See and Submit Files to Assignment Submission Folders
Content > View Course Content |
Assignments > See and Manage Assignment Submission Folders
Assignments > View Submitted Files
Content > Manage Content |
View permissions
Assignments > Give Feedback |
| Quizzes |
Quizzes > View Quizzes
Quizzes > Take Quizzes (As Participant)
Content > View Course Content |
Quizzes > View Quizzes
Quizzes > View Quiz Setup
Content > Manage Content |
View permissions
Quizzes > Grade Submitted Quizzes |
| Discussions |
Discussions > View Discussions
Discussions > Compose New Threads
Discussions > Can be assessed (permission setting is selected)
Content > View Course Content |
Discussions > View Discussions
Discussions > Can be assessed (permission setting is unselected)
Content > Manage Content |
View permissions
Discussions > Assess Topics |
| External Learning Tools (LTI) |
Not Applicable – Learners can already view LTI topics inline. No change in their view. |
External Learning Tools > Launch External Learning Tool Links
Content > Manage Content
Content > See Content Stats
Content > Create and Edit Modules and Topics |
Not Applicable – LTI topics are not evaluated in Brightspace |
|
Note: For Discussions, permission settings can be edited by navigating to Roles and Permissions, selecting the context menu next to the role name, and then clicking Edit Settings. Role permission changes may take a few minutes to take effect on Content pages. |
Video: Interact with assessable activities in Content