SCORM (Sharable Content Object Reference Model) is a set of standards for creating and delivering online learning content in Brightspace that allows instructors to upload and manage SCORM-compliant learning courses.
Add a SCORM or xAPI package to the Content tool
If you are using the new SCORM solution, you can upload SCORM or xAPI packages directly into the Content tool.
To add a SCORM or xAPI package to the Content tool
- In Content, either create or select a module to include your SCORM or xAPI package in.
- Within your selected module, from the Upload/Create button, select New SCORM Object/xAPI Object.
- In the Add Course Package - SCORM dialog window, do one of the following:
- If you want to upload a new SCORM or xAPI package, click Upload. Then, either browse one or more files, or drag and drop the files into the designated area.
 | Note: You can upload up to 50 SCORM or xAPI objects at a time. |
- If you want to add a previously uploaded SCORM or xAPI package, select it from the list.
- Click Save.
- On the Add Course Package - SCORM screen, do one or more of the following:
- Click Save.
Manage SCORM or xAPI package versions in the Content tool
Keeping your SCORM packages up to date ensures learners always access the most accurate version of your content. The version management feature allows you to upload new versions, preview existing ones, download previous iterations, or revert to an older version when needed.
|
Note: Updating a SCORM/xAPI package replaces the asset everywhere it is used in Brightspace. |
Upload a new SCORM/xAPI package version
Use this workflow to replace an existing SCORM or xAPI package with an updated version.
-
Navigate to the course module where the existing SCORM/xAPI package is deployed.
- Click Add Existing.
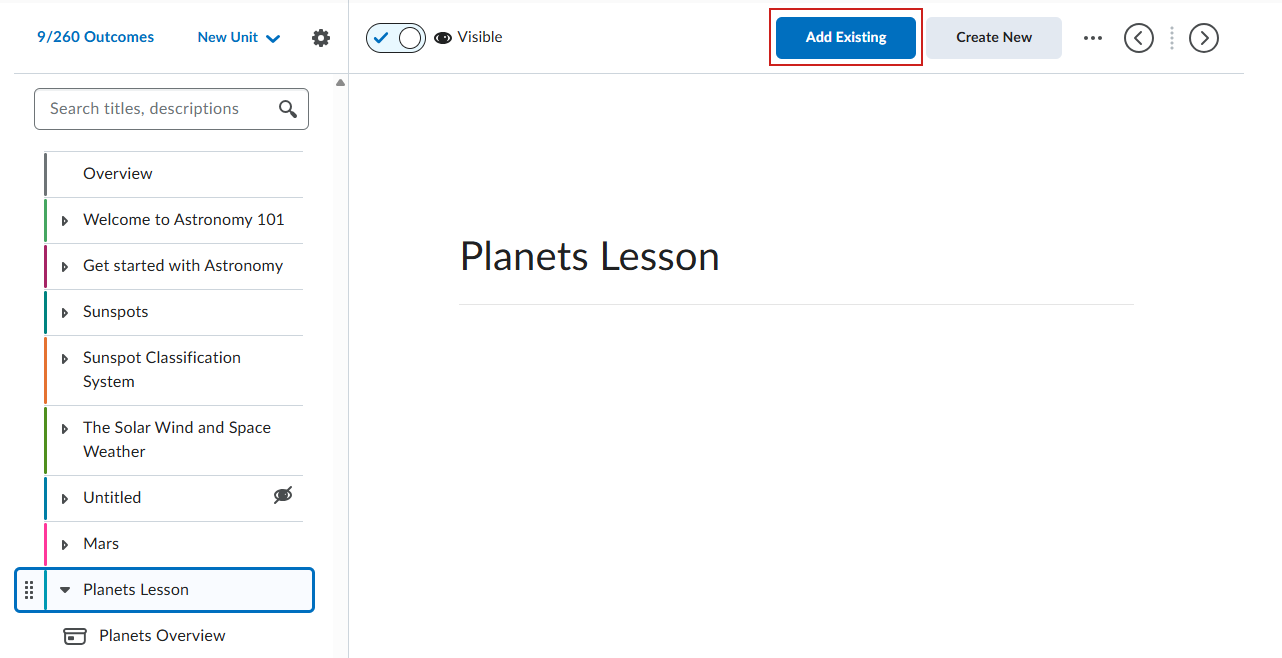
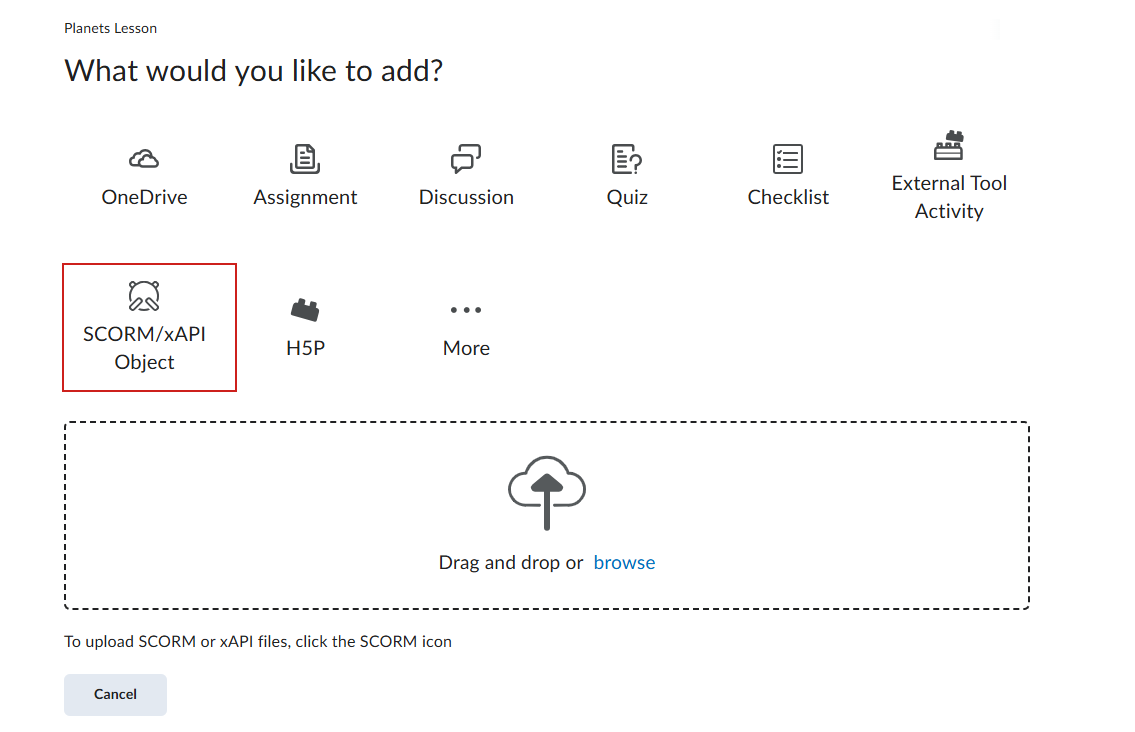
- On the What would you like to add page, select SCORM/xAPI Object.
- In the Add Course Package - SCORM/xAPI dialog window, locate the SCORM/xAPI package you want to replace and click the Action Dropdown.
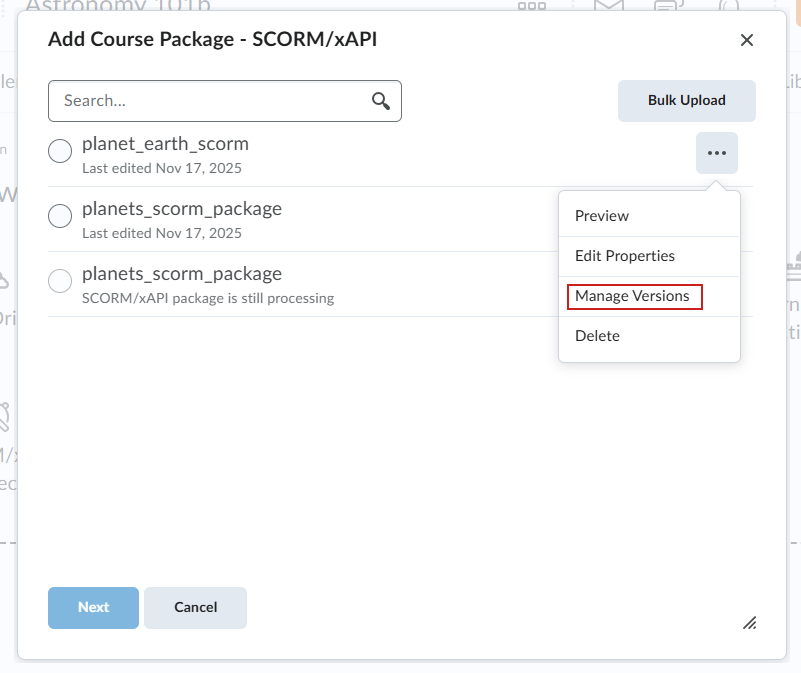
- Select Manage Versions.
- In the Upload New Version section, drag and drop the updated SCORM/xAPI package or browse to upload it.
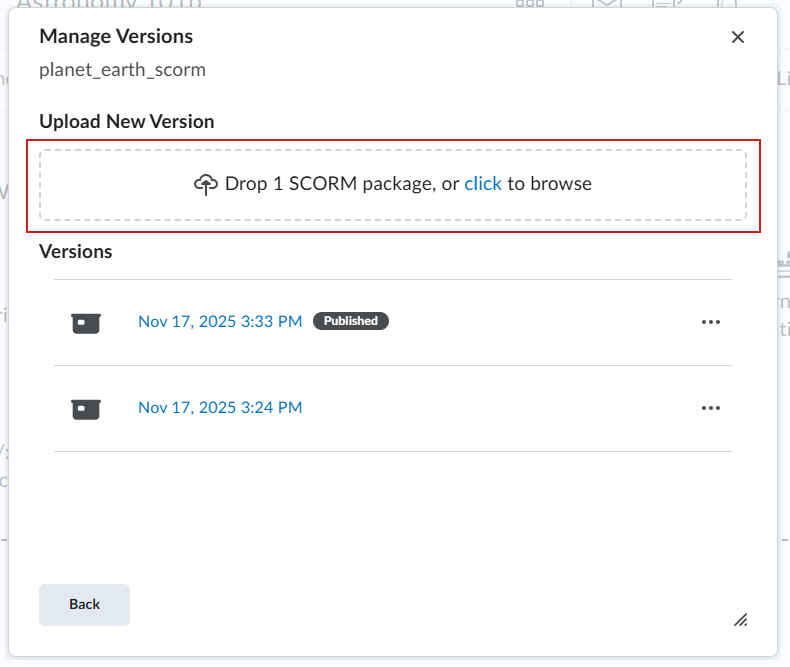
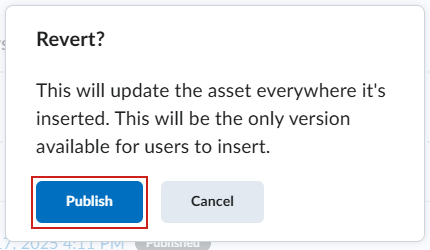
- When the upload completes, click Publish.
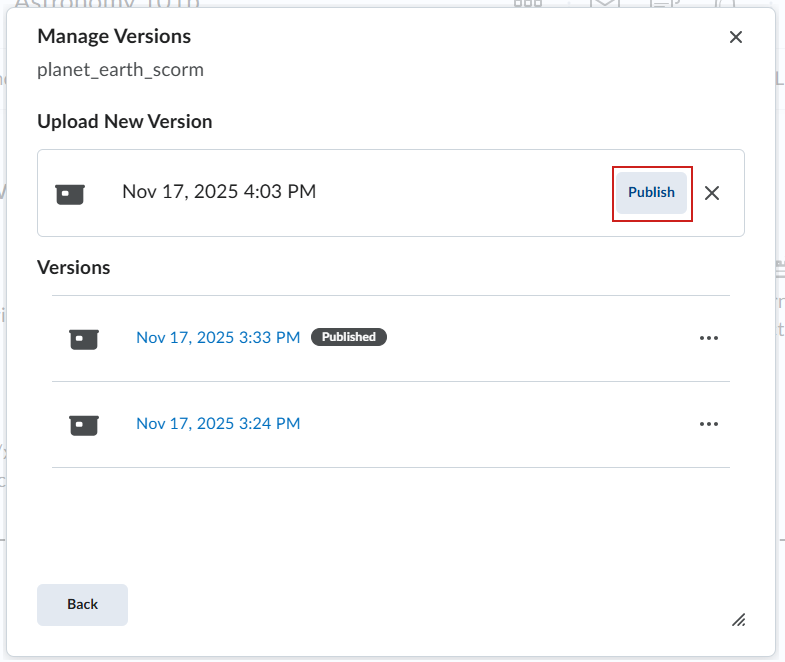
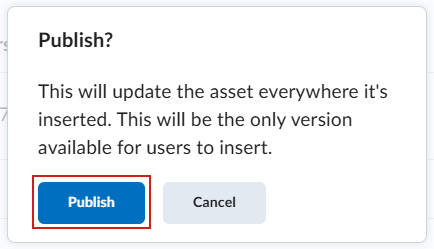
- Click Publish again on the confirmation message to replace the SCORM everywhere it appears.
- The updated SCORM/xAPI package now appears in the list with an updated date and Published indicator.

- Click Back to return to the Add Course Package - SCORM/xAPI dialog.
- Click Cancel to close window.
You have now replaced the SCORM/xAPI package in your course content with an updated version.
Preview an existing SCORM/xAPI package version
Use this option to quickly view the content of a SCORM/xAPI package before deciding whether to update or reuse it.
- Navigate to the course module where the SCORM/xAPI package is deployed.
- Click Add Existing.
- One the What would you like to add page, select SCORM/xAPI Object.
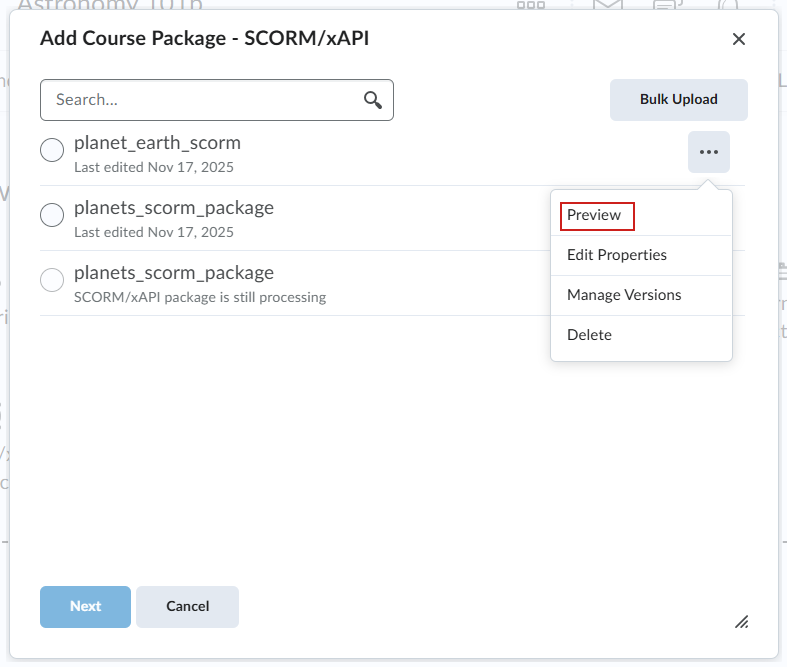
- In the Add Course Package - SCORM/xAPI dialog window, locate the SCORM package you want to preview and click the Action Dropdown.
-
Select Preview.
A preview of the SCORM/xAPI package opens.
Download a previous version of a SCORM/xAPI
Use this option if you need a local copy of an earlier version for backup, review, or editing.
- Navigate to the course module where the existing SCORM/xAPI package is deployed.
- Click Add Existing.
- One the What would you like to add page, select SCORM/xAPI Object.
- In the Add Course Package - SCORM/xAPI dialog window, locate the SCORM package you want to download and click the Action Dropdown.
- Select Manage Versions.
- In the Manage Versions dialog, click the Open menu and select Download.

The SCORM/xAPI package version is now downloaded.
Revert to a previous SCORM/xAPI package version
Use this workflow to replace the current SCORM/xAPI package with an older version.
- Navigate to the course module where the existing SCORM/xAPI package is deployed.
- Click Add Existing.
- One the What would you like to add page, select SCORM/xAPI Object.
- In the Add Course Package - SCORM/xAPI dialog window, locate the SCORM package you want to download and click the Action Dropdown.
- Select Manage Versions.
- In the Manage Versions dialog, click the Open menu and select Revert.
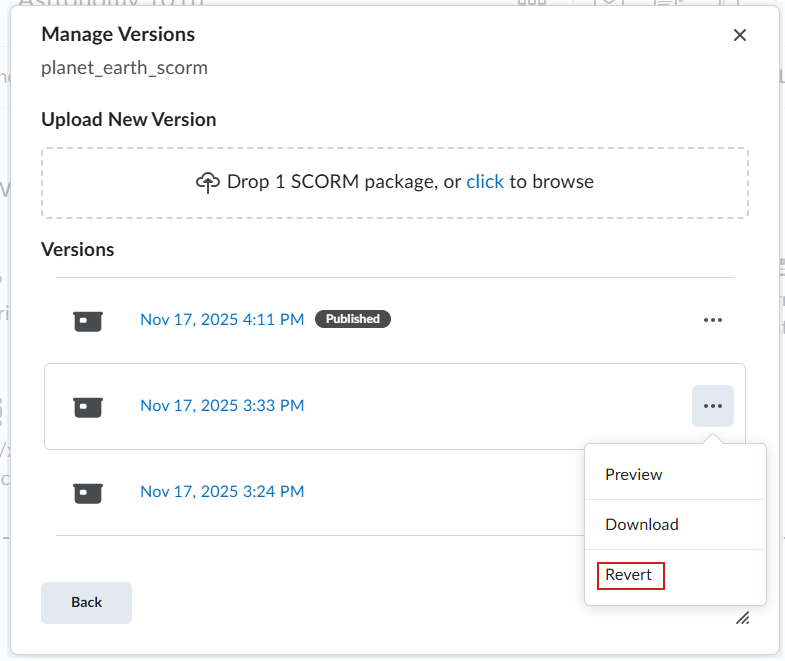
- Click Publish on the confirmation message to replace the SCORM everywhere it is used.
The SCORM/xAPI package has now been reverted to the selected previous version.
Import a Legacy SCORM package
If you are using the Legacy SCORM solution, SCORM packages must be imported to the Content tool. The import function identifies the content as SCORM, and allows the proper initialization of SCORM LMS calls.
|
Note: The Legacy SCORM solution does not support xAPI objects. |
To import a SCORM package
- From Edit Course, click Import/Export/Copy components > Import Components.
- Select from a course package.
- Click Start.
- Drag and drop the SCORM package onto the upload target.
- Click Import All Components.
- Do one of the following:
- To view the SCORM package within Content, click View Content.
- To import another SCORM package, click Import Another Package.
Set SCORM Review/Retake functionality when importing SCORM/xAPI object
The built-in SCORM review/retake functionality can be enabled or disabled. When disabled, it allows you to use any native review/retake functionality and prevents conflicts with such.
Enable and disable SCORM review/retake functionality in the New Content Experience
- Navigate to Add Existing > SCORM/xAPI.
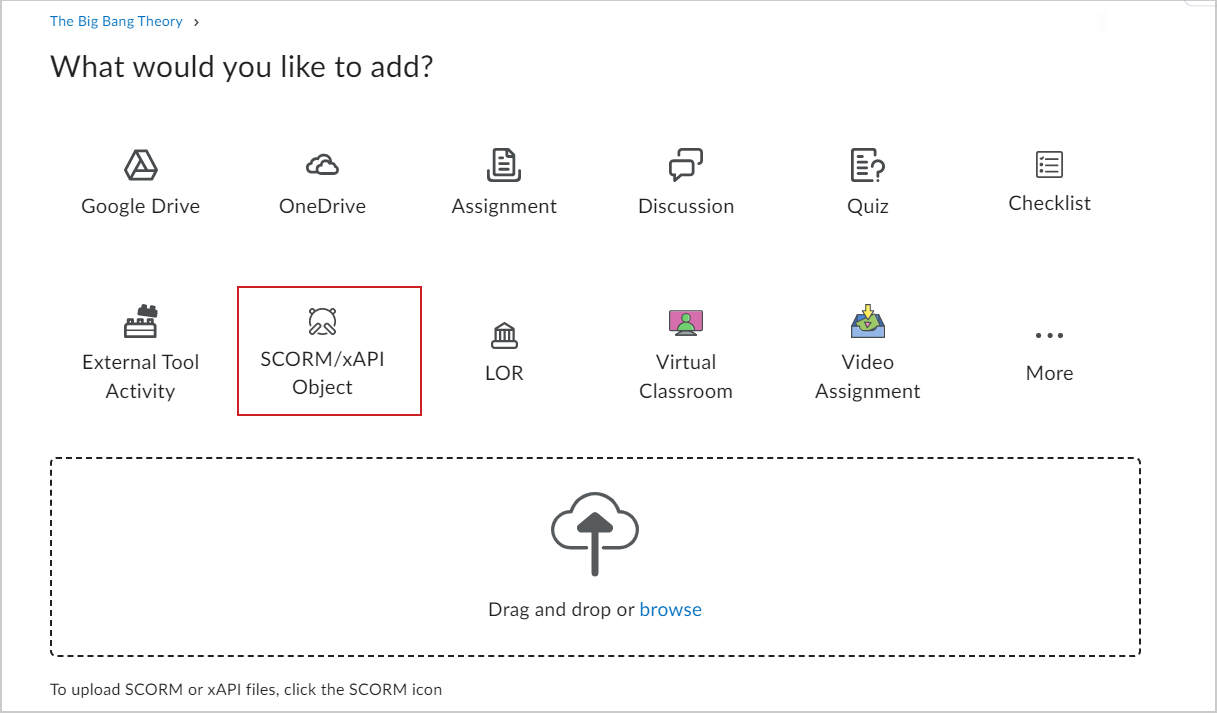
Figure: The SCROM/xAPI Object option on the What would you like to add? page.
- Select a SCORM object to upload.
- Click the Action Dropdown menu and click Edit Properties.
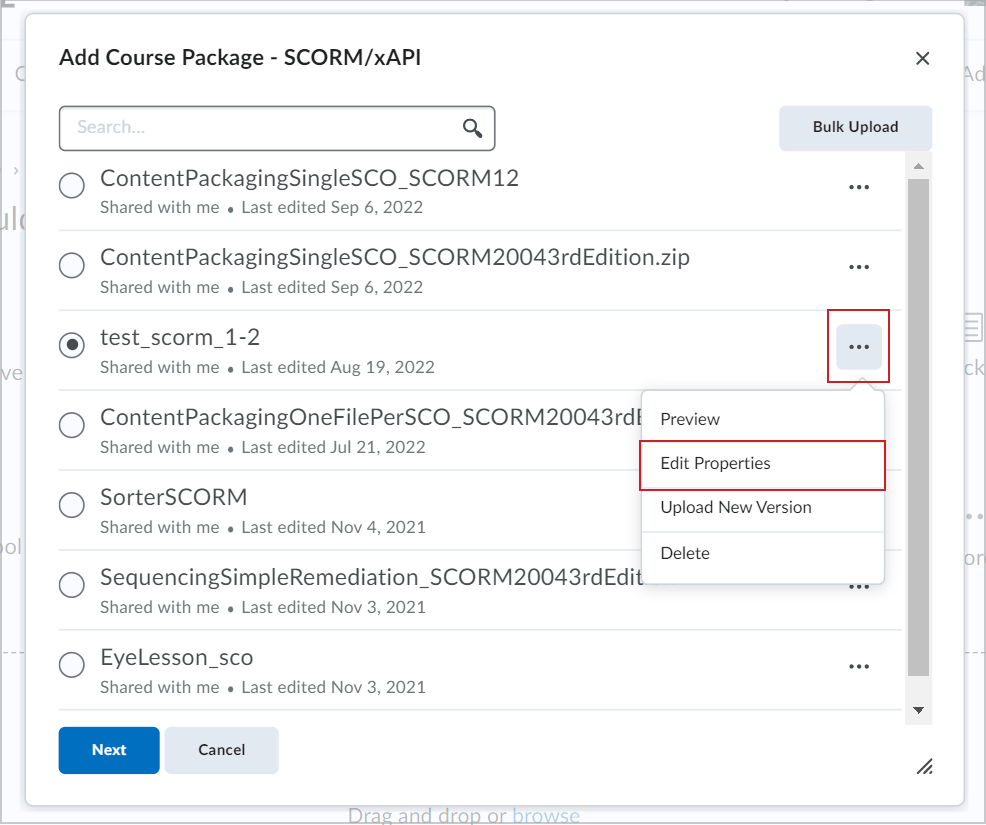
Figure: The Action Dropdown menu showing the Edit Properties option.
- In the Edit Properties dialog, under the Course Package Review/Retake Options, select one of the following:
- Add review/retake options. My package does not have built in review/retake functionality.
- Do not add review/retake options. My package does have built in review/retake functionality. (Default)
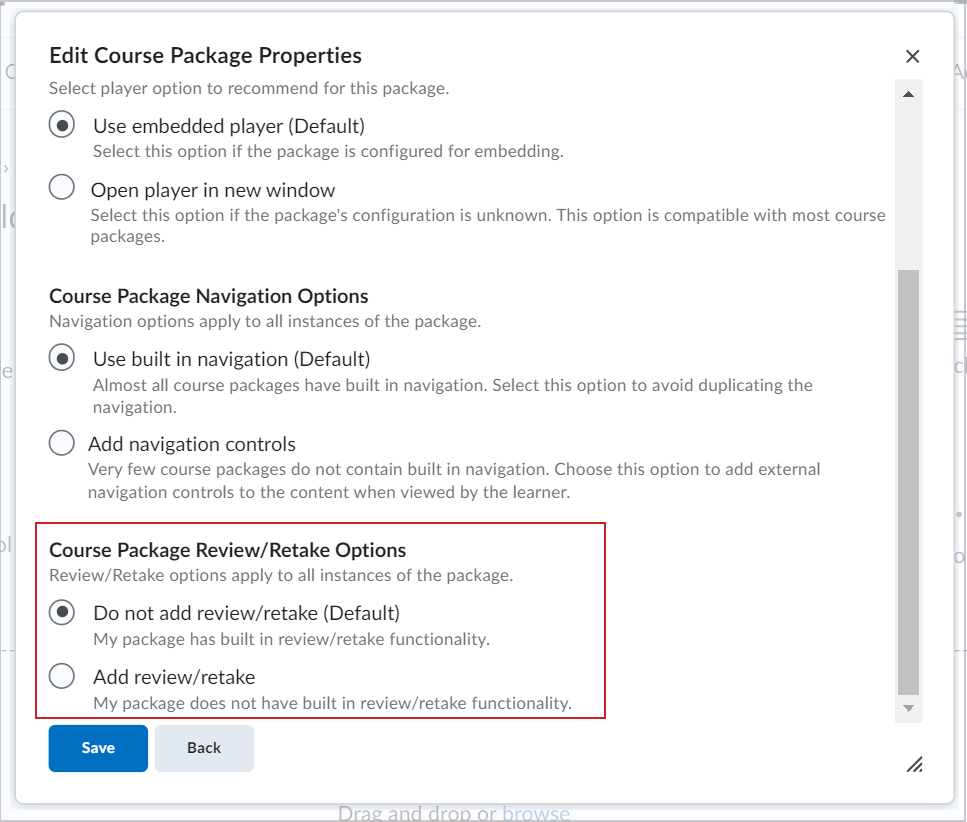
Figure: The Course Package Review/Retake Options section.
- Click Save.
|
Note: If you want to change this option for an already imported SCORM object, you will need to re-import the SCORM as this feature is included at the time of processing the SCORM into Brightspace. |
Enable and disable SCORM review/retake functionality in Classic Content
- Navigate to Upload/Create > New SCORM/xAPI Object.
- In the publishing workflow, Edit Properties dialogue, expand the Advanced Settings area. Under the new subheading Course Package Review/Retake Options, select one of the following:
- Add review/retake options. My package does not have built in review/retake functionality.
- Do not add review/retake options. My package does have built in review/retake functionality. (Default)
|
Note: If you want to change this option for an already imported SCORM object, you will need to re-import the SCORM as this feature is included at the time of processing the SCORM into Brightspace. |
Video: Add a SCORM package to the Content tool
Edit SCORM topics in the New Content Experience
With the new create and edit experience enabled, the edit page for SCORM topics allows you to edit the following information in SCORM packages:
- Content Service SCORM packages – topic titles, dates, and associated grade items.
- Imported SCORM packages – topic titles, dates, and associated grade items.
- LOR Based SCORM packages - topic titles, dates, and associated grade items.
|
Note: The d2l.Tools.Content.LessonsCreateExperienceOptIn configuration variable must be enabled for the new SCORM editing page to be visible. |
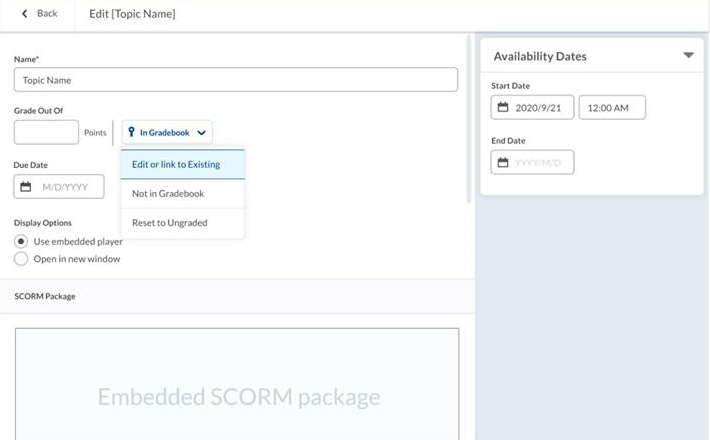
Figure: The SCORM edit page in the New Content Experience.
To edit a SCORM package in the New Content Experience
- From the table of contents, select a unit, lesson, or material.
- Click the (...) Options menu and select Edit.
- Update the item.
- Click Save.
Add individual SCORM objects to Lessons
After you upload new SCORM solution objects into Content, you can add those objects to Lessons.
- In Lessons, click Add Existing.
- Click SCORM Object.
- Select the SCORM you want to add to the Lesson.
- Click the ellipses (…) next to the name of the SCORM object for the following additional options:
- Preview
- Edit Properties:
- Change the title
- Change the description
- Share object with other instructors (dependent on user permissions)
- Indicate if you want to use external navigation
- Upload New Version
- Delete
- Click Next to add the selected SCORM object, and do any of the following:
- Add a grade item to the object.
- Choose the grade calculation method.
- Indicate if you want to link to the object with a static link (the current version of the object is always used) or dynamic link (the most recently updated version of the object is always used).
- Choose player options (either use an embedded player or open in a new browser window).
- Click Add.
Bulk Uploading SCORM objects to Lessons
- In Lessons, click Add Existing.
- Click SCORM Object.
- Click Bulk Upload.
- Drag and drop files or select Click to Upload.
- Click Upload.
- Once uploading is complete, click Keep Default Properties for all files or Edit properties for all files.
- If Edit properties for all files is selected, do the following for each uploaded SCORM object:
- Change the title.
- Change the description.
Share the object with other instructors (depending on user permissions).
- Indicate if you want to use external navigation.
- Click Next to move to the next SCORM object.
Edit the properties of new SCORM objects
When uploading a new SCORM object into the Content Service, you can either retain its current properties or modify them.
After the upload, click Properties and perform any of the following actions:
After uploading an object, click properties and do any of the following:
- Rename the SCORM object: Change its name as needed.
- Share the file: click Yes, share this file with > from the dropdown menu, choose the department (for instructor and administrator roles) or organization (administrator role only) to share the object with.
- Restrict sharing: If you prefer not to share with other courses, select No, keep this file only to myself.
- Add external navigation: To use an optional navigation bar, click Add external navigation. My file does not have built in navigation option.
| Note: By default, the external navigation is turned off because most courses have built in navigation. |
Remove a grade item from a SCORM object after the package is imported
In order to remove a grade item that was originally created as part of a SCORM package, you must first break the association between the grade book item and the content item.
To remove a grade item from a SCORM object after the package is imported
- In the Content tool, navigate to the SCORM object that you want to disassociate from the grade item.
- Click the content topic.
- From the Activity Details tab, in the Assessment area, click the topic title.
- From the context menu, click No Grade.
- Click Save.
|
Note: If the SCORM package is already deleted, you cannot remove the grade book item. If you require grade book items to be removed from your course, contact D2L Support. |
Move your imported SCORM content to a different module
If you are using the legacy SCORM solution and import a SCORM package, a single module and topic are created as part of the process. After the import is complete, you can use the move function in the Content tool to relocate the topic to the desired module, then delete the unnecessary module that was automatically created during the import.
Adjust the display size of your SCORM object
If you are using the legacy SCORM solution, in many cases, display issues are the result of settings selected when authoring a SCORM package. If SCORM objects appear too small or too large when viewed in Content, consider replacing the absolute values set for the dimensions in the HTML file with relative values to improve the display.
To adjust the display size
- From Manage Files, click the action menu for the file you want to edit.
- Select Edit File > HTML Source Editor.
- Replace the absolute values for width and height in the HTML file with relative values.
- Click Save.
|
Note: The location of these elements varies depending on the authoring tool used to create the SCORM package. Editing these values within the publishing tool and creating a new package with the updated settings allows you to reuse the package successfully while only needing to make changes once. |
Update associated grade items and auto-transfer grades
When updating the grade item associated to a SCORM package in the New Content Experience (Lessons), existing scores are copied into the newly associated grade item. This is available for SCORM packages added through the Content Service, imported SCORM, and LOR based SCORM.
Since SCORM is auto-graded through the SCORM package, a scaled version of the user's score is automatically copied. For example, if a learner scores 50/100 (50%) on a SCORM topic, and the instructor modifies the associated grade item to be out of 150 points, the learner's score will be recalculated to 75/150 (50%) on the new grade item. This recalculation occurs whenever the associated grade item is changed through the Edit page in the New Content Experience.