Surveys are an excellent way to solicit feedback from participants regarding any aspect of a course. You can gather anonymous or non-anonymous opinions and information from users. Unlike quizzes, survey questions do not require right or wrong answers and can include Likert-style rating questions.
Requirements
The following are required to use the Surveys tool:
- To access and use the Surveys tool, you must have the required Survey permissions applied to your role. These permissions can only be granted by your organization administrator.
- To add the Surveys tool to your course navbar, you must have the required Navbar permissions applied to your role. For more information on adding a tool or link to your course navbar, refer to the Customize your course navbar topic.

|
Tip:You can also locate available course tools by navigating to Course Admin from your navbar. If you cannot find the Surveys tool in your Brightspace instance, contact your organization administrator to obtain the required permissions. |
Survey examples
Start off the course with an informal poll
An informal poll can ask about people's backgrounds, previous education, and interest in the course. You can choose to make the answers anonymous, or to share them so that learners can explore their classmates' responses. You can use a variety of question types for this fun poll, including:
- Short Answer
- Multi-Short Answer
- Multi-Select
- Multiple Choice
Collect informal course evaluations or mid-year reviews
You can use a combination of different question types typically found in evaluations or reviews, including:
- Likert
- Written Response
- Multi-Short Answer
Ask about people's learning styles and content delivery preferences
You can use a variety of different question types for learning style and delivery preference, including:
- Multiple Choice
- Multi-Select
- Written Response or Short Answer
Determine which learning resources were most helpful to achieve learning objectives
You can use the following question types to determine the most helpful type of learning resources:
- Multi-Select
- Multiple Choice
- Ordering
- Likert
Pose open-ended questions to determine areas of learner confusion
You can use Short and Written Response question types for this scenario.
Set up a "Choose-your-own adventure" game or quiz
You can introduce the course in a fun way or reinforce course messaging through this type of survey activity. To achieve this, you can use survey branching with the following question types:
- Multiple Choice
- True or False
Set up a survey
Create surveys and use statistical tools to monitor current course trends, seek opinions, and assess user satisfaction.
To set up a survey
- Navigate to Surveys.
- On the Manage Surveys tab, click New Survey.
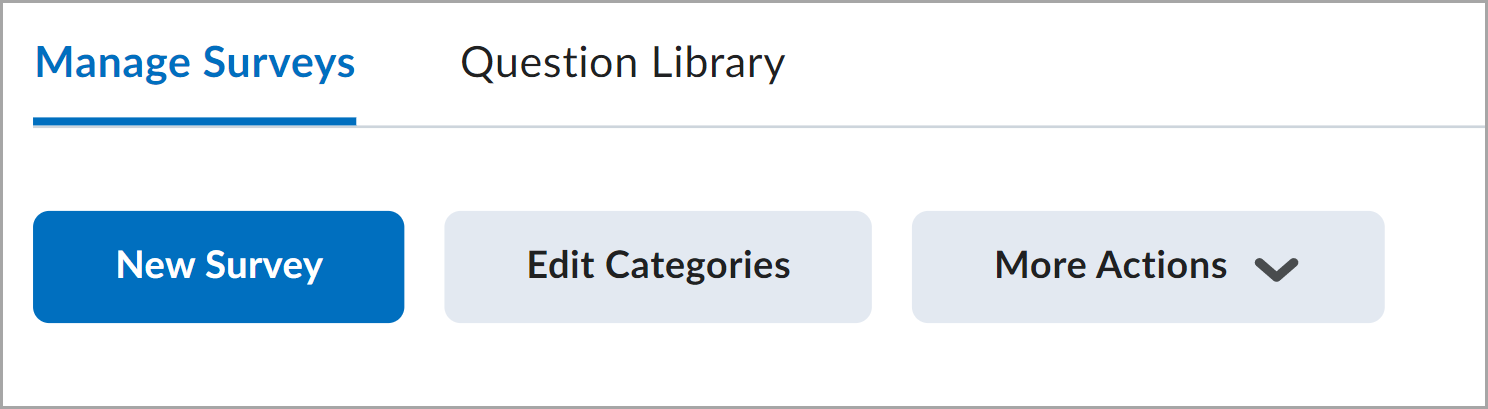
Figure: Click New Survey on the Manage Surveys tab.
- Enter a Name and define additional settings for your survey.
- To add questions to the survey, click Add/Edit Questions.
<![CDATA[ ]]>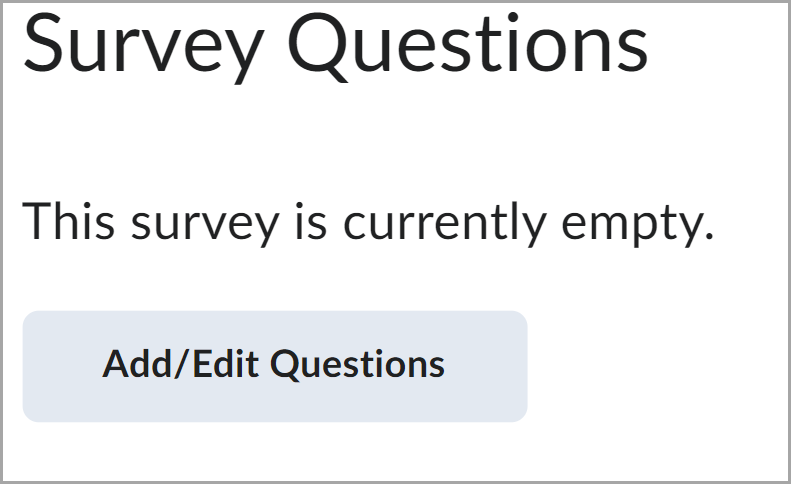
Figure: Click Add/Edit Questions.
- Click New and select the question type or information item you want to create.
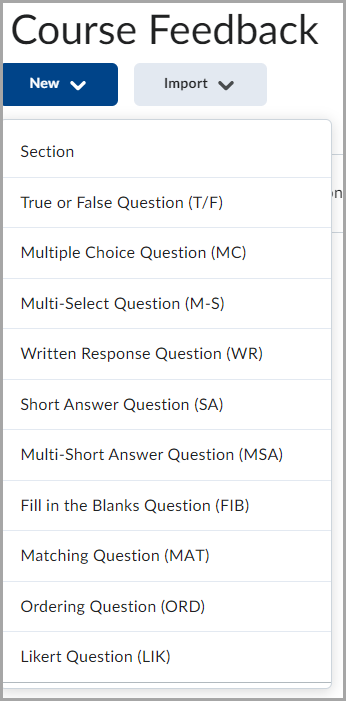
Figure: Select a question option from the New drop-down menu.
- To share questions between Self Assessments, Quizzes, and Surveys in the Question Library, click Save and Close to exit the survey. On the Manage Surveys page, from the tool navigation, click Question Library.
- Click Done Editing Questions.
You have created a survey.
Set up a survey using Question Library
If you have created questions for your survey outside of the survey, you can add Question Library questions to your survey.
To set up a survey using Question Library
- On the Manage Surveys page, click the survey name.
- Click Add/Edit Questions > Import.
- To import questions from the Question Library, from the Import Source drop-down list, select From an Existing Collection.
- From the Source Collection drop-down list, select Question Library.
- To display all questions available, select Collection Root from the Source Section drop-down list.
- From the Source Collection area, select questions you want to import to your survey.
- Click Save.
You have imported questions into your survey from Question Library.
Set survey restrictions
On the Restrictions tab of the survey, you can create new, or attach existing release conditions if you want a survey to be available to users only after they fulfill other specified tasks. Examples of release conditions include completing an Assignments submission, scoring a specified grade in a particular quiz, completing a Self Assessments submission, and being enrolled in a particular section. You can also use Release Conditions to make the survey available only to a particular role. Edit and change release conditions by clicking the Remove icon or Remove All Conditions.
If you decide to make the survey available with certain release conditions, you can also use the Intelligent Agents tool to notify learners that the survey is available once they have fulfilled the applicable release conditions.
In the Availability area, use Hide from Users to control the visibility of a survey.
Control user responses in a survey
You can set a response type to specify the number of survey attempts users are allowed.
To control responses in a survey
- Navigate to Surveys.
- On the Surveys page, click the survey name.
- Click the Restrictions tab.
- In the User Responses area, set the Attempts Allowed drop-down list to one of the following:
- Unlimited - Users can answer and submit a survey as many times as they want.
- Single attempt that is editable - Allows users a single survey attempt. They can re-access and edit responses as long as the survey is still available.
- Limited - Sets a number of permissible survey attempts.

Figure: The Attempts Allowed drop-down list.
You have controlled responses to your survey.
Set a date range for a survey
You can specify a date range that your survey becomes available to users. You can also add surveys associated with a date to your course calendar.
To specify a date range for your survey
- Navigate to Surveys.
- On the Manage Surveys tab, click the survey.
- Click the Restrictions tab.
- In the Availability area, select Has Start Date or Has End Dateand specify the dates and times when users can access the survey.
- To display the survey in the Calendar tool, ensure the Hide from Users option is not selected, and select Display in Calendar.
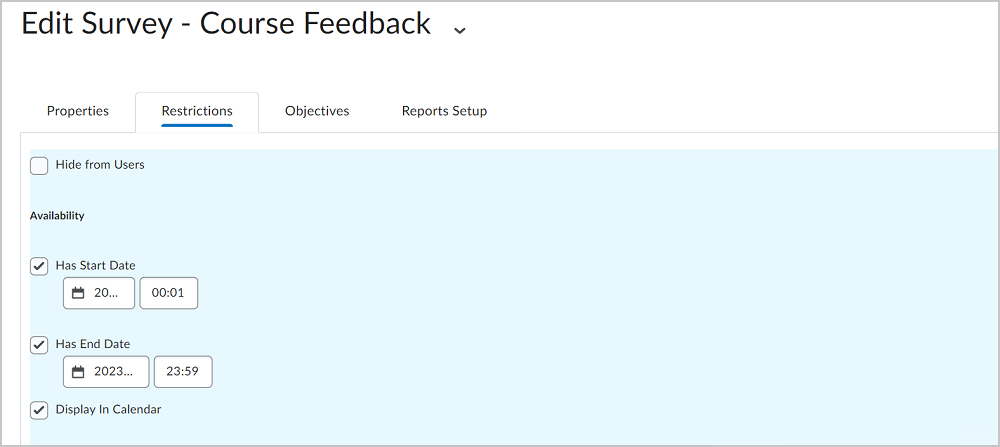
Figure: Populate the Start Date and End Date fields in the Restrictions tab. Ensure the Hide from Users option is not selected, and select Display in Calendar.
- Click Save and Close.
You have set a date range for your survey.
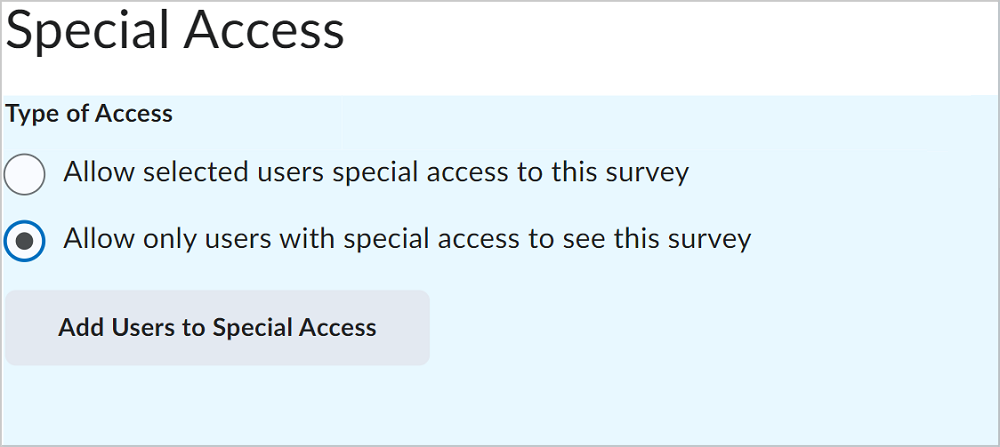
Create special access to a survey
You can assign specific users a different set of survey availability dates. Special access properties enable you to increase the time limit for special-needs users and allow different start and end dates for individual users.
To create special access to a survey
- Navigate to Surveys.
- On the Surveys page, click the survey name.
- Click the Restrictions tab.
- Do one of the following:
- Click Add Users to Special Access.
- Search for users and select the check boxes beside the names of users you want to assign special access to.
- Click Add Special Access.
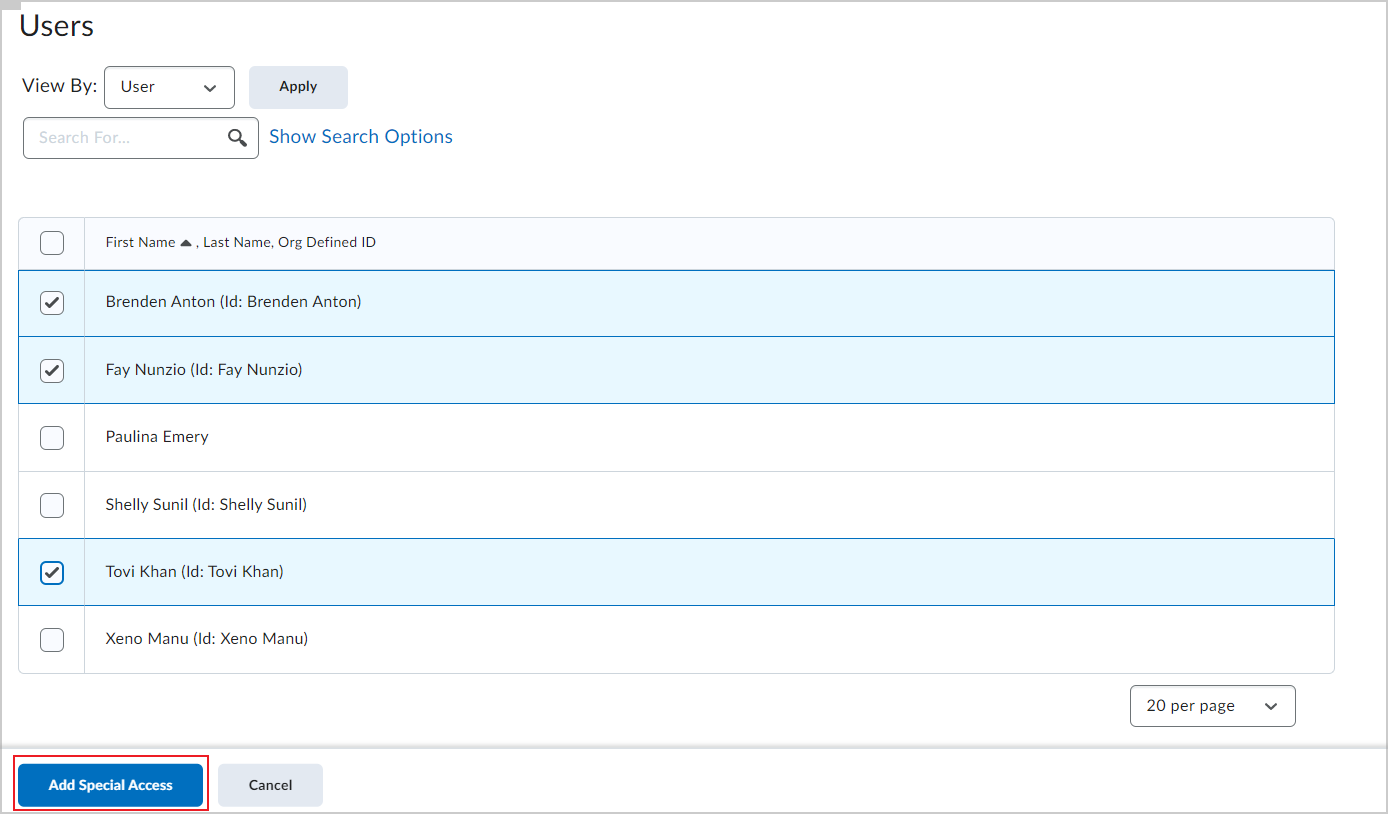
Figure: Select users for special access to a survey.
You have set special access for your survey.
Survey branching
When branching is used, survey questions are presented one at a time, each on a separate page. Page breaks are inserted between every question. Survey branching allows you to choose which question comes up next based on the user's response.
- On the navbar, click Surveys.
- On the Manage Surveys page, click on the survey you want to add branching to.
- In the Survey Questions area, click Branching Wizard. The wizard displays a list of the questions in your survey and their corresponding types. Answers are shown for Multiple Choice and True or False questions. You have the option to skip questions or terminate the survey based on the answer to a Multiple Choice or True or False question.
- Choose the answers that you want to create a branch from and fill in appropriate branching information.
- Click Save.
Video: How to set up a survey
Set a survey to active
- Navigate to Surveys.
- On the Manage Surveys tab, click the survey name.
- Click the Restrictions tab.
- In the Dates and Restrictions area, select Hide from users to set visibility.
Alternate Method:
- Navigate to Surveys.
- On the Manage Surveys page, open the context menu of any survey.
- Click Hide from Users to prevent learners from viewing the survey.

|
Note: From the survey Actions menu, select Make Visible to Users to display a hidden survey. |
Notify participants of an available survey
You can notify participants of an available survey in one of the following ways:
- On the Edit Survey page, click Invite Participants to send a survey notification directly to a user's external email address. The body of the email is limited to 65,535 characters.
- In the Announcements widget, create an Announcements item that announces the availability of the survey on the course home page and links to the survey via a quicklink.