Course widgets can help you engage with your students by featuring useful tools on your course homepage. The first step is to create a widget-based homepage. After you create the homepage, you can add or remove widgets, customize their appearance, and create custom widgets to expand the functionality of your course homepage.

|
Note: When you choose widgets, you can select from default System Widgets, any Custom Widgets you have created, and widgets from the Homepage Widget Expansion Pack (if licensed).
For more information on widgets refer to the following topics:
To add and modify widgets, your role must have the appropriate permissions. Contact your administrator and refer to System Widgets Permissions.
|
Create a widget-based homepage
The first step in adding widgets to your homepage is to create a widget based homepage.
To create a widget based homepage
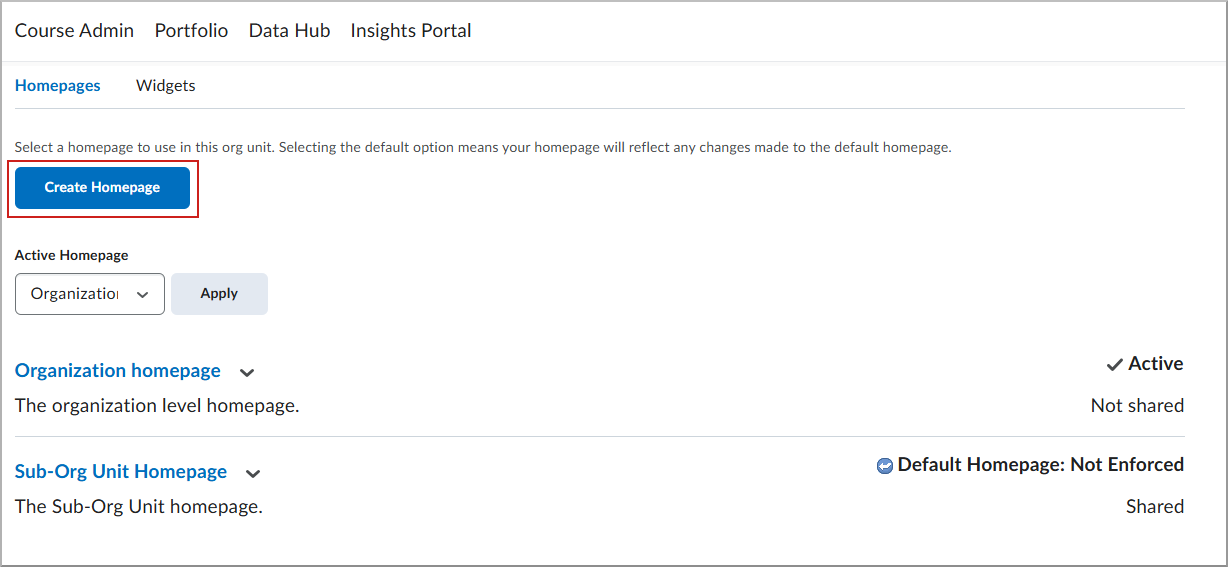
- On the navbar, click Course Admin > Homepages.
- From the Homepages tab, click Create Homepage.
- From the Create Homepage page, do the following:
- Enter a Name and Description for your homepage.
- In the Type drop-down, select Widget-based.
- (Optional) To add a header below the navbar, select Include homepage header, then enter the replace string for the information you want to display.
Note: Replace strings are placeholders the system resolves to course information (for example, course name) when the homepage is applied.
- To choose a layout for a widget-based homepage, click Change Layout and pick a panel layout.
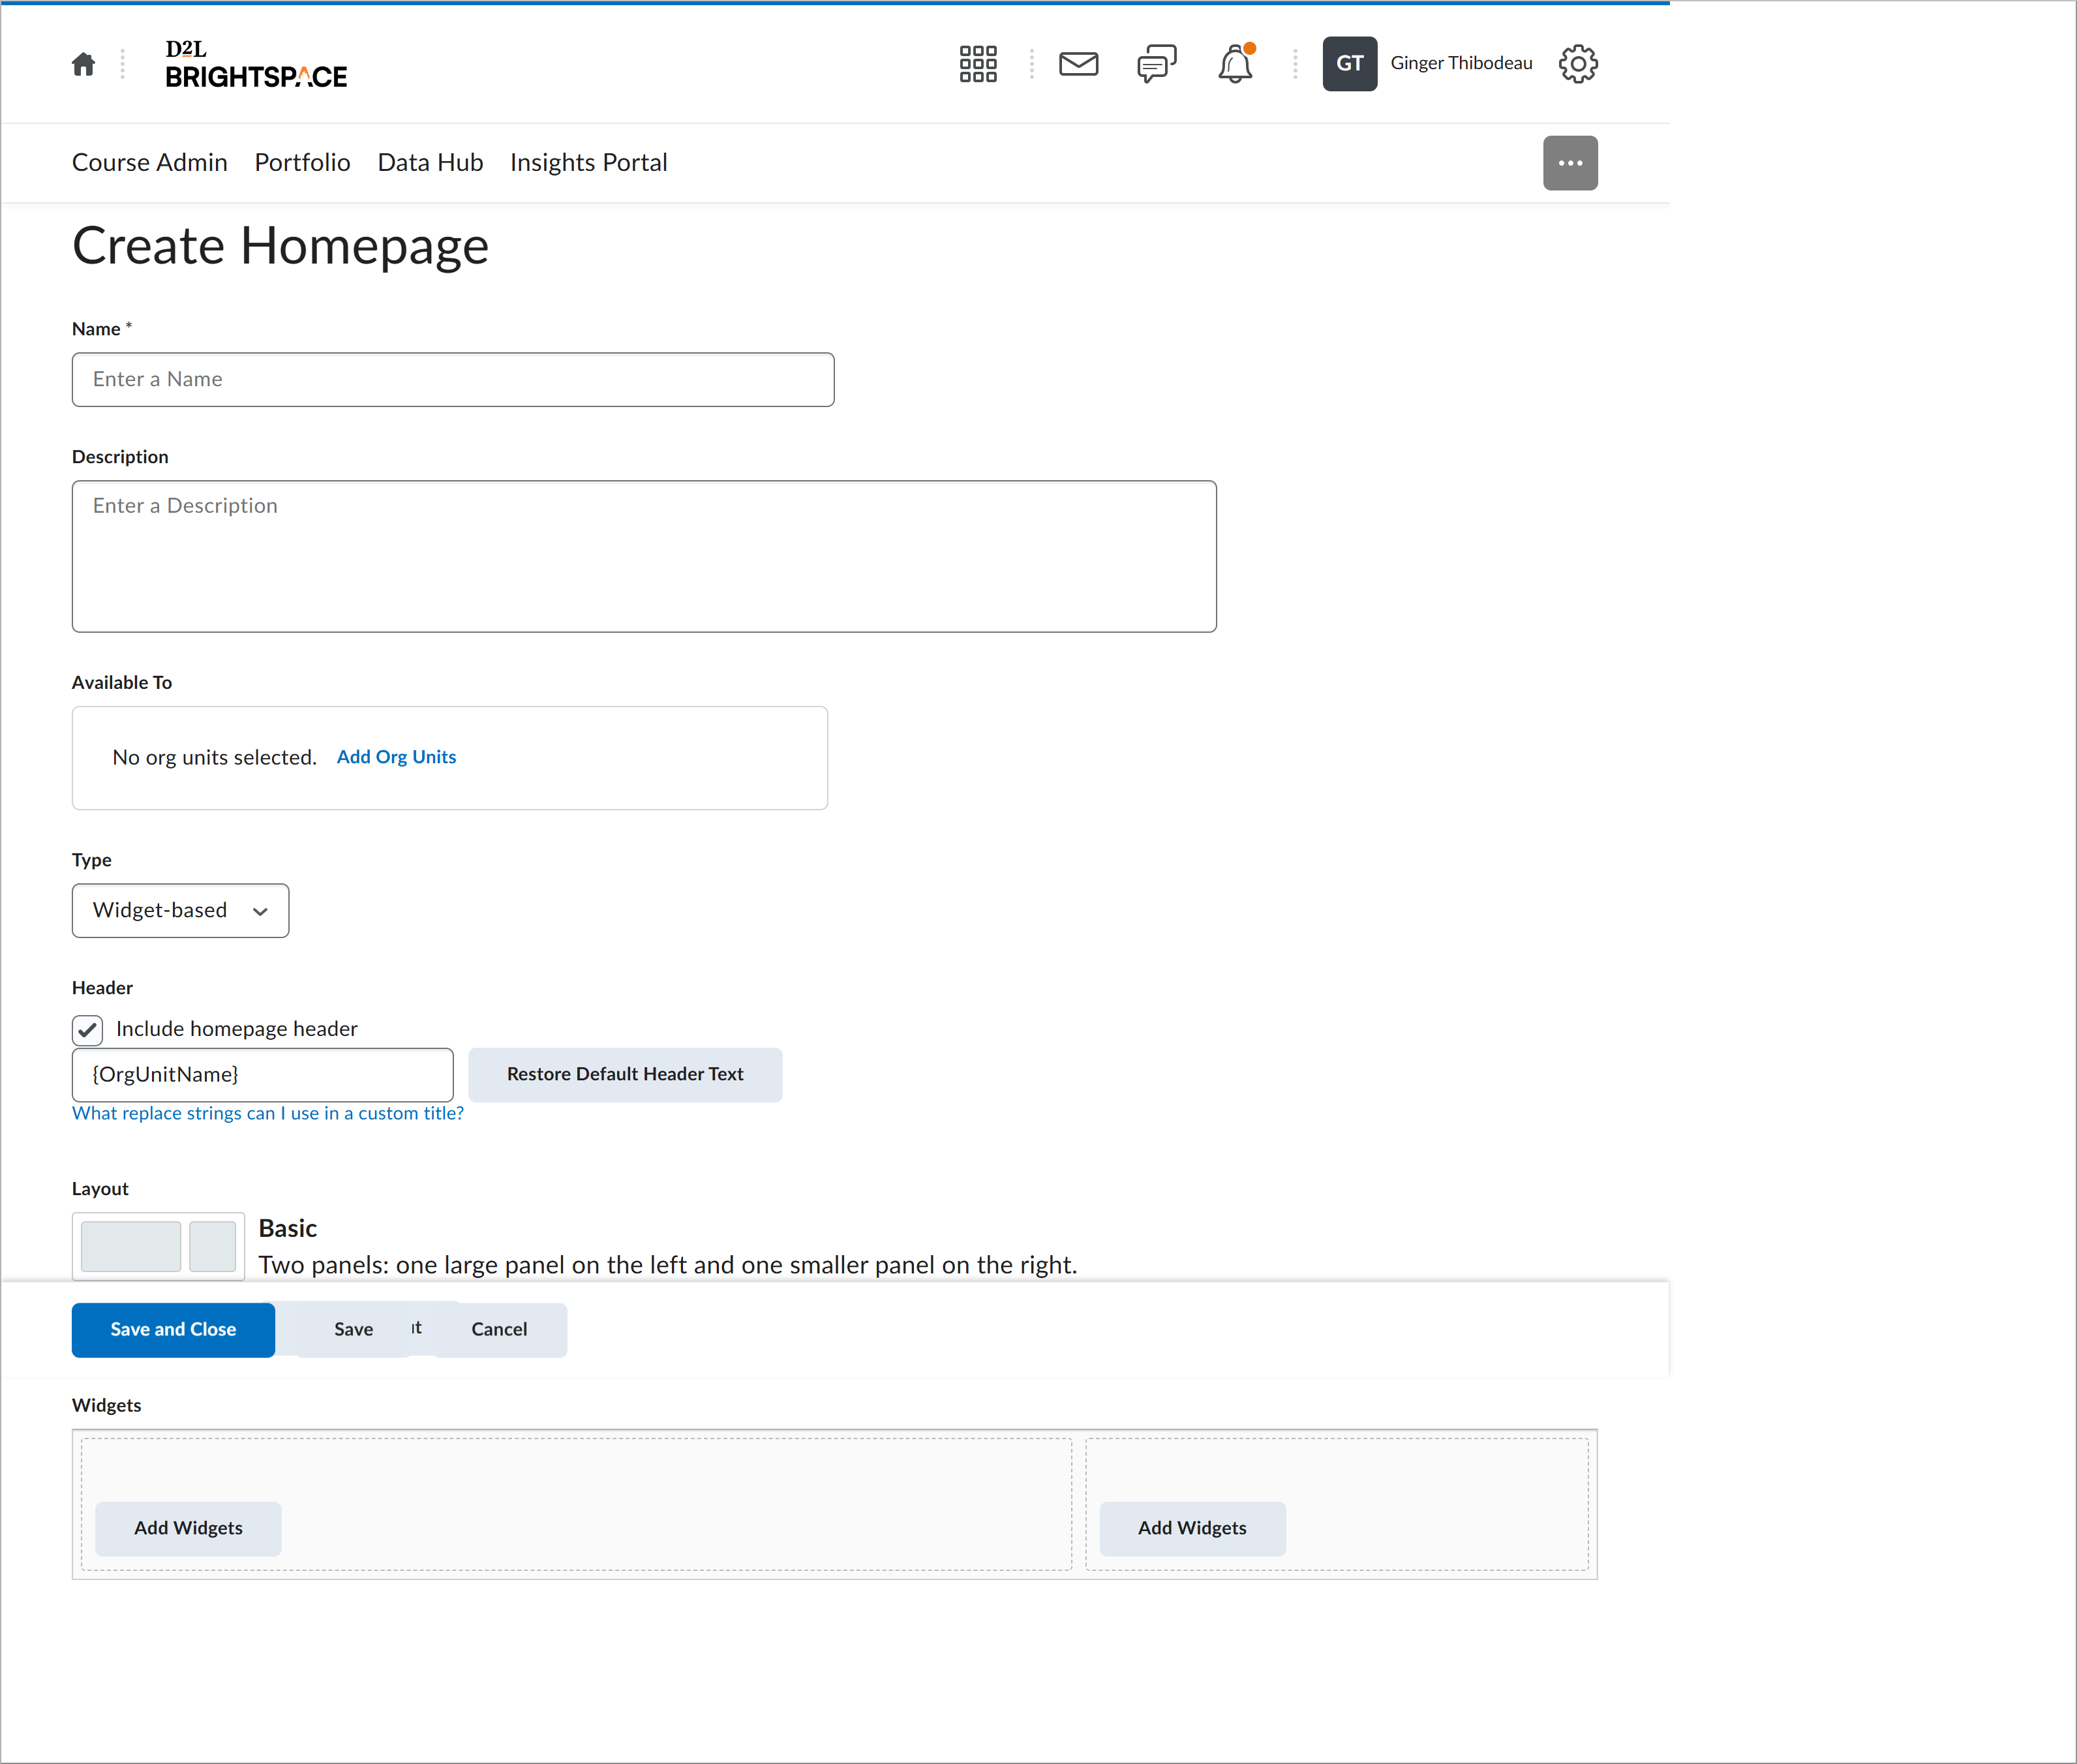
- Click Save and Close.
- From the Active Homepage drop-down menu, select your homepage and click Apply.
Add widgets to your homepage

|
Important: The widgets listed in Add Widgets depend on tools that are available in your organization and enabled for the current org unit. If a widget is missing, ask an administrator to turn it on in Admin Tools > Organization Tools.
|
To add widgets to your course homepage
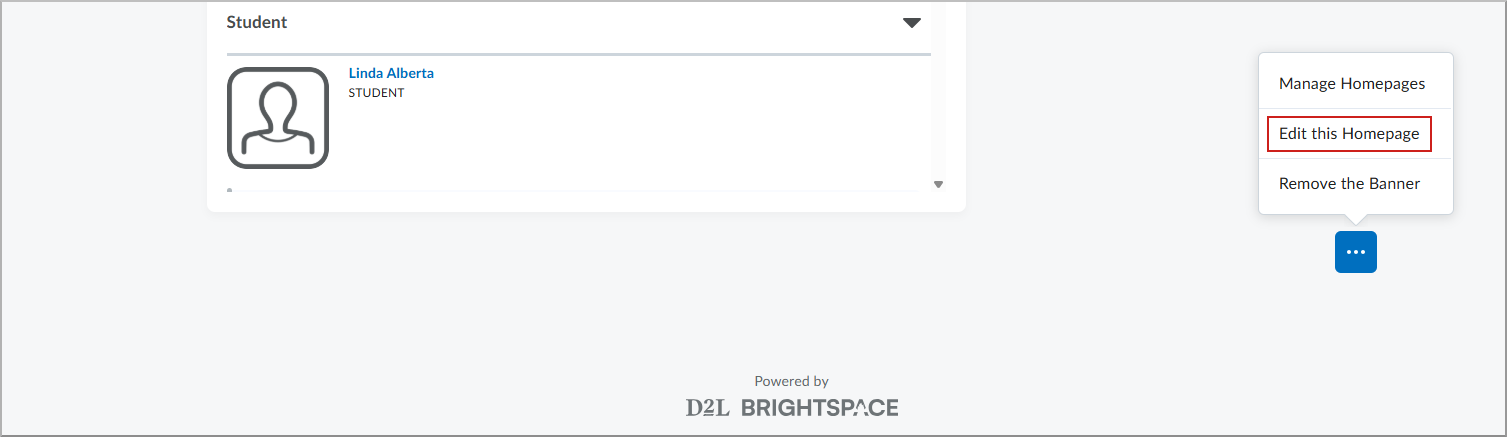
- Scroll to the bottom of your course homepage, click Homepage Options and select Edit this homepage.
- In Widgets, select Add Widgets to view available widgets.

- Select the check boxes for the widgets you want, then click Add.
- Drag a widget to change its vertical placement or move it to another panel.
- Click Save and Close.
Edit or remove widgets on your homepage
You can also edit your homepage to remove widgets.
To remove widgets from your homepage
- From your course homepage, click Homepage Options (...) and select Edit this homepage.
- In Widgets, do one of the following:
- To remove a widget, select Remove next to the widget.
- To edit a widget’s appearance, select the widget name, then adjust the options (for example, Hide title bar, Replace widget name, or Restrict minimizing).
- Click Save and Close.
Troubleshooting
If you don’t see Edit this homepage:
- Confirm you have a widget-based homepage
Edit this homepage only appears for widget-based homepages. If your course uses a Tool homepage (for example, Content) or an External URL homepage, widget options won’t be available.
To switch to a widget-based homepage
- Go to Course Admin > Homepages.
- Create or select a homepage that uses a panel layout (widget-based).
- In Active Homepage, select your widget-based homepage, then select Apply or Save.
- Copy the system homepage first
Default (system) homepages are often locked. Copy it, edit the copy, then make the copy active.
To copy and activate a homepage
- Go to Course Admin > Homepages.
- Open the actions menu next to the active homepage and select Copy.
- Open the copy, make your changes, then select Save and Close.
- In Active Homepage, select the edited copy and apply your changes.
- Check your permissions
Your role needs permissions such as Manage Homepages (and typically Manage Widgets / Create or Edit Widgets). If you’re missing these, you won’t see Edit this homepage. Contact your administrator and refer to System Widgets Permissions.