Use the New Content Experience (Lessons) to create, add, and arrange learning materials for your course.
Video: New Content experience (Lessons)
Create a new unit in the New Content Experience (Lessons)
The first step in adding and organizing learning materials is to create a new unit in your course.
To create a new unit
- From your course navbar, click Content.
- Click New Unit.
- From the New Unit page, do the following:
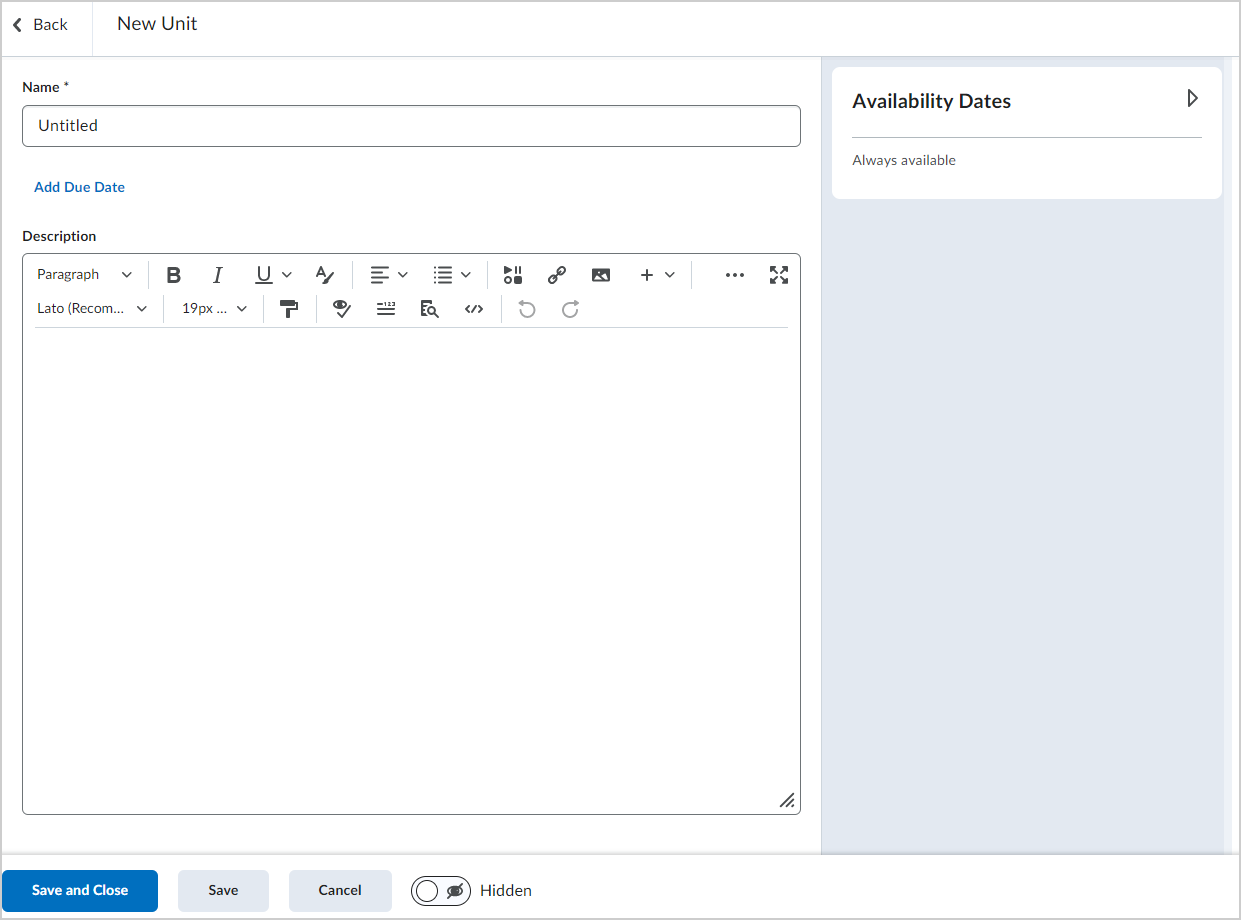
- Enter a Name for the unit.
- If desired, click Add Due Date and enter a Due Date.
- If desired, enter a Description for your new unit.
- Click Availability Dates to set a Start Date and End Date for the new unit.
- Use the visibility toggle to make the unit visible or hidden from students on creation.
- Click Save.
The new unit is added to your course.
Create a new lesson in the New Content Experience (Lessons)
Create a new lesson and add it to a unit in Content.
To create a lesson
- From your course navbar, click Content.
- From the table of contents, click a unit that you want to add the lesson to.
- Click Create New and then click New Lesson.
- From the New Lesson page, do the following:
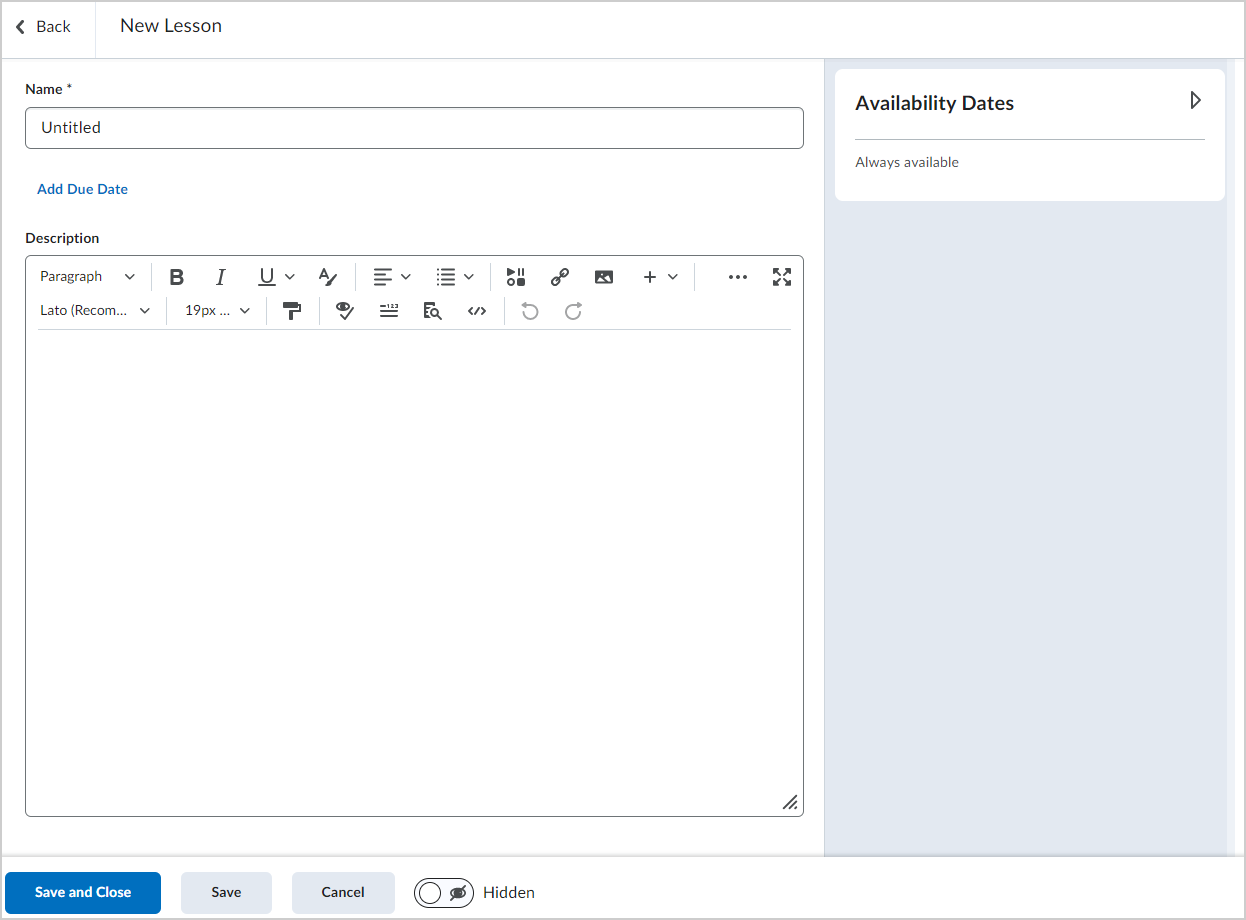
- Enter a Name for the unit.
- If desired, click Add Due Date and enter a Due Date.
- If desired, enter a Description for your new unit.
- Click Availability Dates to set a Start Date and End Date for the new unit.
- Use the visibility toggle to make the unit visible or hidden from students on creation.
- Click Save.
The new lesson is added to the selected unit.
Create a new page in the New Content Experience (Lessons)
Create a new page and add it to a unit in Content.
To create a page
- From your course navbar, click Content.
- From the table of contents, click a unit that you want to add the lesson to.
- Click Create New and then click Page.
- From the New Page page, do the following:
- Enter a Page Title.
- Enter a Due Date.
- Add Page Content. For additional information about using Templates to add page content, refer to Use templates in Content.
- Set a course timeframe and Release Conditions for the content.
- Set Completion information for the content.
- Click Save.
Define the color of root modules in your course
You can define the color of root modules in your course. Sub-modules inherit the parent module's color. This is possible in scenarios where the module meets the following criteria:
- There is no parent above the module in the content navigation hierarchy.
- The course uses a theme to set a navbar color and all modules are one cohesive color.
- The instructor attempting to change the color of the module has the Content > Edit Root Module Colors permission granted to their role.
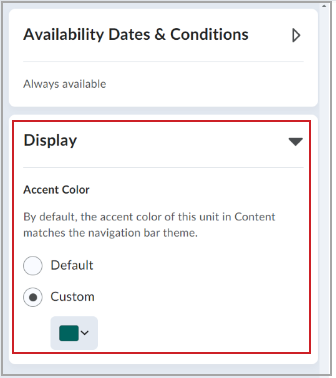
When the criteria are met, the collapsible panel on the right of the Edit Module page includes the display accordion:
About the navbar colors and cohesive colors criteria
For all topics within a module to appear with the same color, one of the criteria is to ensure that the course uses a theme set to a navbar color and all modules are one cohesive color. In the Admin Settings > Navigation and Themes, in the Themes tab, you can set the Primary Color to Use the default (muti-color) or you can Choose colors to select a single color. To meet the criteria, you must choose a single color. To verify your settings on the Themes tab:
- Click the theme that you are using.
- Under Primary Color, verify that the Choose colors radio button is selected.
- If not, select Choose colors, click the color picker, and select a color.
- Click Save and Close.

|
Note: If the collapsible Display area does not appear after completing this procedure, verify that you have actually chosen a color from the picker. If the color is null, the criteria is not met. |
Create new material in the New Content Experience (Lessons)
You can add the following learning materials to your course in the New Content Experience (Lessons). To clearly indicate where you are adding material to, the top of the Create New menu displays breadcrumbs. This also allows you to easily navigate up or down the tree to add material at different levels.
To create and add new learning material
- From your course navbar, click Content.
- Do any of the following:
- Drag and drop locally saved files to the unit, lesson, or folder you want to add the material to directly in the navigation area.
- From the table of contents, select the unit, lesson, or folder you are adding material to and click Create New. The What would you like to create? page opens.
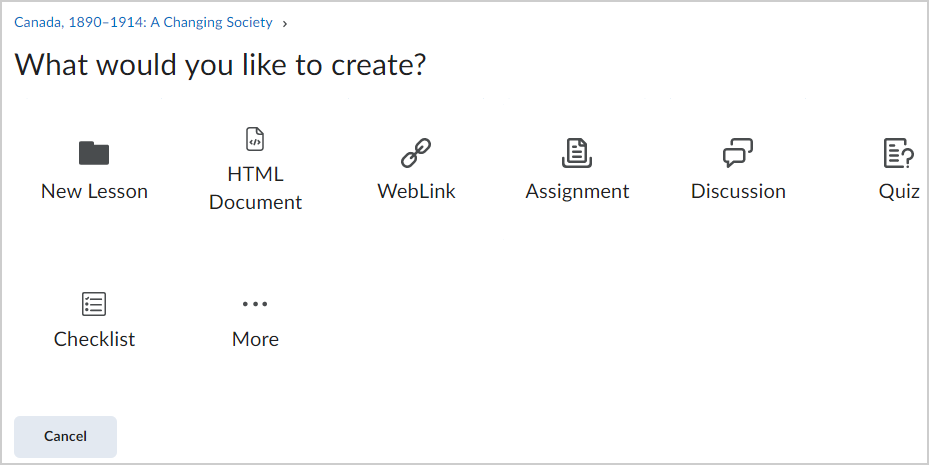
- Choose one of the available options:
- New Lesson
- Page: Enter a title and use the HTML editor to create your new content item. Use the visibility toggle to make the HTML document visible or hidden from students on creation and click Save.
- WebLink
- Assignment
- Discussion: Choose a Forum and Enter a Name and Description, and then click Create and Insert.
- Quiz: Enter a Name and Description, and then click Create and Insert.
 | Note: You will need to access the Quiz in the Quizzes tool to add questions and edit the settings. |
- Checklist: Enter a Name and Description, and then click Create and Insert.
- Self-Assessments: Enter a Name and Description, and then click Create and Insert.
- Surveys: Enter a Name and Description, and then click Create and Insert.

|
Note: It is no longer possible to create a new External Tool Activity using the Create New menu. Instead, click Add Existing, click External Tool Activity, and then click Create New LTI Link. |
Video: How to add new materials
Link to external resources in the New Content Experience (Lessons)
To supplement your course material with external resources, link out to resources using a web link.
To link to external resources
- From your course navbar, click Content.
- Click Create New.
- Click WebLink.
- From the New Web Link page, do the following:
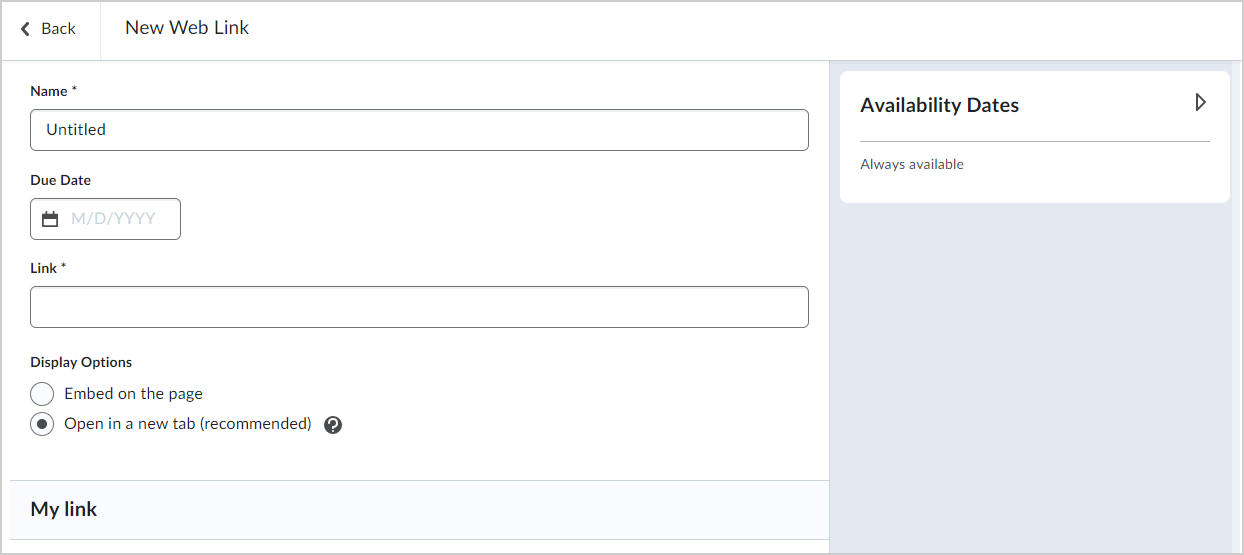
- Enter the display name in the Name field and the web address in the Link field. A preview of the link appears under My Link.
- If desired, enter a Due Date, Start Date, and End Date.
- Under Display Options, do one of the following:
- Select the Embed on the page (iframe) radio button to embed a secure (https) link in the Lessons viewer.
- Select the Open in a new tab radio button.
Click Save.
An external link to learning materials is added to Content.
Embedding versus linking to external resources in the New Content Experience (Lessons)
Linking and embedding both direct students to external resources but are different in how the pathway to the resource is displayed. Linking is when you copy the URL or link address for a resource and then paste it into your course as either a hyperlink or the link itself. When students click the link or hyperlink, they are redirected away from your course to the resource on another web page.
Embedding allows students to view external media on the same page in your course. For example, if you embed a video into a course module, students can view the video in the module instead of being redirected to another web page.
Linking is best when you want students to read longer resources, like an article. Embedding is best when you have playable media that you want students to watch or listen to while they go through content.
To link to external resources
- On your course homepage, navigate to Content.
- Click the Content topic where you want to add your link.
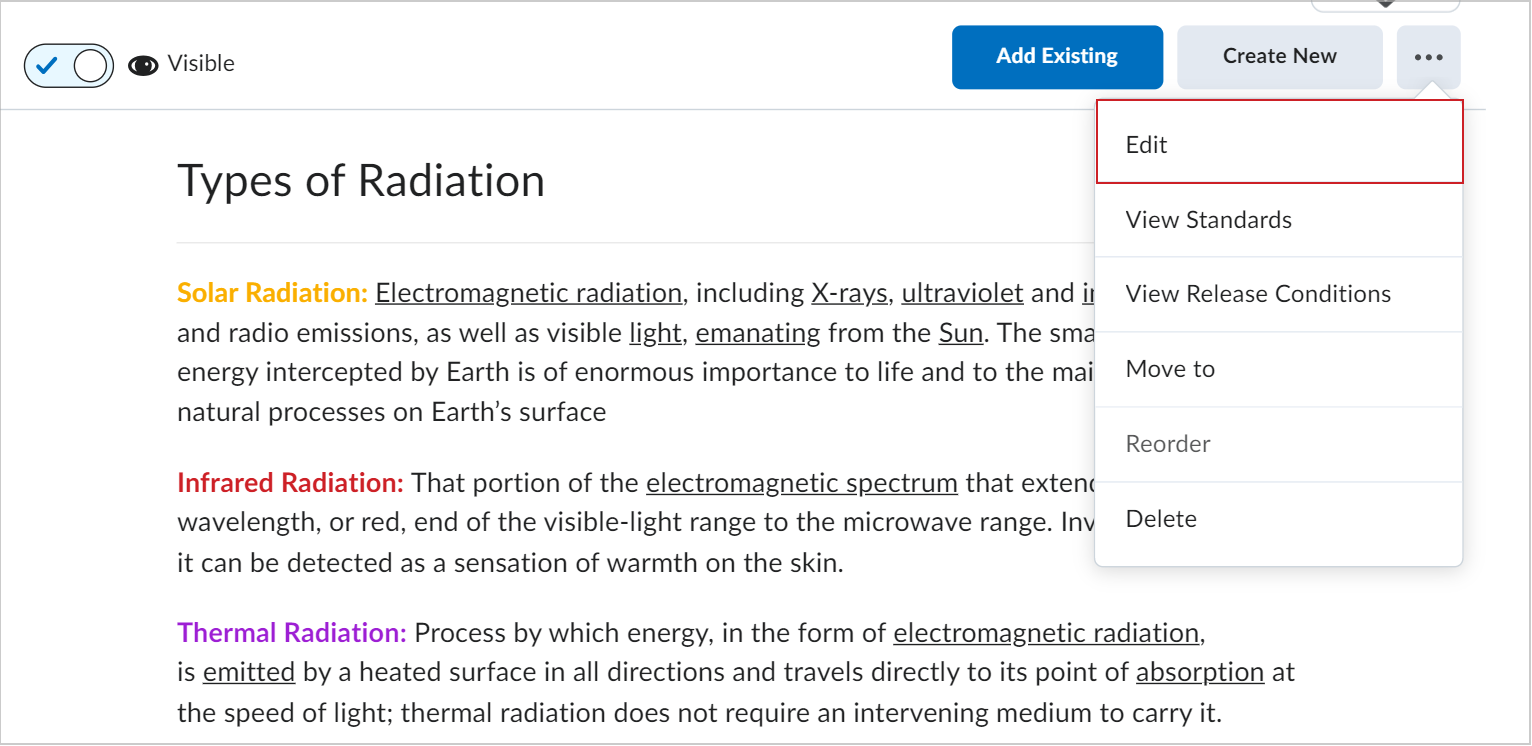
- Click Options (...) > Edit. If you want to create a new Content topic, click Create New > New Lesson.
 | Note: The following steps are applicable for linking wherever Brightspace Editor is available. Linking is not limited to the Content tool; and can be used in tools like Announcements, Assignments, Discussions, Quizzes, and widgets. |
- Copy the link address from the resource you want to link to.
 | Tip: While you can place just the link in your topic, the best way is to hyperlink text so that you can include the name of the resource and reduce the visual weight for your students. |
- In Brightspace Editor, write the name of your linked resource.
- With your cursor, highlight the resource name. In the context menu above the name, click the Add/Edit Link button.
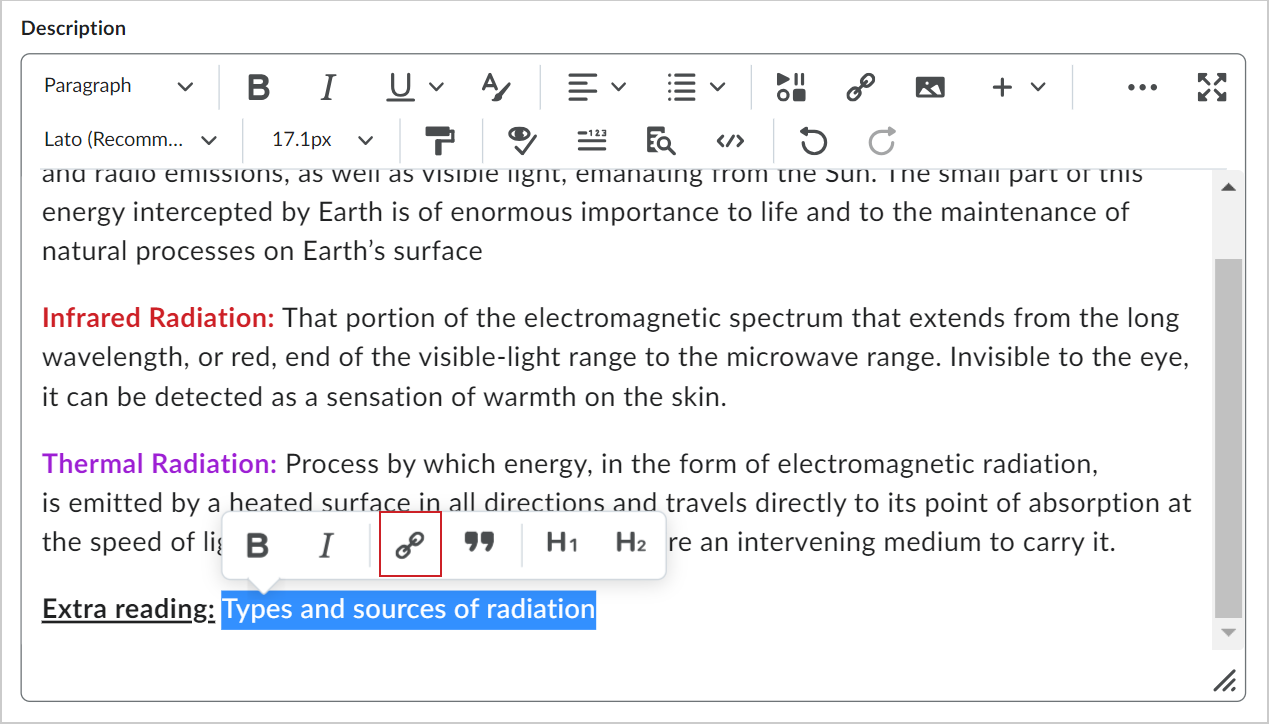
- Enter the link address into the Link field and click Create. The linked text appears as a default blue color.
- Click Save and Close.
You have added a hyperlink to your Content topic. Students will be redirected to the external resource by clicking on the hyperlink.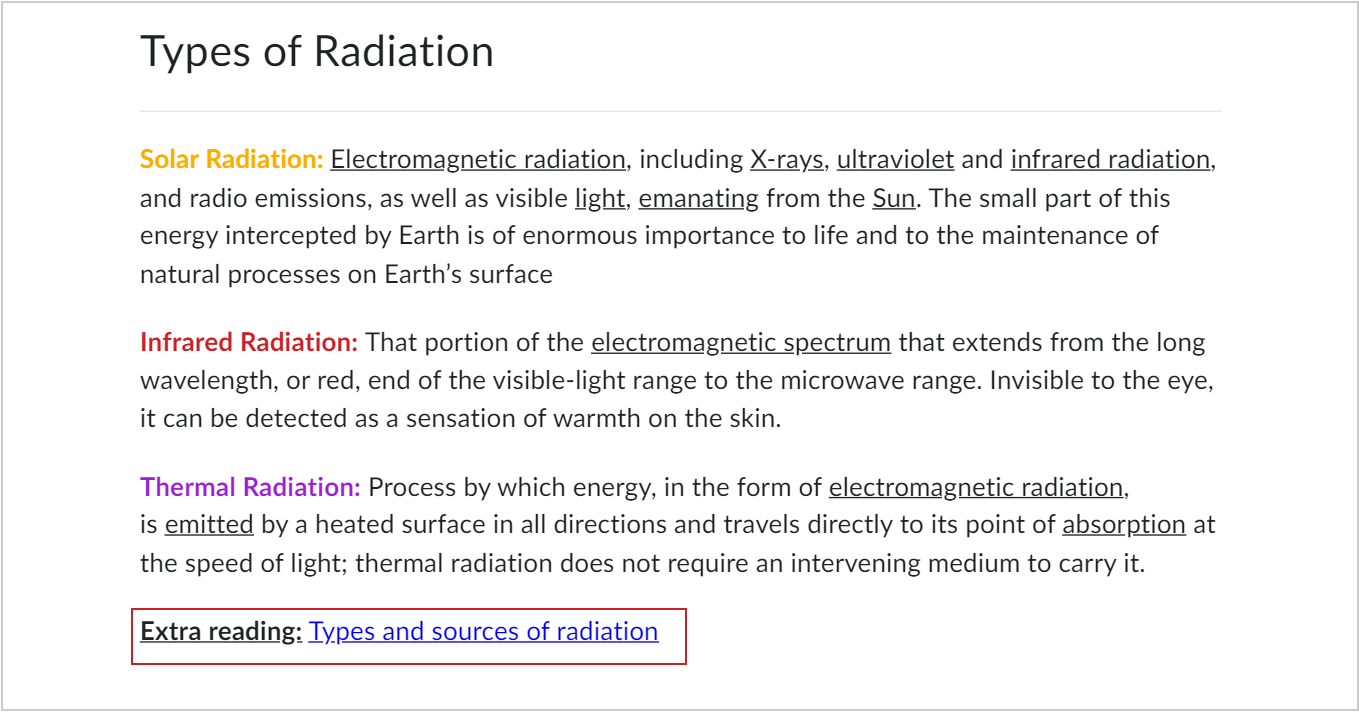
To embed an external resource
- On your course homepage, navigate to Content.
- Click the Content topic where you want to embed your media.
- Click Options (...) > Edit. If you want to create a new Content topic, click Create New > New Lesson.

 | Note: The following steps are applicable for embedding media wherever Brightspace Editor is available. Embedding is not limited to the Content tool; and can be used in tools like Announcements, Assignments, Discussions, Quizzes, and widgets. |
- Navigate to the media you want to embed. For this example, we will embed a YouTube video.
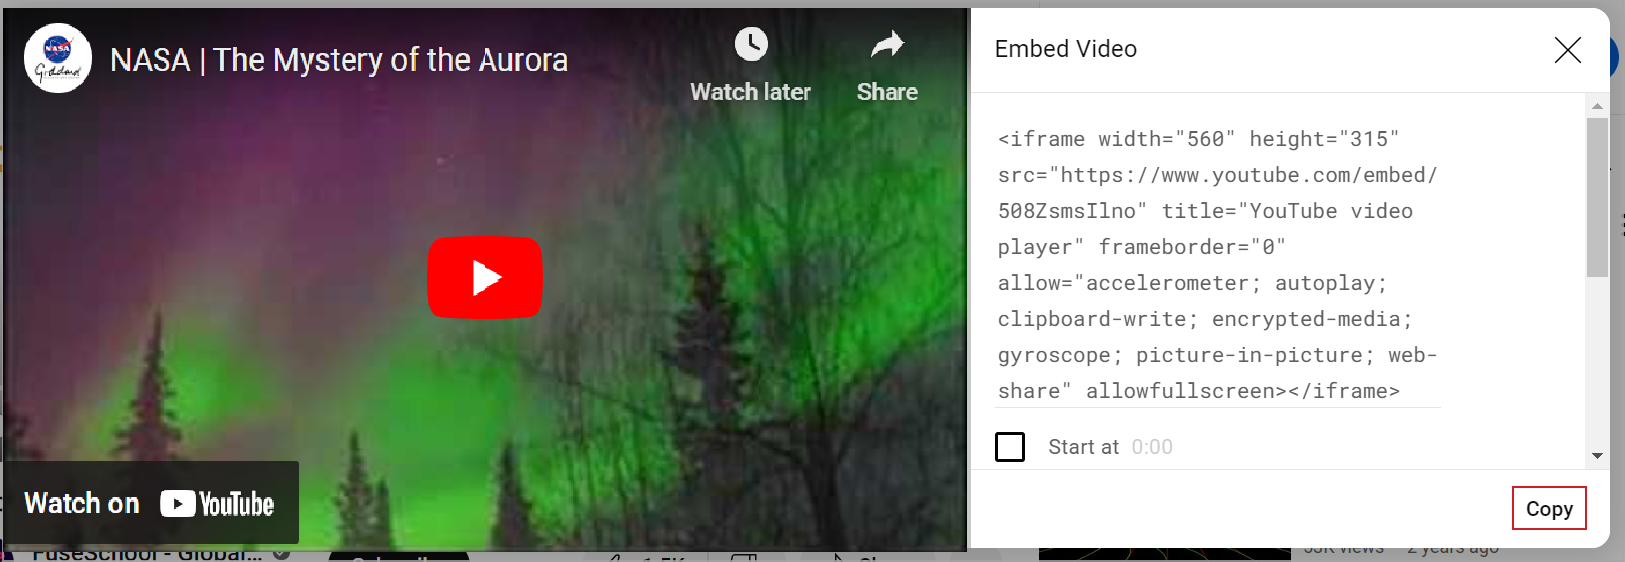
- In YouTube, click Share > Embed.
- The embed code appears in the right panel. Click the Copy button to copy the embedded code.
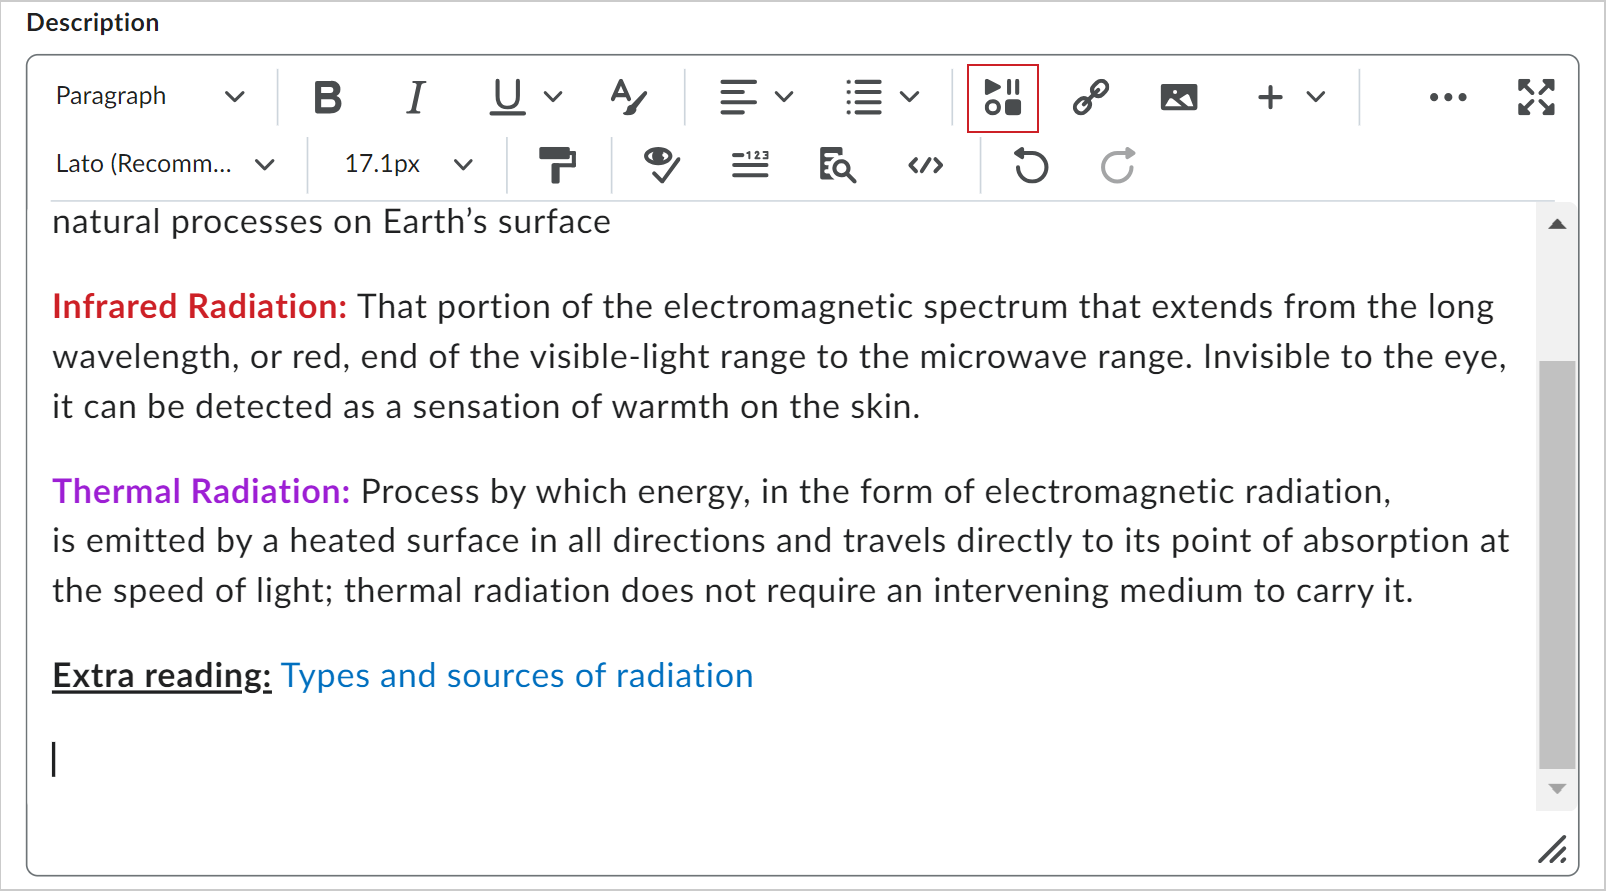
- In your Content topic, click Insert Stuff.
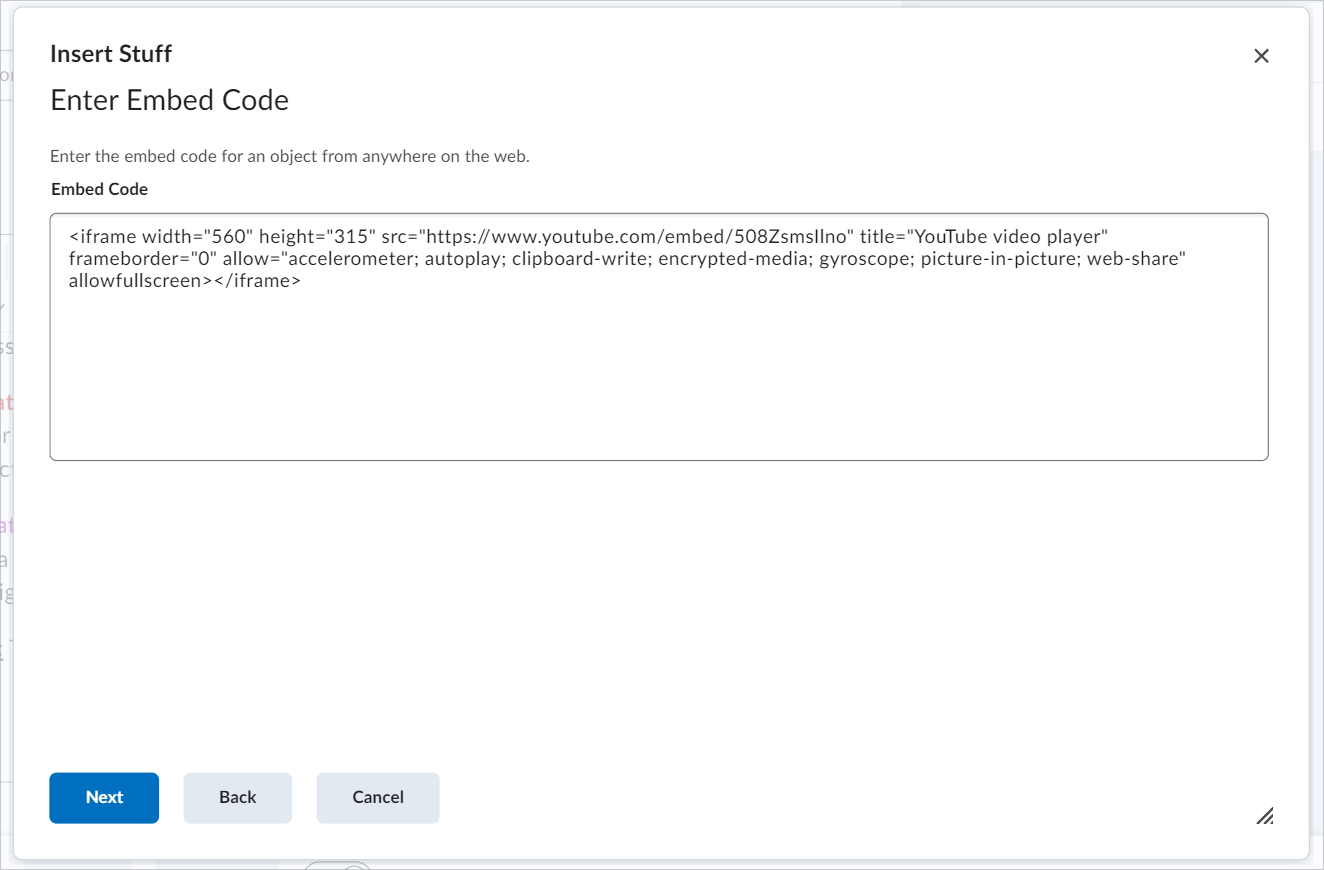
- In the Insert Stuff dialog, scroll down and click Enter Embed Code.
- Paste your embed code into the textbox and click Next.
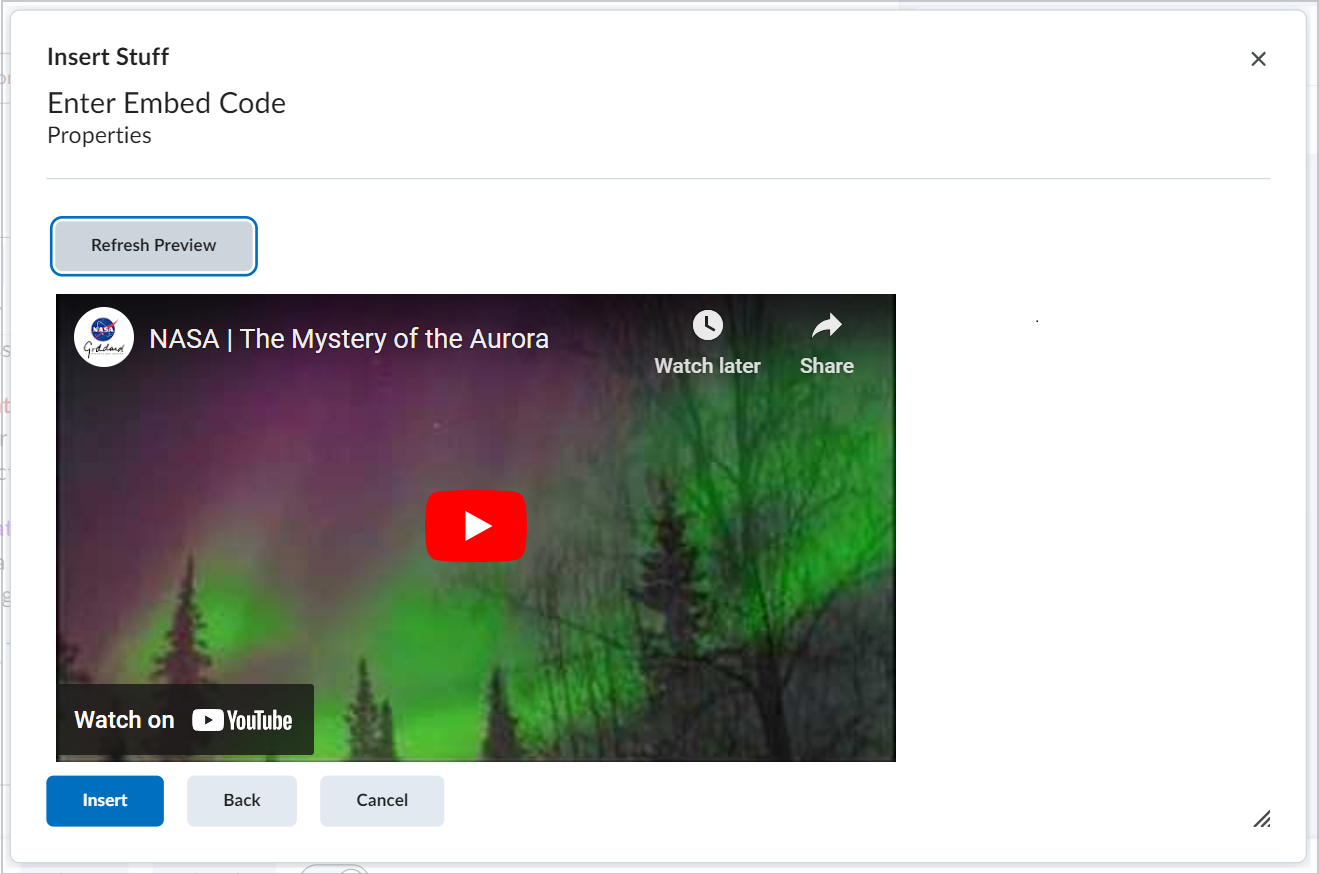
- Wait while your video loads in the dialog. Then click Insert.
- Click Save and Close.
Your media has been embedded in your Content topic. Students can play the media within your Content topic instead of being redirected to YouTube.
Set material as optional or required in the New Content Experience (Lessons)
You can set your course materials as Optional or Required for students to improve their experience and manage their learning time more effectively.
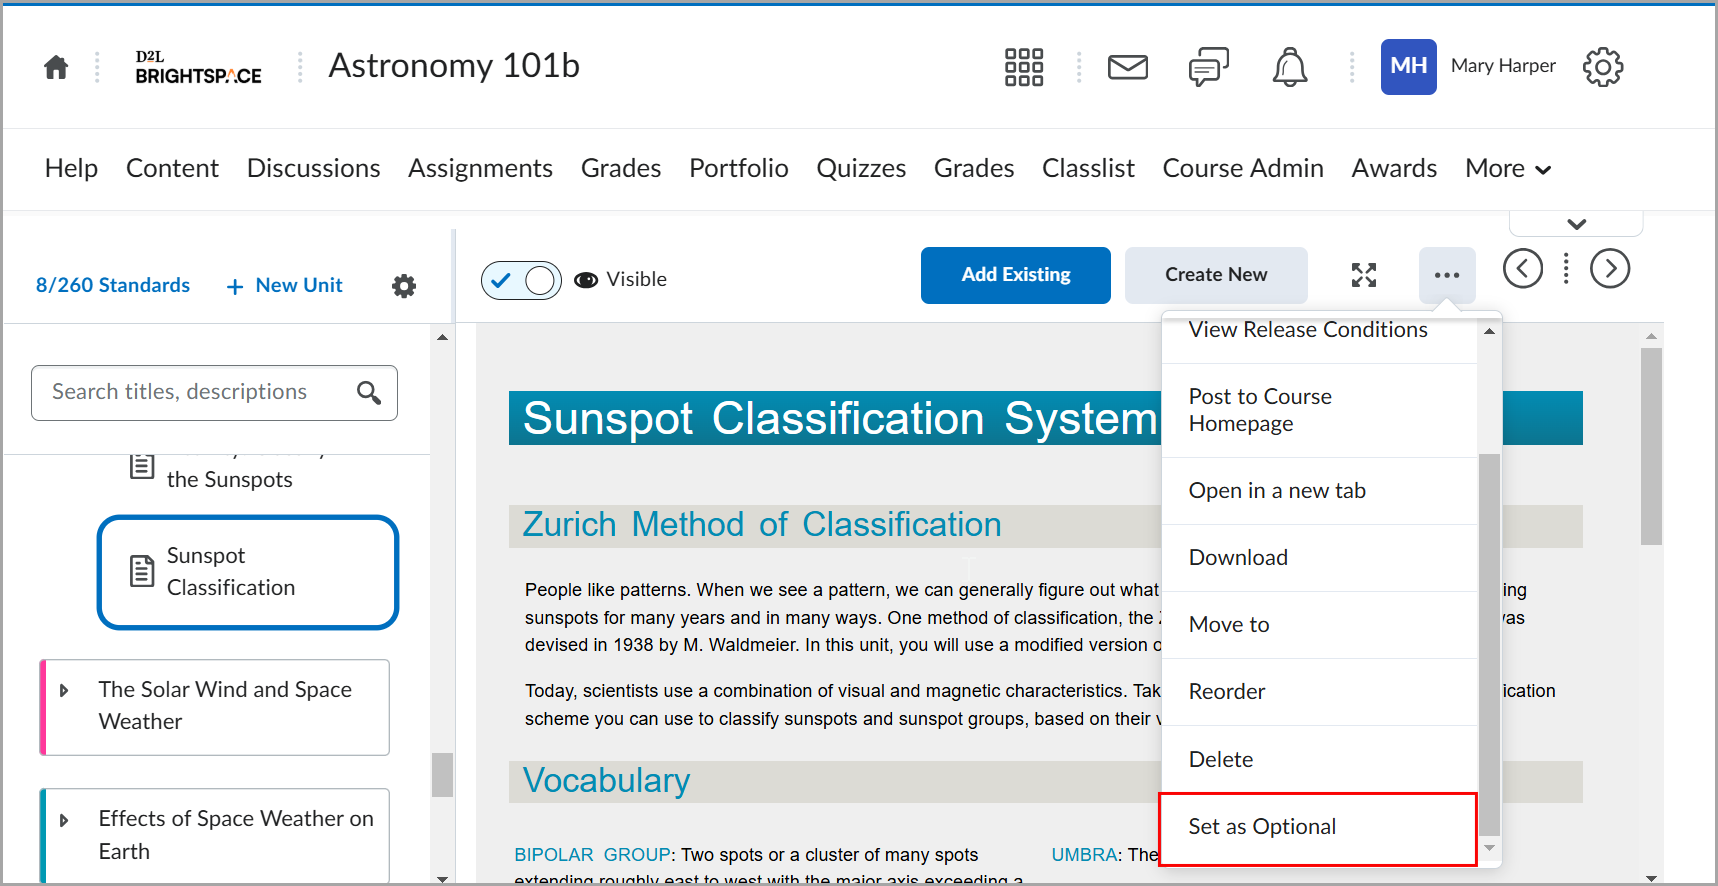
To set material as Optional or Required
- From the table of contents, select the desired material.
- Click the Options (...) menu .
- Select Set as Optional or Set as Required.

|
Important: Students using New Learner Experience can see if a topic is Optional or Required, but students and instructors using New Content Experience (Lessons) cannot. |
Add existing material in the New Content Experience (Lessons)
You can also add existing material to your course from the New Content Experience (Lessons). To clearly indicate where you are adding material, the top of the Add Existing menu displays breadcrumbs. This also allows you to easily navigate up the tree to add material at different levels.
To add existing material
- From your course navbar, click Content.
- From the table of contents, select the unit, lesson, or folder you are adding material to.
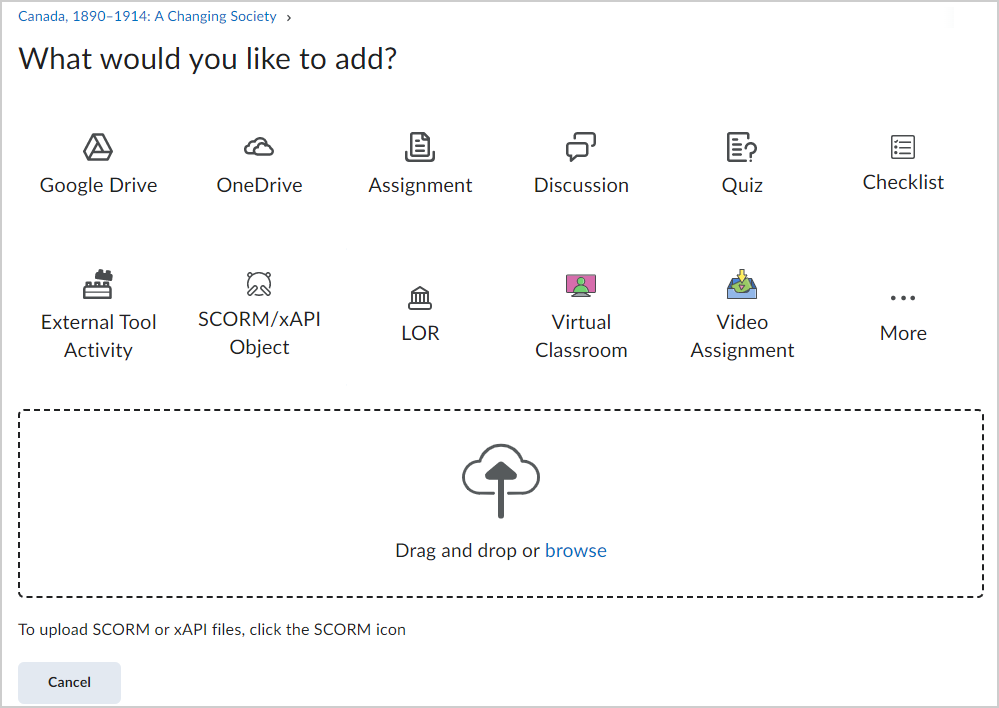
- Click Add Existing. The What would you like to add? page opens.
- Choose one of the available options:
- Google Drive: Click Continue to Google Drive > Allow> choose an item to add.
 | Note: When adding private files from a Google Drive account to Brightspace, a notification indicates if the file is private, and teachers are given the option to change permissions so that anyone with the link can view the file. |
- OneDrive: Click Continue to OneDrive > select your account > enter credentials and click Accept > choose an item to add.
- Assignment: Select an assignment from the list.
- Discussion: Select a discussion forum > click a discussion topic.
- Quiz: Select a quiz from the list.
- Checklist: Select a checklist from the list.
- External Tool Activity: Select from the tool providers that are in use by your institution, or click Create a New LTI Link to register a new LTI link.
- SCORM/xAPI Object: Select a SCORM course package to import into the Lessons tool.
- LOR: Search or browse for a learning object from Brightspace Learning Repository (LOR). A learning object can be a quiz, presentation, image, video, or any other kind of document or file you use to create course content and learning materials for online learning.
- Drag and drop a file onto the dialog or click browse to select a file from your computer, course files, or a public file. The file is added to the selected unit, lesson, or folder.

|
Note: When you add an existing assignment, discussion, quiz, or survey to a content topic, the content topic's Visibility state syncs with the Visibility state of these existing activities. For example, if you add an existing assignment that is Visible to content, the content topic maps to the assignment's visibility state and becomes Visible. |
Video: Add external content to a course
Video: Copy existing course content into a course
Replace uploaded files in the New Content Experience (Lessons)
You can replace uploaded .PDF, Word, PowerPoint (.PPT), and image files that you added to a unit, lesson, or folder in the New Content Experience.
To replace uploaded files
- From your course navbar, click Content.
- From the table of contents, select the .PDF, Word, .PPT, or image file you want to replace.
- Click the Options menu and then select, Edit.
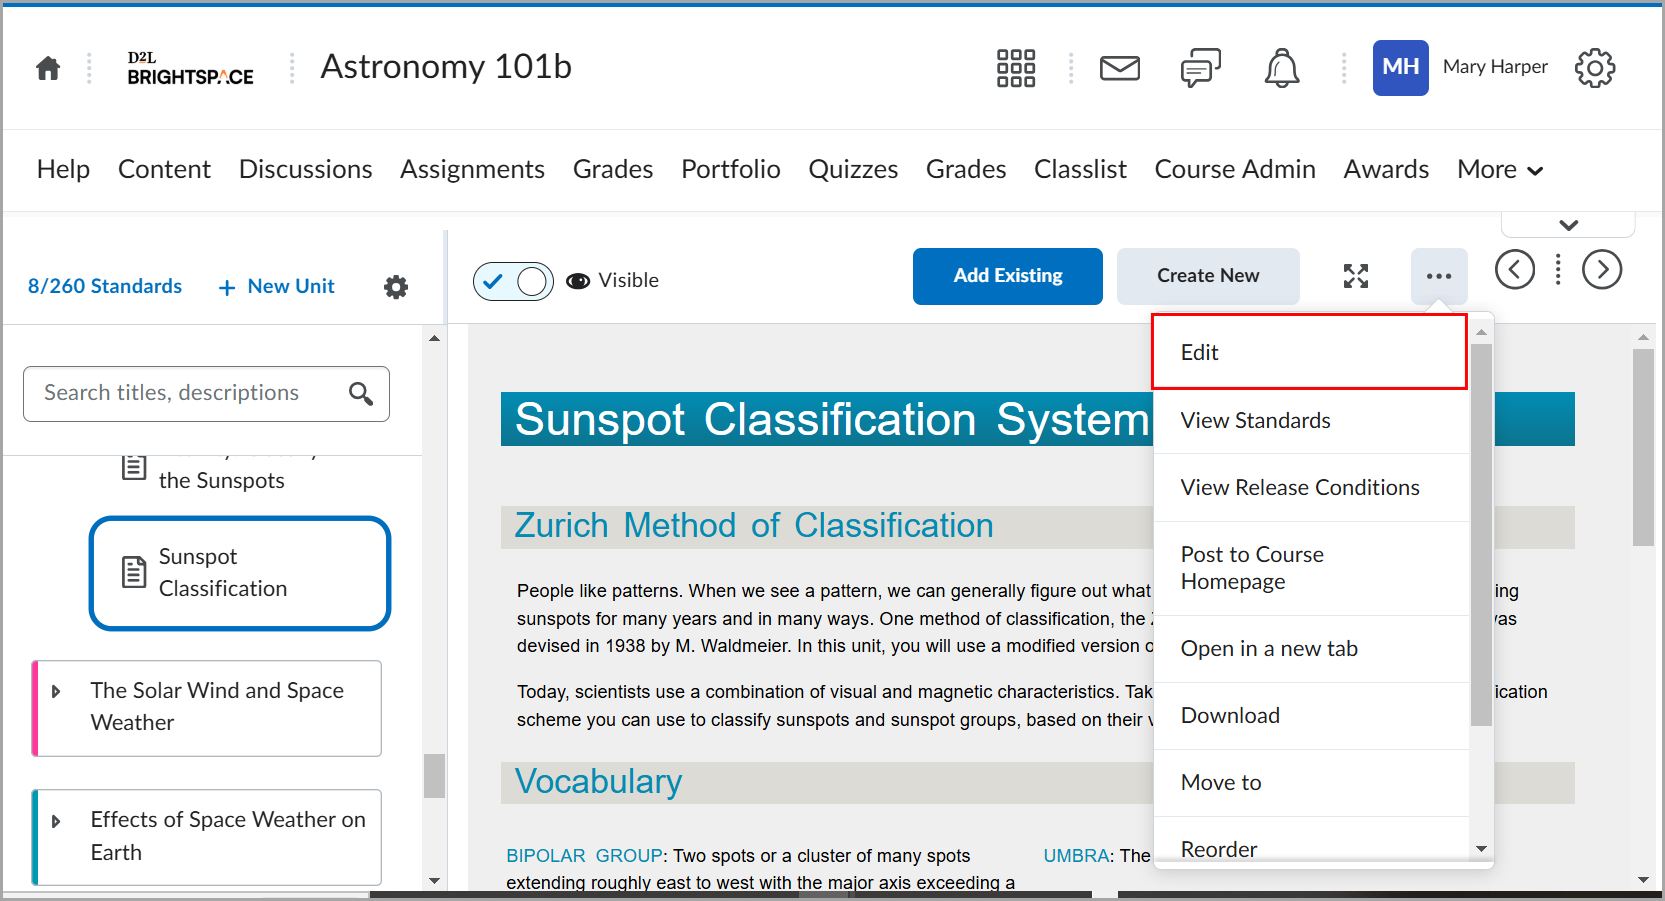
- Click Replace.
- Select the updated file you want to add from your computer, course files, or a public file.
- Click Add.
The selected file is replaced.
Rearrange materials in the New Content Experience (Lessons)
Units, lessons, and materials can all be rearranged by dragging and dropping them to the desired position.

|
Note: When moving Units and Lessons, the number assigned is automatically updated (e.g. Unit 2 becomes Unit 4 if it is moved into that position).
To use drag-and-drop functionality in the Table of Contents at any depth level, the configuration variable d2l.Tools.Content.EnableLessonsEnhancedTOC must be turned ON.
|
To rearrange materials
- From the content area's table of contents, click and hold a collapsed unit, lesson, or material.
- Do one any of the following:
- Drag it to the desired position and release your click.
- From the (...) Options menu, select Move to or Reorder.
- Use the arrow keys on your keyboard to set the new location of the unit, lesson, or material.
- Click Done.
The selected material is moved to a new location in your course table of contents.
Video: How to rearrange units, lessons, and materials
Edit materials in the New Content Experience (Lessons)
You can update or modify your existing materials, including creating and editing topic descriptions, directly from the activity page.
To edit materials
- From the table of contents, select a unit, lesson, or material.
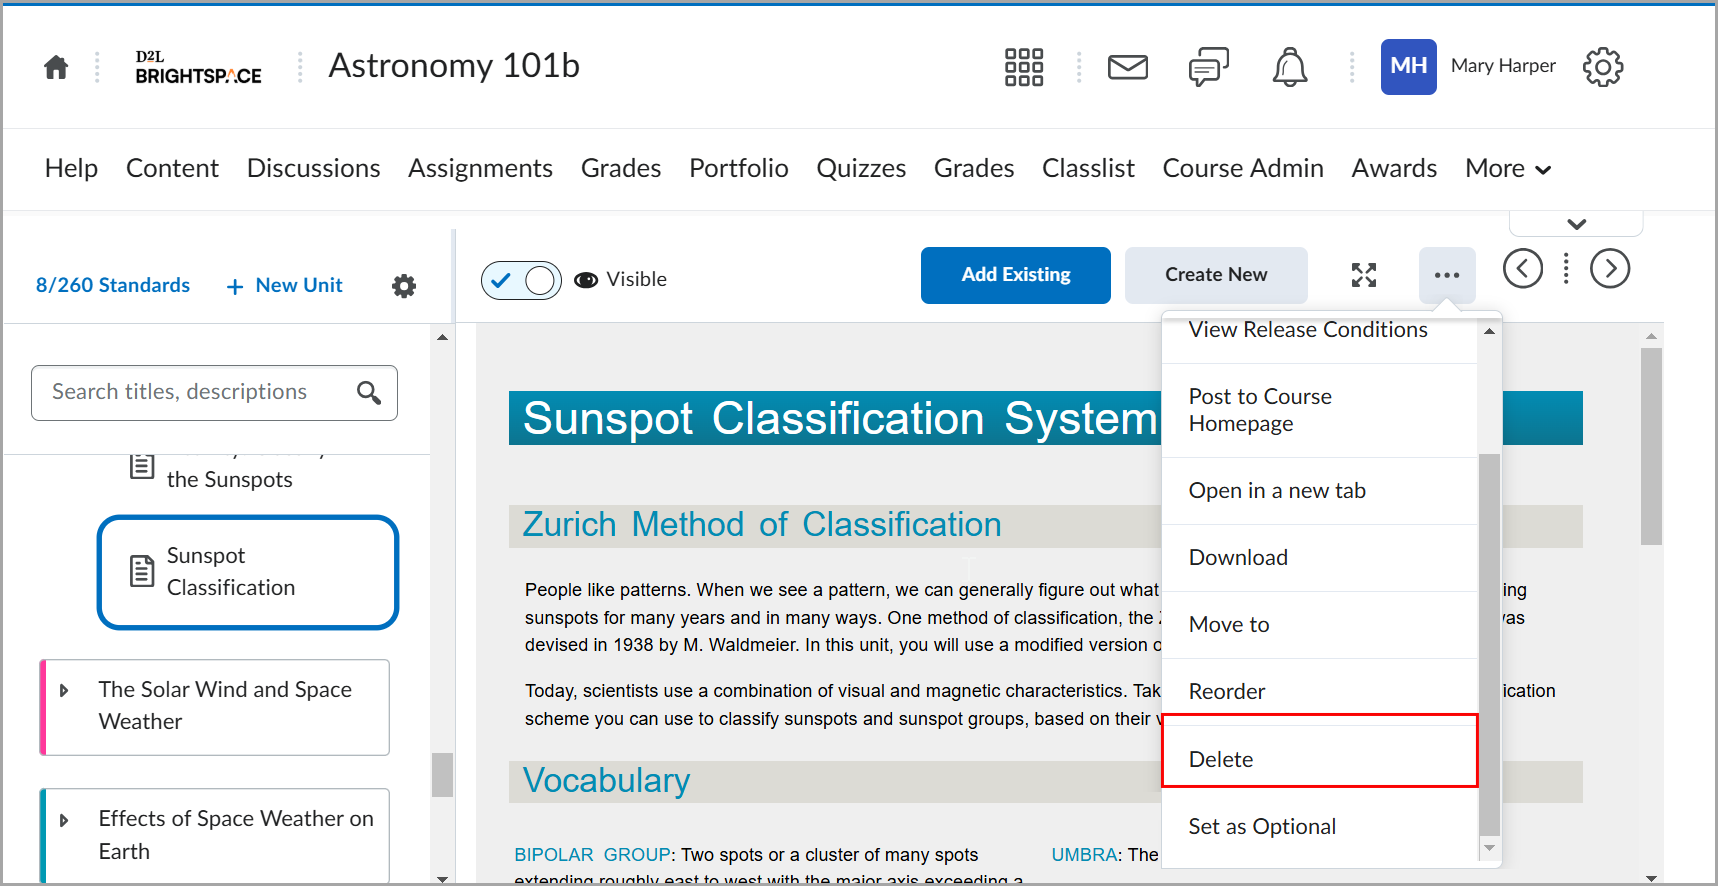
- Click the (...) Options menu and select Edit.
- Update the item.
- Click Save.
The selected unit, lesson, or material is edited and saved.
Delete materials using the New Content Experience (Lessons)
Delete selected materials from your units or lessons
To delete materials
- From your course navbar, click Content.
- From the table of contents, select a unit, lesson, and material.
- Click the Options (...) menu.
- Select Delete.
- Select one of the following options:
- Remove the topic from Content but keep the associated file or activity in the course
- Permanently delete both the topic from Content and the associated file or activity from the course
Click Delete.

The selected course materials are deleted.
Post materials to your course homepage
Use Content to post discussions, quizzes, or assignments directly to your homepage on the Activity Feed widget.

|
Important: Your course homepage must include the Activity Feed widget for to post materials from Content. Refer to the Create a widget-based homepage for more details about using widgets on your homepage. |
To post materials to your course homepage
- From your course navbar, click Content.
- Select a content item from the table of contents.
- Click the (...) Options menu and select Post to Course Homepage.
- From the Create a post dialog, do the following:
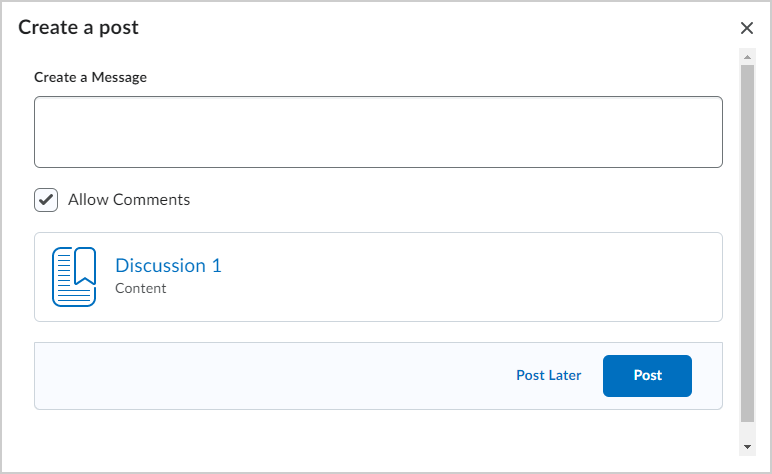
- Enter a message to share with students.
- If desired, deselect Allow Comments.
- If you want to schedule the post later, click Post Later > choose a date and time > Schedule Post.
- Click Post.
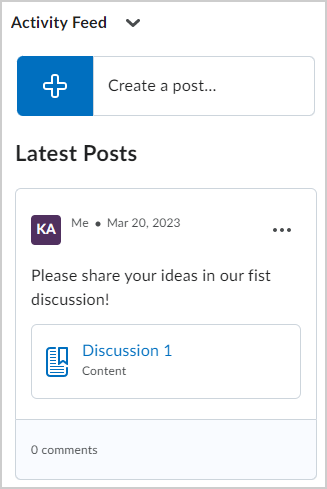
The selected material is posted to your course homepage on the Activity Feed widget.
Linking to materials in Lessons
When browsing in Lessons, a unique URL is assigned to each unit, module, topic, and lesson. This allows instructors to link to a specific location in Lessons without students having to navigate to the item manually.
When creating a new HTML document, you can insert a link to a specific location in Lessons using the HTML toolbar.
- In Lessons, click Create New.
- Click HTML Document.
- From the toolbar, click Insert Quicklink.
- Click Content.
- Find and select the material to create a link to, and then click Save.
- Click Save.
What kinds of files can I use with Lessons?
|
Extension
|
Notes
|
|
PDF, JPG, JPEG, PNG, BMP, GIF, MP4, OGV, WEBM, OGG, AAC, FLAC, MP3
|
Files with these extensions display in the embedded viewer in Lessons.
Note: AAC and FLAC do not render inline when in immersive learner view
|
|
DOC, DOCX, PPT, PPTX, PPS, RTF, ODT, ODP, XLS, XLSX
|
Files with these extensions display in the embedded view only if Document Conversion Service is turned on for your organization
|

|
Note: All other file types uploaded to Lessons appear as download links for users to view outside of Brightspace. |