Display all upcoming events to students in one spot. Post events such as project due dates, office hours, in-class events and more to the calendar.
Create course events in Calendar
You can create an event for your course using the Calendar tool.
Note: You can also add locations to your events, and assign them to seating charts. Refer to the Manage events and locations topic for more details.
To create course events in Calendar
- On the navbar, click Calendar.
- Click Create Event.
- From the Create Event page, do the following:
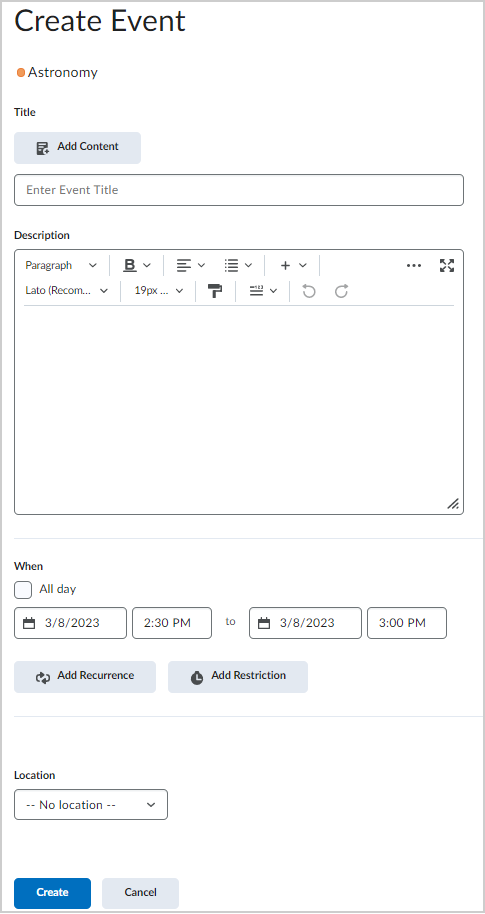
Figure: The Create Event page.- To associate course content with the event, click Add Content. Select the module from which you want to add content. Click Add.
- If you've associated course content with the event and want to use a custom name for the event, select the Use custom name check box. Enter a name for your event.
- If you have not associated course content with the event, enter a name for your event.
- To add date and time details to your course event, in the When area, click on the provided fields.
- To add recurrences to the event, click Add Recurrence. Enter your event recurrence details.
- To add restrictions to the event, click Add Restriction. Enter your event restriction details.
- To add a location for the event, from the Location drop-down list, and do the following:
- Select a location from the drop-down list. All active locations are available to associate with the event.
- Select the Custom option from the drop-down list. Enter the name of the location for your event in the adjacent field.
- If there are no active locations and a drop-down list is not available, enter the name of the location for your event in the field provided.
- If you have the required role permissions, enter a location name to create a new location.

Figure: The Location field of the Create Event page.
Important: You must be granted the Locations > Manage Locations and Delete Locations permissions to enter a location name and create a location. This permission also enables you to Manage Locations from the Locations tool. Refer to the Manage locations topic for details.
- Click Create.
The event is created and added to your calendar.
Note: You can add start and end date restrictions to Quizzes, Assignments, and other tools, which are then automatically populated in your course calendar.
Video: Create a Calendar event
Change Calendar settings
- From your course navbar, click Calendar.
- Click Settings.
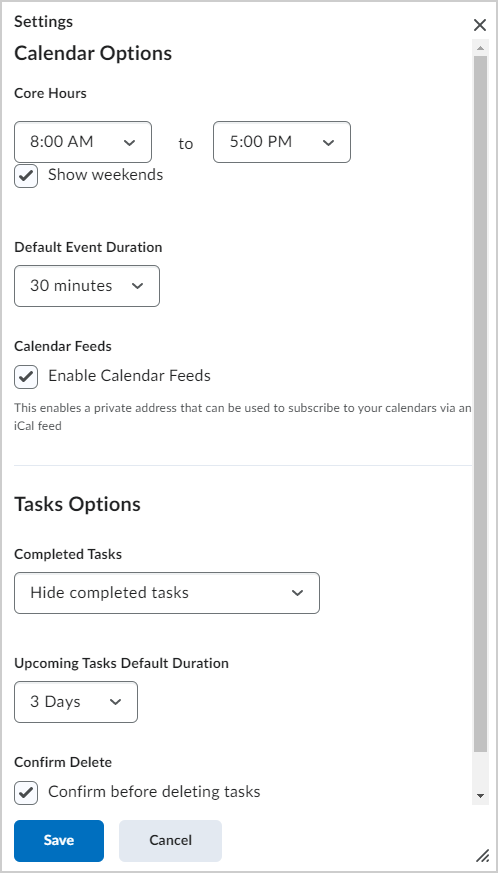
Figure: The Settings dialog for Calendar.
- Under Calendar Options, do any of the following:
- Set Core Hours for your course.
- Select a Default Event Duration.
- To allow users to subscribe to your calendars using an iCal feed, select Enable Calendar Feeds.
- Under Task Options, do any of the following:
- Select how long to show Completed Tasks on your calendar.
- Select the Default Duration for upcoming tasks.
- If desired, select Confirm before deleting tasks.
- Click Save.
Your calendar settings are saved.
Create multiple instances of an event for different groups and sections
If you have more than one group or section participating in the same course event during different time intervals, you can create multiple instances of the same event, tailored to each group or section’s needs. The group or section events share the name and description fields, but once you finish creating the events in bulk, they display as individual events.
To create events for different groups or sections
- On the navbar, click Calendar.
- Click Create Event.
- In the Attendees area, click Add Groups/Sections.
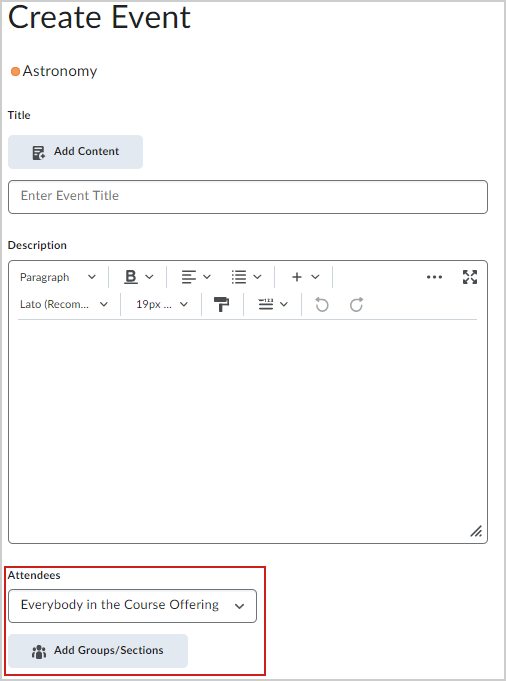
Figure: The Attendees area of the Create Event page.
Important: This option is only available if you have already created at least one group or section for your course.
- In the Add Groups dialog, click on the group or section you want to add. Repeat steps 3-4 until you have added all of the groups and sections you want.
- For each group or section, customize the date, time, frequency, location, and any restrictions for your event.
- Click Create.
Multiple instances of the same event are created for each group or section.
Change visibility for events
You can customize when you want an event to be hidden or visible.
To change visibility for events
- On the navbar, click Calendar.
- From the tool navigation, click the List tab.
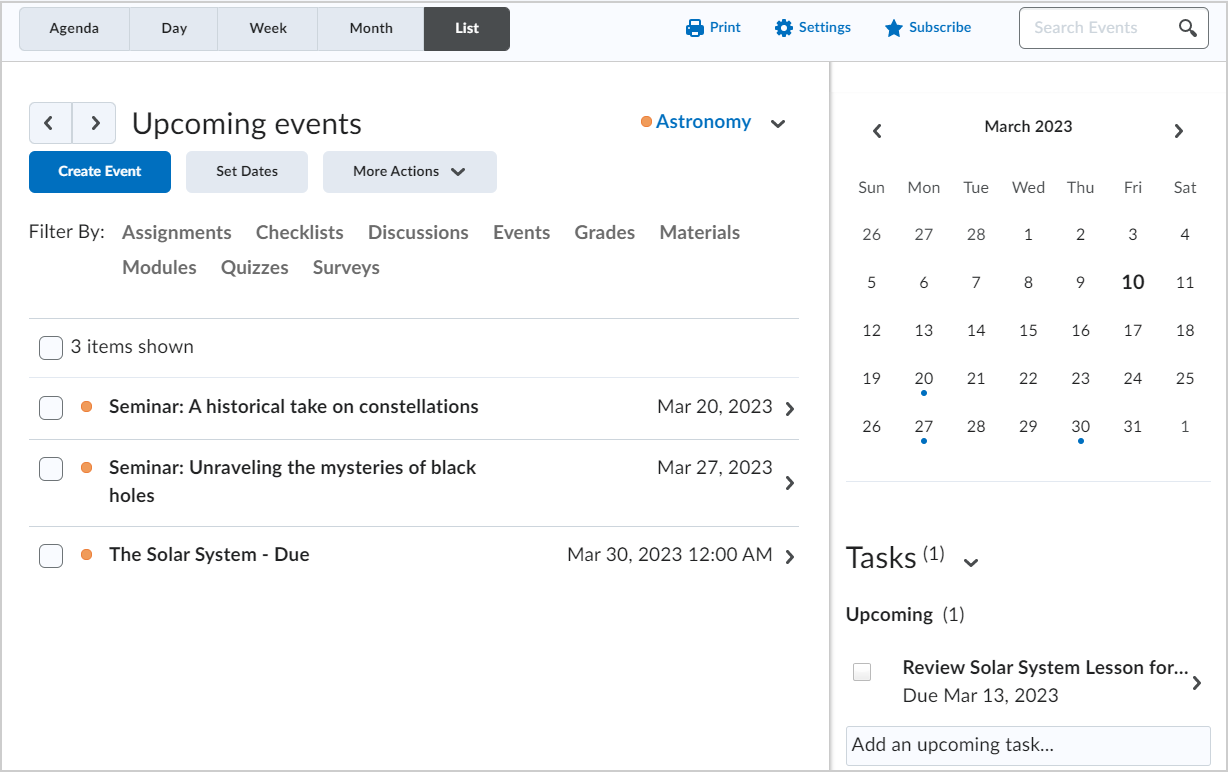
Figure: The Calendar page with the List tab selected.
- Select the check boxes by any event for which you want to make visibility changes.
- Click More Actions and select Change Event Visibility.
- From the Set Visibility dialog, select from the following:
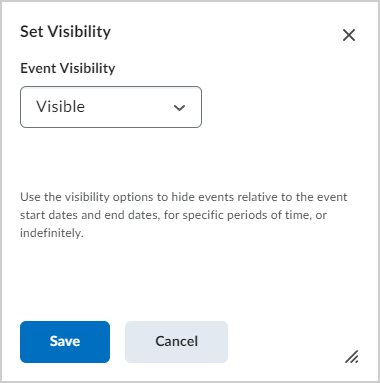
Figure: The Set Visibility dialog.- Visible
- Hidden Until: Enter a range of days, hours, or minutes before the event start to keep the event hidden.
- Hidden After: Enter a range of days, hours, or minutes after the event start to make the event hidden.
- Visible Between: Set a date range for when the event is visible.
- Hidden
- Click Save.
The selected events are set to be hidden or visible based upon your settings.
Offset dates for events
You can change the dates and times of event.
To offset dates for events
- On the navbar, click Calendar.
- From the tool navigation, click List.
- Select the check boxes by any event for which you want to offset dates.
- From the More Actions button, click Offset Dates.
- From the Offset Dates dialog, do any of the following:
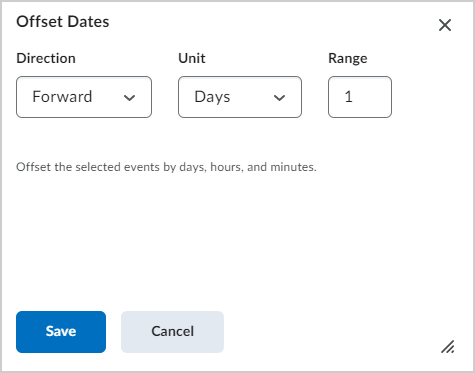
Figure: The Offset Dates dialog.- Select to offset the date either forward or backward.
- Select to offset by days, hours, or minutes.
- Enter a range for the offset. For example, a range of 5 will move the unit of time forward or backward by 5.
- Click Save.
Your event date is updated.
Add a location to calendar events
The Locations tool integrates with Calendar, enabling you to add locations to events you create in the calendar for a specific course or for the organization. Use this functionality to quickly and easily notify students where events are taking place. When a calendar event has an associated location, the location appears in the event information.
Locations must be active to add them to events. If you have the appropriate permissions, you can activate locations when you create events in the Calendar tool by clicking the Manage Locations link.
- Access the Calendar tool.
- Click Create Event.
- Enter the details of the event.
- In the Location section, do one of the following:
- Select a location from the drop-down list. All active locations are available to associate with the event.
- Select the Custom option from the drop-down list. Enter the name of the location for your event in the adjacent field.
- If there are no active locations and a drop-down list is not available, enter the name of the location for your event in the field provided.