You can create a course and design it to meet your learner's needs.
Create your course
First, create a course. Refer to Manage courses and course templates with the Courses tool to learn about how to create a course offering or course template.

|
Important: To use the Courses tool, ensure that you have the required Courses configuration variables and Manage Courses role permissions set for your role. Contact your administrator for details.
|
Create course modules and topics
Next, you can use Content to create modules and topics. Refer to Add and organize learning materials in the New Content Experience (Lessons) for more details.
Edit your course homepage
The homepage is the start page shown in a web browser when learners access a course. You can use the Homepage Management tool to create a new homepage and set it as the active start page for your course.

|
Note: All courses are initially set up with a default course homepage by your system administrator.
Your organization might enforce course homepages. If so, the homepage listed on Homepages displays an Enforced status, and you cannot change your active homepage. |
To edit your homepage
-
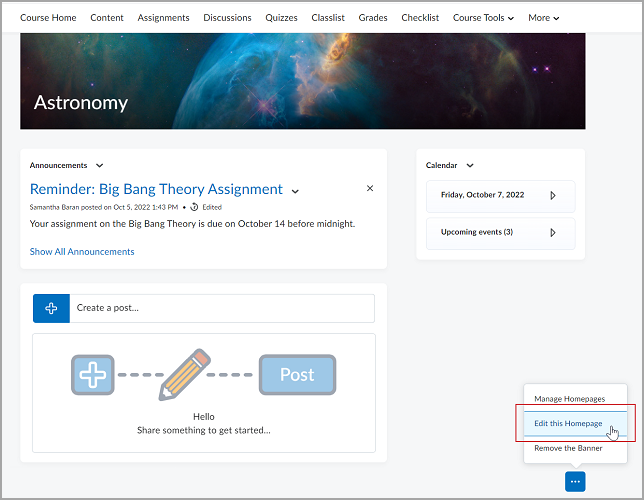
On your Course Home page, click the three dots (ellipses) button and select Edit this homepage in the bottom right corner.
-
Edit values in the Name and Description fields if needed.
-
In the Type field, select the type of your homepage:
-
In the Header field, you can include the homepage header and specify the OrgUnitName parameter.
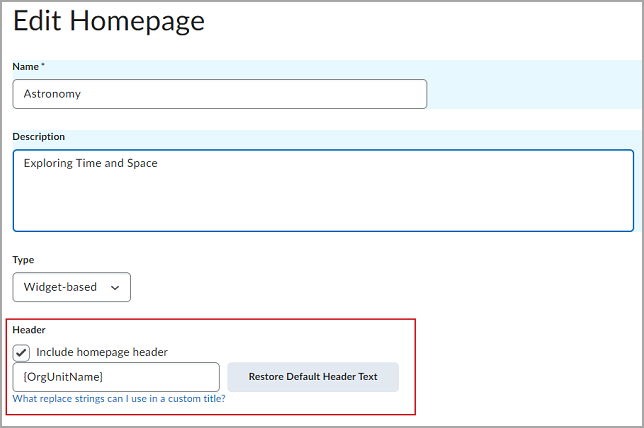
Figure: The Edit Homepage page with the Header field highlighted.
-
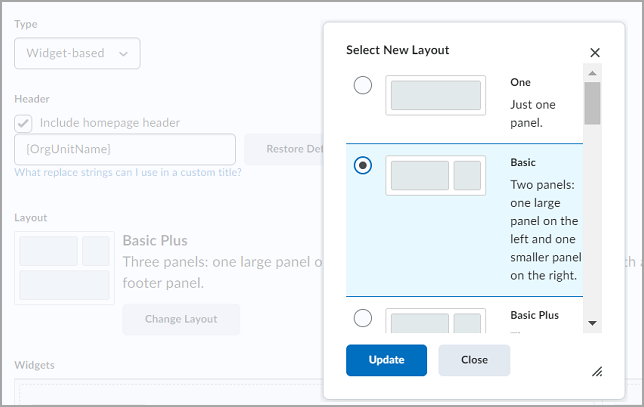
You can replace the corresponding homepage layout with a new one by clicking the Change Layout button. Select the new layout and click Update.
-
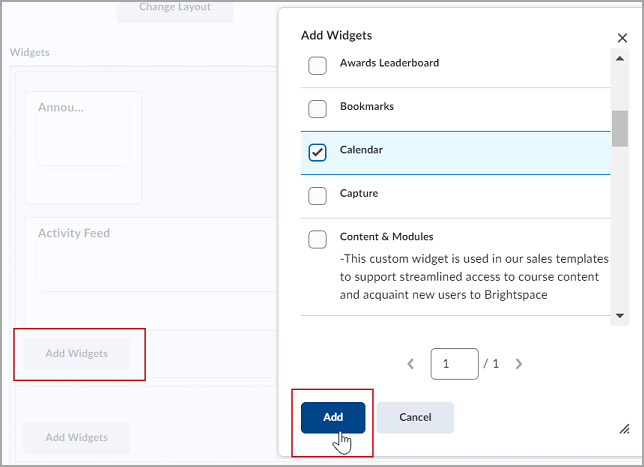
In the Widgets section, click Add Widgets.
|
Note:The widgets listed in the Add Widgets dialogue are dependent on the tools available for use within your organization and added to the current org unit. |
-
Select the widgets that you want to add and click Add.
-
To change a widget's vertical placement on a panel or move it to another panel, click and drag the widget.
-
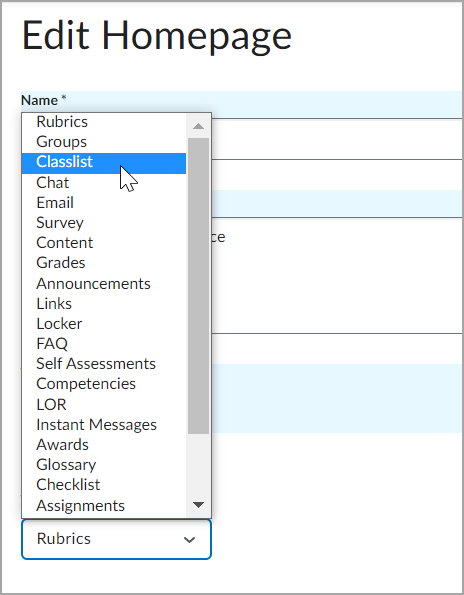
Tool: displays a system tool, such as Content, as your homepage.
To edit the Tool-based homepage: Select the needed tool in the Tool field. For example, the Classlist tool.
-
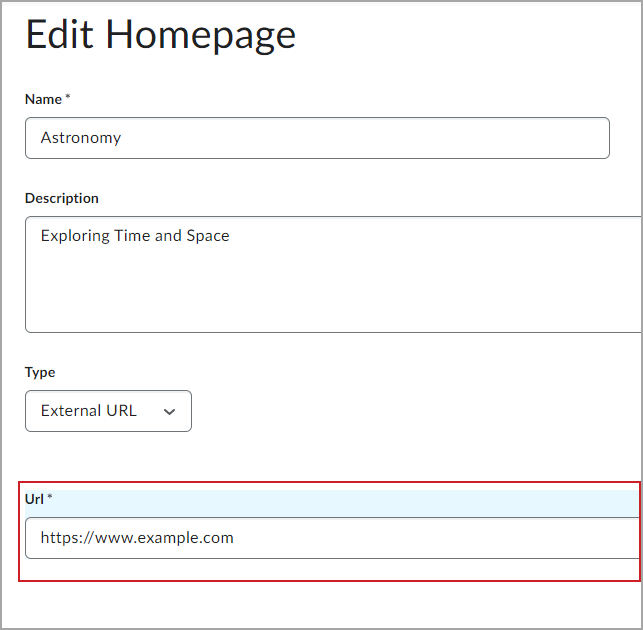
External URL: displays an external web page as your course homepage.
To edit the URL-based homepage: In the Url field, enter your external URL.
-
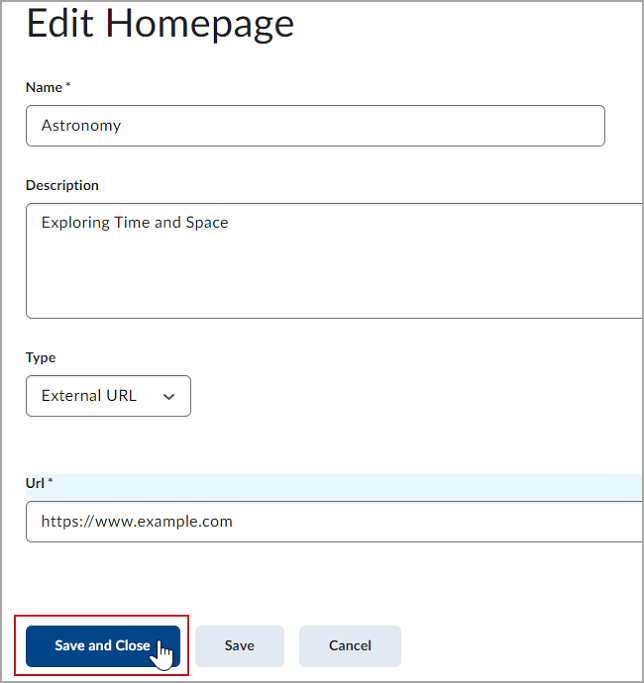
Click Save and Close.
Your Course Home page will now display as widget-based, tool-based, or as an external URL depending on your choice of setting.
Make your course available and active
After building your course, ensure that you are aware if it is accessible to learners by controlling its availability and active status. This is particularly important if you only want to make your course available to learners during a specified time period or academic term.
This article outlines the workflow for managing the visibility of your course for learners by controlling your course’s active status and setting start and end dates.
To activate your course
-
From your organization home page, use the course selector to search for and open the course you want to activate.
-
On the course homepage, from the navbar, click Course Admin.
-
Click Course Offering Information.
-
Select Course is active.
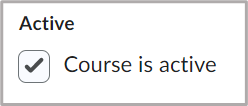
Figure: The Course is active.
|
Note: You can deactivate a course offering to hide it from learners by clearing the Course is active. |
-
Click Save.
|
Note: If a Start Date and End Date are set but the instructor does not select Course is active, the course does not become accessible to learners on the selected Start Date. The course must be activated by selecting Course is active. |