About course content
Instructors can create course content with the following tools:
- Create course content with the Content tool
- Format course content with the use of Brightspace Editor
- Add URL links to a course with the Links tool
- Create a custom learning path in a course with Release Conditions
- Notify learners about updated course content
- Add availability and due dates in Content
- Evaluate assignment submissions from Content
Create new content using an existing Page template
You can create multiple Pages from one central template saved in a template directory. Each template is saved with standard styles and images included.
If you set up a path to a directory containing Page templates in Manage Files, these template choices appear in a drop-down list when you create a new document. All links to assets such as images, CSS, and JS files are maintained when you create a new Page from a template using the Content tool.

|
Note: If you have already created an entirely new Page, you can save it in your template directory for other documents. If you are using SCORM packages, refer to Import and manage SCORM. |
To create a new Page using a template
- From your course navbar, click Content.
| Note: The following steps are completed using Lessons, or the New Content Experience. |
- Within a module, click Create New > Page.
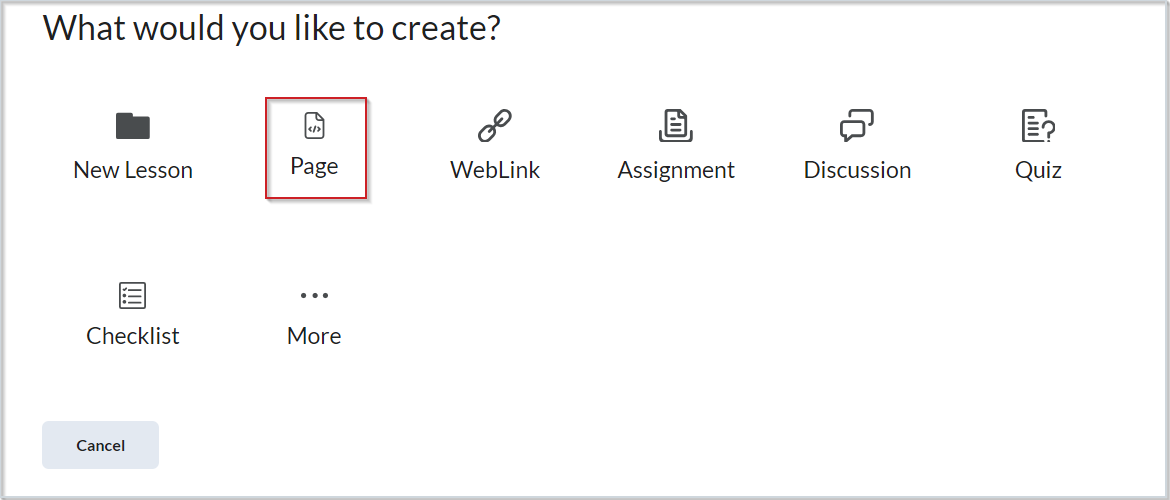
Figure: Click Page to begin creating content.
- From New Page, enter a Name.
- Click Select Template. Select a template from the drop-down list.
- Click Save and Close.
Create new content
Use the Content tool to create a file to add to your course as new content.
To create a file for your course
- From Content, select the module where you want to create the content.
- Click Create New > New Lesson.
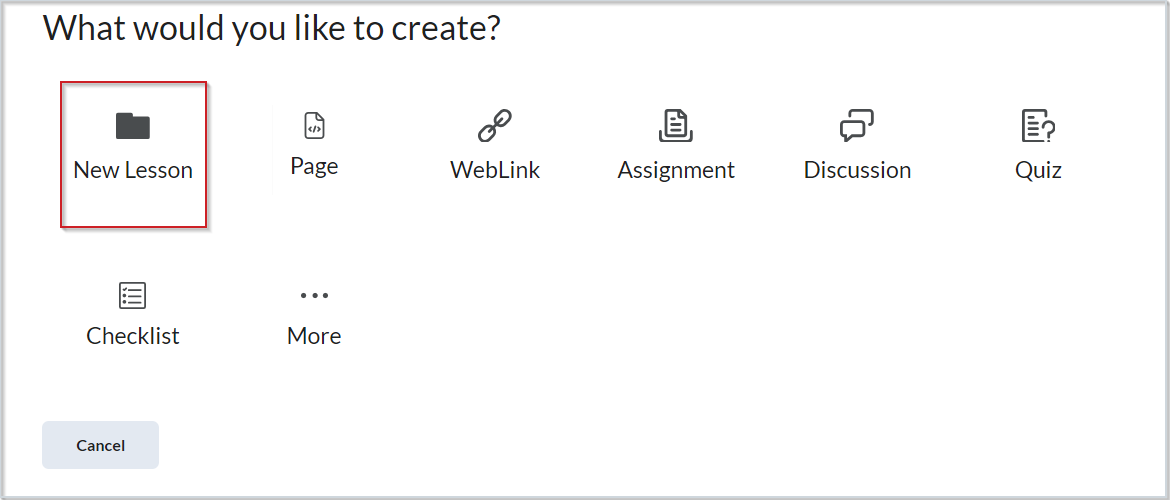
Figure: Click New Lesson to begin creating content.
- Do one or more of the following:
- Complete the file details using Brightspace Editor.
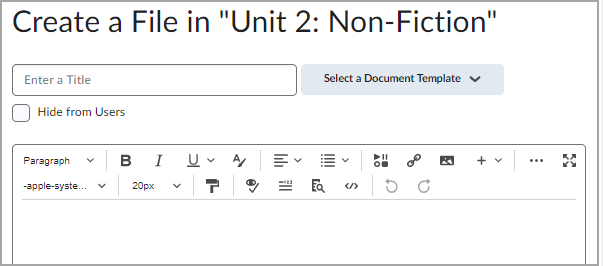
Figure: Create your content using Brightspace Editor.
- Click Select a Documentation Template to view the available pre-made file templates.
| Note: This option is only available if your Brightspace implementation has templates pre-configured. |
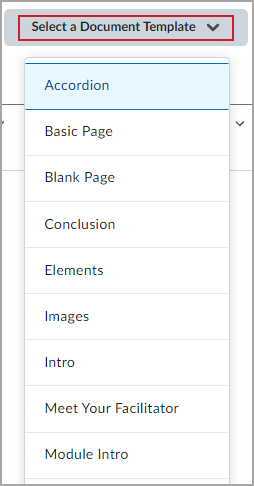
Figure: Click Select a Documentation Template to view available templates.
- Set a Due Date for your content if desired.
- In the Availability Dates & Conditions accordion, set a Start Date and End Date for your content if desired.
- Click Add Release Condition if you want to add a new or existing release condition.

Figure: Expand the Availability Dates & Conditions accordion to add a start date, end date, and release conditions.
- Set the Visibility of your content.
- Click Save and Close to review and publish your file.
 Figure: Set the content's visibility and click Save and Close to publish your content.
Format your document
Use the robust set of options found at the top of Brightspace Editor to customize your document. To learn more about Brightspace Editor, refer to About Brightspace Editor.

Figure: Brightspace Editor options for customizing content.
- Edit Font configurations.
- Use Insert Stuff to insert multimedia, files, links, embed code, and record videos with the Video Note tool.
- Use the Insert Quicklink option to add a link to a specific file, assessment, or module.
- Use Insert Image to add images to your content. Ensure you include adequate alternative text for learners who use assistive technology.
- Use the Equation Editor to build equations directly into your file.
- Use the Accessibility Checker to ensure your document meets online accessibility standards in compliance with Web Content Accessibility Guidelines (WCAG) 2.1 Level AAA standards (worldwide) and compliance with Section 508 of the Rehabilitation Act, 1973 (United States of America).
- Select More Actions to access additional format options.
Add external content to a course using the Content tool (Lessons)
Use the Content tool to add external files to your course modules. You can drag and drop or browse files on your device to add them.
To add external files from your device
- Select the files from your computer to import into Brightspace.
- Drag and drop those files into the module. You can also browse for your file by clicking browse.
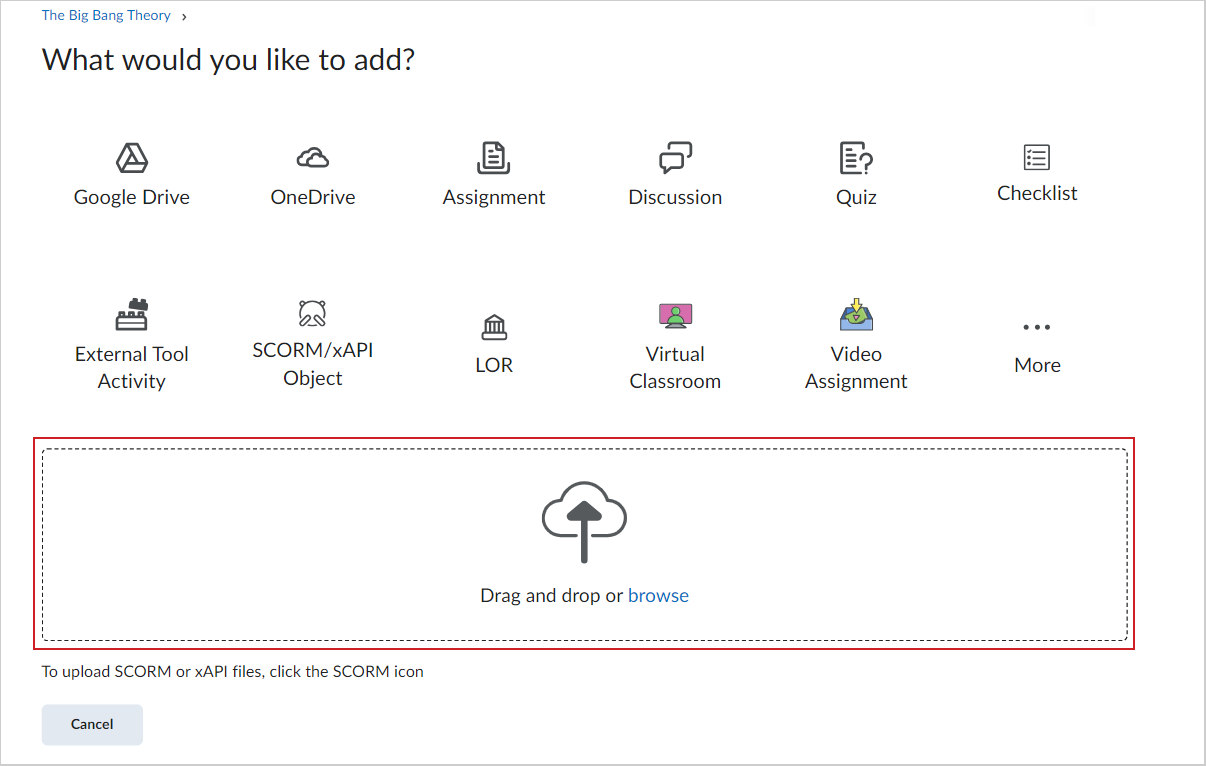
Figure: Drag and drop your file into the module or click browse.
Add existing material
To add an existing course object to Content
- Navigate to Content.
- In a module, click Add Existing.
- Select the type of content you want to add. You can also add content from Google Drive, OneDrive, and your device.
Re-order course content
In the Content tool, you can arrange your course content by dragging and dropping modules and topics using the module or topic's drag handle (content_draghandle).
If you drag a module or topic above or below other modules and topics, a space appears to indicate you can drop the module or topic there.
You can also automatically update your existing files by dragging the newest version of your file from your device into the appropriate module. When a module contains no topics, an upload target displays. When a module contains topics, you can still drag a file into it. A space indicates where the file will be dropped, allowing you to create new topics between pre-existing ones. You can also drop files from your computer directly into the Table of Contents panel.
When you drag files from your computer into a module's upload target to add or update topics, the files will save in the Manage Files tool. A dialog prompt will appear asking you where in Manage Files you want to save the new file.
Add third-party tool resources to a course
Use the Content tool to add a third-party tool to your course, such as Google Drive or One Drive.
To add third-party tool content to your course
- From Content, select the module where you want to create the content.
- Click Add Existing > More.
- In the Course Materials dialog, from the Third Party section, select the tool you want to use.
- Select the content you want to add into your module.
|
Note: Availability of third-party tools is configured and managed by your Brightspace administrators. |
Import existing content from another course
Use the Content tool to import existing content from another course.
To import existing content from another course
- Navigate to Content.
- Click Add Existing > SCORM/xAPI Object.
- In the Add Course Package dialog, select the course package you want to add.
- Select the course you want to add.
- Click Next.
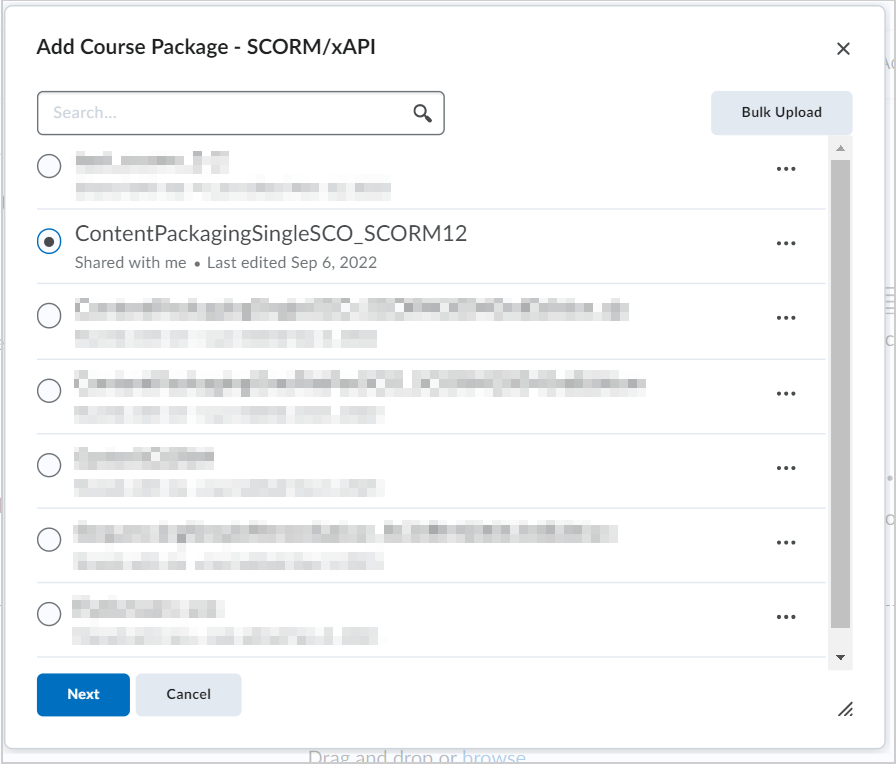
Figure: Select a course package and click Next.
- Determine the following details:
- Under Do you want a grade item created for this instance?, select Yes or No.
- In the Grade Calculation Method menu, select how you want grades to be calculated.
- For Version Control, select either Always display the latest version or Display this version even if a new version is added.
- For the Course Package Player Options, select how you want players to function.
- Click Add.
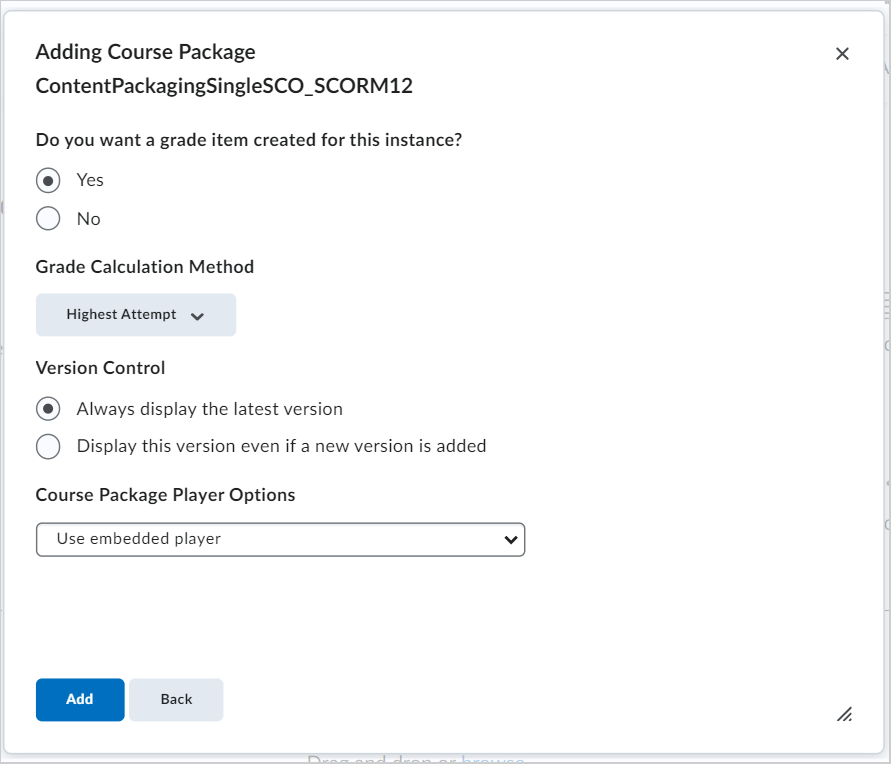
Figure: Decide the settings for your course package and click Add.
Copy an existing course
You can copy an existing course in Brightspace.
To copy an existing course
- From the Import Course drop-down menu, click Copy Existing Course.
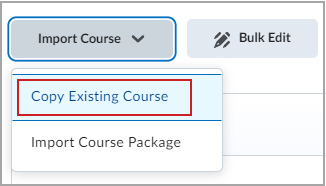
Figure: The Import Course drop-down menu with the Copy Existing Course option highlighted.
- Click Copy Components from another Org Unit.
- Use Search for offering to search for the course containing the course components you want to copy.
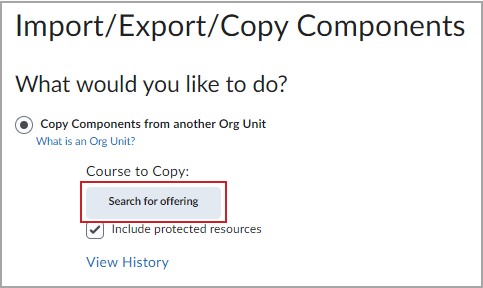
Figure: The Import/Export/Copy Components window with the Search for offering button highlighted.
- Choose the course.
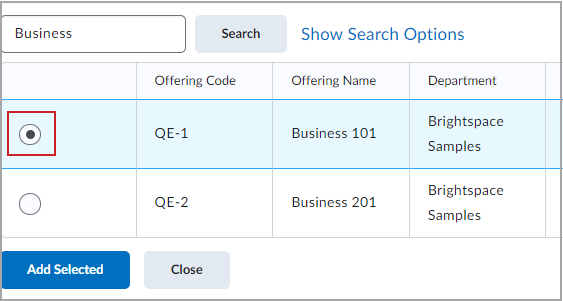
Figure: The Select course offering window with a sample course offering selected.
- Click Add Selected.
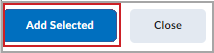
Figure: Click Add Selected.
Note: From the Import/Export/Copy Components menu, there are additional options to:- Copy Components from Parent Template
- Export as Brightspace Package
- Export as Common Cartridge
- Export as Thin Common Cartridge
- Import Components from Learning Object Repository or Course Package
- Select Copy All Components or select individual components to indicate which components to copy over. You are notified when the course upload is complete.

Figure: Click Copy All Components.
| Note: When choosing Select Components, you have the option to select all items or individual items from the following tools: Content, Content Display Settings, Course Files, Assignments, Grades, Grades Settings, Quizzes, Awards, Rubrics, Course Appearance, Surveys, and Release Conditions. |
The Copy Course Components History menu displays your current and any previous course copies. From this page you can copy another package, view content you just imported, or review and manage dates.