You can create modules, sub-modules, and topics for your course in the Classic Content experience. You can then add and organize your learning materials within this structure in the Content tool.
Video: Create course content
Create a new module and sub-module
You must create a new module before you can add topics. You can also create sub-modules (modules within existing modules) to establish a deeper hierarchy.

|
Note: If your course is SCORM 2004-compliant, new modules that you create are outside the sequencing and navigation built into the SCORM package. |
To create a new module
- From your course navbar, click Content.
- In the Table of Contents panel, click Add a module .
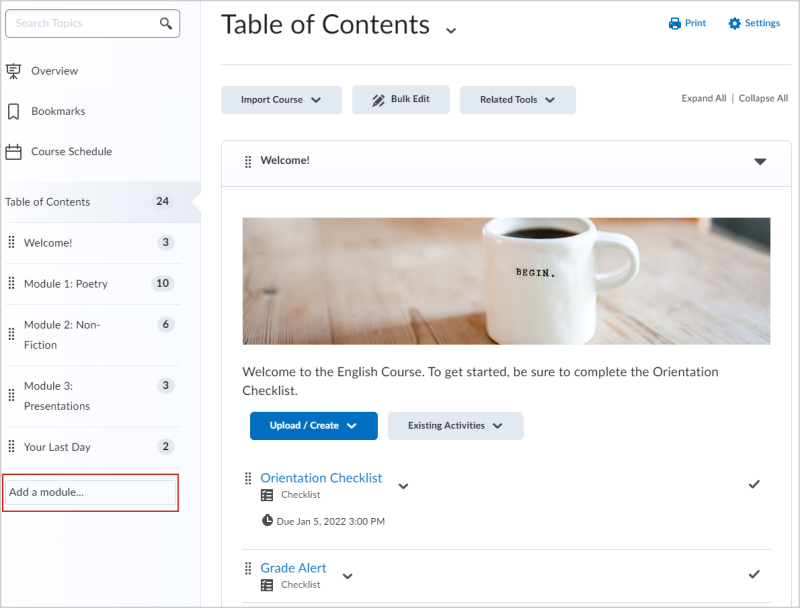
- Enter the name of your new module and then press Enter.
A new module is added to your Table of Contents and the module is opened for editing.
To create a sub-module
- Under Table of Contents, click a module.
- Click Add a sub-module.
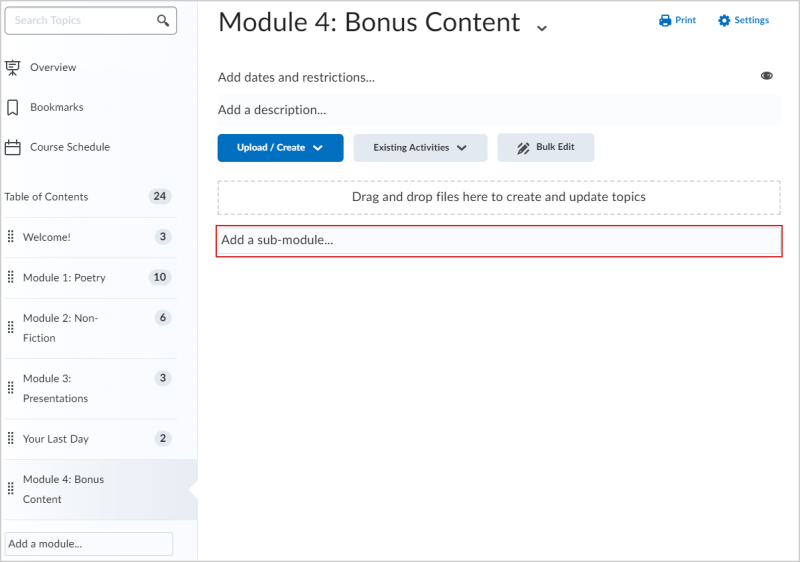
- Enter the name of your new sub-module and then press Enter.
The sub-module is added to your module. You can upload, create, and add existing activities.

|
Tip: You can reorder modules and sub-module by clicking the icon (the eight dots) to the left of the module or sub-module name and dragging the module or sub-module to the desired location. |
Video: How to create a new module
Create a new topic
You can add content to a module or sub-module. This content is called a topic. Topics can contain audio-video recordings, uploaded files, text, and JavaScript all displayed in HTML.
|
Note: To enhance the security of content files that execute scripts to create extra-rich HTML experiences (such as objects that can execute JavaScript), there is a sandboxing feature that creates a secure iFrame around the HTML file. This allows an HTML file to execute scripts (such as JavaScript) within the iFrame only but will prevent them from executing outside the iframe (against the domain). This enables some flexibility in creating rich content, but reassurance for the security-conscious that end user information remains secure in all situations, such as when learners in specific courses have a special role with permission to create content topics. |
To create a new topic
- From your course navbar, click Content.
- In the Table of Contents panel, click on the module in which you want to create a new topic.
- Do any of the following:
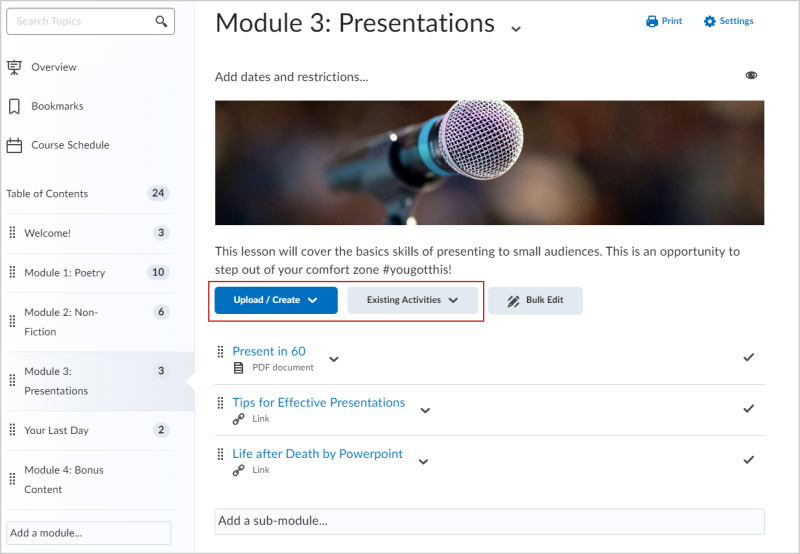
- Click Upload/Create to add new content:
- To add a video or audio topic, click Video or Audio.
- To add a Brightspace Capture topic, click Capture.
- To add existing files from your computer, course offering files, or Shared Files area, click Upload Files.
- To add a new file, click Create a File.
- To add a link, click Create a Link.
| Note: It is recommended that all link topics open as an external resource to prevent any unexpected security conflicts. |
- To add existing files from Manage Files, click Add from Manage Files.
- To add files from Brightspace Learning Repository, click Add Object from LOR
- To add a new checklist, click New Checklist.
- To add a new discussion topic, click New Discussion.
- To add a new assignment, click New Assignment.
- To add a new quiz, click New Quiz.
- To add a new survey, click New Survey.
- Click Existing Activities to add existing content:
- To add an existing assignment, click Assignments
- To add an existing checklist, click Checklist.
- To add an existing discussion topic, click Discussions.
- To add an existing Brightspace ePortfolio item, click Brightspace ePortfolio.
- To add an existing external learning tool, click External Learning Tools.
- To add an existing form template, click Forms.
- To add an existing quiz, click Quizzes.
- To add an existing self assessment, click Self Assessments.
- To add an existing survey, click Surveys.
| Note: Additional menu options may be available depending on your institution. |
- Do one of the following:
- To insert an existing activity, in the Add Activity window, click on the activity.
- To create and insert a new activity, in the Add Activity window, click Create New [activity]. Enter your activity details and click Create and Insert.
A new topic is added to your module.
Add templates in Classic Content
- On the navbar, click Content.
- Click Settings.
- In the Content Authoring area, select Enable HTML Templates.
To make it easier to find HTML templates, select the Sort HTML Templates by name option to sort templates in alphanumeric order based on filename.
Administrators can set the default sort order for the org or specific org units by editing a configuration variable. By default, HTML templates are sorted alphanumerically based on directory structure.- If you want to change where your templates are located, click Change Path. Select your new location, then click Select Path.
- Click Save.
Video: Edit Templates in Classic Content
Video: How to create a video topic
Video: How to create an audio topic
Video: How to upload a topic
Video: How to add an existing activity to Content
Delete a module, sub-module, or topic
You can delete a module, sub-module, or topic from your Table of Contents in Classic Content.
|
Note: Deleting a module or sub-module deletes all topics within that module or sub-module. |
To delete a module, sub-module, or topic
- From your course navbar, click Content.
- In the Table of Contents panel, click the module, sub-module, or topic you want to delete.
- Do one of the following:
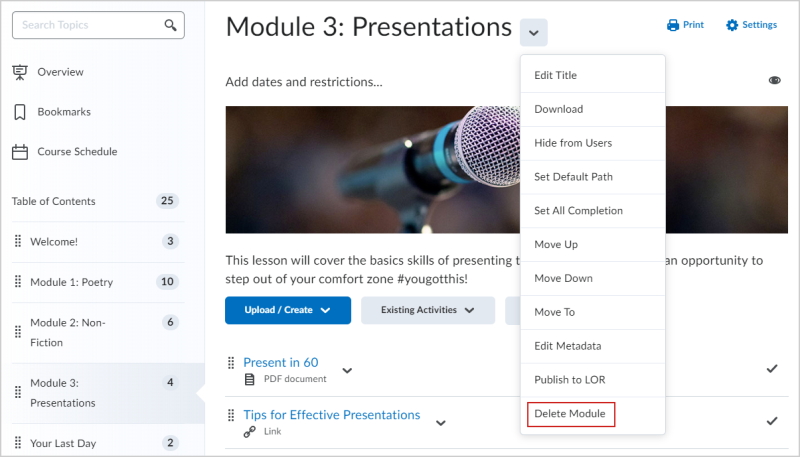
- To delete a module, click Delete Module from the module's context menu.
- To delete a topic, click Delete Topic from the topic's context menu.
- To delete a sub-module, click the sub-module from the Table of Contents panel and click Delete Sub-module.
- Decide whether you want to remove the module or topic from the Content view only or permanently delete the module or topic from the course (this will also delete all associated objects including discussions, quizzes, etc).
- Click Delete.
The module, sub-module, or topic is deleted.
Video: How to delete a module
Add availability and due dates in Classic Content
You can edit availability and due dates for lessons, topics, and assessable activities, including quizzes, assignments, and discussions, directly from Content.
If you set an end date later than the due date for a topic, learners can access and complete the topic from the Overdue tab on the Course Schedule page. Topics with a due date and no end date also appear in the Overdue tab on the Course Schedule page.
|
Note: In Classic Content, adding a due date to a content item that is associated to an assignment overrides an existing end date that is further in the future. The due date also overrides the end date in the Calendar tool. |
- On the navbar, click Content.
- On the Table of Contents page, click Bulk Edit.
- For any topic or module that you want to add availability or due dates to, click Add dates and restrictions.
- Do any of the following:
- To add a start date, click Add start date. Enter your start date details.
- To add a due date, click Add due date. Enter your due date details.
- To add an end date, click Add end date. Enter your end date details.
- Click Update.
- Click Done Editing.
Add a release condition in Classic Content
- On the course navbar, click Content.
- In the Table of Contents, locate the content item you want to have a release condition.
- Open the context menu, and select Edit Properties In-place.
- Click Add dates and restrictions…, and under Release Conditions click Create.
- From the Condition Type menu, select the condition you want to create.
- Add Condition Details, and click Create.
- Click Update to save your changes. The release condition details are now listed below the topic name.
Notify users of changed content in Classic Content
You can also use Classic Content to notify learners of updates or changes to course content.
To notify users in Classic Content
- On the navbar, click Content.
- In the Table of Contents pane, click on the module that contains the HTML topic you want to update, then click on the topic.
- Do one of the following:
- To edit the contents of the topic, from the context menu of the topic, click Edit HTML. Make your changes.
- To replace the topic, from the context menu of the topic, click Change File. To upload a new file, click
 Upload. Follow the prompts to add your new file.
- Select the Notify students that the content has changed check box.
- If you want to describe your update changes, enter a description in the Add a summary of the changes field.
- If you want learners to revisit the topic to complete the activity, select the Reset completion tracking check box.
- Click Update.