Create attendance registers to track attendance for your course-based activities, such as a mandatory discussion seminar.
Create an attendance register and sessions
Sessions are the components of an attendance register that define one or more events in your register. Your collective sessions make up your register.
For example, if you want to track attendance for a weekly seminar, you would create a "Weekly Seminar" register and then add sessions for each seminar using distinguishable session names "Week 1," "Week 2," etc. Attendance data is tracked for each session and displayed on the register's Attendance data page.
To create a new attendance register and sessions
-
Navigate to your course, and from the navbar, click Attendance.
-
On the Attendance Registers page, click New Register.
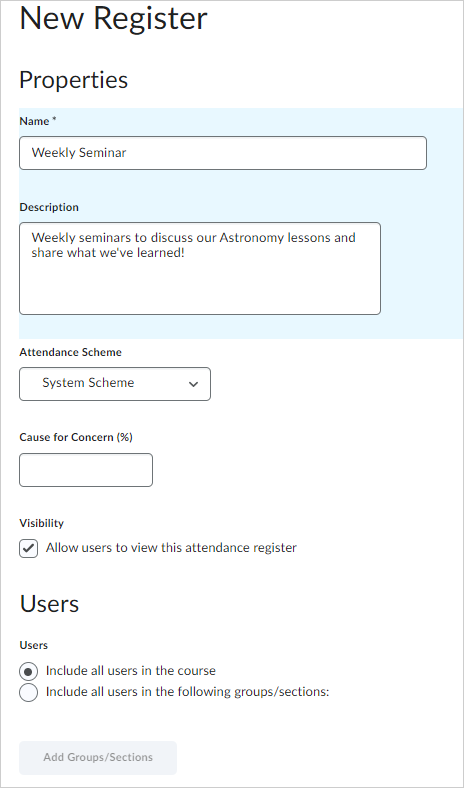
Figure: Enter your attendance register information on the New Register page.
-
Enter a Name for your register.
-
Enter a Description.
-
Choose an attendance scheme from the Attendance Scheme drop-down list.
-
If you want to see a Cause for Concern icon (warning) beside under performing users' names on the Attendance Data page, enter a percentage in the Cause for Concern field that indicates your minimum attendance requirement.
-
Select the check box to Allow users to view this attendance register.
-
Select the users that you want to include in your register. You can choose to include all users or specific groups or sections.
-
Add one or more sessions for your register.
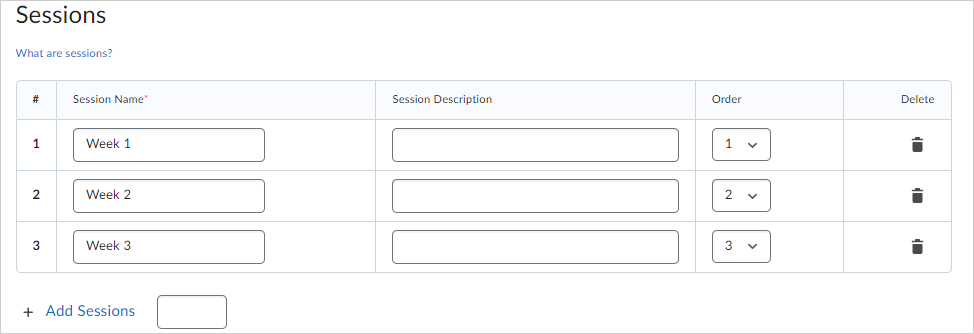
Figure: Enter names, descriptions, and choose the chronological order for your sessions.
-
Click Save.
Set your Cause for Concern percentage
The Cause for Concern metric helps you track learners that fail to meet your attendance requirements by placing the Cause for Concern icon beside their names on the Attendance Data page.
To set your Cause for Concern percentage
- From the Attendance Registers page, click New Register or Edit Register from the context menu of an existing attendance register.
- In the Cause for Concern field, enter a percentage that indicates your minimum attendance requirement.
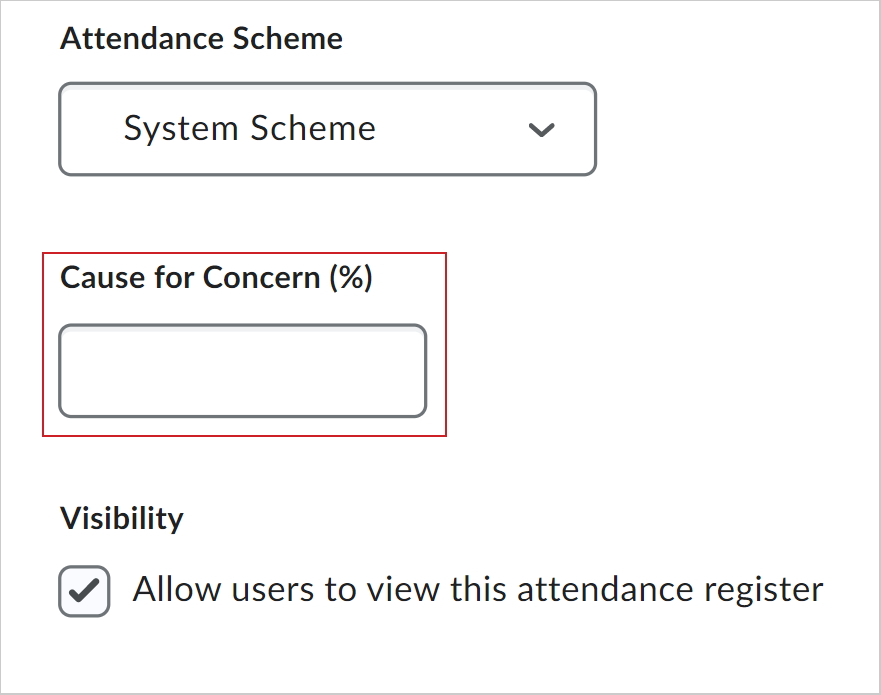
Figure: The Cause for Concern (%) field.
- Click Save.
Enter attendance data
You can enter attendance data for each session of your attendance register.
To enter attendance data
- From your course homepage, navigate to Attendance.
- On the Attendance Registers page, click the register name used to track attendance.
- On the Attendance Data page, click the Enter Attendance Data icon next to a session and enter attendance data for your sessions.
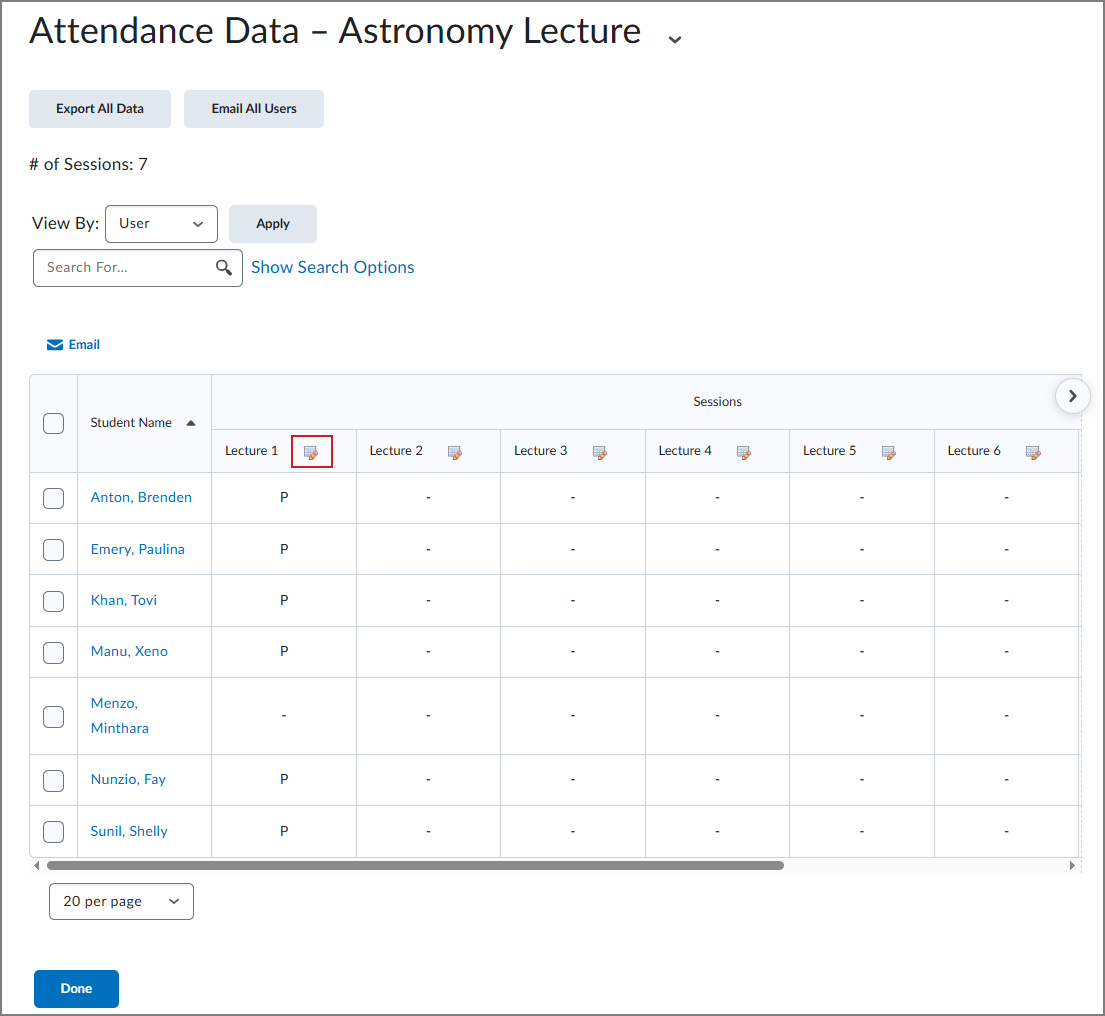
- Use the Attendance Status drop-down lists to change the attendance status for your users. You can also click Set Status to set the same status for all users.
- Click Save.
- On the Attendance Data page, click Done.
Modify the visibility of an individual register
You can modify the visibility of attendance registers individually.
To modify the visibility of an individual register
- Navigate to Course Admin.
- Under Learner Management, click Attendance.
- To modify the visibility of an individual register, from the Actions drop-down menu of the particular register, select Make Visible to Users or Hide from Users.
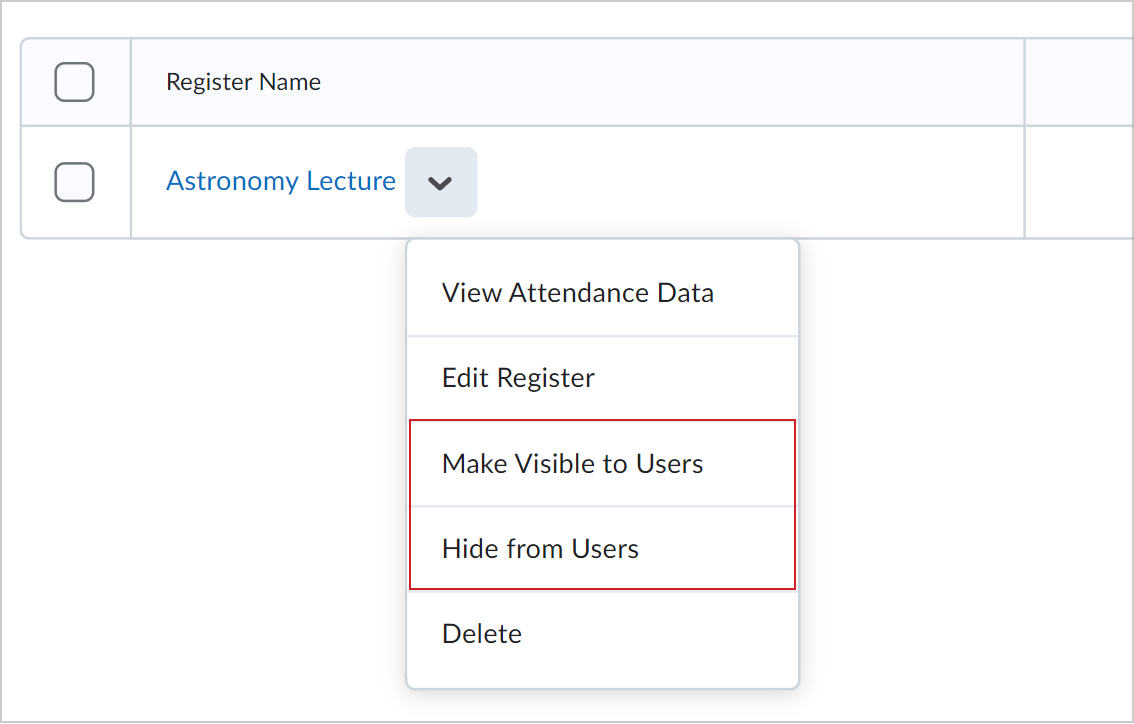
Figure: The Actions drop-down menu for an individual register showing the Make Visible to Users and Hide from Users options.
Modify the visibility of registers in bulk
You can modify the visibility of attendance registers in bulk.
To modify the visibility of registers in bulk
- Navigate to Course Admin.
- Under Learner Management, click Attendance.
- To modify the visibility of registers in bulk, select the check boxes alongside the registers you want to make visible or hide from learner view.
- On the More Actions drop-down menu, select Make Visible to Users or Hide from Users. An icon appears next to hidden registers.
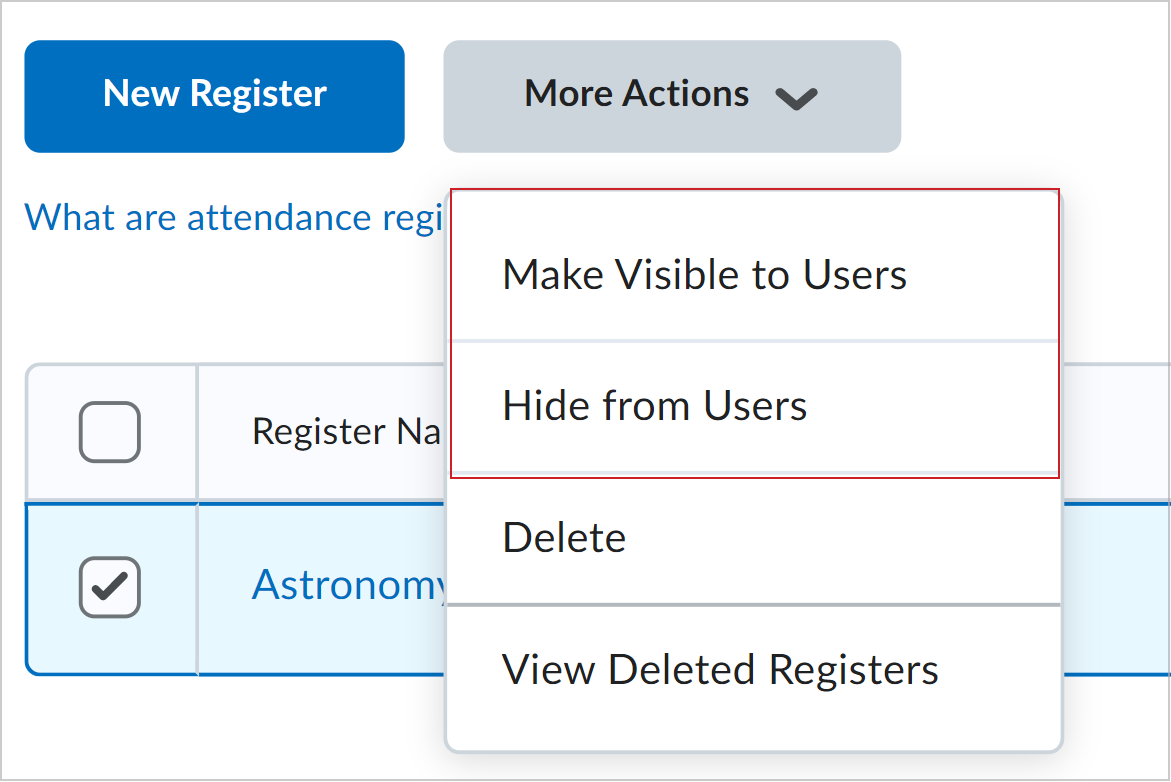
Figure: The More Actions drop-down menu showing the Make Visible to Users and Hide from Users options.
Edit an attendance register, session, or scheme
You may want to edit an attendance register to add additional sessions (weeks).
To edit an attendance register
- On the Attendance Registers page, from the drop-down menu of the register you want to edit, select Edit Register.
- Update the details of the attendance register, and click Save.
Note: You cannot change the scheme in an attendance register once session information has been added to it.
Delete an attendance register
You can either delete individual attendance register, or delete multiple registers in bulk.
To delete an individual attendance register
-
On the Attendance Registers page, from the drop-down menu of the register you want to edit, select Delete.
-
On the Confirmation dialog box, click Delete.
To delete attendance registers in bulk
- Select the check boxes of the attendance registers you want to delete, and on the More Actions drop-down menu, select Delete.
- On the Confirmation dialog box, click Delete.
Delete an attendance session
You can delete an attendance register session.
Important: Deleting a session in a register or a scheme clears all associated attendance data. Only delete sessions when you are confident that you no longer need the attendance data.
To delete an attendance session
- On the Attendance Registers page, from the drop-down menu of the attendance register you want to edit, select Edit Register.
- Click Delete next to the session you want to delete.
Restore a deleted attendance register
You can also restore an attendance register after you delete it.
To restore a register
-
On the Attendance Registers page, click the More Actions drop-down menu, and then select View Deleted Registers.
-
Click Restore alongside the name of the register you want to restore.