Enroll a learner in your course
-
In Brightspace, navigate to your course.
-
On the navbar, click Classlist.
-
From the Add Participants drop-down menu, select Create and enroll a new user.
-
Fill in the user’s information.
-
If you want to send the user an enrollment email, select the Send Enrollment email.
-
Click Enroll.
Import users in bulk
Your CSV or TXT file should follow the format outlined on the Bulk User Management page.
-
From the Admin Tools menu, click Users > Bulk User Management.
-
Browse to locate your CSV or TXT file and click Next.
-
When the file processing is complete, click Next.
-
If you receive any errors on the Bulk User Management Preview Actions page, click Exit to cancel the import and revise your CSV or TXT file to correct the errors.
-
Specify the actions you want to perform on each line and click Next.
-
If the list of actions extends over multiple pages, click Update Selection to save your selections before moving to another page.
-
Select one or all of the email notification or activation options and click Run.
-
To review your import actions, click View Summary.
-
Click Done.
Enroll a learner using Intelligent Agents
You can boost individual interaction with your learners without extra effort using intelligent agents, particularly when enrolling your learners.
To enroll your learners:
-
On the course home page, click Course Admin.
-
Click Intelligent Agents.
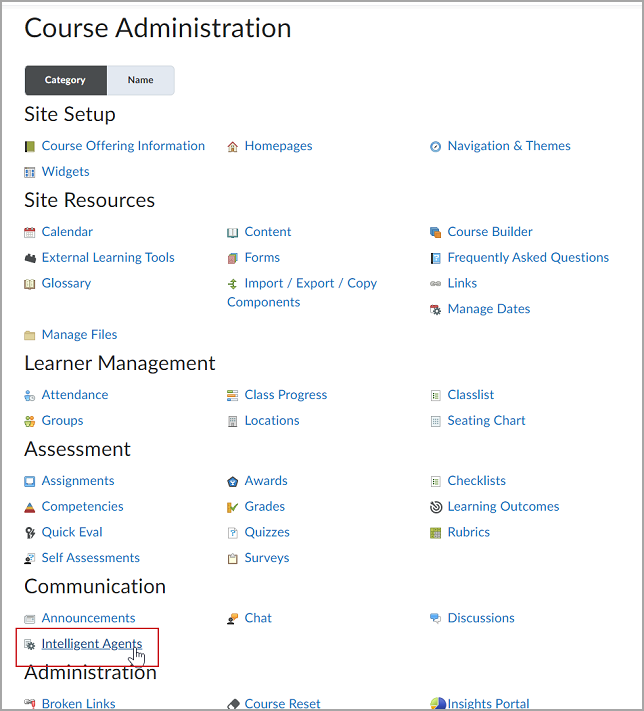
Figure: The Course Administration page with the Intelligent Agents option highlighted
-
On the Agent List page, click New Agent.
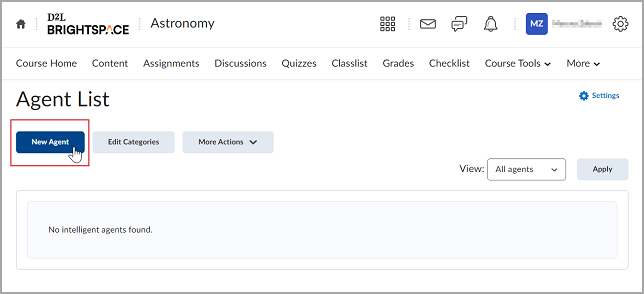
Figure: The Agent List page with the New Agent button highlighted.
-
On the New Agent page, enter:
-
Agent Name: enter the title of your agent.
-
Description: add additional information if needed.
-
Select a Category.
Note: You can also create a new category by clicking the Add Category link to the right of the Category dropdown menu. Enter a name into the Name field, and then click Save.
-
Select Agent is enabled if you want the agent to be active.
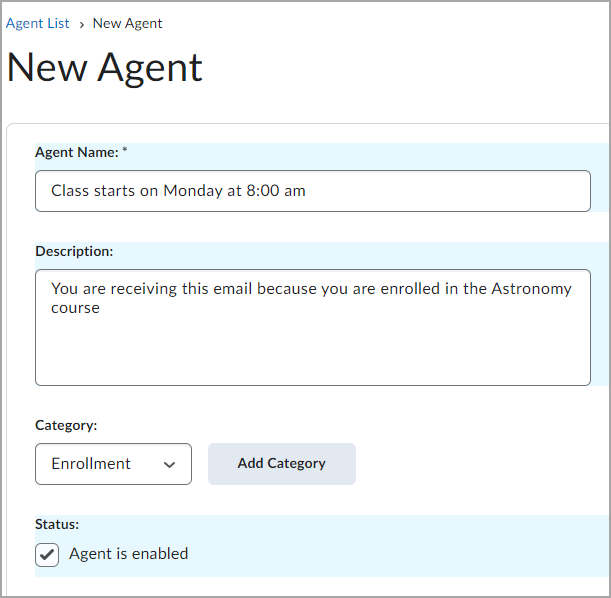
Figure: The New Agent page, shows the agent details box. This contains the Agent Name, Description, Category, and Status.
-
Expand Scheduling.
Under Scheduling > Frequency, choose a frequency option from the dropdown menu and complete the schedule dates and repetition options as needed. For enrolling your learners, select the One-Time Run option.
Note: Intelligent Agents can only be scheduled to start after the course start date. Scheduled intelligent agents stop running and are automatically disabled if the course is inactive, past its end date, or deleted. You can still set up a practice run or a manual run of an intelligent agent at any time in a course with a passed end date.
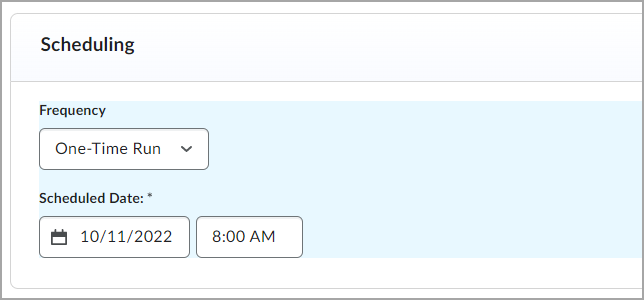
Figure: The Scheduling block with the Frequency dropdown menu expanded.
-
Expand the Criteria:
-
Under Role in Classlist, do one of the following:
-
If you want the intelligent agent to apply to all roles in the Classlist, select the All users visible in the Classlist.
-
If you want the intelligent agent to be applied to select roles, select the Users with specific roles and select the respective roles.
-
Under Take Action on Activity > Login Activity, enter your criteria if you want your agent to target users' login habits.
Note: Login activity refers to logins at the platform level.
-
Under Take Action on Activity > Course Activity, enter your criteria if you want your agent to target users' course habits.
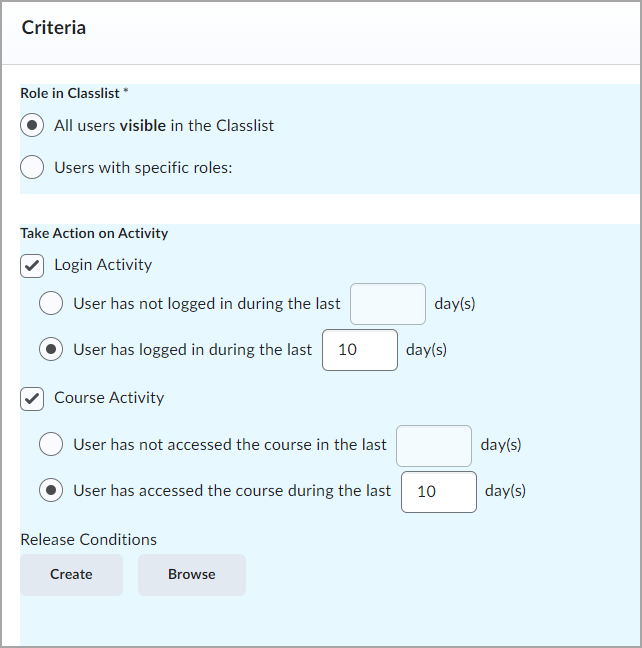
Figure: The Criteria block.
-
Under Release Conditions, click Create. In the field Condition Type, select the Org Unit Enrollment from the dropdown list, click Select Org Unit, select the course you require them to be enrolled in as the condition, and confirm by clicking Insert. Complete any additional Condition Details that appear and click Create.
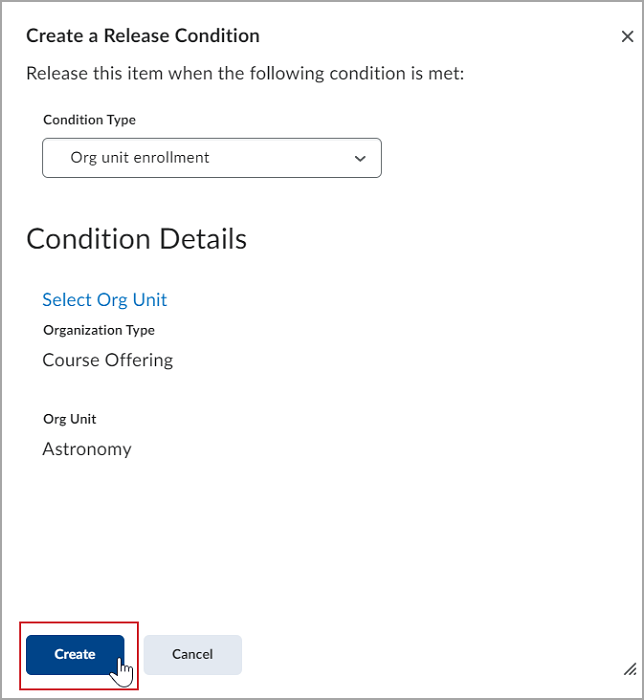
Figure: The Create a Release Condition window with the Create button highlighted.
-
Expand Actions.
Note: You need to have the Use Agent Enrollment Actions and Perform Unenroll permissions to set your agent to perform an enrollment action.
-
Under Repetition, select how often you want the agent to take action.
-
Under Change User Enrollments, select Change user enrollments when the criteria are satisfied.
-
Populate the following fields:
-
From the Enrollment Action dropdown list, select the Enroll user in a course option.
-
From Select an Org select your course.
-
From the Role dropdown list, select what role the user will be enrolled with when the agent criteria are satisfied.
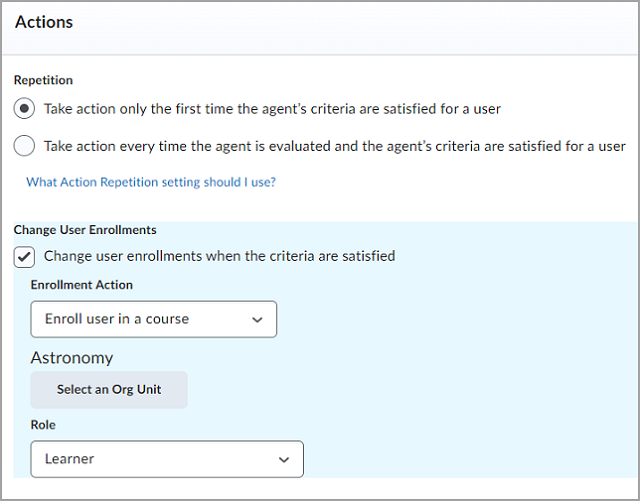
Figure: The Action block. This contains the Repetition, Change User Enrollments, and Role options.
-
Under Send an Email, select the Send an email when the criteria are satisfied option and enter your email details and relevant attachments if you want the agent to send an email when the criteria are satisfied.
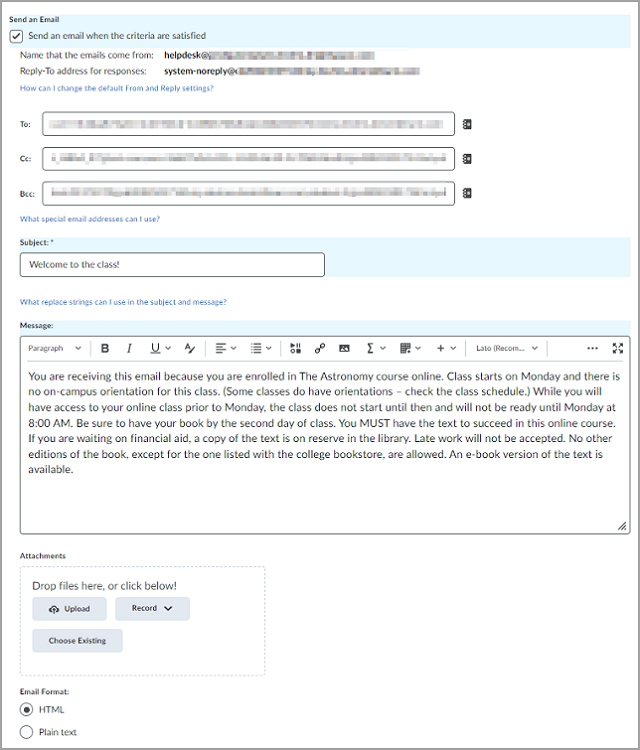
Figure: The Send an Email option.
-
Click Save and Close.
All selected learners will be enrolled in your course using Intelligent Agents.
User attributes
The Manager Dashboard and Learning Groups tools each use attributes to organize user and course information.
Learning Groups uses standard attributes assigned to users to organize the users into learning groups. These standard attributes, such as Department, Division, or Location, can provide logical groups for some courses that are required by corporate policy. Other standard attributes, such as Employee Role, can determine other courses that are available to users with that attribute.
Manager Dashboard uses a reserved attribute type to determine courses available to managers called Affiliated Org Units. Entering org unit codes (such as a Department org unit code) as the attribute values for each user with the Manager role makes only those courses affiliated with the org unit code available for assignment to direct and indirect reports by managers. This reserved attribute type cannot be used to create or alter learning groups. You must set the d2l.Tools.ManagerRole.CoursesAvailableToAssign configuration variable to use this attribute. Managers with restricted course assignment options can only select from the designated courses in the org unit type when assigning courses - other courses that are available in the organization are unavailable to the manager within the Assign Courses workflow.
D2L has a set of default attributes configured for use by Learning Groups and Manager Dashboard. Contact D2L Implementation Services if you want to create custom attributes and configure your instance for the custom set. Up to 50 total attributes can be used. Note that attribute values should not exceed 256 characters (bytes).
The Attributes admin tool is used to browse the defined attributes in the system, view the attribute data assigned to each user, and is the entry point for manually uploading attribute data.
All attributes are added to the system using a CSV file that contains the Attribute name, Attribute type, description, values, and unique values. All standard and reserved types of attributes are included in the CSV file template provided by D2L. The maximum CSV file size you can import is 2GB.
If you do not have a CSV file, you can download a template to create the CSV file on the Bulk Attribute Upload tab of the User Attributes page.
Learning Groups
Learning Groups uses the attributes associated with each user to create automatic groups of users and to set up automatic course and learning path enrollments. The LMS Username is a required attribute for all users.
As a starting point, D2L recommends a default set of user attributes for Manager Dashboard. You can choose some or all of the available attributes in addition to the LMS Username attribute.
D2L strongly recommends using the Manager user attribute if you want to use the Manager Dashboard tool. The Manager attribute is used to set up the manager/employee organization structure. You can only have one value for the Manager attribute.
Allow learners to self-enroll with Discover
To provide learners with greater flexibility and control over their personal learning goals, the Discover tool allows them to search for active courses and self-enroll. In addition, learners can self-unenroll from the courses they self-enrolled in.
To configure a course for self-enrollment:
-
Navigate to the course.
-
Select Course Admin > Course Offering Information.
-
Under Discover, check the Make this course available in Discover so learners can self-enroll option.
-
Under Description, include a course description to appear in Discover.
-
Ensure that the Course is active option is checked. Inactive courses are not included in Discover.
-
Click Save.