Integration Pack for Student Information Systems (IPSIS) provides tools to help administrators review data processing results, investigate issues, and resolve integration errors. These tools help you maintain a healthy integration by identifying processing failures, warnings, and unexpected data changes.
In IPSIS, a batch is a single .zip file submitted for processing. You can review information for individual batches or across multiple batches to identify processing trends and recurring issues.
Log Messages provide information about errors, warnings, and informational messages generated during batch processing.
Audit Logs provide information about records IPSIS created, updated, or deleted while processing a batch.

|
Note: Log messages are available for 30 days while Audit log entries are retained. |
Review batch errors regularly to ensure that data updates continue processing as expected. Some errors affect only individual records, while others prevent an entire batch from processing. Investigate unexpected errors to maintain accurate synchronization between your Student Information System (SIS) and Brightspace.
If your organization intentionally ignores specific warnings or errors, document those exceptions as part of your integration procedures. Unresolved errors can result in missing enrollments, outdated course information, or manual correction work in Brightspace.
To support regular monitoring, you can configure batch summary email notifications. Review and resolve batch errors after each processing cycle whenever possible.
Access IPSIS troubleshooting tools
You can access IPSIS log and audit information from multiple locations within the IPSIS Administration interface.
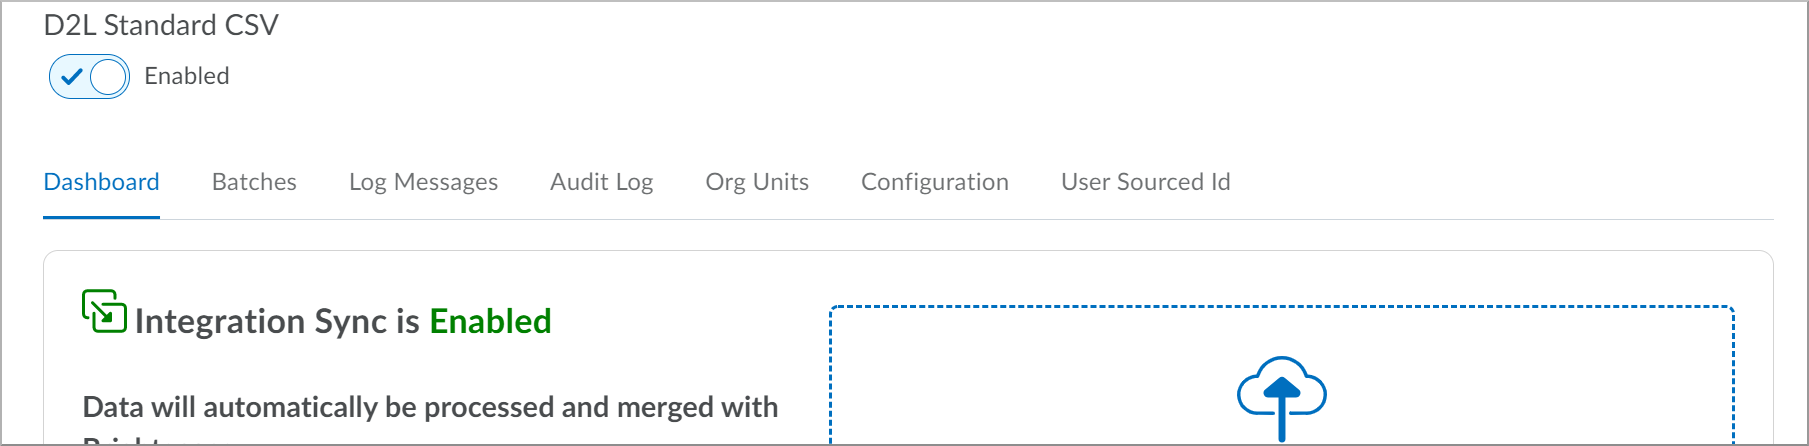
Dashboard
At the bottom of the Dashboard tab, you can review the most recent batch run, including batch status, validation mode usage, and links to related log messages. If errors or warnings occur, the log message link automatically filters results for that batch.
Batches
The Batches tab displays status information for all processed batches. Re-run capabilities are only provided for the most recent batch run on the Dashboard tab, not for any batches listed on the Batches tab.
|
Note: Log messages are available for 30 days only. Older batches may no longer contain accessible log messages. |
Log Messages
The Log Messages tab displays errors, warnings, and informational processing messages that have been received for the last 30 days. This tab provides filtering capabilities based on batch, time, object type, and action. Grouping log messages provides a quick way to assess multiple messages. The Dashboard and Batches tabs link to this tab with a filter already applied for the selected batch.
Audit Log
The Audit Log tab displays information about created records, updated records, deleted records, and enrollment changes that occurred with each batch run. This tab filters based on time, object type, and action. The Dashboard and Batches tabs link to this tab with a time filter already applied for the selected batch.
Typical new implementation troubleshooting workflow
During a new IPSIS implementation, administrators typically validate integration data incrementally before enabling full automation.
- To validate CSV formatting, run files using validation mode.
- To identify formatting or mapping issues, compare CSV file data to current Brightspace usage, if prior usage has been established, for any data formatting changes that would cause mismatches.
- To isolate processing problems, process each CSV file individually in sequence, for example, process semesters, then departments, then course templates, using UPDATE actions first.
- To prevent cascading issues, resolve all errors before processing the next file.
- To automate ongoing synchronization, add business process rules to create updates for the data to create, update, or remove Brightspace records.
- To confirm expected behavior, test all related business processes in Brightspace to ensure correct data updates are completed.
Typical troubleshooting workflow
When an error or warning appears, use the following workflow to investigate the issue.
- To review the error, open the message in the Log Messages tab.
- To identify the failed action, review the error message and associated metadata.
- To investigate the affected record, locate the corresponding row in the source CSV file.
- To identify mismatched data, compare the CSV record with existing Brightspace data.
- To resolve the issue, update the source system, Brightspace data, or file generation process as needed.
- To verify the fix, re-run the batch or process an updated CSV file.
For more information, refer to About the Batches page.
Receive an email summary for a D2L Standard CSV batch
You can subscribe to IPSIS batch summary notifications to receive an email each time a batch finishes processing. The notification is sent for every batch, whether errors occurred. These notifications help administrators quickly identify successful processing runs or batches that require troubleshooting.
Prerequisite
Your Brightspace role must include the Subscribe to Batch Job notifications permission.
Subscribe to IPSIS batch summary notifications
- Navigate to User icon > Notifications.
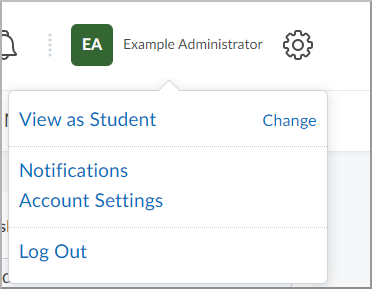
- To verify your notification email address, review the Email Address section under Contact Methods.
- To locate IPSIS notification settings, navigate to the Instant Notifications section.
- To enable batch summary emails, select the Email check box for IPSIS Platform - Batch Summary Completion.
- To save your notification preferences, click Save.
|
Note:
- SMS notifications provide only batch status information and do not include detailed processing results.
- IPSIS notification emails use the email configuration for your Brightspace environment. If you do not receive notifications, verify your email address and junk mail settings before contacting D2L Support.
|
For more information, refer to:
View log messages in IPSIS
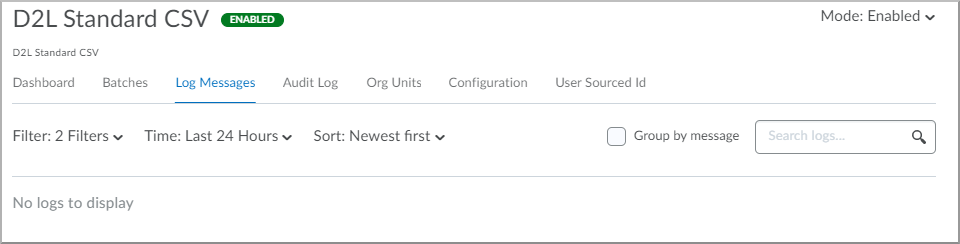
The Log Messages tab provides information about issues that occurred during IPSIS data processing. You can use filtering, grouping, and search options to investigate errors, warnings, and informational messages.
Prerequisite
Your Brightspace role must include the Access IPSIS Administration Console permission.
Types of log messages
The types of log messages typically found in the Brightspace IPSIS tool fall into several categories:
- Informational (Info) messages indicate normal operation and successful actions.
Examples:- A user or course was successfully created or updated.
- A section was successfully deleted.
- An enrollment record was processed without errors.
- Warning messages highlight potential issues that do not stop the process but might require attention.
Examples:- A user was created, but some optional attributes were missing.
- An update was skipped because the data was already current.
- Mappings, such as org units, were not found, but the process continued with defaults.
- Error messages indicate a failure that prevented data from being processed.
Examples:- A required field, such as OrgUnitId, is missing or invalid.
- The user or course could not be created due to a constraint.
- The integration job failed due to malformed XML or bad data.
- Critical errors with exceptions indicate a major system error or unhandled exception.
Examples:- System-level failure during processing.
- Unhandled exceptions during the data import or sync.
- Failed connection to the SIS or intermediate file storage.
- Debug or trace messages, which are only visible in debug mode or system logs, provide detailed, low-level information for developers or advanced troubleshooting.
Examples:- Internal API calls.
- Full payloads of messages received.
- Execution steps and durations.
Filter log messages
- Navigate to IPSIS Administration > Log Messages.
- To filter messages by batch, object, or action, click Filter.
- To filter by batch, select the Batches tab, and then select a batch.
- To filter by object type, select the Entities tab, and then select an entity.
- To filter by message type, select the Log Levels tab, and then select the message types you want to review.
|
Note: Error messages identify issues that prevented records or files from processing. Warning messages identify issues that should be reviewed but did not stop processing. |
Filter by time
- To filter messages by time period, click Time.
- To display all available log messages, select Any.
- To review recent processing activity, select Last Hour or Last 24 Hours.
- To define a specific time range, select Custom.
|
Note: Selecting Any may increase page loading time in environments with large processing volumes. |
Sort and group log messages
- To change the message display order, click Sort Type.
- To display the newest messages first, select Newest.
- To display the oldest messages first, select Oldest.
- To group similar messages together, enable Group By.

|
Tip: Grouping messages can help you identify the most common processing failures more quickly. |
Search log messages
- To investigate a specific issue, enter a search term in the search field.
- To review matching results, press Enter.
You can search using values such as usernames, Org Defined IDs, org unit codes, or batch identifiers.
Review log message details
- To view additional information for a message, expand the log entry. Each log message includes an error message and may include a sub-message with metadata that provides context about the batch, file, row, or data record affected by the message.
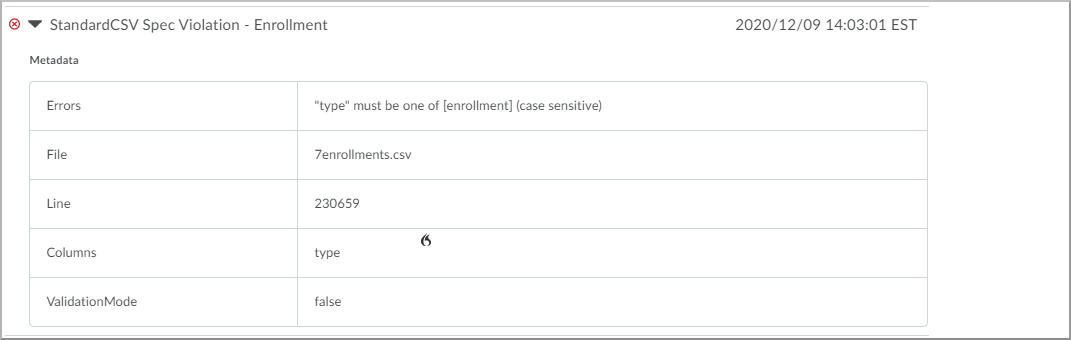
- To investigate the issue, review the message details and associated metadata.
The metadata can include information about the related batch, file, row number, or data record associated with the message.
For more information, refer to Troubleshoot processing jobs.
Common IPSIS errors
One common area of error is related to data changes that alter primary key data or delete data outside of IPSIS. IPSIS must have a mapping for any data it will create, update, or delete. Manual changes within the User Management tool or Org Unit Editor can cause errors within IPSIS. Use IPSIS to process updates when possible instead of manually changing data.
For more information, refer to:
Change org unit codes
In IPSIS, org unit codes are unique identifiers for org units, such as course templates, course offerings, departments, and sections. IPSIS uses these values to match records from your information system with records in Brightspace.
Changes to org unit codes should be uncommon and should be completed carefully to avoid duplicate org units or synchronization errors.
Prerequisite
Your Brightspace role must include the Manage IPSIS Configuration Options permission.
Warnings about changing org unit codes
- Org unit codes act as unique identifiers. Org Unit Codes are used by IPSIS to match records from the SIS with records in Brightspace. If you change a code, for example, for a course, department, or semester, IPSIS may no longer recognize the org unit and may treat it as a new, unrelated org unit.
- Changes can disrupt existing data mappings, including course and enrollment syncing, gradebook associations, and section and user mapping. Learners or instructors may lose access to courses or duplicate entries may appear.
- Changes can result in data duplication. If an org unit code is changed in Brightspace but not updated in the SIS, future syncs may create a second copy of the same course or department because IPSIS treats it as new.
- IPSIS logs may include integration errors such as Org Unit not found, Duplicate Org Unit, or other synchronization errors.
Process if an org unit code has been changed
- Pause or disable the affected IPSIS feed immediately to prevent further incorrect data syncing.
- Ensure the org unit code in the SIS matches the current code in Brightspace. If possible, revert the change in Brightspace to the original code.
- Update mappings in IPSIS. Manually map the new code to the correct org unit in Brightspace using the Edit Mappings option in IPSIS Administration.
- If syncing errors persist or data integrity is in question, contact D2L Support for guidance. D2L Support may help repair org unit references in the backend if necessary.
- Document changes. Keep a record of the original and changed codes for auditing and future troubleshooting. Update internal procedures to prevent unauthorized or accidental changes.
Best practice
Do not change org unit codes directly in Brightspace.
If the change is required:
- Change it in the SIS first.
- Let IPSIS push the updated code into Brightspace through the regular sync.
Org unit type naming
In Brightspace IPSIS, ensure that org unit types are referenced accurately, especially when using standard org units such as Course Template, Course Offering, and Department.
Mismatch between UI and file format
- The Brightspace UI displays some org unit types without spaces, for example, CourseTemplate.
- However, in IPSIS data files, these same org unit types must include spaces, for example, Course Template.
If you use the UI name in the file:
- IPSIS will not recognize the org unit type.
- Sync jobs may fail or result in missing or invalid org units.
- Errors may include:
- Invalid org unit type specified
- Org unit type not found
Correct usage example
Org Unit Type naming comparison
| Org Unit |
Displayed in UI |
Required in IPSIS Files |
|---|
| Course Template |
CourseTemplate |
Course Template |
| Course Offering |
CourseOffering |
Course Offering |
| Department |
Department |
Department (no change) |
Resolve a mismatch
- Refer to the official Brightspace org unit type list for correct naming in IPSIS files.
- Double-check the spelling and spacing when configuring your XML, CSV, or other integration formats.
- Use the org unit type name from the API or documentation, not the one shown in the UI.
Update a user's Org Defined ID
In IPSIS, the Org Defined ID acts as the primary identifier for users. IPSIS uses this value to uniquely identify users when processing updates, enrollments, and unenrollments.
You cannot update the Org Defined ID directly through D2L Standard CSV files. Changes to this value should be uncommon; however, some organizations may need to update Org Defined IDs when users change roles and different roles use different ID formats.
Some organizations also assign temporary Org Defined IDs before users receive permanent identifiers. In these cases, Org Defined ID updates may occur more frequently.
To update an Org Defined ID
- Navigate to Admin Tools > IPSIS Administration > User Sourced ID.
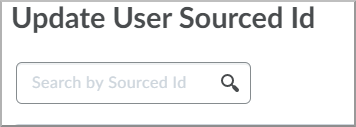
- To locate the user record, search for the current Org Defined ID.
- To specify the replacement value, enter the new identifier in the New Sourced ID field.

- To save the update, click Submit.
|
Note:
- Updating the User Sourced ID updates both the IPSIS mapping tables and the related Brightspace user record.
- If the Org Defined ID was previously changed manually in User Management, you must still update the value in the User Sourced ID tab using the identifier currently known to IPSIS.
- Updating the Org Defined ID only in a CSV file or in User Management can cause duplicate username errors during IPSIS processing.
- Some authentication methods rely on the Org Defined ID value. Verify that the updated value functions correctly with your authentication provider before processing additional batches.
- Searches in the User Sourced ID tab require exact matches.
|
Example: Searching for johnsmith does not return results if you search for john.
For more information, refer to Update Sourced ID.
Check whether an org unit is mapped in IPSIS
When troubleshooting IPSIS integration errors, you may need to determine whether IPSIS has an existing mapping for a specific org unit. Existing mappings can affect how IPSIS processes updates, deletions, and recreations of org units in Brightspace.
For example, if an org unit was manually deleted in Brightspace but still exists in IPSIS mappings, IPSIS may prevent the org unit from being recreated and generate synchronization errors. You may also need to investigate whether IPSIS recognizes an org unit under a different org unit code, which can result in duplicate org units being created.
The Org Units tab in the IPSIS Administration interface displays org units that IPSIS has previously processed and mapped to Brightspace org units. Reviewing these mappings can help you determine the appropriate resolution steps, such as updating source system data, processing delete actions through IPSIS, or restoring org units from the Brightspace Recycle Bin.
Prerequisite
Your Brightspace role must include the Access IPSIS Administration Console permission.
Review org unit mappings
- Navigate to Admin Tools > IPSIS Administration > Org Units.
- To filter results by org unit type, use the SIS Type drop-down list.

- To locate a specific org unit, enter a value in the search field.
|
Note: The search field returns partial matches. Example: Searching for BIOL may return values such as BIOL-101-01-Fall2021 and BIOL-300-02-Spring2020. |
For more information, refer to IPSIS - D2L Standard CSV Error Troubleshooting Guide.
Check which records IPSIS changed
While troubleshooting an integration, you may need to investigate what action occurred for a particular object. Use the Audit Log tab in the IPSIS Administration Console to track changes occurring within Brightspace. The Audit Log maintains a record of object creations, updates, deletions, enrollments, and unenrollments.
During initial testing of a new integration, the Audit Log can help you compare the quantity and type of completed actions against the changes you expected from your information system. A common troubleshooting practice is to gather counts for each action type and object type for comparison with client data.
In contrast, the Log Messages tab displays data that IPSIS did not process successfully. Use the Audit Log tab to review data that IPSIS processed successfully. For example, if you expected an existing org unit to update but IPSIS created a new org unit instead, no error appears in the Log Messages tab because IPSIS successfully completed an action. However, the Audit Log reveals that the expected action did not occur, allowing you to investigate why the incorrect action was processed.
Prerequisite
Your Brightspace role must include the Access IPSIS Administration Console permission.
Review audit log entries
To navigate to the IPSIS Administration Console, select Admin Tools Cog > IPSIS Administration > Audit Log.
The Audit Log tab helps you review actions that IPSIS processed successfully. You can filter and sort audit records to investigate integrations, troubleshoot unexpected behavior, and validate synchronization activity between your information system and Brightspace.
Similar to the Log Messages tab, the Audit Log tab includes several filtering options.
By default, when you navigate directly to the Audit Log tab, the Time filter is set to Last 24 hours, and results are sorted by date with the newest entries listed first.
Unlike the Log Messages tab, when you access the Audit Log from a specific IPSIS batch, filtering is based on the processing time of the batch instead of the batch number.
|
Note: When you select Any from the Time filter, IPSIS may return many records if your organization has used IPSIS for an extended period. Large result sets can slow page loading and filtering performance. To improve performance and review the most relevant information, use a specific time range. |
Each audit log entry can be expanded using the drop-down arrow to display additional details. Expanded entries include External Links that open related records directly in tools such as Org Unit Editor or User Management. This helps you quickly investigate the affected object.
Audit Log entries indicate when an action occurred, such as UPDATE, but they do not identify which specific fields changed. To review detailed data changes for org units, users, or enrollments, use Brightspace Data Sets.
You can filter Audit Log entries using the following options:
- Object: Any, User, Course Offering, Course Template, Department, and additional IPSIS-supported object types.
- Action: Created, Updated, Deleted, Enrolled, and Unenrolled.
- Time: Predefined time ranges, including Last 24 hours, or Any for all available records.
For more information, refer to IPSIS - D2L Standard CSV Error Troubleshooting Guide.
Troubleshoot enrollment accuracy issues
With any enrollment integration, data accuracy is critical. Out-of-sync enrollments can result in catch-up integration runs or require significant manual effort to correct enrollment records. Understanding the enrollment change scenarios supported by IPSIS helps you prepare for troubleshooting and recovery if enrollment discrepancies occur.
The key concept for all actions in IPSIS - D2L Standard CSV is that IPSIS must know about an object before it can process changes related to that object.
For all enrollment changes, IPSIS must meet the following requirements:
- Have a mapping for the relevant org unit.
- Have a mapping for the relevant user.
- Have a role mapping between the source role and a Brightspace role.
- For unenrollments, have an existing mapping for the org unit, user, and role combination from the original enrollment.
If enrollments become out of sync between Brightspace and your information system, you can use the following approaches to correct the data.
Potential enrollment scenarios and their expected results are described in the following table.
Potential enrollment scenarios and expected results
| IPSIS Configuration |
Brightspace Role Configuration |
Prior IPSIS Actions |
Prior Brightspace Actions |
Action |
Result |
Notes |
|---|
|
IPSIS Overwrite System Role = True
IPSIS Overwrite User's Role in Course, Section, or Group = True
Mapping for CSV role to Brightspace Role Exists
|
Role setting for Section Access set to None of the Above
|
Section Created in IPSIS
Only one Section Child of Course Offering
User Created in IPSIS
|
None |
Enroll user into section with mapped role |
User enrolled in Section and parent Offering |
Most common enrollment scenario |
|
IPSIS Overwrite System Role = True
IPSIS Overwrite User's Role in Course, Section, or Group = True
Mapping for CSV role to Brightspace Role Exists
|
Role setting for Section Access set to None of the Above
|
Section Created in IPSIS
Only one Section Child of Course Offering
User Created in IPSIS
User Enrolled in Section in IPSIS
|
None |
Enroll user into section with a different mapped role |
User enrollment changed to new role in section and offering |
N/A |
|
IPSIS Overwrite System Role = True
IPSIS Overwrite User's Role in Course, Section, or Group = False
Mapping for CSV role to Brightspace Role Exists
|
Role setting for Section Access set to None of the Above
|
Section Created in IPSIS
Only one Section Child of Course Offering
User Created in IPSIS
User Enrolled in Section in IPSIS
|
None |
Enroll user into section with a different mapped role |
User enrollment is not changed |
N/A |
|
IPSIS Overwrite System Role = True
IPSIS Overwrite User's Role in Course, Section, or Group = True
Mapping for CSV role to Brightspace Role Exists
|
Role setting for Section Access set to None of the Above
|
Section Created in IPSIS
Only one Section Child of Course Offering
User Created in IPSIS
User Enrolled in Section in IPSIS
|
User role in offering is changed to a different role |
Enroll user into section with a different mapped role |
User enrollment changed to new role in section and offering |
N/A |
|
IPSIS Overwrite System Role = True
IPSIS Overwrite User's Role in Course, Section, or Group = True
Mapping for CSV role to Brightspace Role Exists
|
Role setting for Section Access set to None of the Above
|
Section Created in IPSIS
Only one Section Child of Course Offering
User Created in IPSIS
User Enrolled in Section in IPSIS
|
User role in offering is changed to a different role |
Enroll user into section with original role |
User enrollment changed to original role in section and offering |
N/A |
|
IPSIS Overwrite System Role = True
IPSIS Overwrite User's Role in Course, Section, or Group = False
Mapping for CSV role to Brightspace Role Exists
|
Role setting for Section Access set to None of the Above
|
Section Created in IPSIS
Only one Section Child of Course Offering
User Created in IPSIS
User Enrolled in Section in IPSIS
|
User role in offering is changed to a different role |
Enroll user into section with a different mapped role |
User enrollment is not changed |
N/A |
|
IPSIS Overwrite System Role = True
IPSIS Overwrite User's Role in Course, Section, or Group = True
Mapping for CSV role to Brightspace Role Exists
|
Role setting for Section Access set to None of the Above
|
Section Created in IPSIS
Only one Section Child of Course Offering
User Created in IPSIS
User Enrolled in Section in IPSIS
|
None |
Unenroll user from section |
User is unenrolled from the Section and parent Offering |
Explicit unenrollments are typically a critical function for clients |
Troubleshoot user creation errors
When creating a new user or updating an existing user, IPSIS may return errors that require additional investigation. These errors typically occur because information in your information system does not match the data in Brightspace. To resolve these errors, review and compare the data in your CSV files and Brightspace to identify and correct any mismatched values.
Common error messages
Relevant error messages caused by data mismatches include:
- User cannot be created. Errors: the username supplied is invalid or already in use. please choose a different username
- Unable to save org user
Troubleshoot duplicate username errors
- Identify the OrgDefinedID referenced in the error message within the SourcedID metadata field, for example, OrgDefinedIDA.
- Using the User Management tool, search for the OrgDefinedID in Brightspace and note the username associated with the account, if one exists.
- Verify that the OrgDefinedID is unique. If more than one account uses the same OrgDefinedID, clean up the duplicate accounts so that only one account remains associated with that OrgDefinedID.
- Locate the OrgDefinedID in the User CSV file that generated the error and note the username associated with the account.
- Using the User Management tool, search for the username from the CSV file in Brightspace and note the OrgDefinedID associated with that username.
- Compare the OrgDefinedID and username values between the CSV file and Brightspace to determine which values are incorrect or outdated.
- If the user has not yet been loaded into IPSIS, update the data directly in User Management or by using Bulk User Management. Updates through IPSIS are not required in this scenario.
- If the user has already been successfully loaded into IPSIS, update the OrgDefinedID using the Update User Sourced ID tab in IPSIS Administration.
Common causes
To troubleshoot duplicate username errors, compare the username and OrgDefinedID values in the CSV file with the corresponding values in Brightspace. Verify that:
- The OrgDefinedID is unique
- The username is correct
- The values match between the SIS, CSV file, and Brightspace
Common scenarios include:
- The OrgDefinedID in Brightspace is incorrect or empty
- The username in Brightspace or the SIS contains a typographical error
- The username in the SIS was changed and now overlaps with an existing account, for example, John.Smith07 changed to John.Smith7, which is already assigned to another account
For more information, refer to IPSIS troubleshooting overview video.
Debug logging
Whenever troubleshooting IPSIS, one of the first places to start is the System Log. If no useful information appears, it may be necessary to configure Debug logging. Do not forget to turn off debugging when you are finished.
Common error messages
|
Error
|
Description
|
|
Invalid Configuration: Missing Role Mapping for Role {Role Name}.
|
This response typically indicates that there is not a role mapping for {Role Name}. Create a mapping in the IPSIS Administration Console for the source system in question.
|
|
Error in LIS PMS.replacePerson: Unable to create user.
|
This error indicates that the user already exists in Brightspace and has been deleted by ReplaceDelete. The person(s) are default handlers with ReplaceUserValidateBaseHandler and the expected record does not exist. As a workaround, use a handler that does expect the user instead, for example, ReplaceUserLastNameNoUpdateHandler.
|
|
Unhandled Exception in LIS PMS.replacePerson: password is not valid Parameter name: password.
|
This message is logged in the logging split as an error when the message provided in a PMS replacePerson message does not contain a password that meets the requirements of the config variable d2l.Auth.Password.ValidationRegex.
|
|
Error with update of user with code {User Code}. Account mapped to invalid LMS UserId {User Id}. The account may have been deleted.
|
This response typically indicates that the user associated with {User Id} has been deleted through Brightspace. Addressing this requires updating the IM_USER_MAPPINGS.UserId value to a new UserId (or restoring the deleted user through Brightspace).
|
|
Invalid Configuration: Role Mapping for Role {Role Name}. Desire2Learn RoleId {Role Id} does not exist.
|
This response typically indicates that the role associated with {Role Id} has been deleted through Brightspace. Addressing this requires updating the IM_ROLE_MAPPINGS.RoleId value to a new RoleId (or restoring the deleted role through Brightspace).
|
|
Error with update of org unit with code {Org Unit Code}. Org unit mapped to invalid LMS OrgUnitId {Org Unit Id}. This org unit may have been deleted.
|
This response typically indicates that the org unit associated with {Org Unit Id} has been deleted through Brightspace. Addressing this requires restoring the deleted org unit through Brightspace.
|
|
Invalid Configuration: OrgUnitTypeMapping for OrgUnitType {Org Unit Type}. D2L OrgUnitTypeId {Org Unit Type Id} does not exist.
|
This response typically indicates that the org unit type associated with {Org Unit Type Id} has been deleted through Brightspace. Addressing this requires restoring the deleted org unit type through Brightspace.
|
|
Create D2L.IM.Platform.OrgUnits.Default.CourseOffering object failed: Org Structure constraint preventing create of course offering. Please check Courses tool configuration variables.
|
This message is viewable in the IPSIS Administration, Log Messages tab. Check the d2l.Tools.Courses.SemesterOptions config variable to see if it is marked as required. If it is, then you can either provide a valid semester with your request or change the config variable to not be required (and then your current request will work).
|
|
Create D2L.IM.Platform.OrgUnits.Default.CourseTemplate object failed.
|
This message may be logged when the config variable d2l.Tools.Courses.DepartmentOptions is set as needed and a Department is not provided.
|
|
Unable to change the parent offering of course section with id {id}. This behavior is not supported.
|
This message is logged when trying to update an existing course section to have a different parent course offering. This behavior is not supported in the default implementation.
|
|
IMExternalOrgUnitInfo is null for LIS_Membership_{ListingCode}
|
This error occurs when an enrollment is attempted for an org unit that is not present in the IM tables in the database. The cause is typically because an enrollment was attempted into an org unit that was created manually in Brightspace. Enrollments using IPSIS must only be processed for org units that were also created using IPSIS.
Logger Type
D2L.IM.IPSIS.LIS.MMS.LISMembershipManagementServices
|