You can configure notifications so that users with the appropriate permissions receive updates about the status of bulk jobs initiated and completed using IPSIS Platform.
To enable notifications for IPSIS batch
- From your homepage, click your name and then click Notifications.
- Under Instant Notifications, select IPSIS Platform - Batch Completion Summary.
- Click Save.
Notifications are sent when an IPSIS batch job is completed successfully, completed with errors, or canceled.
Change the default notification message
You can change a default IPSIS Platform - Batch Completion Summary notification message to a custom value. For example, when a batch is complete, the default notification message that is sent is "Bulk Job Completed". You can change this value to a custom value of your choice.
Depending on the status of the batch job, the default email message displays one of the following subjects:
- [ERROR] IPSIS Batch: Error with Completed Batch - {Source System Name} (Batch ID#)
- IPSIS Batch: Successfully Completed Batch - {Source System Name} (Batch ID#)
- IPSIS Batch: Cancelled Batch - {Source System Name} (Batch ID#)
By default, the body text of an email message displays the following information:
Batch ID: {Batch ID#}
Source System: {Source system name}
Start: {Start date}
End: {End date}
Batch Summary:
X Org Unit(s) processed
X Course Template(s) processed
X Course Section(s) processed
X User(s) processed
X Enrollment(s) processed
Errors:
X Org Unit(s) could not be processed
X Course Template(s) could not be processed
X Course Section(s) could not be processed
X User(s) could not be processed
X Enrollment(s) could not be processed
When X = 0 line will not show in email
To change the default notification message
- From the Admin Tools menu, click Language Management.
- On the Languages tab, click the language that your site uses.
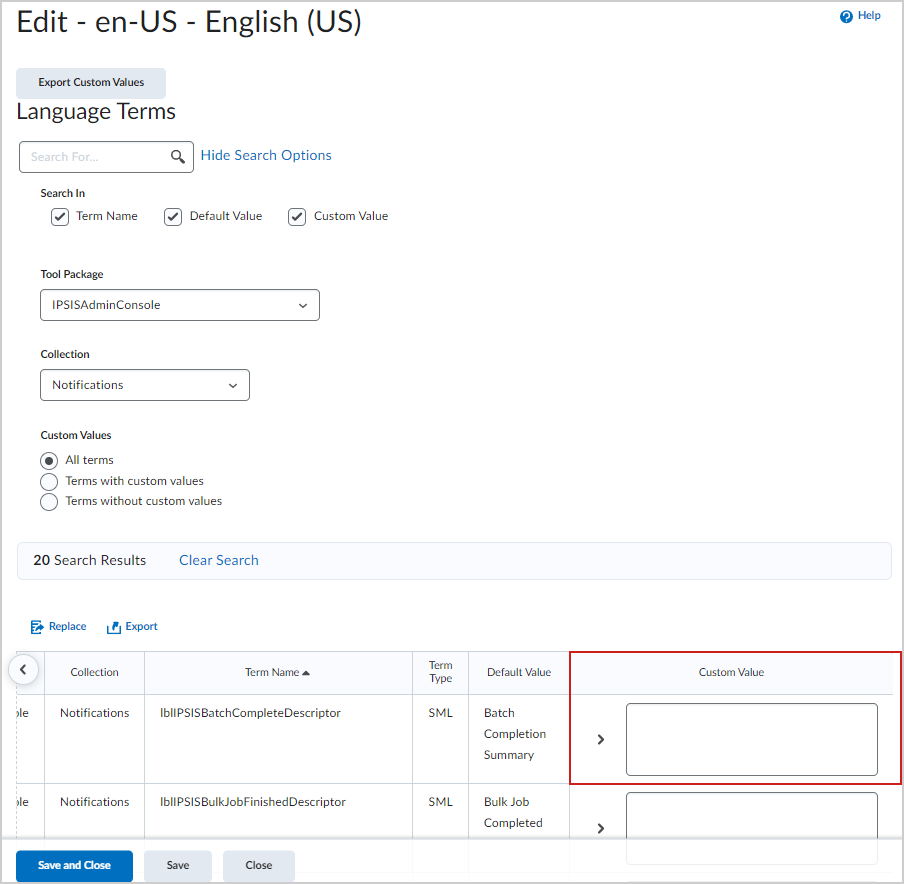
- From the Tool Package drop-down list, select IPSISAdminConsole.
- From the Collection drop-down list, select Notifications.
- With the search field empty, click Search. A table of search results is generated.
- In the Custom Value field, enter the custom text that you want to be sent for that specific notification.

- Click Save and Close.
The default notification message is changed to the Custom Value you set for that specific notification.