The Configuration tab of IPSIS Integration 1.0 displays a list of source systems that have been configured with your organization's instance of Brightspace. It also contains a list of Extension Points, for which handlers and translators can be configured in specific ways to manage information passing between the SIS and Brightspace.
With appropriate permissions, you can manage both source systems and associated extension points for that source system. With restricted, view-only permissions, you can view but not change source system details and extension points.
Important: IPSIS Integration 1.0 is a legacy integration that managed all SIS integrations implemented prior to the release of Brightspace 10.7.2.
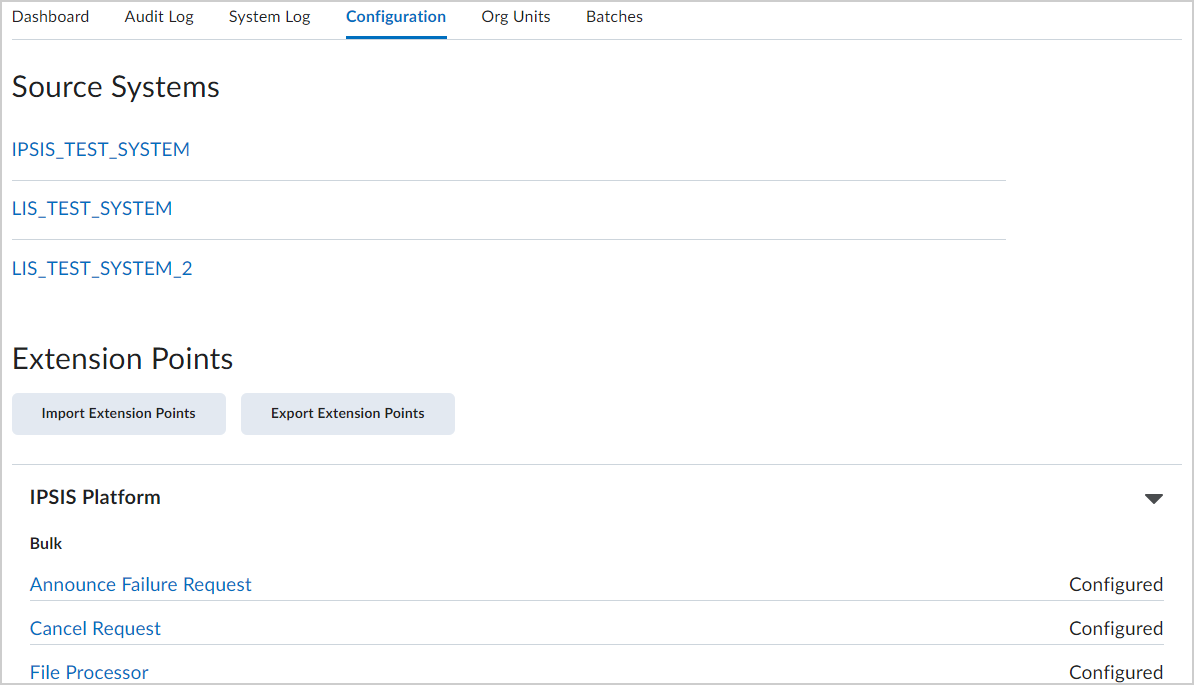
Figure: The Configuration tab of IPSIS Integration 1.0.
About plug-ins and extension points
To understand how to manage extension points, it's necessary to understand what plug-insare and their relation to extension points. A plug-in extends the capabilities of a system. New plug-ins further customize the behavior of a system. Extension points group plug-ins together. Any time the system is applying certain behavior and business rules, it runs configured plug-ins for a particular extension point.
There are many extension points in IPSIS to handle the many behaviors for which it may be responsible. Plug-ins are available for creating, updating, deleting, and reading of Brightspace entities. Examples of entities include course offerings, departments, sections, templates, etc.
Within IPSIS, plug-ins are divided into two classifications: handlers and translators, and each one implements a behavior (business rule, for example) for an extension point.
Each extension point can be configured with one or more plug-ins from a predefined list. You can change the order in which the plug-ins are executed with drag-n-drop using the drag handles to the left of the plug-in name, and add or remove them from the configuration. You can also remove a configured plug-in for an extension point. Without plug-ins configured for an extension point, the system is unable to interact in any way with the types of entities for which the extension point is intended to operate upon.
Extension points are configured at the organization level. This has the following implications:
- The same behavior applies to all entities (such as course offerings, semesters, etc.) across the entire organization.
- Removing or changing plug-ins for an extension point impacts the behavior across the entire organization.
- Different behavior based on different extension point configurations is not possible (for a single organization), and custom behavior for different org units require customization of the plug-ins themselves.
Access and configure an extension point
You can access and configure an extension points from the Configuration tab of IPSIS Integration 1.0.
To access and configure an extension point
- From the Admin Tools menu, click IPSIS Administration.
- Click the IPSIS Integration 1.0 tile.
- Click the Configuration tab.
- Under Extension Points, click to expand a source system integration name. For example, IPSIS Platform.
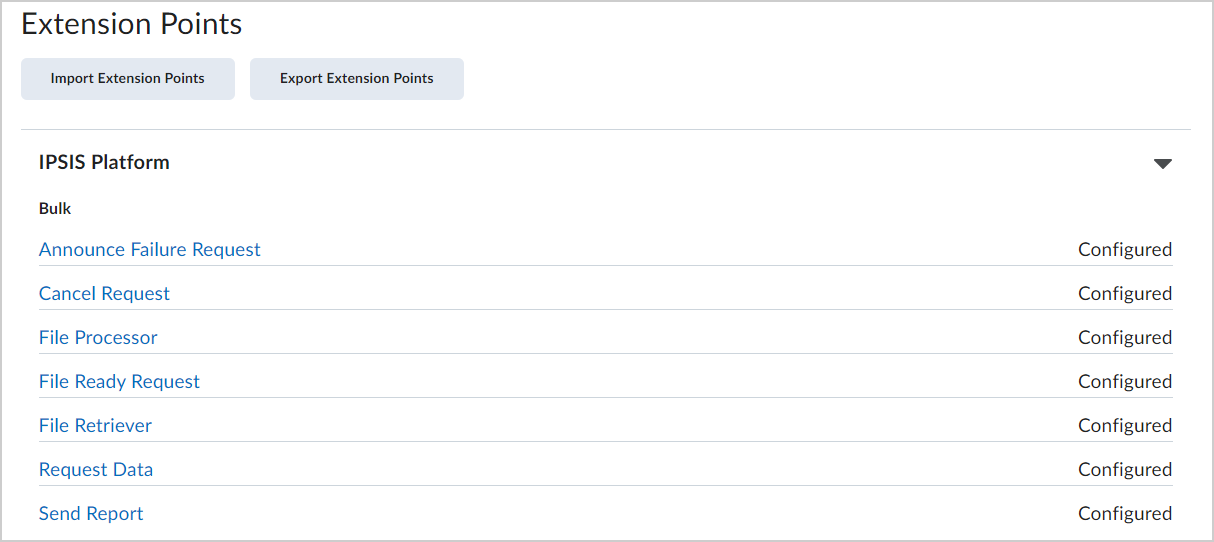
Figure: A list of Extension Points configured for IPSIS Platform.
- Click the name of an extension point to open the settings page.
The currently configured (and enabled) plug-ins appear under Active Plug-ins. Plug-ins not enabled for an extension point appear under Available Plug-ins.
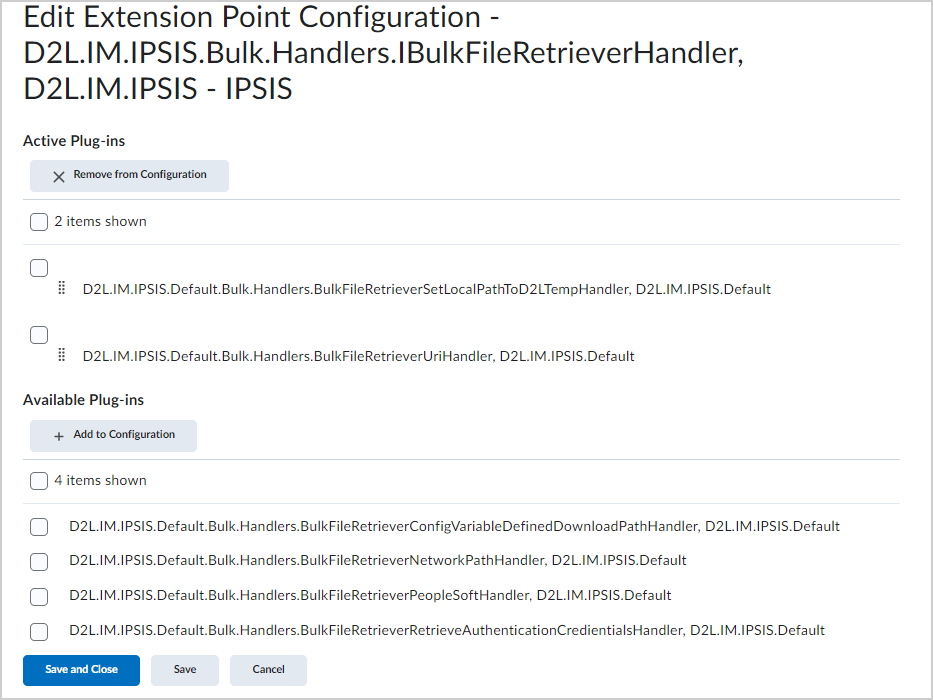
Figure: The Edit Extension Point page.
The page allows an administrator to create, modify, or remove a plug-in configuration for a given extension point, provided that the administrator has the Manage IPSIS Configuration Options permission enabled. Specific actions include:
- Add an available plug-in to the list of active plug-ins
- Remove a plug-in from the list of active plug-ins
- Change the sort order of the active plug-ins
- Remove the entire configuration
- Set custom properties of a plug-in
The active and available plug-in lists are mutually exclusive - adding an item to one list removes it from the other.
Add an extension point plug-in
You can add a plug-in to an extension point using the Configuration tab of IPSIS Integration 1.0.
To add a plug-in
- From the Admin Tools menu, click IPSIS Administration.
- Click the IPSIS Integration 1.0 tile.
- On the Configuration tab, click the extension point that you want to add the plug-in to.
- Under Available Plug-ins, select the check box beside the plug-in name.
- Click Add to Configuration.

Figure: The Add to Configuration button of the Available Plug-ins section.
- Click Save and Close.
The plug-in is added to the selected extension point.
Sort the order of extension point plug-ins
You can change the order of plug-ins that are added to an extension point.
To change the order of a plug-in
- From the Admin Tools menu, click IPSIS Administration.
- Click the IPSIS Integration 1.0 tile.
- On the Configuration tab, click the extension point that you want to change the order of plug-ins for.
- Click and hold the drag handle to the left of the name of the plug-in that you want to reorder. Move it to the desired order.
- Click Save and Close.
Remove an extension point plug-in
You can remove a plug-ins from an extension point.
To remove a plug-in
- From the Admin Tools menu, click IPSIS Administration.
- Click the IPSIS Integration 1.0 tile.
- On the Configuration tab, click the extension point that you want to remove from the plug-in.
- Under Active Plug-ins, select the check box beside the plug-in name.
- Click Remove from Configuration.
- Click Save and Close.
Set custom properties for a plug-in
Custom properties for a plug-in allow you to alter the behavior of a plug-in. The most common scenario is to instruct a translator to extract data from a different field in a request message.
To set custom properties for a plug-in
- From the Admin Tools menu, click IPSIS Administration.
- Click the IPSIS Integration 1.0 tile.
- On the Configuration tab, click the extension point that you want to change plug-in custom properties for.
- Click the context menu beside the name of the plug-in.
- Click Edit Custom Properties.
- Change the properties for the plug-in based on the plug-in documentation.
- Click Save.
Custom properties are saved for the selected plug-in.
About org unit type mapping
The Org Unit Type Mappings configuration is required on a per source system basis to tell the integration what kind of org unit types in Brightspace are affected when requests are received from a Student Information System (SIS). A mapping is required for each org unit type that is going to be accepted from the SIS so that the implementation knows which corresponding org unit type should be used in Brightspace. Each record is associated with a specific source system.
An org unit type mapping is required so that IPSIS knows how to interpret messages of a particular type from a source system. For example, a SIS might communicate messages about Faculties, but IPSIS should interpret those as Departments in Brightspace. That is, when the SIS instructs IPSIS to create a Faculty, the org unit type mapping tells IPSIS to create a Department in Brightspace.
You must coordinate with the source system vendor to obtain the org unit type text strings communicated to IPSIS in its messages. The text strings may depend on the source system vendor, or on how the source system has been configured.
Multiple mappings for an org unit type are also valid. For instance, an institution might want entities referred to in the SIS as course offerings and might want sections to be created in Brightspace as course offerings. In this case, two mappings are needed for Brightspace course offering org unit type.
Note: Multiple mappings are not allowed for the same SIS Org Unit Type. Without a mapping for an SIS org unit type, IPSIS is unable to create, update, and delete that type of entity in Brightspace. If a certain SIS org unit type is to be ignored by IPSIS, exclude a mapping.
Add an org unit type mapping
You can map an org unit type name from your SIS to the corresponding org unit type in Brightspace.
To add an org unit type mapping
- From the Admin Tools menu, click IPSIS Administration.
- Click the IPSIS Integration 1.0 tile.
- On the Configuration tab, under Source Systems, click the source system that you want to add org unit type mappings for.
- From the Edit Source System page, do the following:
- Click Add Org Unit Type Mapping.
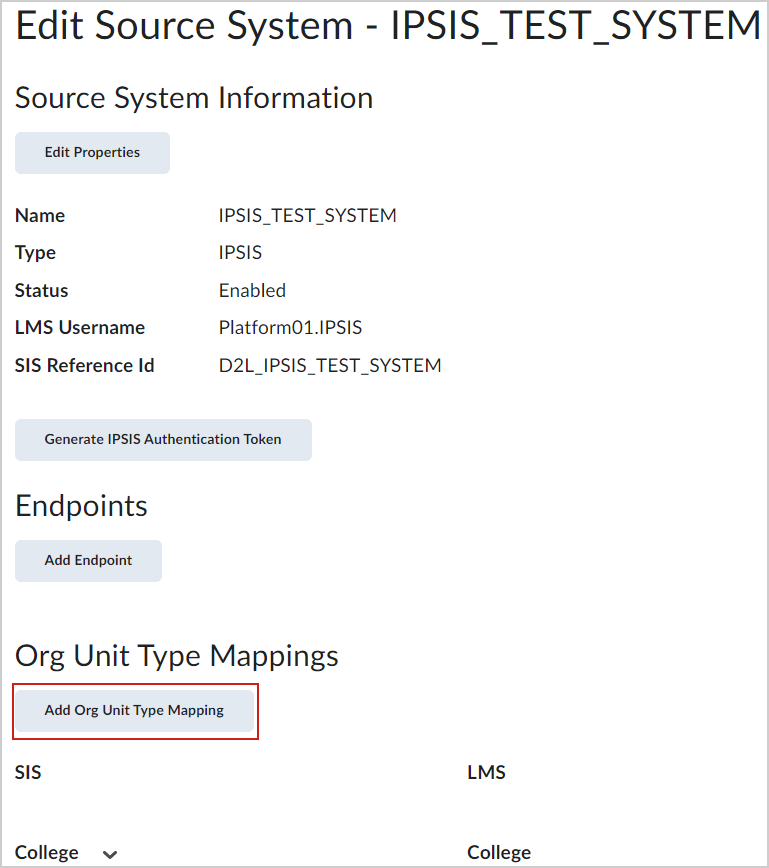
Figure: The Add Org Unit Type Mapping button on the Edit Source System page.
- In the SIS Org Unit Type field, enter an org unit type.
- From the LE Org Unit Type drop-down list, select an org unit type to map the SIS org unit type to.
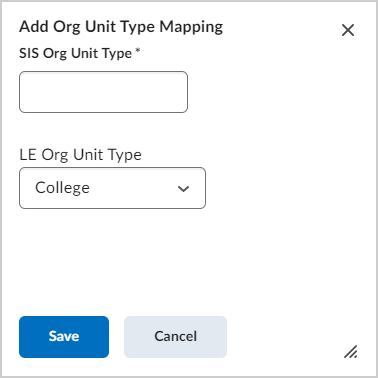
Figure: The Add Org Unit Type Mapping dialog.
- Click Save.
A new org unit type is mapped for the selected source system.
Add role mappings
The Role Mappings configuration is required on a per source system basis to tell the integration which Brightspace roles correspond with the roles in the SIS integration messages. Each role that is accepted from the SIS needs to be mapped to ensure that the implementation knows which corresponding role will be used in Brightspace. Each record is associated with a specific source system.
To add role mappings
- From the Admin Tools menu, click IPSIS Administration.
- Click the IPSIS Integration 1.0 tile.
- On the Configuration tab, click the source system that you want to add role mappings for.
- From the Edit Source System page, do the following:
- Click Add Role Mapping.
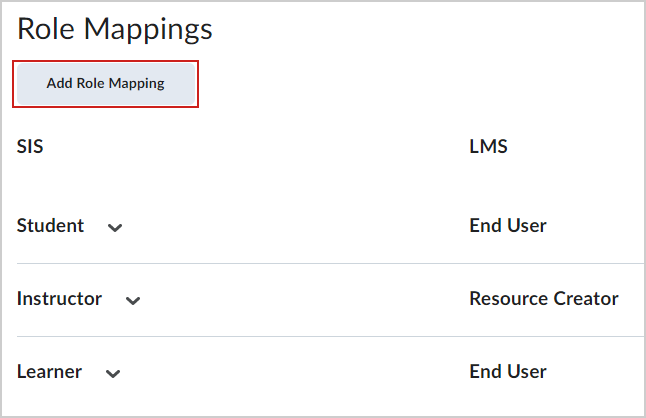
Figure: The Add Role Mapping button on the Edit Source System page.
- In the SIS Role field, enter a new SIS role.
- In the LE Role drop-down list, select a role that you want to map the SIS role to.
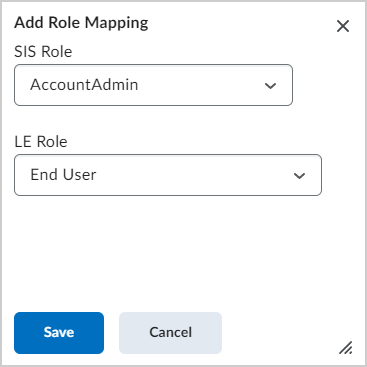
Figure: The Add Role Mapping dialog.
- Click Save.
New role mappings are mapped for the selected source system.