Upload CSV files for processing
After you create CSV files from the data in your SIS and add them to a ZIP file, you can upload the ZIP file from the Dashboard tab in IPSIS Administration. You can also upload ZIP files to the SFTP site you created during your initial set up. Brightspace monitors the SFTP site on ten-minute intervals for new ZIP archives.

|
Important: All CSV files must include differentials only and be zipped.
|
To upload a CSV file:
- From the Admin Tools menu, click IPSIS Administration.
- Click D2L Standard CSV or the custom name for the integration.
- From the Dashboard tab, drag-and-drop the ZIP file or browse for it on your computer.
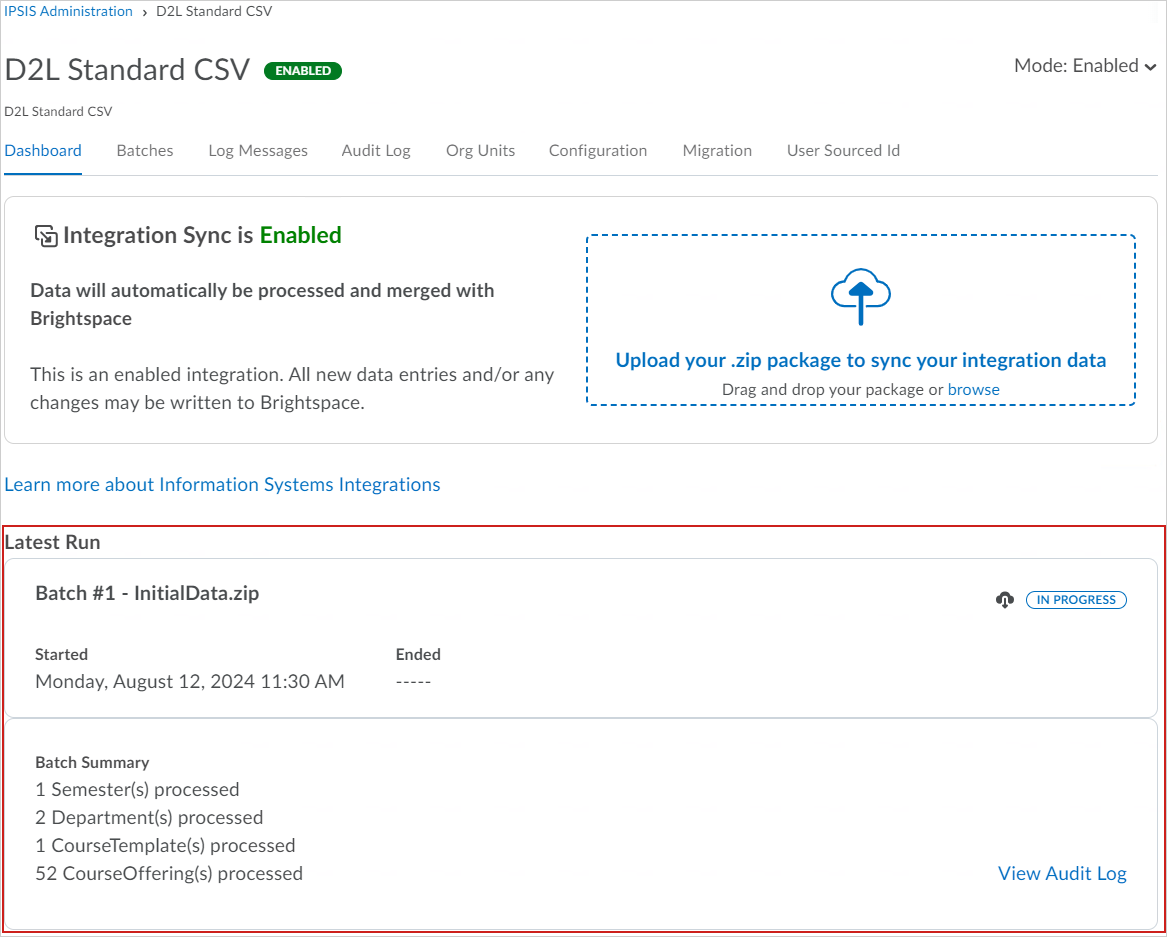
Once your ZIP file uploads, it appears in the Latest Run area of the IPSIS Administration Dashboard. The Latest Run area provides you with a date Started and Ended for that batch run as well as a Batch Summary displaying all items processed in the batch.

Figure: Review all latest batch runs in the Latest Run area.
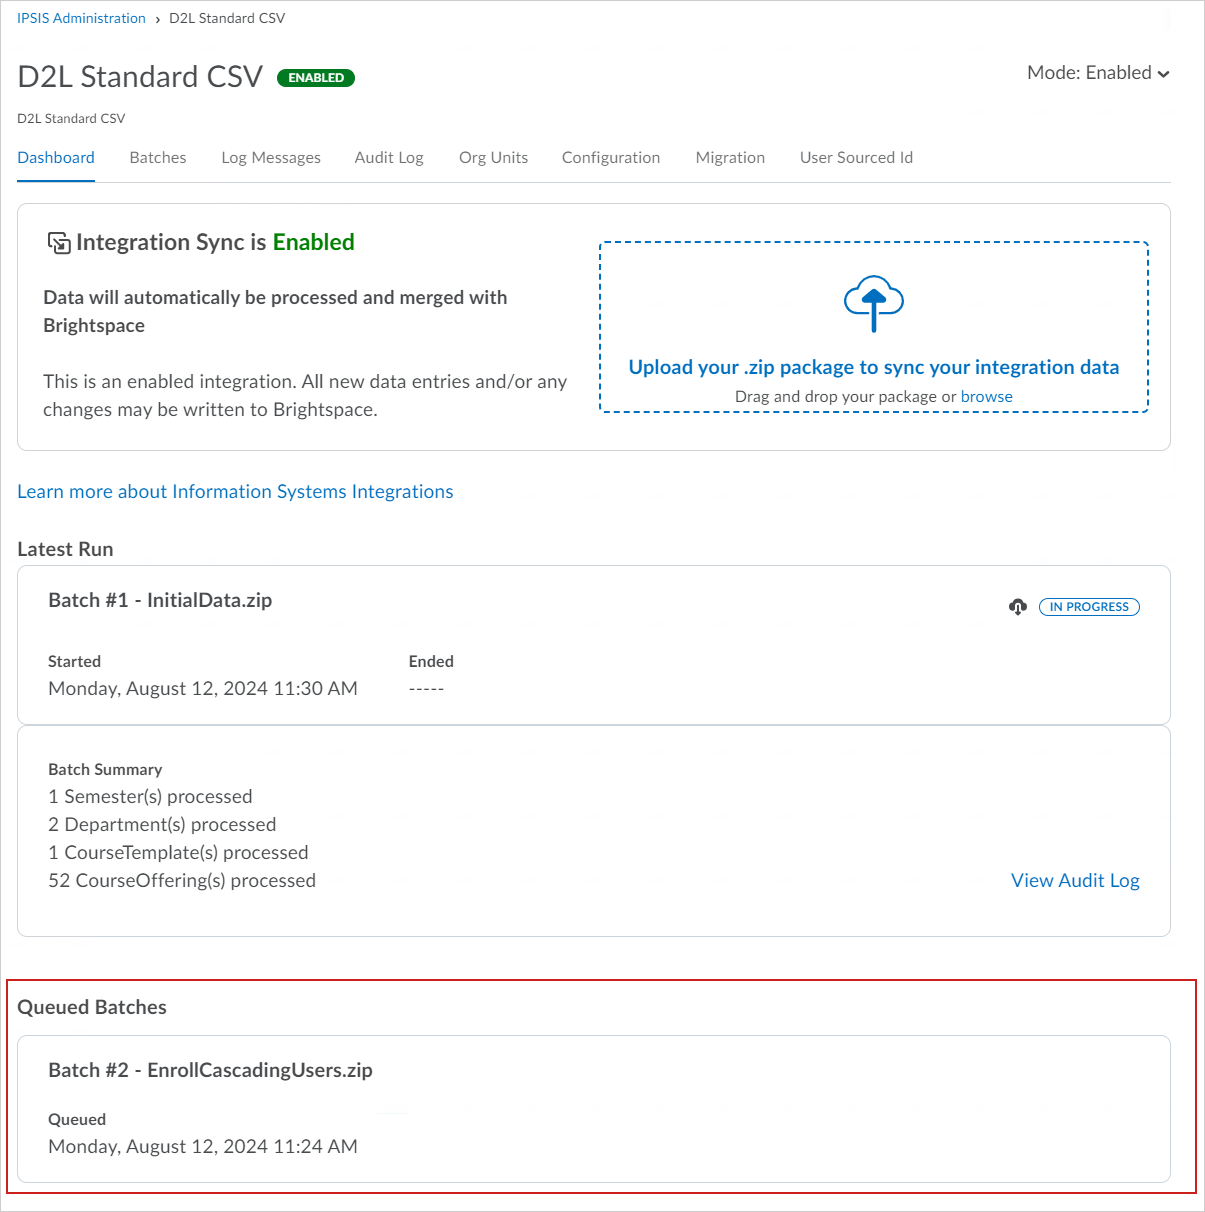
If you are uploading or running a series of batches, all batches that are waiting for upload are displayed in the Queued Batches area.

Figure: Review all batch runs that are Queued and awaiting upload in the Queued Batches area.
Re-run a batch
In the IPSIS Administration interface, the Batches tab displays a history of all batch processing jobs you run on your system. It includes a summary that links you to the error and audit logs using each batch’s start and end date and time.
If necessary, you can re-run the most recent batch from the Batches tab.
To re-run a batch
- From the Admin Tools menu, click IPSIS Administration.
- Click D2L Standard CSV or the custom name of the integration. The dashboard is displayed.
- Click Re-Run Batch associated with the specific batch you want to re-run.

|
Note: To see the Batches tab and receive D2L Standard CSV email summaries, the user's role must be configured to Subscribe to Batch Job notifications and be granted the Access IPSIS Administration Console role permission. |