Watch this video to learn how to create a new course with the Courses tool. Review the written steps below, and check Manage courses and course templates with the Courses tool to learn more about working with Courses in Brightspace.
The Courses tool makes it easy to create, copy, and search for courses, course templates and source course org units. You can find courses using search and filters and navigate directly to a course homepage or Course Admin page.
Requirements
The following is required to use the Courses tool:

|
Important: When you are creating a new course, the ability to associate your course with a Department, Template, and Semester is controlled by Courses tool configuration variables. These configuration variables control whether you must select a Department or Semester when creating a course. They also control whether a new Course Template is automatically created when you create a new course. Refer to Courses configuration variables for more information.
The ability to create a Department or a Semester also requires you to have the following Org Unit Editor permissions:
Org Unit Editor > Can Create and Edit Org Units.
You must have the following Manage Courses permissions to perform bulk updates to courses from the Courses tool:
- Manage Courses > Change Status
- Manage Courses > Change Start and End Dates
|
Visual tour of the Courses tool
The Courses tool includes separate tabs for managing Courses, Templates, and Source Courses.
Courses tab
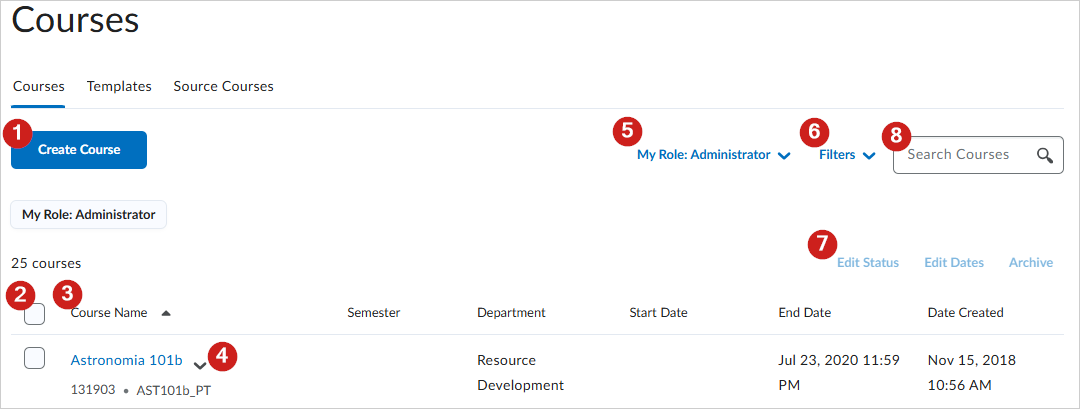
- Click Create Course to open the Create Course page with options to create and configure a new course. Refer to Manage courses and course templates with the Courses tool for more information.
- Select multiple courses to perform bulk actions.
- Click headings to sort columns alphabetically from A-Z or Z-A.
- Click the drop-down to View, Manage, Copy, or Archive a single course.
-
Click My Role: [Role] to filer courses applicable to that specific role. This option is only available if you have more than one role enrolled in varying courses, and those roles have the required Manage Courses > Has Access to the Manage Courses tool role permission
- Click Filters to filter results by:
- Date Created
- Department
- End Date
- Semester
- Start Date
- Status
- Select multiple courses and click any of the following:
- Edit Status: Edit the active and inactive status of all selected courses.
- Edit Dates: Edit the start and end dates of all selected courses.
- Archive: Archive all selected courses with one bulk action. You can only archive a maximum of 50 selected items at a time.
- Search for courses.
|
Important: From the Courses tab, you can click Load More to load up to 250 courses at a time. The system allows you to choose how many courses to display in increments of 50, 100, 150, 200, or 250.
The number of courses displayed when selecting Load More is controlled by the d2l.Tools.Courses.LoadmoreIncrement (OrgUnit) configuration variable.
Refer to Courses Configuration Variables for more information.
|
Templates tab
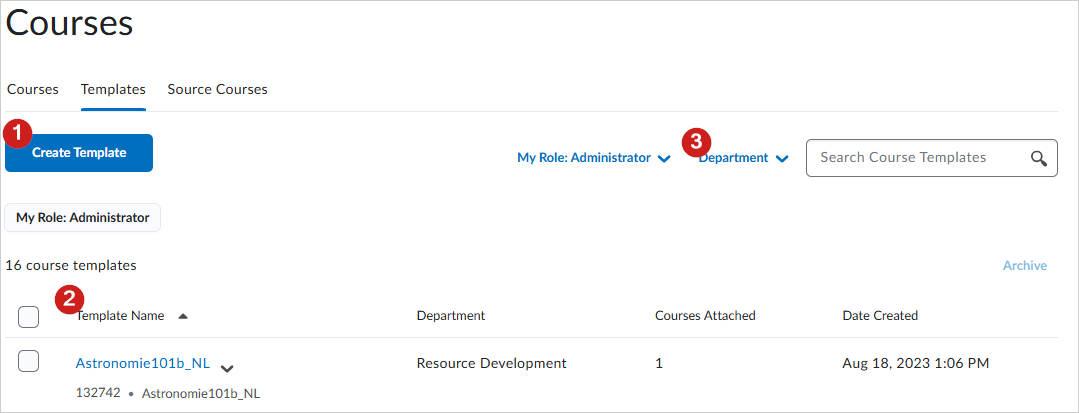
- Create Template: Opens the Create Template page with options to create and configure a new course.
- Click Template Name, Department, Courses Attached, or Date Created to sort columns.
- Department: Click to search for and select specific department filters.
Source Courses tab
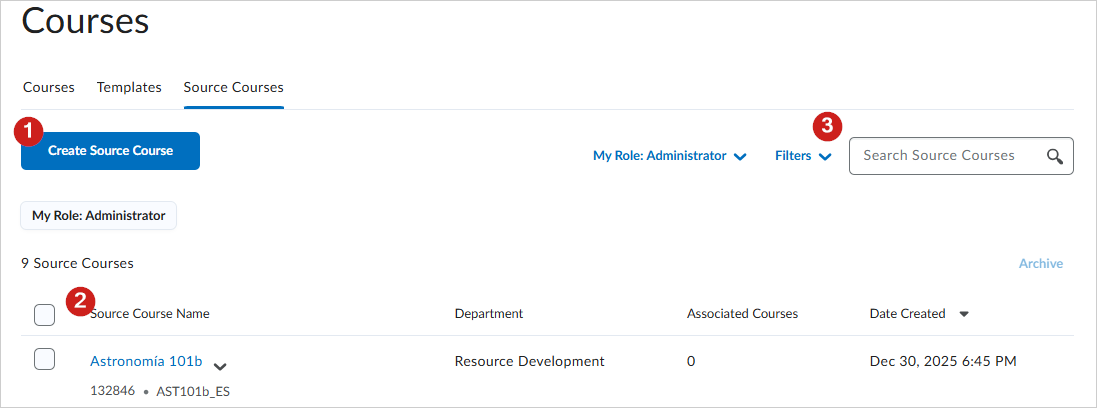
- Create Source Course: Opens the Create Source Course workflow, with options to Start with a blank source course and Start from an existing course.
- Click Source Course Name, Department, Associated Courses or Date Created to sort columns.
- Search Source Courses or click Filters to find source courses filtered by Department, Semester, Status, or Dates.