AI Image Generation for Instructional Designers: A Beginner’s Guide


Did you ever try to generate an image with AI, but didn’t know where to start? AI image generation tools offer creative freedom like never before. We see hyper-realistic AI-generated images on websites, in videos, or on social media and often wonder: How do people make something so detailed without being graphic designers?
As instructional designers, we spend hours searching for the “just right” image that fits our course content. But what if that image doesn’t exist? In a perfect world, we’d always collaborate with graphic designers to bring our ideas to life. But in reality, we don’t always have the time, budget, or access to design support. In those cases, instead of settling for a less-than-ideal image or endlessly scrolling through stock libraries, we now have another option. Thanks to AI, we can create visuals that align precisely with our learning goals, themes, or visual tone. The trick is learning how to ask AI for what you want. Let’s break it down.
What Is an AI Image Prompt?
An AI image prompt is simply a description you give to an image generator like DALL·E. The more descriptive and structured your prompt is, the more accurate and useful the image result will be.
Think of it like giving instructions to a visual artist. You’re telling the AI who or what to draw, how it should look, where it should be, and what style or mood it should convey.
The 14-Part Prompt Formula (No Design Skills Needed!)
This table is your roadmap to crafting effective prompts for any instructional content.
Prompt Part | What to Include | Examples / Clarification |
|---|---|---|
1. Main Subject(s) | Who or what is in the image? | A lion, a futuristic car, a young woman |
2. Activities / Actions | What is the subject doing? | A dog jumping, a teacher explaining a chart |
3. Setting / Background | Where is the subject? | A busy city, a quiet classroom, a desert |
4. Mood / Atmosphere | What’s the emotional or narrative tone? | Serious, romantic |
5. Environment | General context of the space | Indoor, underwater, in space, snowy field |
6. Colors / Patterns | Specific hues, tones, or visuals | Warm earth tones, vibrant purples, polka dots |
7. Art Form | Choose the type of visual media | Watercolor, digital painting, pencil sketch |
8. Artistic Style | Choose a style or influence | Realism, Impressionism, Japanese ink |
9. Degree of Realism | How real or stylized? | Photorealistic, cartoonish, dreamlike |
10. Lighting | Source and tone of light | Golden hour, candlelight, spotlight |
11. Framing / Perspective | Camera angle or position | Over-the-shoulder, top-down, centred view |
12. Orientation | Layout format | Portrait, landscape, square |
13. Use Case | Where the image will go | Website banner, poster, slide background |
14. Output Quality (Optional) | Technical specs | 4K, transparent background |
Tip: You don’t have to use all 14 elements every time. Start with 3–5 and build from there!
Example Prompt Breakdown
Let’s say you’re building a course on cybersecurity. You need an image for a landing page.
Here’s a simple prompt:
“A hooded hacker typing on a laptop in a dark room, neon green code on screen, digital illustration, cyberpunk style, dramatic lighting, high-resolution landscape format.”
What the AI will understand:
- Subject: A hooded hacker
- Action: Typing on a laptop
- Setting: Dark room with neon code
- Style: Digital illustration, cyberpunk
- Lighting: Dramatic
- Use case: Likely a banner or background
- Quality: High-resolution, landscape
Result: A visually compelling image that matches your course theme.

Image created with DALL·E
Tip: If you want a photo-realistic result, use the word photo instead of image in your prompt.

Image created with ChatGPT 4o
How to Start Creating AI Images
You don’t need to know how to draw or code, just use your words.
1. Choose a tool.
Some beginner-friendly AI image tools include:
- ChatGPT
- DALL·E (built into ChatGPT with Pro plan)
- Canva’s AI Image Generator
- Adobe Firefly
- Bing Image Creator (uses DALL·E)
2. Write a prompt using the table.
Pick 3–5 key categories from the prompt structure.
3. Test and tweak.
AI will give you several variations. If the prompt is not quite right, revise it. Add details about colour, lighting, or style.
Avoid These Common Mistakes
❌Too vague: “A teacher in a classroom” → Too generic.
❌Too complex: Avoid stuffing every idea into one prompt.
❌Forgetting usage: A portrait won’t look good as a banner. Set the orientation.
❌Ignoring style: “Photo” and “cartoon” create different images.
Final Thoughts: Start Simple, Stay Curious
The best way to learn AI image generation is to try it. Start with one scene from your lesson plan and experiment with different prompt versions. You can even ask ChatGPT what changes it recommends. Let your instructional creativity lead the way, and let AI handle the visuals.
Remember: AI isn’t here to replace creativity, it’s here to amplify it!
This article was created with the assistance of ChatGPT, and the images were generated using DALL·E.
Want to Learn More?
Connect with your institute's D2L Customer Success Manager or Client Sales Executive, or reach out to the D2L Sales Team for more information about how Learning Services can support you on your learning journey.
Comentários
-
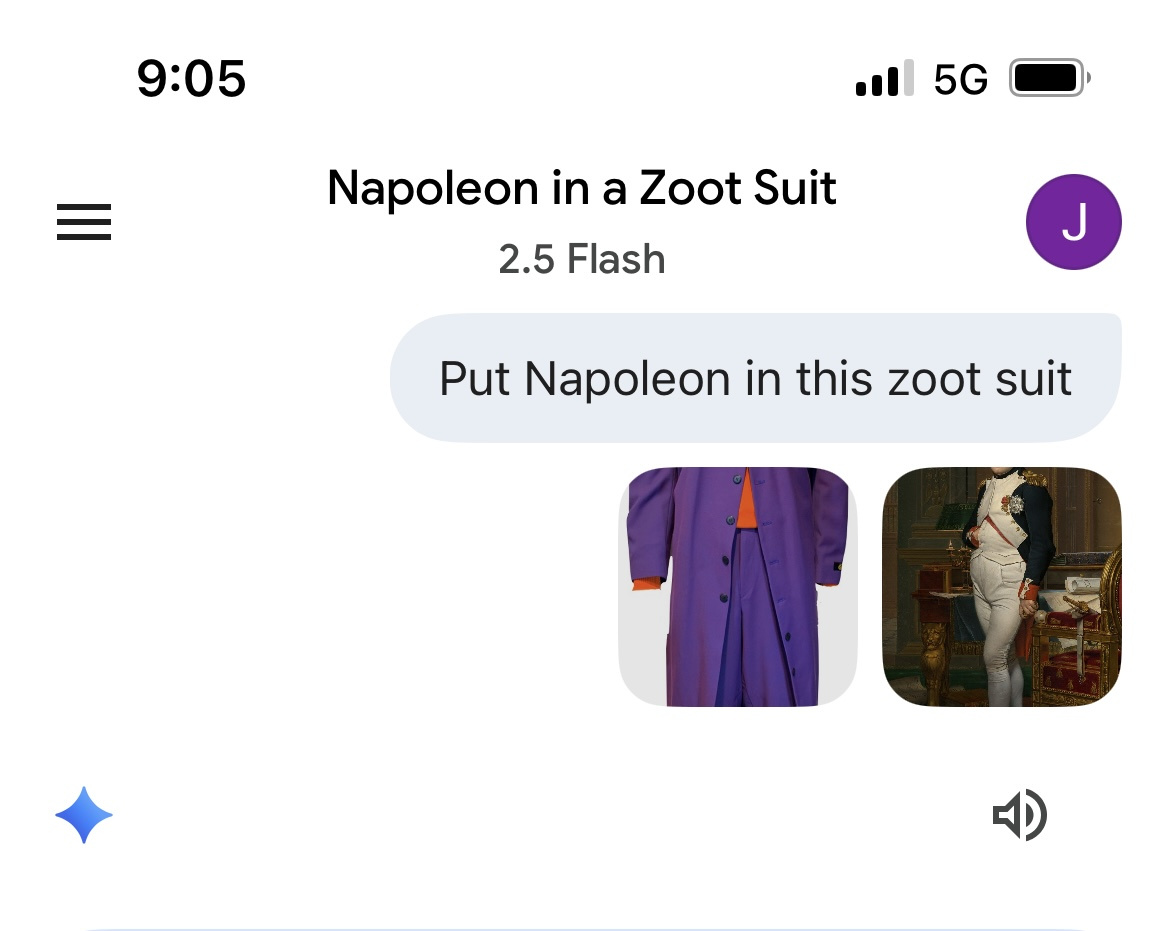
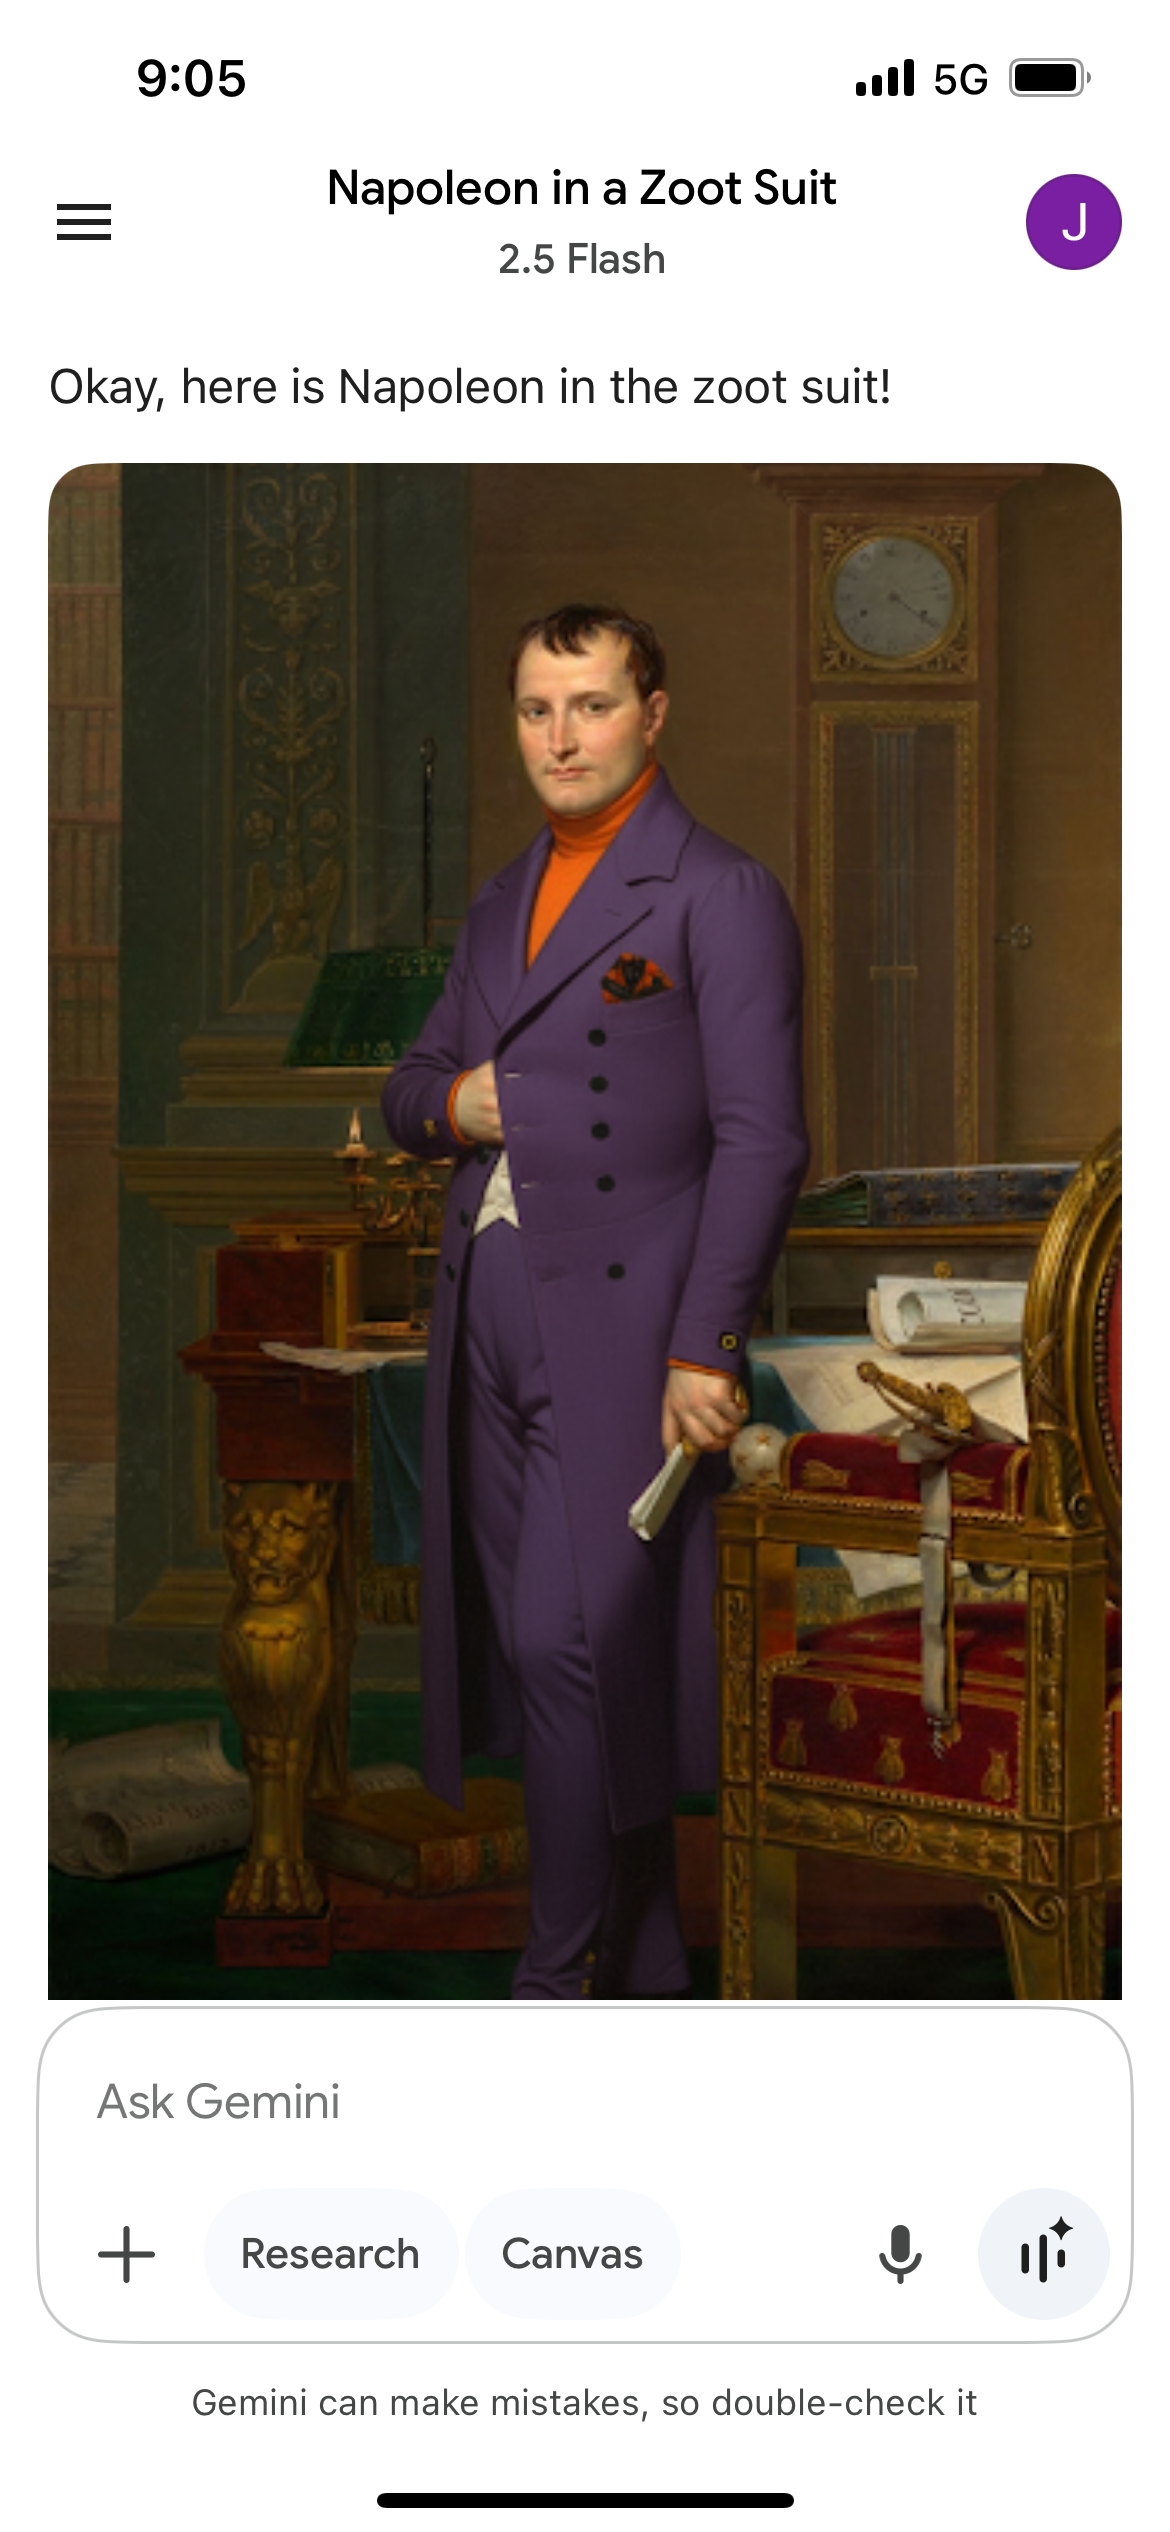
Amazing resource! One thing I would add is that including source images can really help attain a specific style. For example, you can use an existing stock image and put the characters in outfits or situations that fit your content.
Here's a silly example that I achieved with Google Gemini: